Archive for the ‘quilt block’ Category
Introducing…”Sonoran Dreams”
 I am, not as so focused on completing stuff on my weeks’ lists, since I realized I can’t be a slave to getting everything done and yet not get to the important stuff – art and writing. What I realized is that I have to revise my “self-care” list to include a minimum of two hours on art-making each day – that’s what is truly important for me this year. Art during the day, writing at night – or some combination thereof….
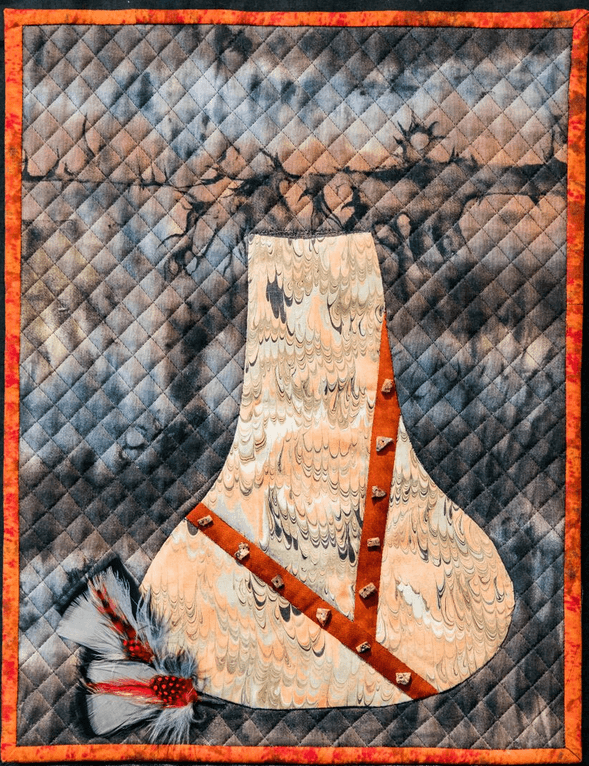
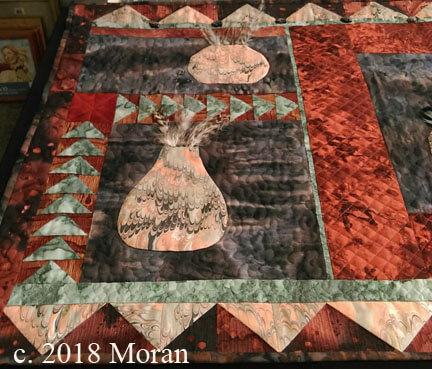
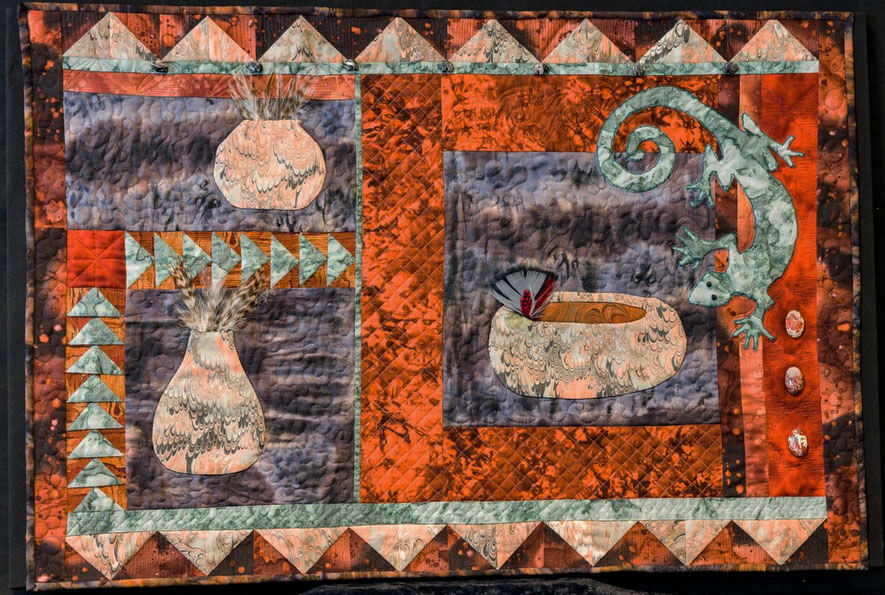
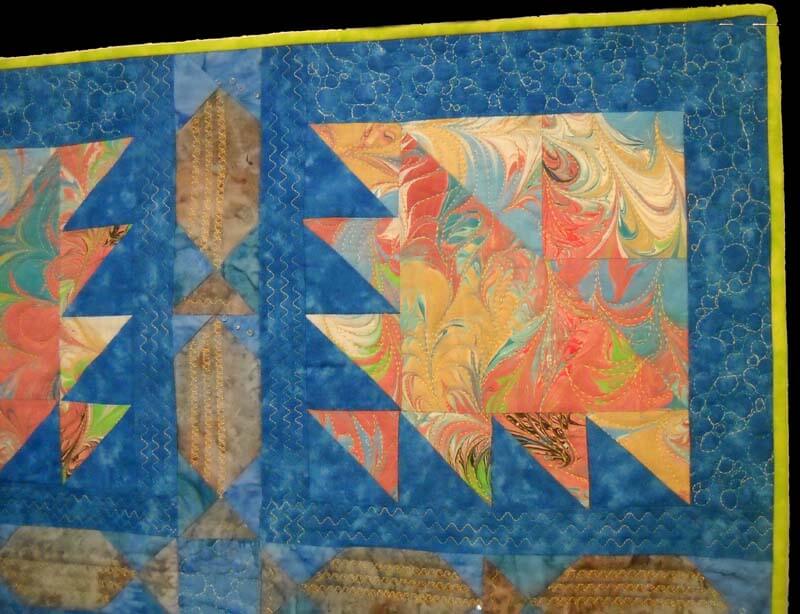
This piece at the left is the companion to the bigger piece – my ever-present “pot quilt,” started some 15 years ago. I really like how this piece came out. Simple yet elegant, just like southwestern pottery. This is “Sonoran Dreams 2.” I also have a lot of the “pot” fabric left, as well as come of the original fabrics when I started this, so I see a small series coming along this year.
The pot quilt started initially because of the marbled fabric. As soon as it was out of the marbling tray, I knew I would make some southwestern pots. I started some (what has now become) improvisational piecing – just making it up as I went along. I had two panels done and together, and the pot in the above piece appliqued. I really liked how it looked all these years later. I was on to something at the time and didn’t realize it. Finishing it just fell together – all my sewing/quilting skills had really improved, and it was easy to pull it all together. In progress –
This is the very beginning from 15 years ago, just beginning the piecing, and at the time absolutely no idea how to quilt it beyond stippling.
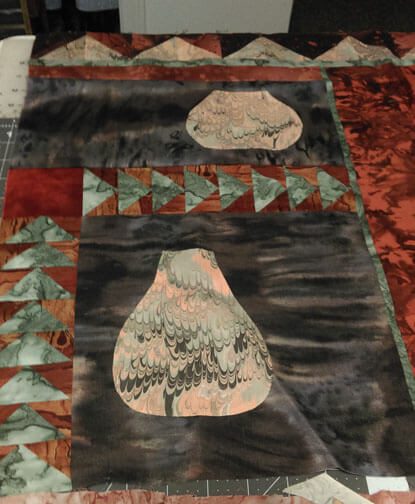
It’s missing the bottom row, as originally it was going to have several more panels. I’ve moved away from wall hangings that just “hang” from a rod and have moved to mounting them on canvas. I saw no need to make this larger, and the extra pot would become its own piece.
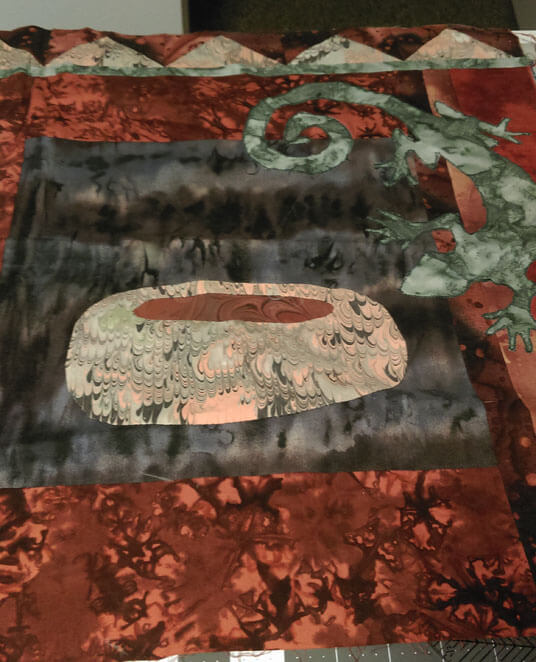
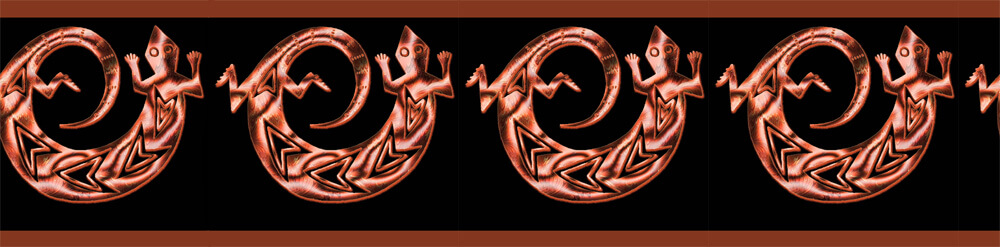
The other side – oh, how I would do the lizard differently (and I will in some other wall hangings), but I do love the “rawness” of this one.
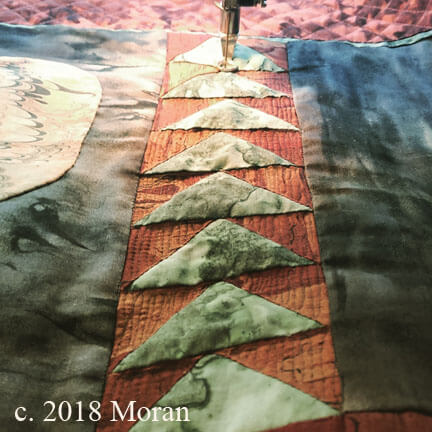
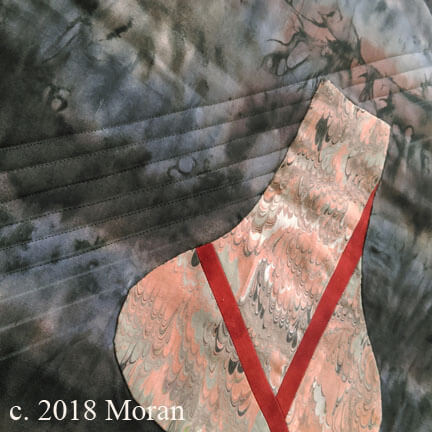
First I started with some straight-line quilting to make the triangles “pop.” I really like that effect, so I decided to do the top and bottom borders that way.
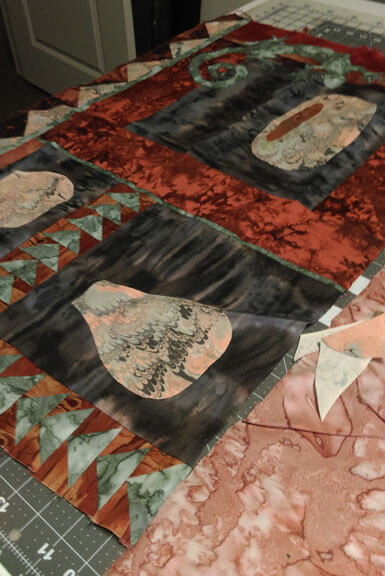
The pot with only outline quilting.
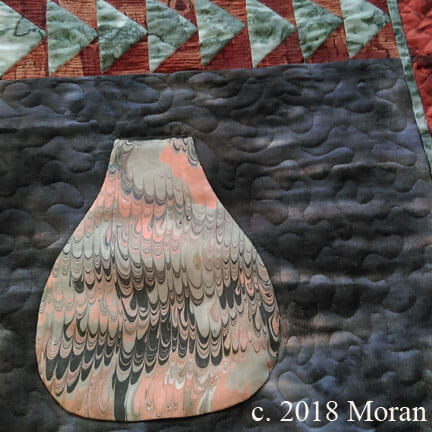
From here I did the gridlines in two places, as it reminded me of the stucco you see throughout the Southwest.
Originally I was going to quilt the lines in the pots but decided that would detract from the overall design, so I outlined the pots and stippled the background. A shiny rust thread used in the stucco, and invisible smoke thread in the stippling – I just wanted texture there.

Now there was the other side…couldn’t think exactly what I wanted to do for the longest time. Using invisible thread again, I outlined the lizard to make him stand out – did it twice (next time I’ll try a double needle – should be much smoother).
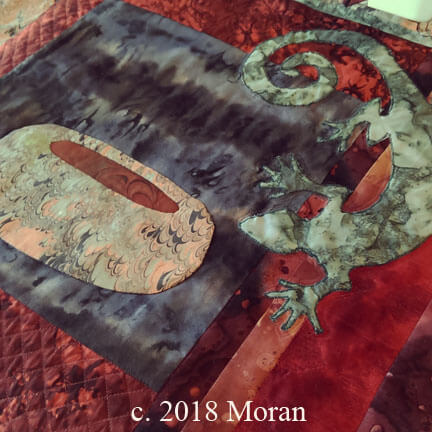
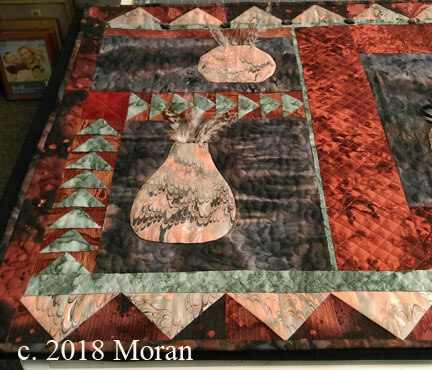
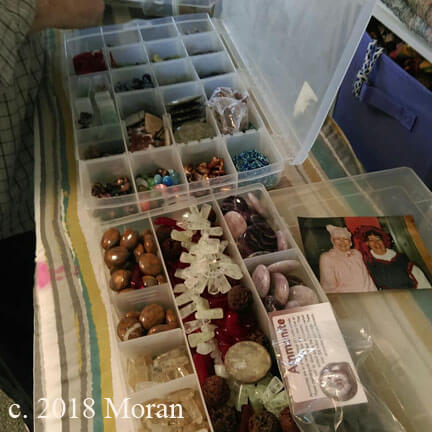
I outlined the pot and did the stippling in the background again. That just left edges – did a triangle motif in the medium brown and then attached some agates for emphasis. I LOVE my stash from the Tucson Gem Show – every year I would go with some specific types of stones in mind – mostly earth and water tones for future wall hangings.
You can see the agates on the right side, and there are bear fetishes across the top green strip.
 Starting the grid lines on the companion piece.
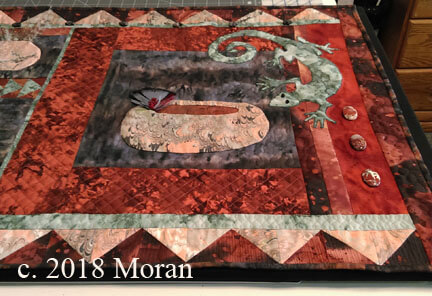
And….ta-da…..”Sonoran Dreams”
Photography by Melanie Bishop
Beginning Free Motion Quilting
Beginning Free Motion Quilting – Yes, You Can!
4 hours, $40.00 (plus 1/2 hour working lunch) 10:00 – 2:30,
February 11, Saturday
Quilting With Color, Williston, Vermont 802-876-7135
Now what? Your quilt top is done…send it out or quilt it yourself? You can free-motion your own quilt top, no fancy domestic or long-arm machine needed! YOU CAN do it all yourself – it just takes practice! From thread choice, basic supplies, setting up your machine, to learning basic FMQ patterns to build other designs on, you will learn the happy sounds of your machine as you practice six basic patterns on fat-quarter sandwiches: straight lines (without a ruler or walking foot), various size stipples, pebbles, basic feather, grid work, and a leaf/vine shape.
You supply:
* sewing machine in working order, ability to lower feed dogs, instruction manual (I can’t stress enough how you need familiarity with your machine and lowering the feed dogs)
* free motion (or darning) foot; NEW #80 0r #90 machine needles (#90 might be easier for you if you want to use fancy threads)
* a selection of threads, from “old and cheap” to “fancy and expensive” (cotton and poly are welcome)
* low-loft cotton (or 80/20 cotton) batting in fat quarter size for two quilt sandwiches
* 4 fat quarters (18 x 22 inches), one for the top and one for the bottom of two quilt sandwiches (not fancy fabrics, just for practice, and muslin is fine – tone-on-tone or solid color is best for getting started
* scrap paper and pen or pencil
* scissors
* marking tools (fabric marker or chalk
* ruler for marking grid lines on the fat quarters
OPTIONAL: small white board and marker for practicing designs; a machine extension table (you will be happier with one…), Machingers quilting gloves.
One of many samples looking at how you can add free motion quilting to your work….

COME JOIN US!!
Suggestions Needed
So I have unearthed a bunch of UFOs in going through one of the containers in the studio. One is up on Facebook, free to a good home for the cost of postage. A couple of them, I need suggestions for what I can do for the quilting. Plus, if you recognize that you made the item, please let me know so I can credit you – it’s been a long time since they were sent to us.
Here’s the first.
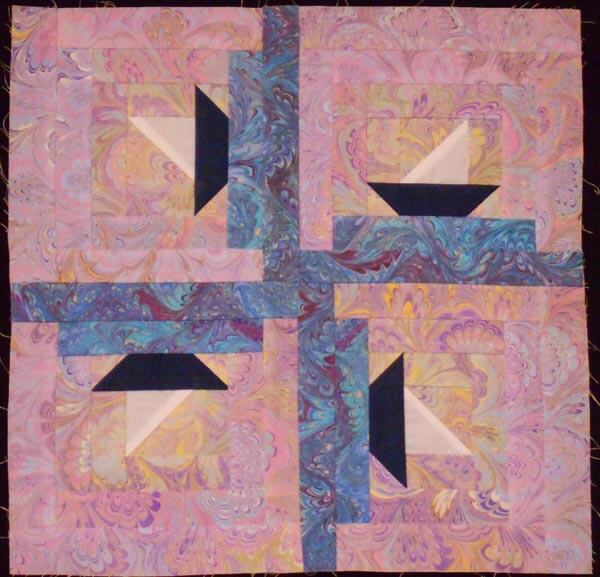
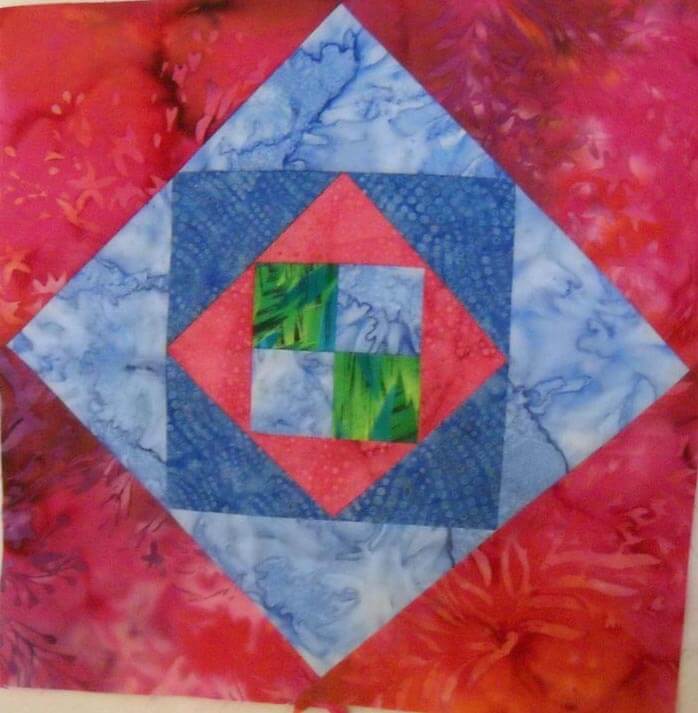
Log Cabin Sampler
This was done for us as a way to use marbled fabric in a traditional block. Now I need suggestions on the quilting. I want to use it as a sampler in my fmq classes. I was thinking of outlining the blue marbling for the waves and then doing something with partial circles around the sunrise/sunset….Ideas?
Here’s number two.
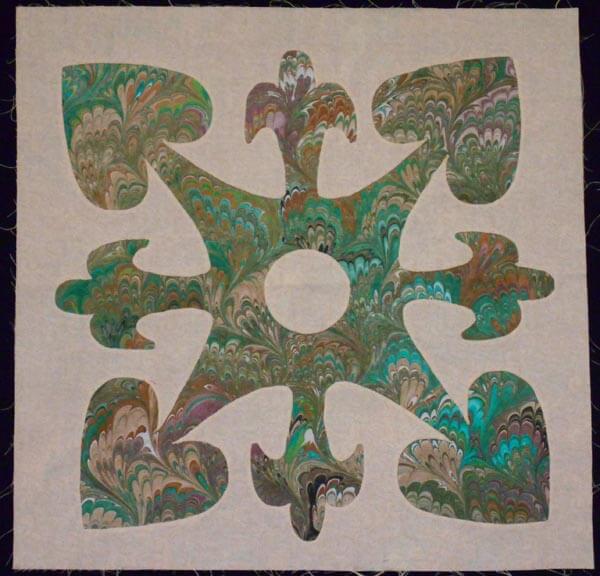
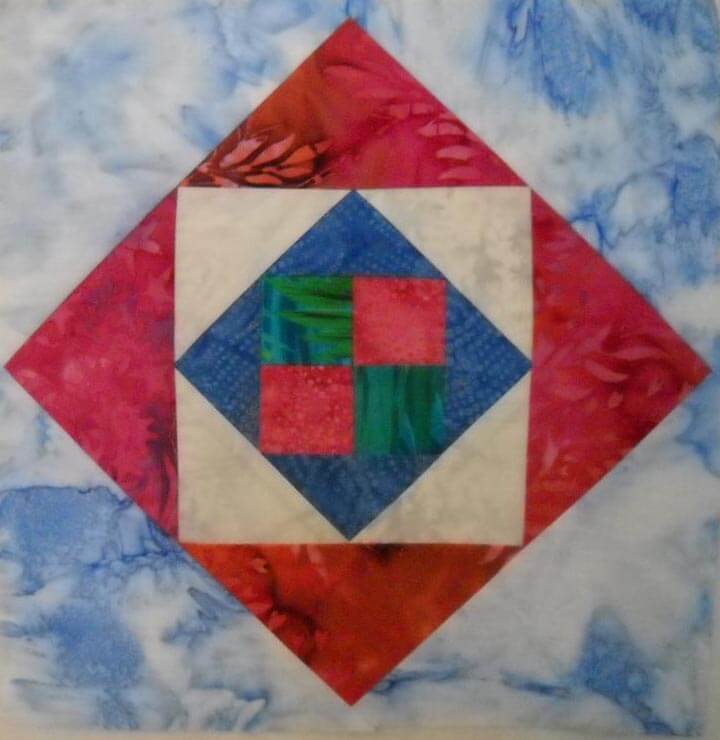
Reverse Applique
This is reverse applique, and I can treat it as a Hawaiian block with outlining, but I’m wondering if there is something else. All suggestions welcome!!
Another Commission Completed
Yoga Susan’s Quilt
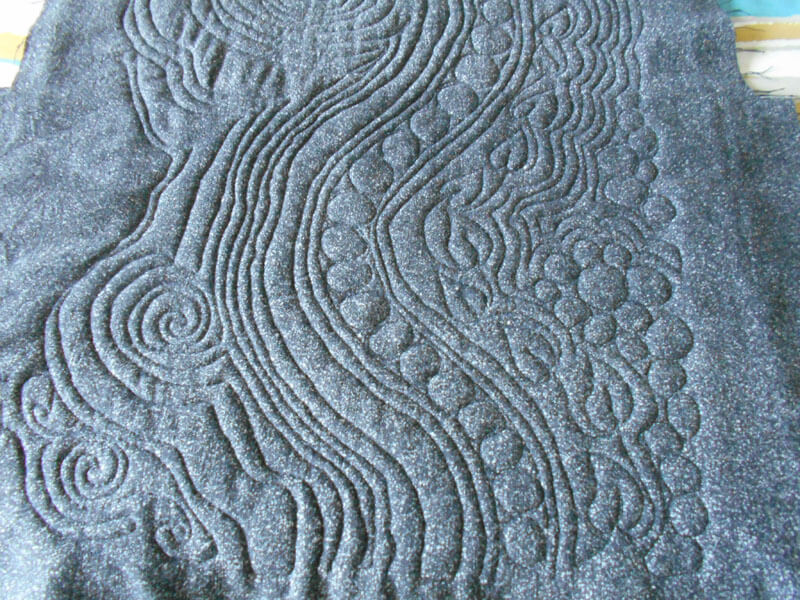
This last quilt commission (which Susan is no doubt getting plenty of use in chilly Tucson, and we have our quilt off the bed, as it’s too warm here in Vermont….) was a challenge for me to fill space with quilting design. I LOVED how it came out, and as usual I learned a few things on it. So when I started this new table runner for a friend for Christmas (left-over pieces from a Judy Niemeyer pattern) I wanted to do an overall quilting pattern that was very organic and would unite all the blocks.
Big lesson – just because you can quilt it, doesn’t mean you should….which harkens back to Road to California in 2012. First time at a big quilt show, and hubby and I kept commenting on the amount of free motion quilting showing up. Some quilts didn’t seem to need that much quilting, and on some the quilting really enhanced the work. This was also when I began taking free motion seriously, and in the last three years I am now teaching basic machine quilting.
But with this table runner, I realized to late (to rip out half the runner) that I had too much quilting. Here’s my table runner that was on the table when our friends came to dinner.
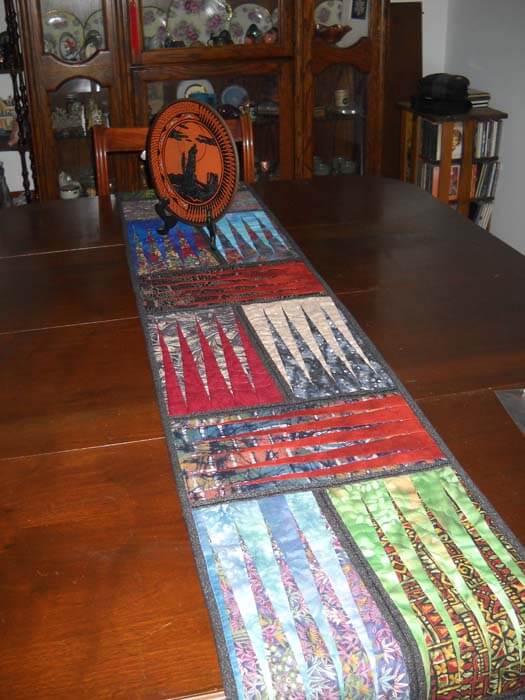
The block pattern is obvious, and at this point I was stumped as to how to quilt it – I ended up using invisible thread with wide circles. Ehh. So I wanted to do something different with this one.
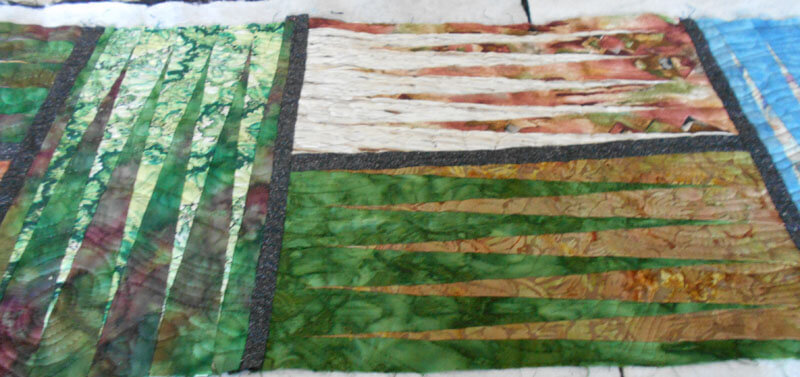
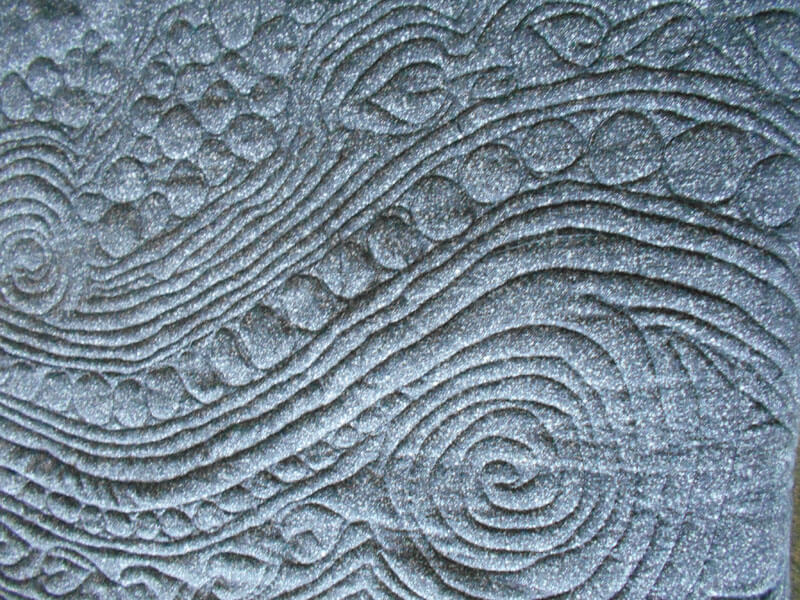
You can see the meandering quilting – I really just played with curved line to offset the sharpness of the design.
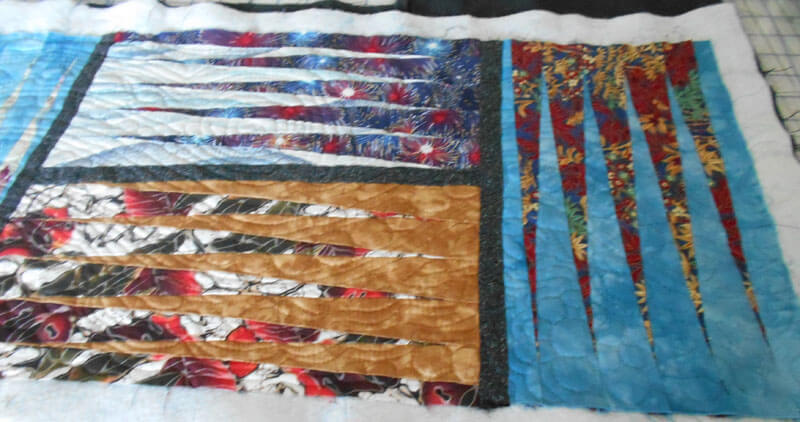
You can see here that the quilting design when up close takes over and dominates the pattern. This is where hubby quoted Tim Gunn (yes, too much Project Runway in our house,……): Edit, edit, edit. Yup – bigger curved lines and no leaves or stones.
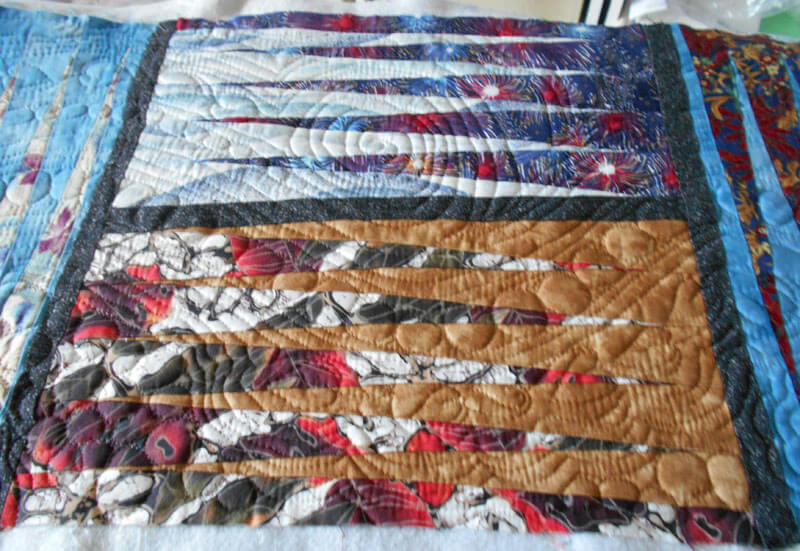
Like I said before, way too late to take all those stitches out. However……when looked at from certain angles, all you see is the pattern. At other angles the quilting is predominant. And, ultimately I like them both.
Before I actually started the quilting, I was subbing one day and had time on my hands, so I was watching one of my Craftsy classes on machine quilting big projects on a small machine (and my Bernina 108 doesn’t get much smaller….). Spray-basting the WHOLE quilt. Nothing will move. I’m trying this, and lo and behold it worked WONDERFULLY.
The spacing could be better, but NO TUCKS! Well, three little ones that actually ironed out. That’s the way I’m going from now on. My fingers will appreciate no more safety pins – this time a year ago it took hubby and me four hours to pin-baste a queen quilt…..
So more lessons learned, and another commission in the works for March. I am having SO MUCH FUN!!!
Traditional Sampler Quilting Tutorial
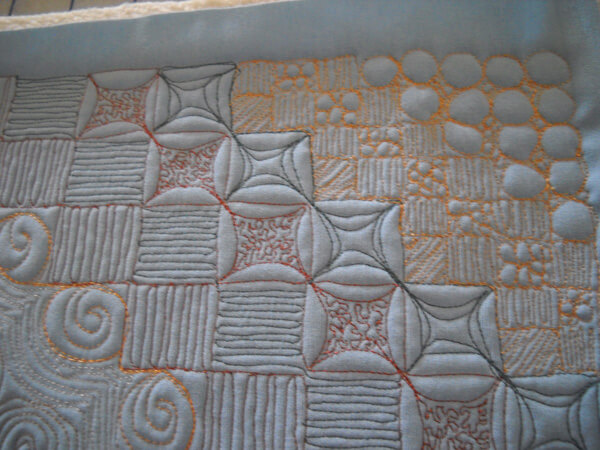
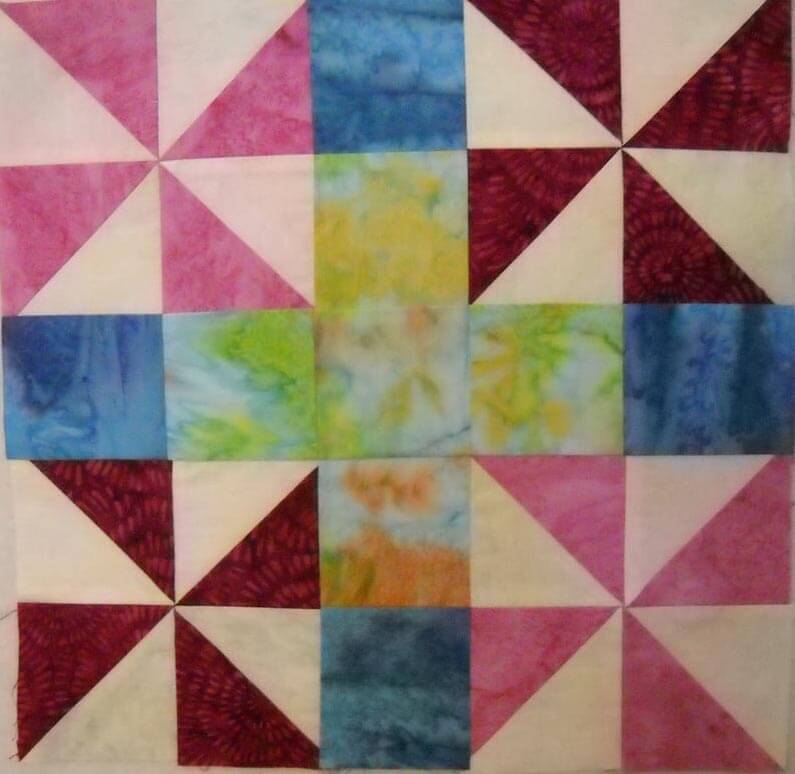
About two years ago I asked for some volunteers to make traditional blocks using marbled fabrics, as I wanted to show what can be done with traditional quilts besides the art quilts I do. Now that I am improving my machine quilting skills, I turned one of the blocks into a new teaching sample for both quilting marbled fabrics as well as using marbled fabric in traditional quilts. First up is the back of the block – a list of all the threads and needle sizes used, as well as any (and all) tension issues, so they could be discussed (and I wouldn’t forget what I used where).
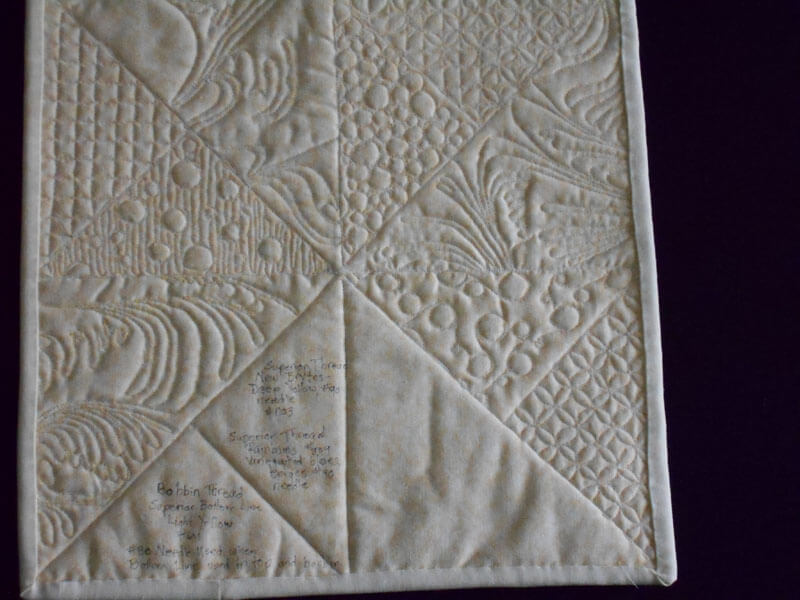
Back of traditional block
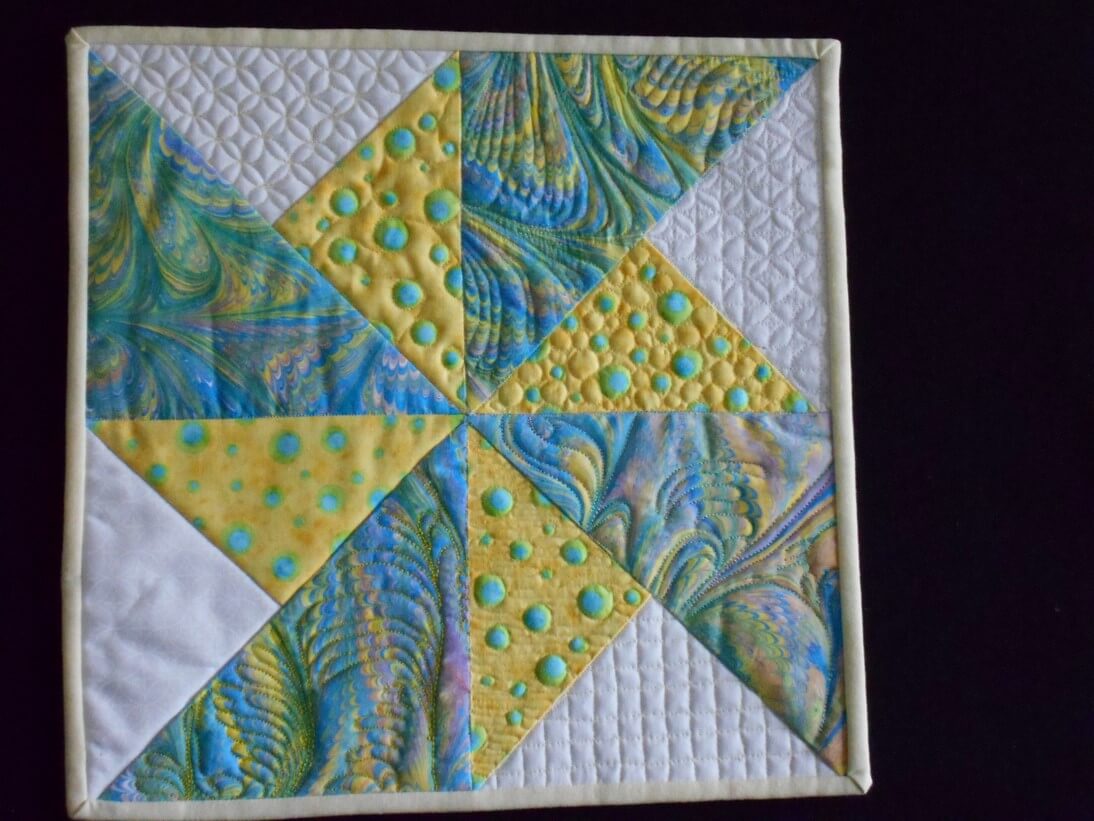
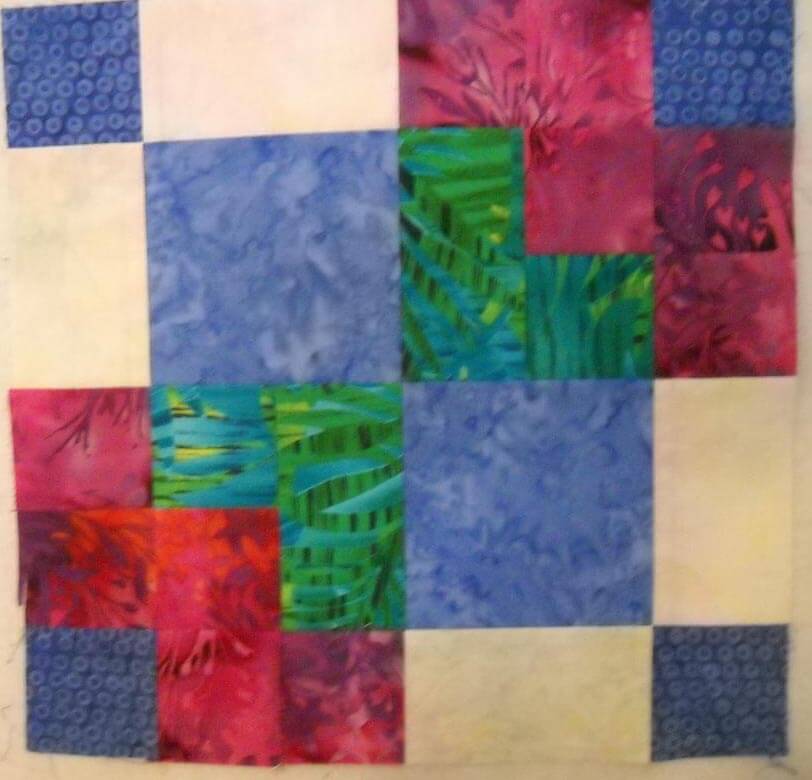
I quartered the block, and one section was left completely unquilted – because that is also an option. Here’s the front of the block:
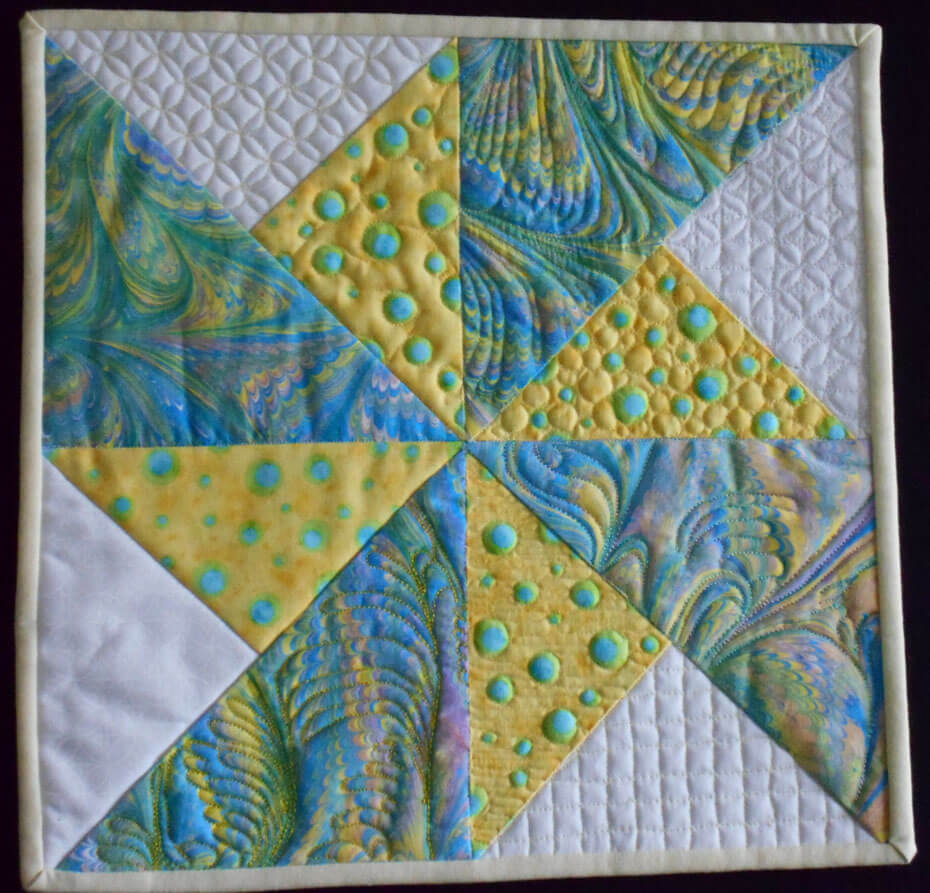
Marbled quilting sample block
Far left – unquilted. The yellow pieces have three different designs. I’m partial to the one with pebbles quilted throughout the piece. I used Bottom Line in the bottom, size 80 Superior needle, and Bottom line in the top.
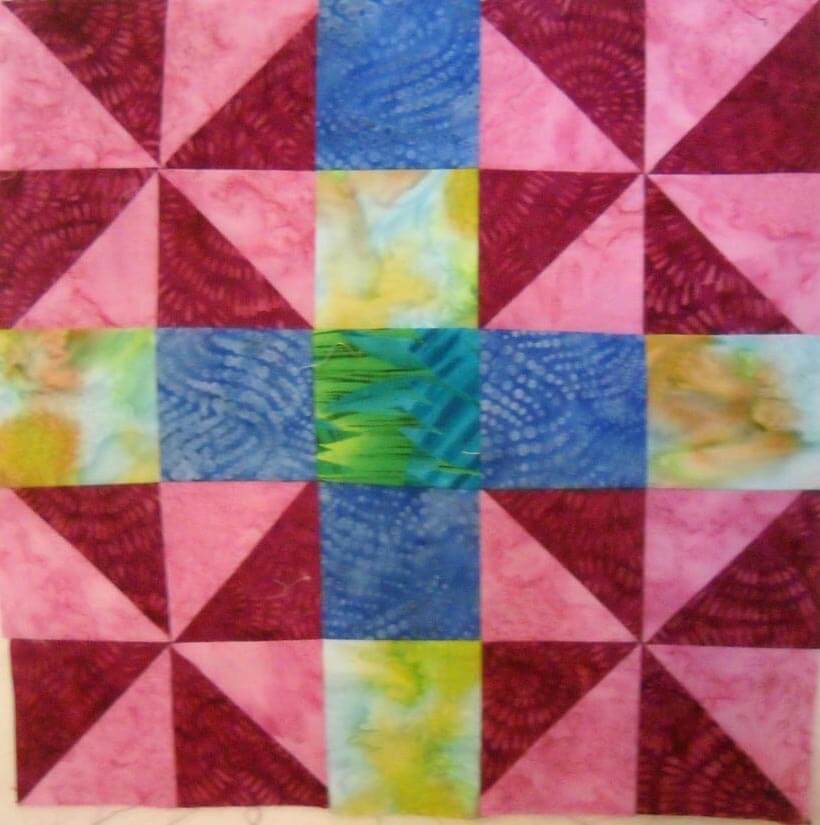
Each marbled piece is done in a different free-form design. Lower center uses a Superior Thread Brytes, heavier, so I used a #90 Superior needle. Upper right used Bottom Line on the top and followed most of the curves in the pattern. Right marbled fabric used a variegated Superior Rainbows thread and only did a few of the wide curves. Different looks in all three. One of my favorite stitches is just following basic curves, and you can see that in this quilt:
Free motion quilting
For the white – BIG lesson was don’t use a distinct variegated thread unless your fmq stitches are VERY even. Spent three hours taking it all out. The white was patterned with circles and small crosses. For the bottom right I used yellow Bottom Line in the top for a hint of color and gridded the triangle, using the fabric pattern as a guide. Upper left, also with white Bottom Line, I followed the circles in the white fabric pattern. Right triangle I followed both patterns, also white Bottom Line, and found it too busy.
After the New Year, I want to experiment with more like this. Let me know if you have done something like this to determine different quilting ideas.
One of My Ongoing Projects
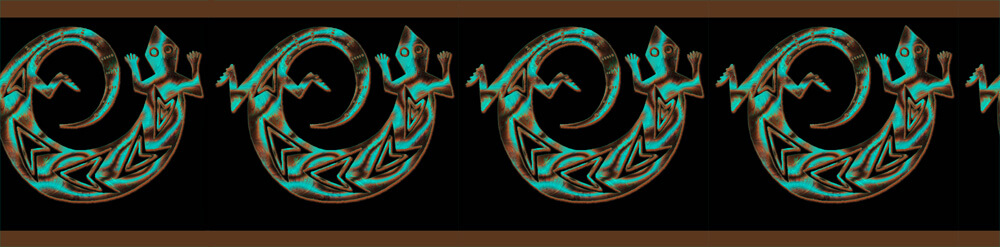
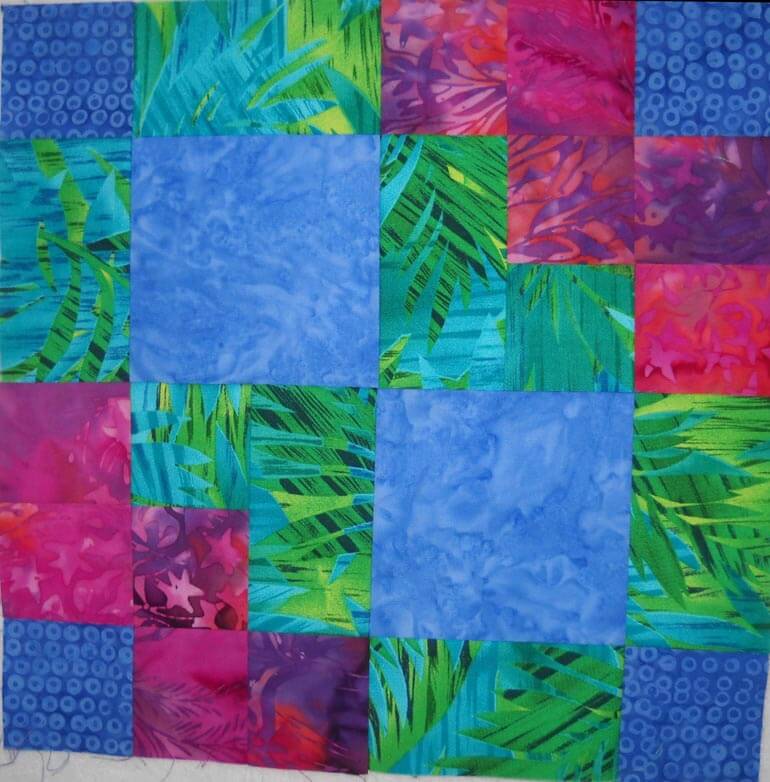
A Border Full of Geckos
Hawaiian Block of the Month from my local quilt shop, Quilter’s Market – which I will SO miss when we move this spring…..
This program is a monthly get-together through our local quilt shop, Quilter’s Market – one of the things I will definitely miss when we move. The theme for this year is Hawaiian Getaway. I’ve been keeping up generally with the blocks, but I will confess to being four five months behind right now – it’s those deadlines for other quilts…. Forgive the pics – I was in a hurry…..
I decided after my first block that it was just too intense in color, so I made one that was softer, with more light fabrics. that got me started making two blocks a month, one saturated, and one that was lighter. The shop has what they call an “Oops Pack,” for when you make mistakes with the pieces of fabrics you get. I picked up both the light and dark packs, because I really liked the sherbet colors. So instead of 12 blocks at the end of the program, I will have 24. I’m planing to set them on point, with plain blocks in between that I can free-motion. For those I’m planning to use some of my adopted mom’s Hawaiian designs. I also really like the work Judy Madsen does (Green Fairy Quilts) with straight-line quilting, so I’m looking forward to designing the motifs.
Amazing how it used to be enjoying making the quilt top, but now I look forward to the quilting oh so much. The goal is to have the blocks done (April is the last month) before I completely pack up the studio for our move. I know it won’t get put together until the months after we are settled.
Here goes…..
I confess to being very curious to see what I come up with for the whole quilt – I do know I am very much looking forward to quilting it!
Latest FMQ Commission
While I haven’t been posting, I have been moderately busy in the midst of still dealing with illness. I quilted a small wall hanging for my yoga instructor (whose house is now FILLED with art I have made for her). Here are some pics – she made the top and I finished it off.
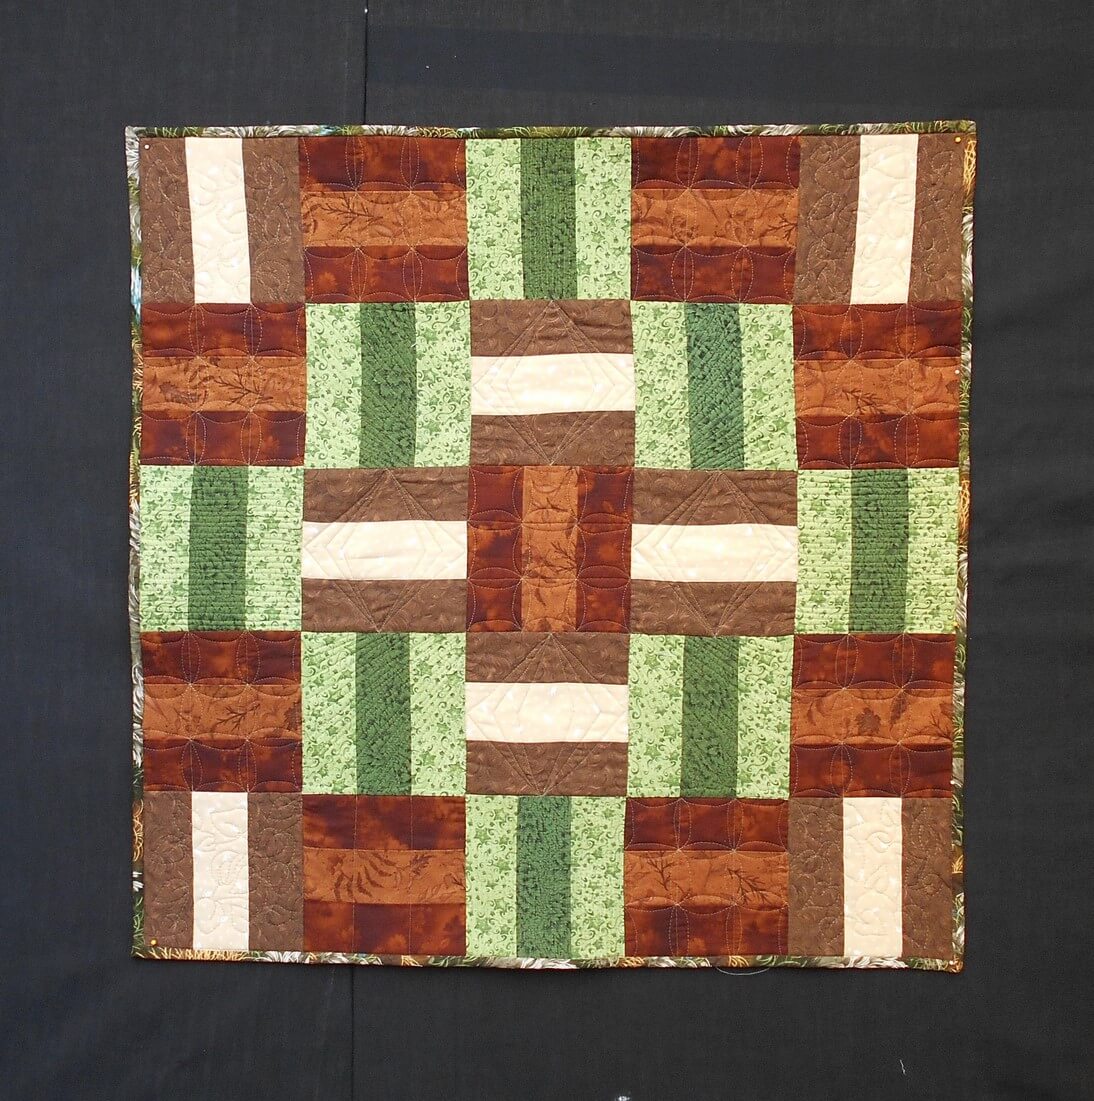
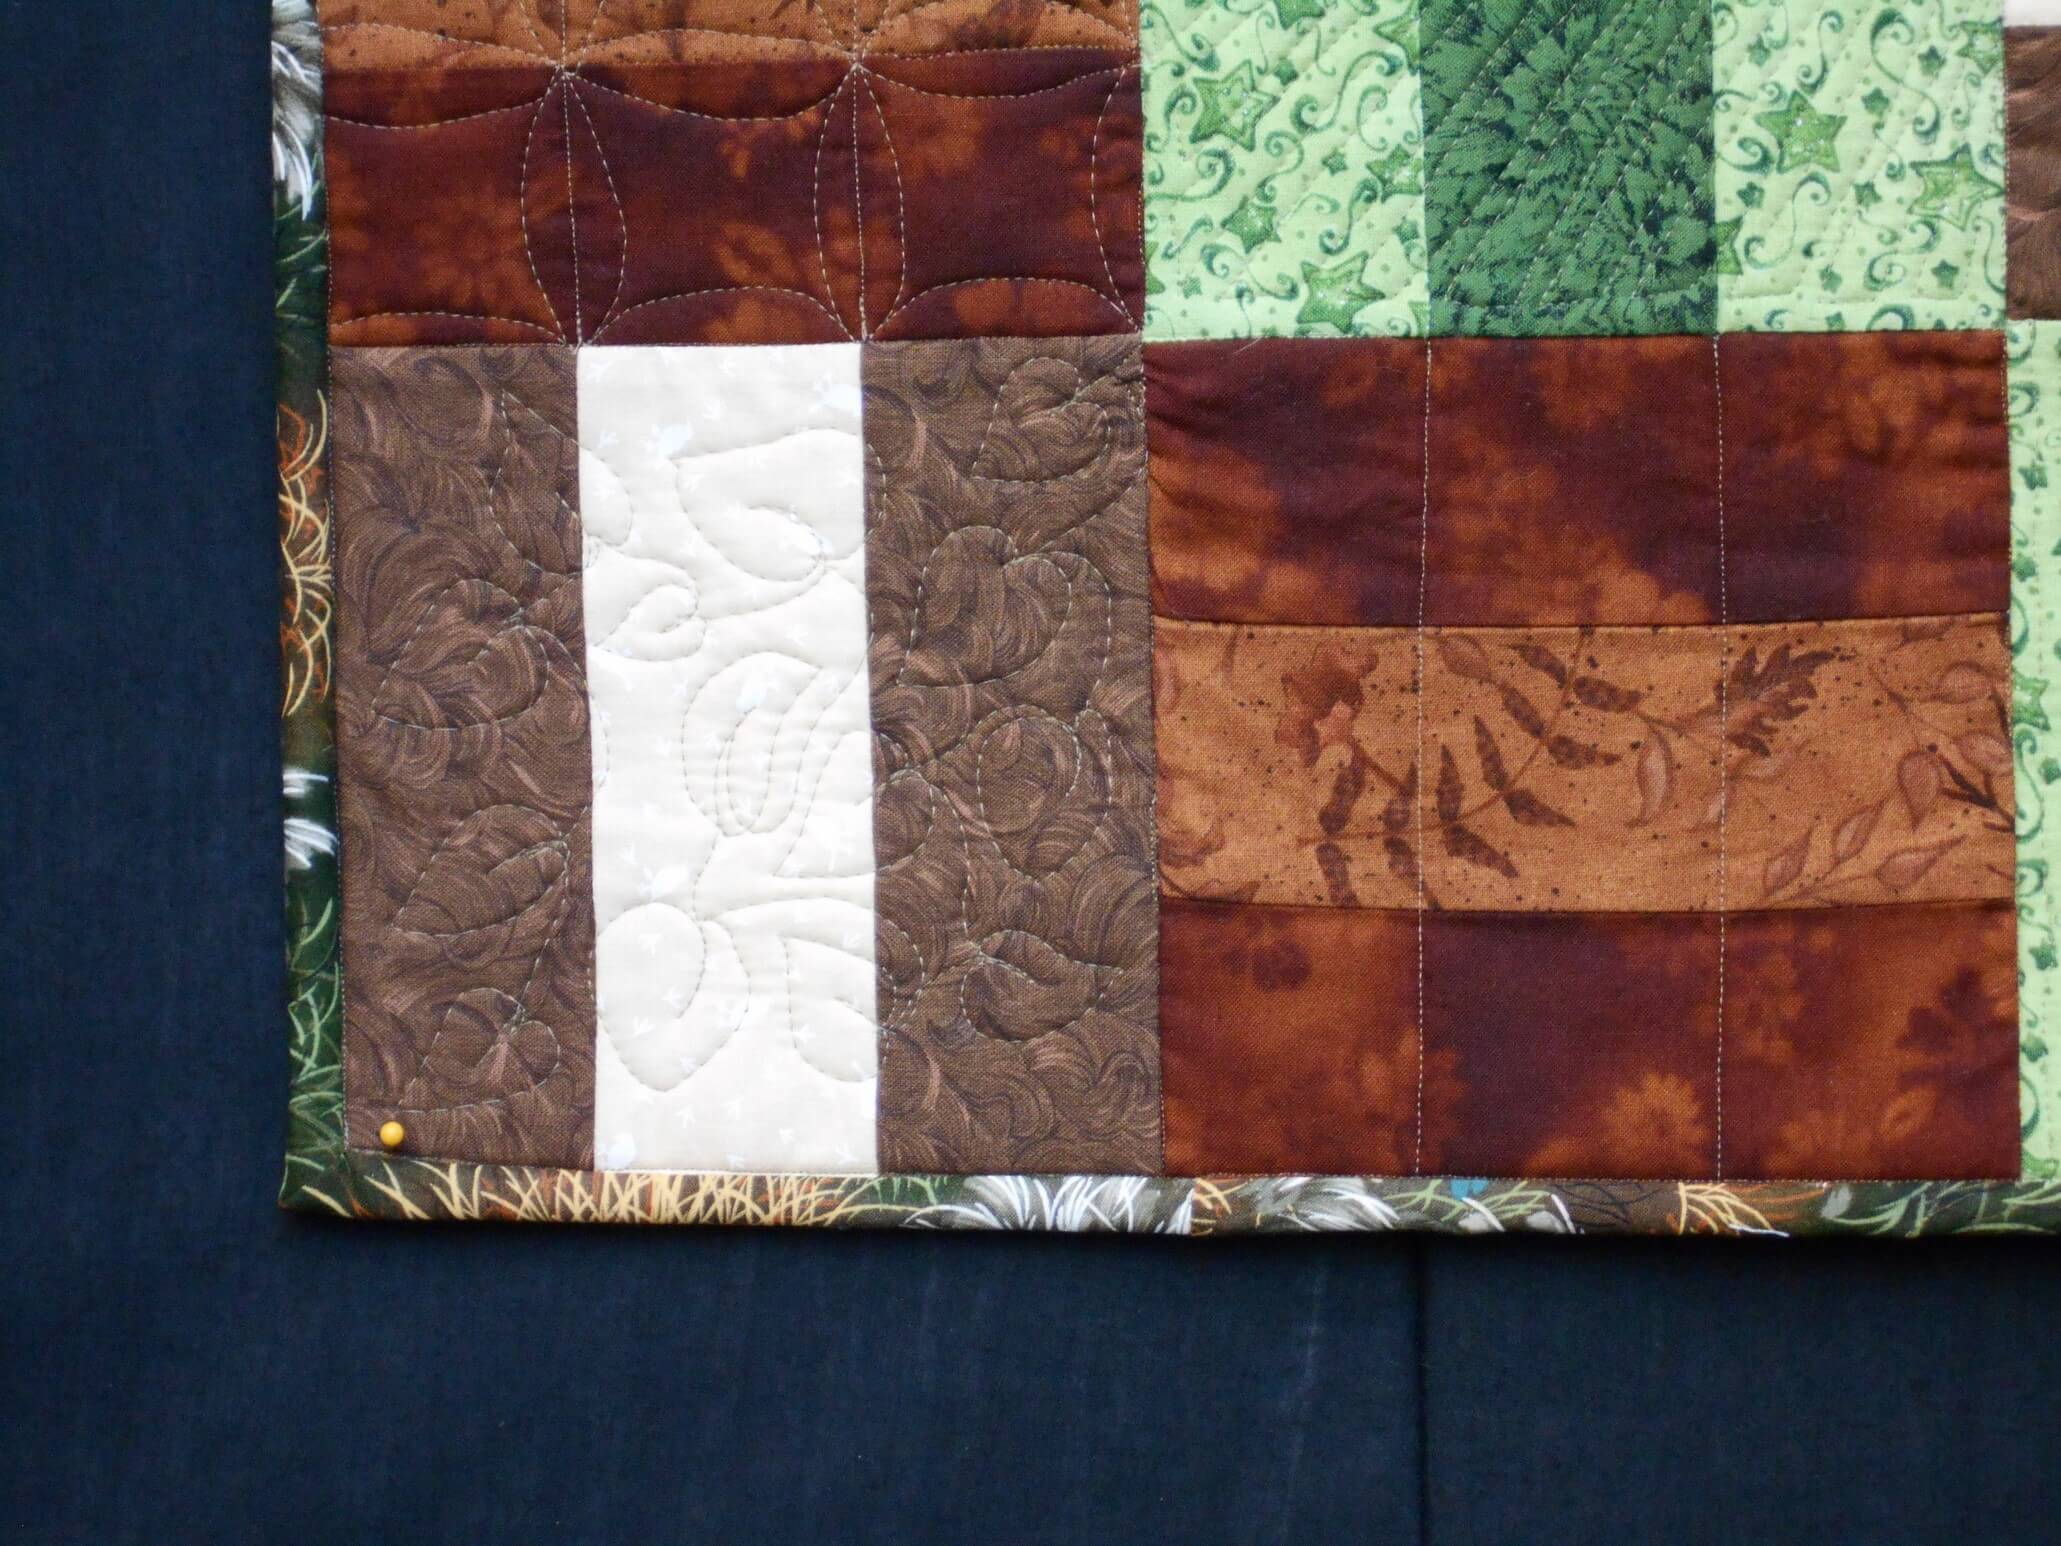
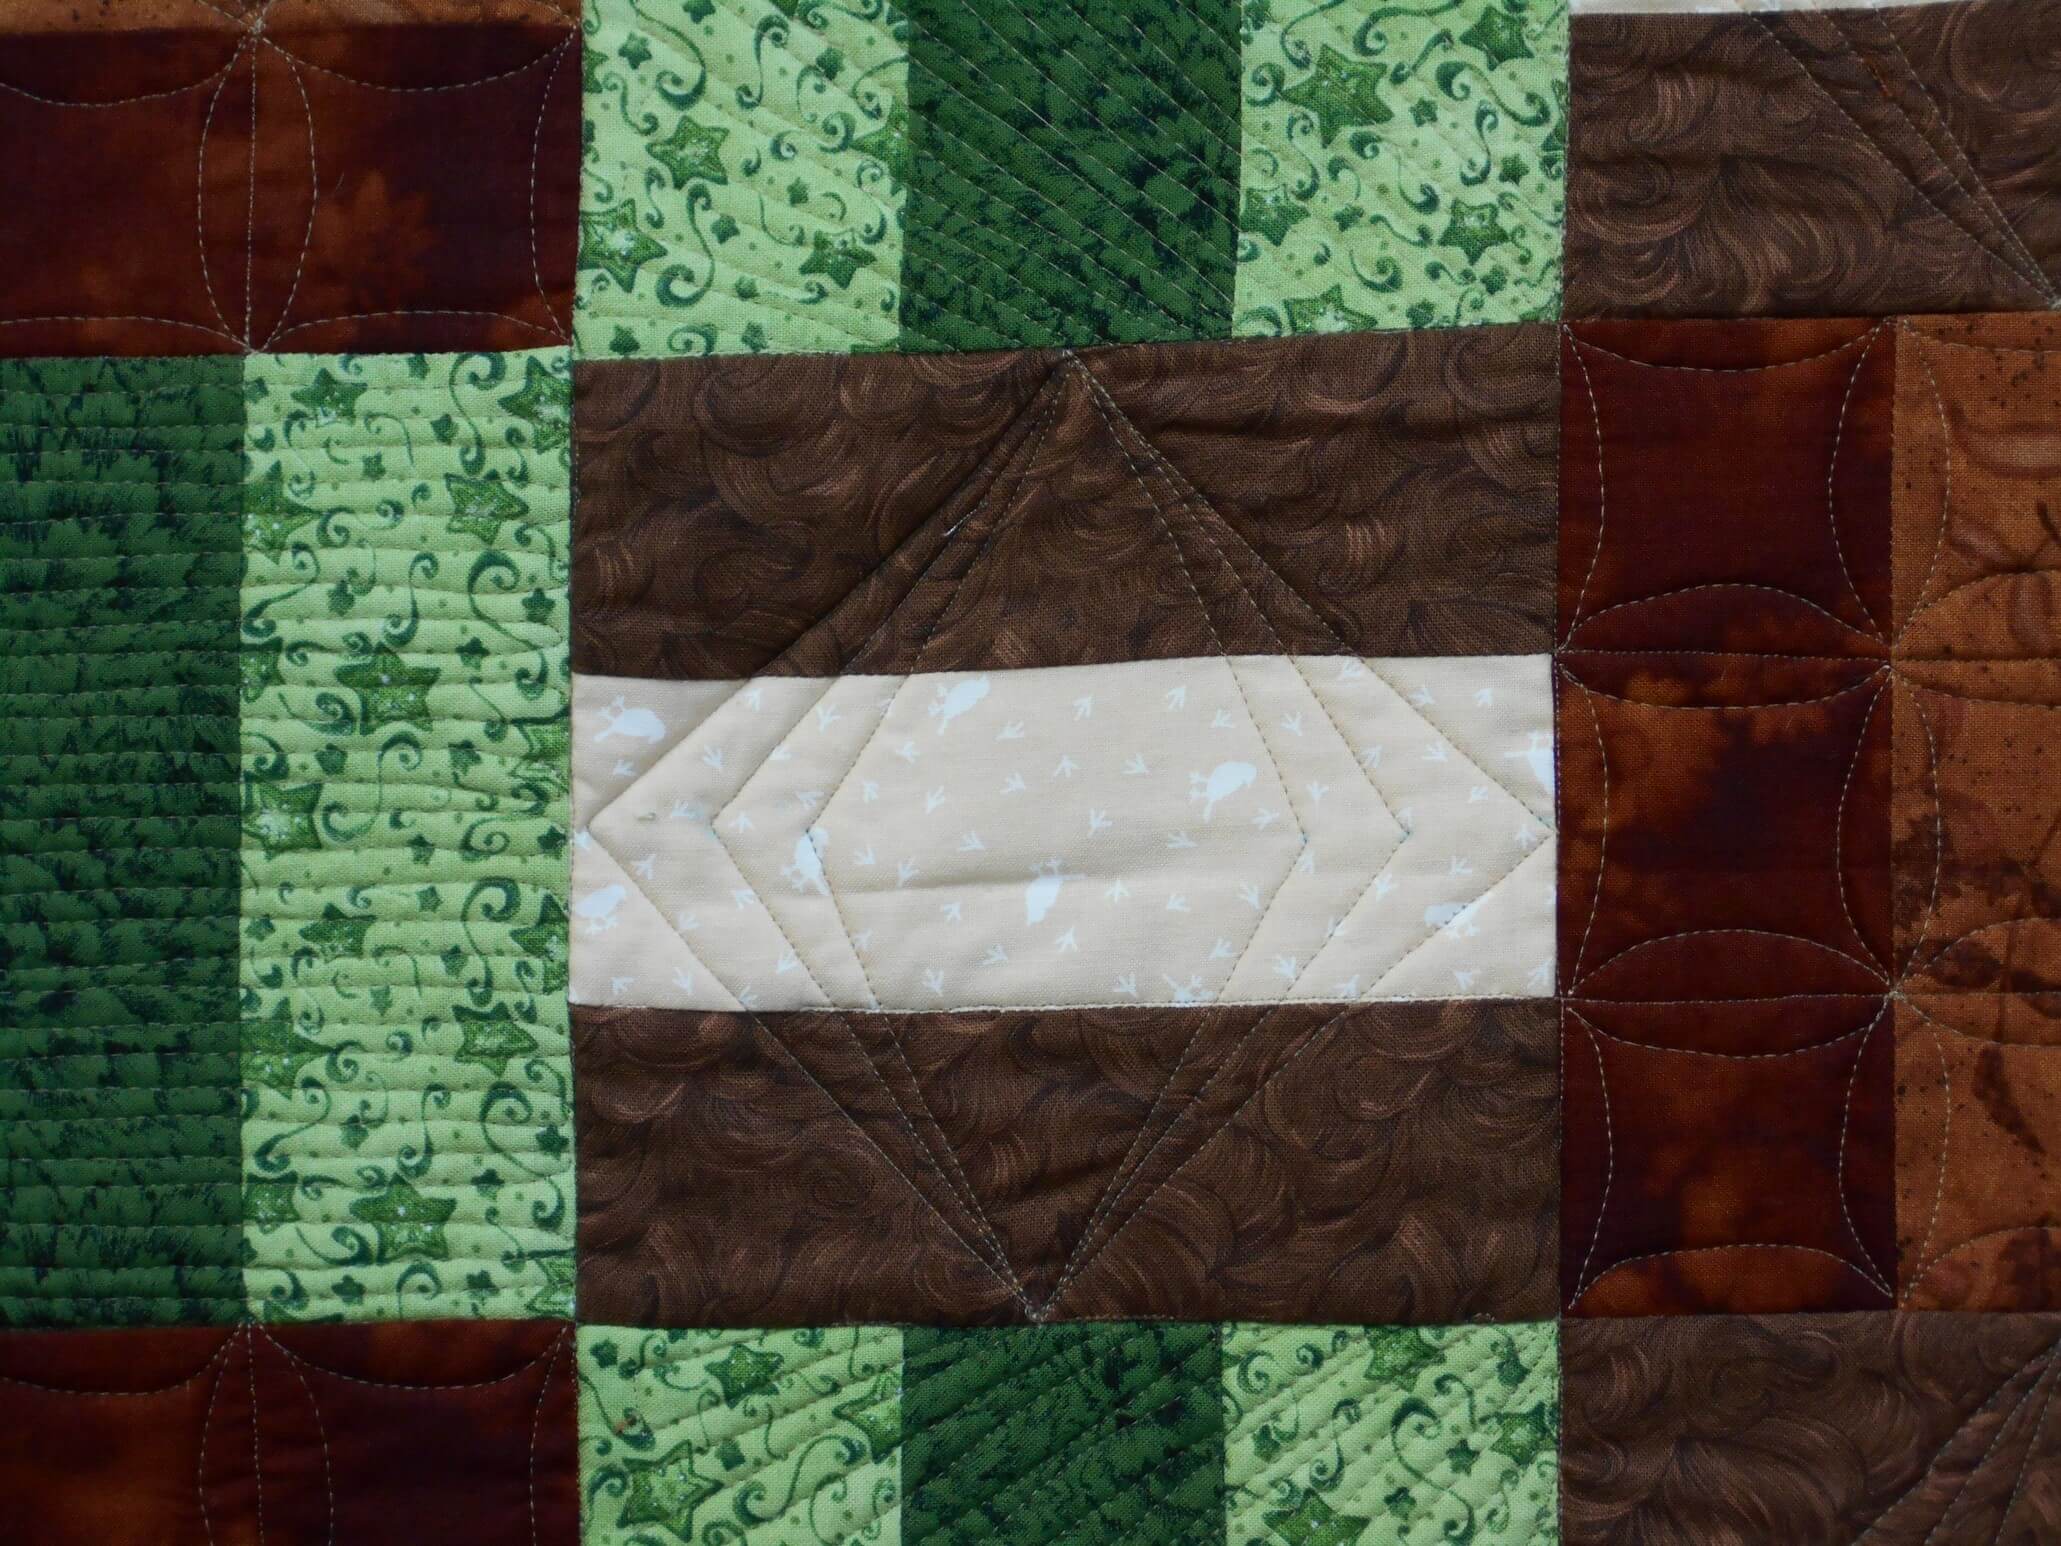
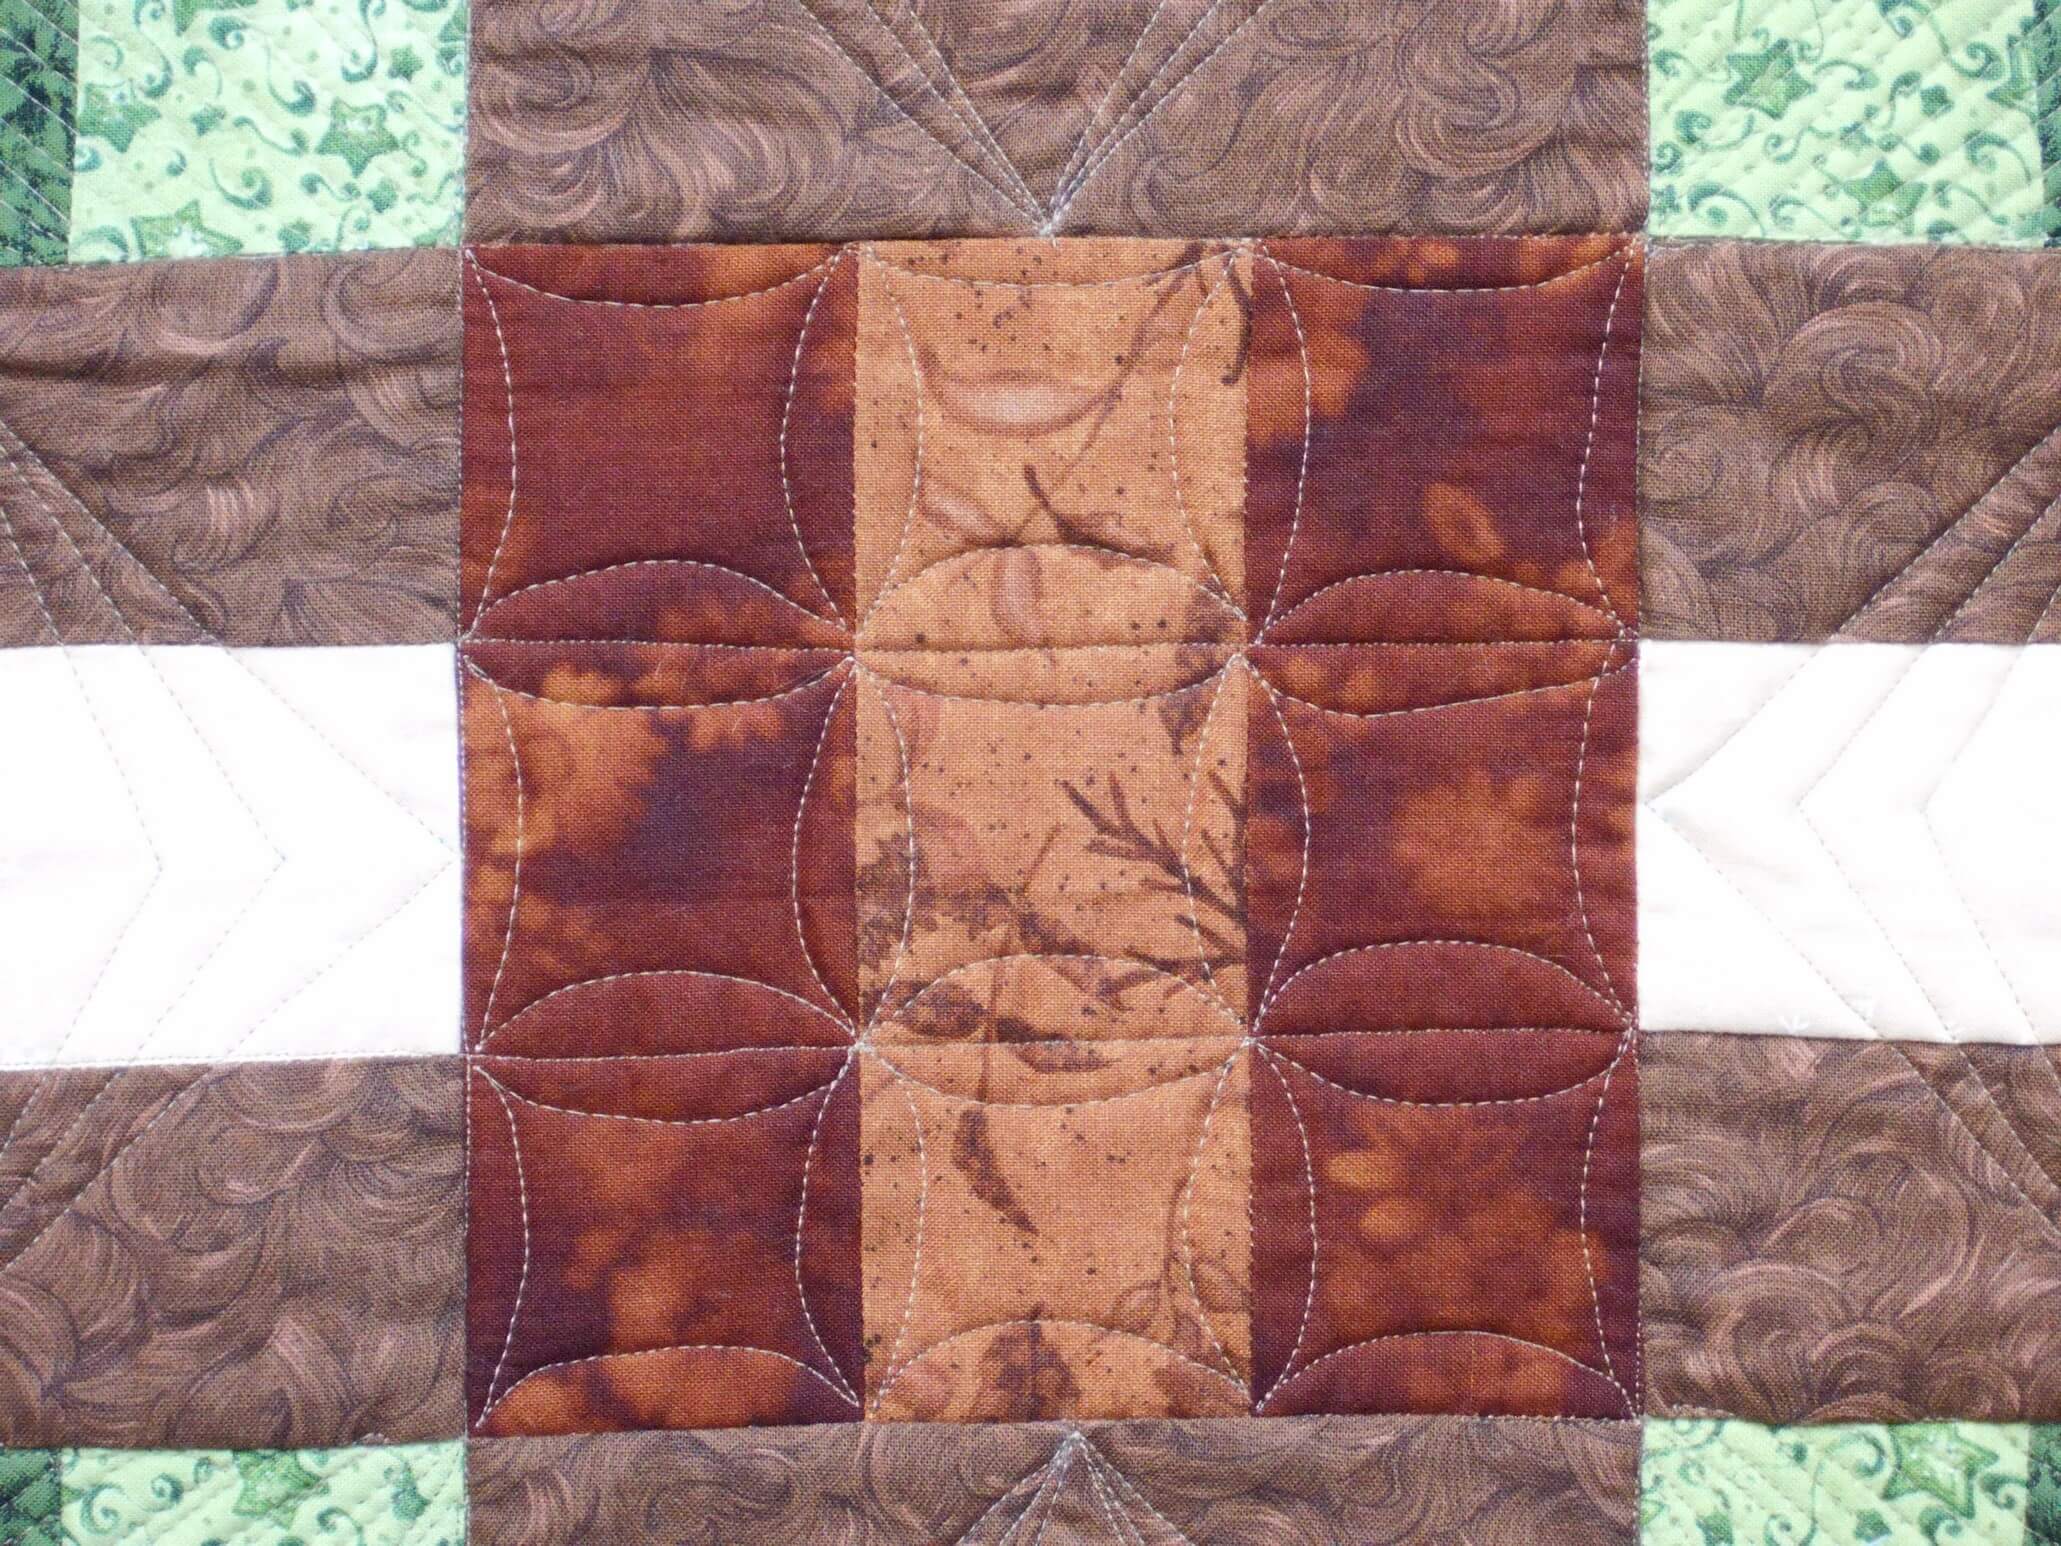
The brown blocks have a cathedral square pattern, the center brown and beige have a diamond pattern, the four corner blocks are a leaf pattern, and the green blocks are just a plain stripe.
PS – this was the picture that made me realize I had forgotten to do one of the patterns……
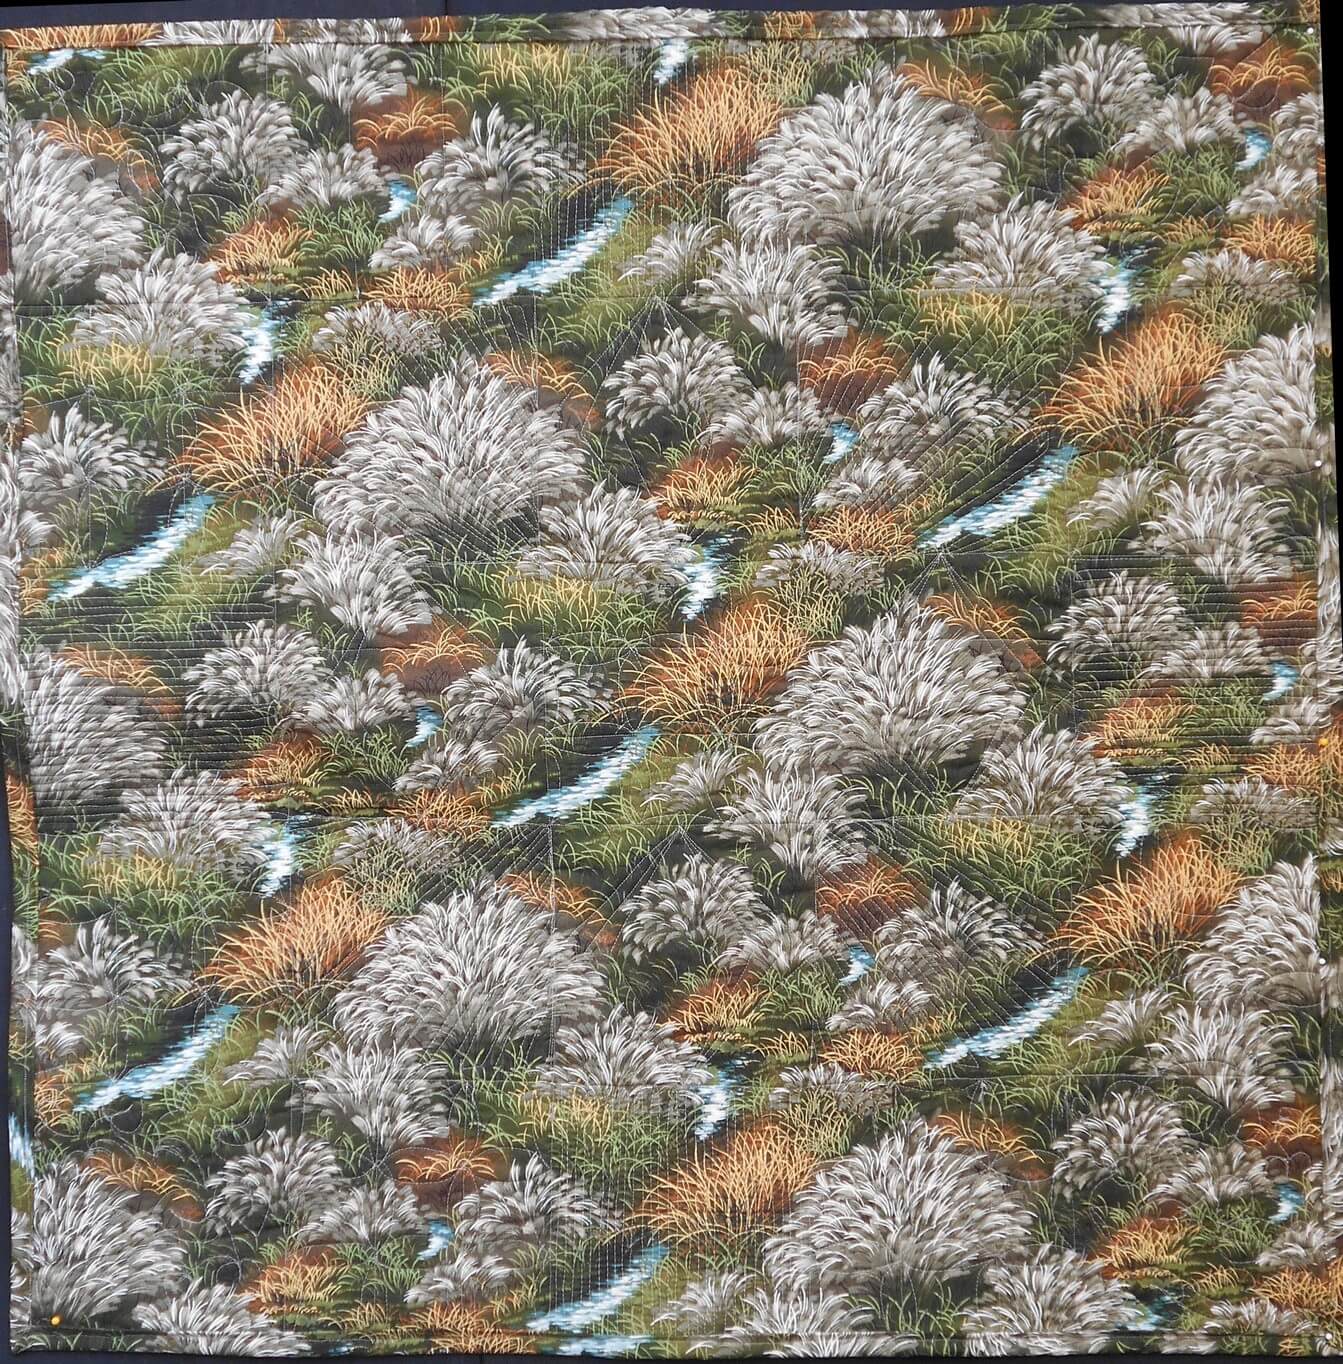
And….the back – one of my favorite pieces of fabric…..
I’m still plugging away……
Work in Progress

I definitely have work in progress…I just never manage to get it up on a Wednesday….so here goes anyway. I finished my table topper for my bed stand, and I was really pleased with how it turned out. I used ideas from the October and November FMQ challenges. First time I used a stencil when I wasn’t hand quilting, and I tried all kinds of techniques, including a not-really-successful trapunto, but I’m learning. Both table toppers are bound in the same purple, even though the designs are totally different on both of them.
This is hubby’s topper.

From Last month:


I was very pleased at how it worked out. My first experiment with water-soluble thread was somewhat successful. But the amount of free motion I managed to do really surprised me. We still have two dresser scarves from the same set of fat quarters. I have an idea for hubby’s using some of the techniques I’ve seen in Diane Gaudynski’s book, but that will have to wait till after the holidays. I am still working on the last table runner for my second mom, due next week in time for Thanksgiving, so that’s the next priority.
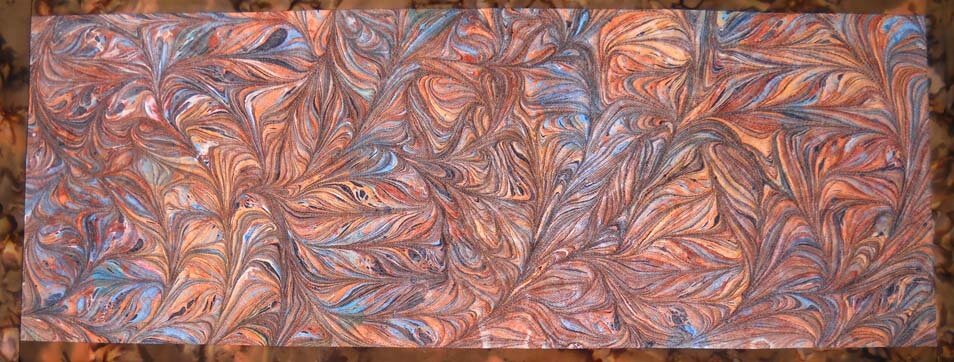
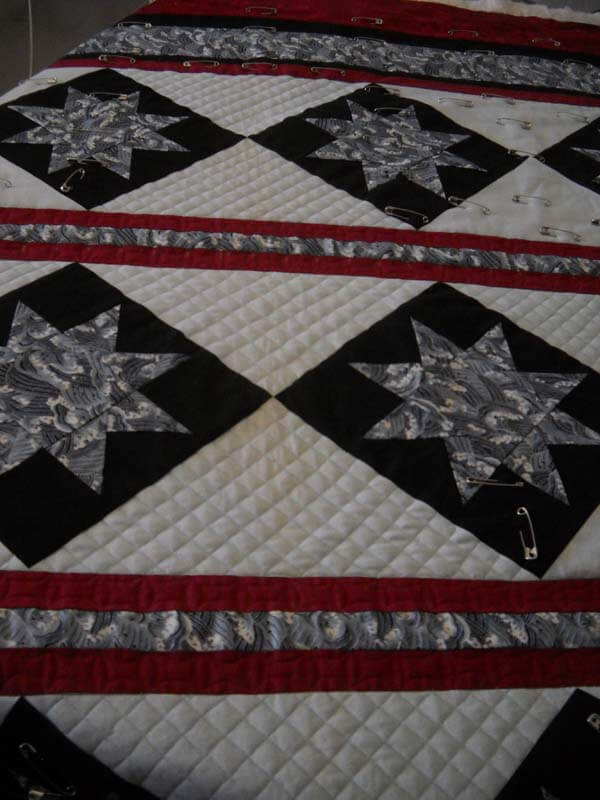
However, I had to take some sewing time strictly for myself. I took this ten-plus-year-old quilt apart late summer, and I finally am getting to redoing it for the holidays, plus turning it into a new tutorial for quilting marbled fabric, this time the nonpareil pattern, a very traditional marbled design. It was just quilted in the ditch and looked really blah…..

Now I have some photos of quilting the marbled fabric in the center of each of the stars. I really want them to pop out.

I’ve just started quilting the center of the star.

I’ve got the centers of the stars done now, and I am doing micro-stippling in all the green. Going pretty fast, which bodes well for getting the tutorial completed! Hopefully more time tomorrow….
Using Marbled Fabrics in Quilts

When we started marbling, we were hooked from the very first piece. The problem was…what do we do with the fabric? Each piece was so gorgeous it was hard to cut into it. We knew we had to get over that mindset. Folks consistently asked, “What do you do with the fabric? I don’t know how to use it.” Confession time – I wasn’t quite sure either. I saw a book and thought marbled fabric would look cool. Now it was “put up or shut up.”
I was a beginning quilter with virtually no good color sense…that was hubby’s field. I figured black goes with everything, so my first quilt was an attic window pattern.

This was a nice way to show off smaller pieces of marbling, but I had to stretch further. It took a number of years before I stopped being afraid of any color except black. I started a Block of the Month, using blocks from Judy Martin. I became more daring…this time it was not black…..but other solids. I built the designs on the colors in the marbling. My January block had a definite “coolness,” so I looked for solids with some texture that would work. I started to expand design ideas and felt that traditional blocks could be the key to using these fabrics.

Now another confession…..when I first started doing quilting, I was pretty much “stitch in the ditch”….with metallic threads, no less. The quilt above is 12 years old, and I took it apart (oy) and used my newly acquired FMQ skills. I didn’t stitch the marbled blocks, as I wanted them to stand out.

The completed quilt – marbled fabrics within traditional blocks. You can read more about the actual quilting here.

I was hooked on finding some great traditional blocks that could spotlight marbling and go together harmoniousl. Summer……..I had some great neon orange cotton, a nice piece of Moda Marbles, but I needed additional fabrics so the quilt wasn’t overloaded with green. I stretched with the print fabrics I added to complement the marbled fabrics.

There’s lots of machine quilting throughout, but the marbling has been left on its own. (I also took this quilt apart…. kind of obsessive. But as quilters, we KNOW what we want. More about the quilting here).

At this point, I had a great piece of marbled fabric that said “I want to be fish.” I found a traditional block that could be used as fish. Thus the “fish quilt” was born (you can read about that quilting here). This time I quilted the marbled fabric by following the lines of the pattern and used stitches from my workhorse Bernina.
 The completed quilt –

I started getting very bold – it never occurred to me to just quilt the marbled fabric itself. This was a major breakthrough. Traditional is fine, and I still work with traditional patterns, but quilting the marbled pattern gives a completely different look to a quilt. This quilt, “Nature 1: Rock Garden,” became my first quilt accepted into a juried show, “Expressions in Textiles.” It is very zen-like, and the quilting emphasizes the rock garden and sand.

Go traditional or go contemporary. Don’t be afraid of the marbled fabrics. They can be the spark that makes your quilt.


Work in Progress Wednesday – Learning Lots!!
 Well, this has been a week of learning experiences, including running the machine needle through the tip of my finger. I’m somewhat frazzled deciding on a project, since I don’t have any looming deadlines. I do, however, have a list of projects that need doing, so I picked one from that list and then added another.
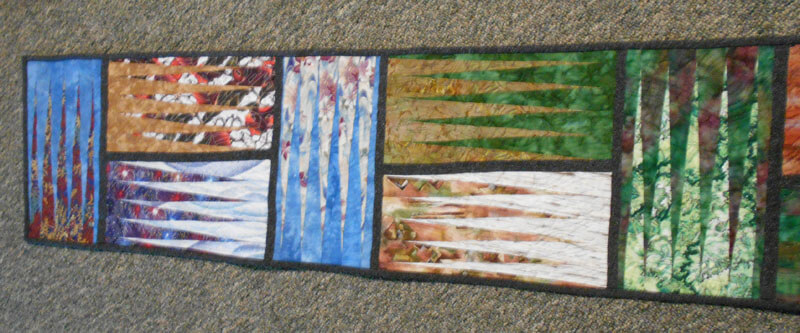
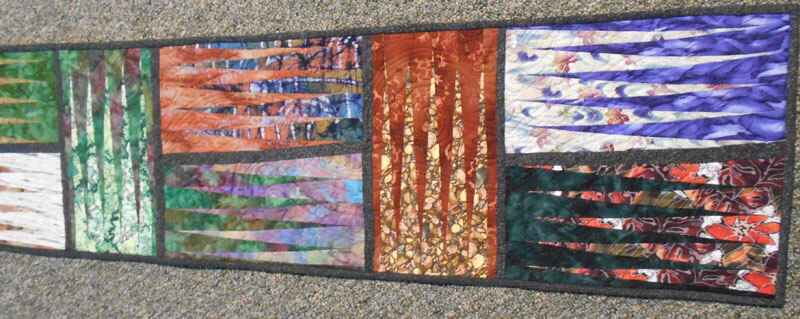
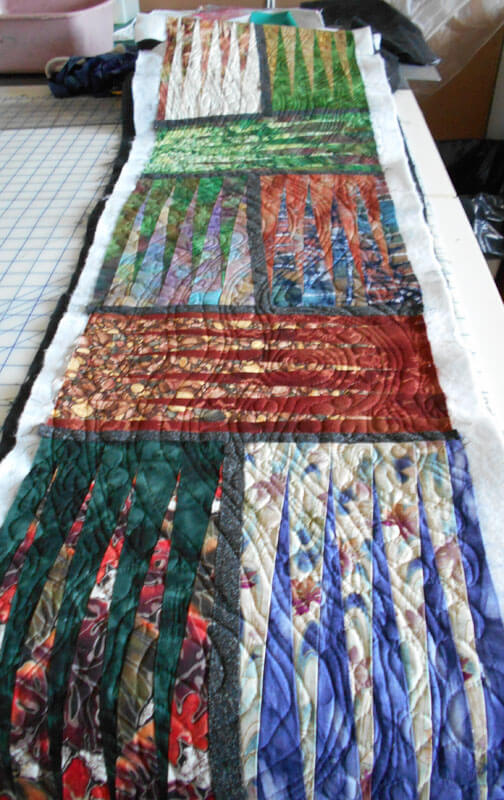
First, from the UFO list. Several years ago (going on three?) I took a class with a friend on a Judy Niemeyer pattern, Stepping Stones. You can see the pattern here. Originally it was going to be a king-sized bed quilt, but I was still teaching, so that got put on hold. When I reorganized the studio (twice), the blocks made it into the UFO pile, and when I made my list in May of projects, I listed these. But….I listed them as a potential table runner, figuring that way they would be done, and I could actually use the table runner, as we have a new dining room set (new to us – we’re babysitting it for a friend). I would also have enough for 6 placemats, too.
Well, there were loads of problems. Could I find the black fabric I was using for connector strips (three searches)? Could I do all the matching, since it had been about 3 years? How would I quilt it? What would I use for backing? I got the four completed blocks into one runner, and then I spent the next three hours taking out all the paper….note to self: you still need to vacuum. The blue I thought to use for backing was a stretchy polyester that wasn’t long enough, so plan B was leftover dark blue from another quilt back. Then I had to buy batting.
Finally everything is together and ready for quilting…..and I had no idea what to do for the quilting. Didn’t seem like feathers would work. Didn’t want to do a stitch-in-the-ditch. Tried some outlining, but I didn’t like it. Then I thought about the overall loopy pattern from the May challenge, but ended up picking all that out. I realized I would need to go with monopoly thread, so the stitching wasn’t obvious. And I was playing around with tension, including two more ripping sessions.
I tried doing some partial circles on each block, so it would look like rippled water. And then I discovered the settings on my machine were set for the decorative stitch I used in the black borders. Seems like I still had the setting on one of the decorative stitches, and I was trying to free motion and there was a lot of drag. I also discovered that I could use a variation of a zigzag stitch and still have the feed dogs up. Turns out I liked the ripple effect, and that’s what I went with for the rest of the runner. Here’s a pic:

Here’s the finished table runner, which is absolutely perfect on the table. It will work with any of the leaves when we put them in.

Then I was feeling somewhat at loose ends. I had been watching The Quilt Show and following the color lessons from Michelle Jackson. I decided to do the first color study, and again I learned a huge amount. The first lesson was really interesting, especially since I have a lot of trouble choosing and working with color. This was to take a monochromatic color and determine dark, medium, and light. I chose greens, because I have a lot in the stash. I discovered that when I’m choosing, I really need to analyze tones and hues. I also need to be sure there is definite contrast. The first study I did was the one where you had a light, medium, and dark, with not a huge amount of contrast. I did not have enough contrast within those three colors.
I also was working with fusing for like the second time ever, and my pattern pieces were not always meeting up. I spent a lot of time trying to make this piece look like something – going back to linear me and not being able to just work without it having to be “something.”
I finally got all the pieces ironed down, and I felt I was moderately successful. Mostly because I learned a great deal about choosing the colors. I was still trying to figure out what to do with the piece. Yes, it’s just an exercise, but the linear part of me needs it to be “something.” Ideally I want to be able to work with light, medium, and dark marbled fabric, but I can see I have a long way to go.
Again, I couldn’t figure out what to do with quilting it. I tried out one decorative stitch and didn’t like it. I reverted back to the satin stitch I was doing two table runners ago. All of a sudden I began to like the piece more. It began to look more “painterly,” and pretty abstract in a pleasing way. I ended up binding in, and the piece would work as a nice little runner or table mat for a vase. It’s going up in my Etsy store.


Who knows where I’m headed next? There are 6 placemats to finish…..
Quilt Remake, Part 2

I finished the quilt remake in time to get the suitcase packed full of quilts to take to StashFest. Of course, it couldn’t be quite that easy to pack the suitcase….ended up packing it three times, as I went to photograph the quilts for a new book, and the first set wasn’t high enough resolution. So we set up again, and this time there was too much light. So third time was the charm….setting up the room again, and unpacking/repacking the suitcase. But the photos are on there way now….and my new little quilt looks great!
When I left off, I was working around the various quilting motifs. The larger triangles had a zentangle-like stippling, and the area around the stars was much smaller stippling. I will definitely need to practice that so the stitches are really consistent. But I really like how the rosettes worked out.
 I wanted to do feathers on the border and ran into tension problems…the background thread (Bottom Line) kept peeking through, and I finally decided I didn’t want o keep taking the feather out. So I changed the thread in the bottom to be the same as on the top – problem solved for the time being. The feathers go up half of each side. They’re pretty subtle, but I like them.
 You can also see the corner squares. I actually marked those lines for consistency. I must say it was the first time I marked anything, and I will probably do it again. I liked the effect, but I need to consider what I’m going to use for marking, so it’s easy to get out.

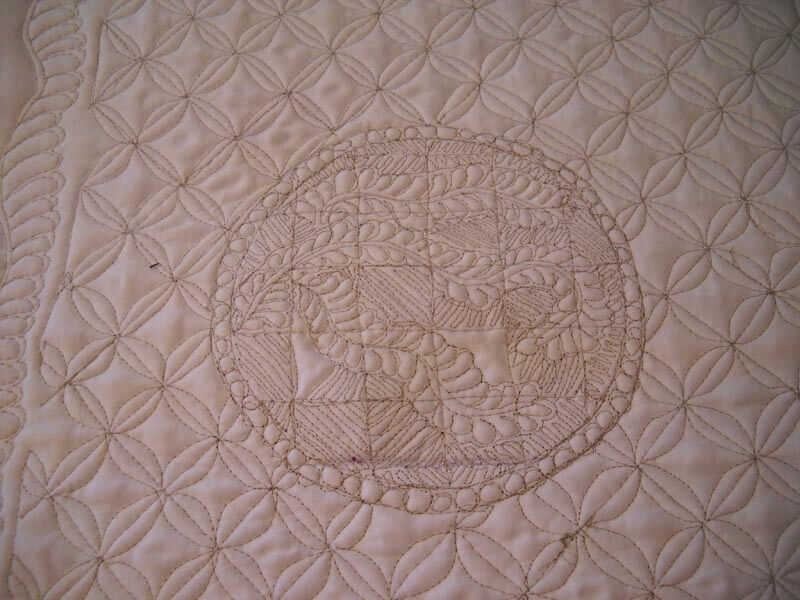
I absolutely love the back! Yeah, there are some tension problems, but I am making SO MUCH progress.
 I can certainly see the appeal of white whole cloth quilts. I feel the same about the backing quilting on my whole cloth marbled quilts.
And finally, hanging briefly on the wall before being packed:
 Tomorrow I will be so ready to leave, and no doubt all the loose ends will be done by noon, so I am going to start taking apart another older quilt in preparation for some brand new quilting!
Work-in-Progress Wednesday
![]()
So I am totally enjoying the free motion quilting challenge, with a new pattern each month for the year. I LOVE doing feathers – never EVER thought I would be able to do them on my own. Now since I have these new skills, I have all these old quilts that look pretty blah…..and I’m going to take them all apart and use them for practice of all my new patterns. I started with a BOM (with Judy Martin blocks) I did in probably 2000, when we were selling marbled fabric in kits, as it seemed like so many people loved the fabric but didn’t really know what to do with it. I had a new block every two months (I had six small quilts, but I ended up selling two of them. I redid one of them last summer, after I looked at some videos from Sharon Schamber. This was originally all stitch-in-the-ditch quilting. Here’s my Monet’s Marbled Garden:

Next one I took apart was my fish quilt, with fabric marbled probably in the late 1990s. Again, just stitch in the ditch. With this one, I realized I could use a couple of decorative stitched on my machine, along with fmq. This time I actually quilted in the marbled fabric, following the lines of the pattern.

Then I decided to get another little one ready to take to the Seattle show, so I spent a weekend taking out all the stitch-in-the-ditch. No picture of “before,” but here’s the backing fabric:

Part of what was so much fun with this quilt was looking at each of the various sections and deciding what I wanted in each place. I happened to have four different Superior Threads that would blend perfectly, as the purpose with these small quilts was to show off the marbled fabrics. I used the Superior silk thread for the first time in the green sections and loved it. You can see in the stars I did some loops (more like zentangles) in the backgrounds of the stars, and did some free motion curves in the points. Everything is very subtle.

My free motion loops need work here. I think it’s a combination of speeding up the machine, as I do move my hands and the fabric pretty quickly with these loops. I’m not happy with the stitch size – very inconsistent, so I know I need more practice.
Now while I don’t subscribe to the quilt police, I really do like to have a ice back to the quilt. While I had some tensions problems, overall I am THRILLED with the back of the quilt. The whole thing finished is going to be gorgeous!

Of course I had to include some feathers, so each of the green squares has a circle of feathers – more like a rosette. Love them!

I thought I had more pictures, but evidently not. Tomorrow is a picture-taking day, so hopefully I’ll get the rest up. I need the feather borders, the white squares, and the back.
Later – packing for the trip!
Top Ten Tuesday
![]()
Lots of catching up to do on blogs, having been gone for 5 days – some really interesting stuff this week.
From JPG Magazine, the best of the color red. Their photo challenges are not to be missed for the outstanding photography.

Hanging Bell - Qing Yang
From our friends the federal government comes a list of interesting blogs:

Picture This: Library of Congress Prints & Photos
Recent Posts
- A Happy Anniversary: Four Years of Sharing on Flickr
- Unbuilt Washington: National Building Museum Exhibit
- New Deal in the New Year: WPA Posters on Flickr


Copyright Matters: Digitization and Public Access
Recent Posts
- How would you search Copyright records? — Building a system with you in mind
- What we’re hearing. – Some feedback on your comments
- What do Copyright records look like? A glimpse at the challenge
And lots more….
This guy is so cool – Paul Nosa and solar-powered sewing….you just have to see this newest:
A great tutorial on making this octagonal block,,,,, from The Modern Quilt Guild. Looks like fun!

This next is just interesting to me, as someone (and who hasn’t) purchased Franklin Mint stuff. “There’s No Accounting for Taste.”
 Yeah, I kinda barfed at the plates, too.
From The Best Article Every Day – paper sculptures. I LOVE paper sculptures!

From Dale Anne Potter comes two interesting links, Art and Artists – free documentaries.

And oh….art on Docu-Watch – too many good choices!
