Quilting Marbled Fabric – 1
 Quilting Marbled Fabric
Part 1
Ever since we started marbling in 1993, people have asked us “What do you do with the fabric?”
We’ve made lots of quilts, both traditional and art-quilts so that folks can see how marbled fabric can fit into a quilt or wearable garment. That got us started, but there was always the feeling that we could be doing more with the fabric itself. A friend took a fat quarter to “play with,” and the following week she came back with a gorgeous piece of completely quilted marbled fabric….just by following the line of the pattern.
Well, that was truly the beginning of taking marbled fabric and really working with it in a quilt. My first attempt was to work with a freeform pattern, just following the lines of the pattern. This uses the stone pattern, as well as a beginning chevron pattern, both of which are easy to follow.
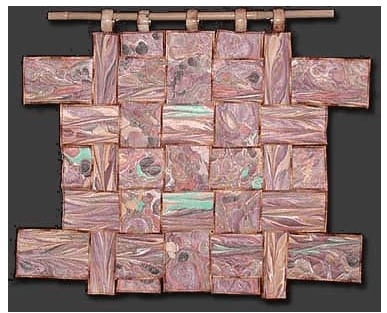 This piece, “Gaia 1: Interdependence,” used a free motion foot, as well as a regular basic stitching foot. Because the strips are relatively narrow, and the batting was thin, I chose not to use a walking foot. Your mileage may vary; if you are comfortable with a walking foot, by all means use one. I find I almost exclusively use my regular foot and my free motion foot.
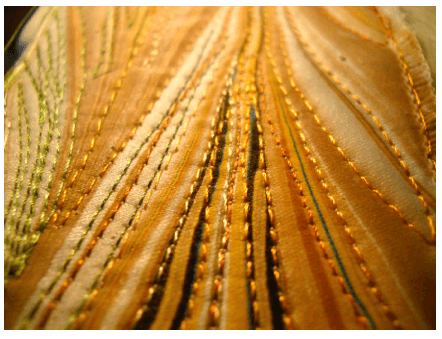
Here is an example of quilting a line using a regular foot. I like having the even stitches, which I don’t always get with my free motion quilting (and no stitch regulator….).
 You can have a great piece of marbled fabric, but sometimes it just needs something. I’m finding that more and more…it is an addiction…..
Getting Started
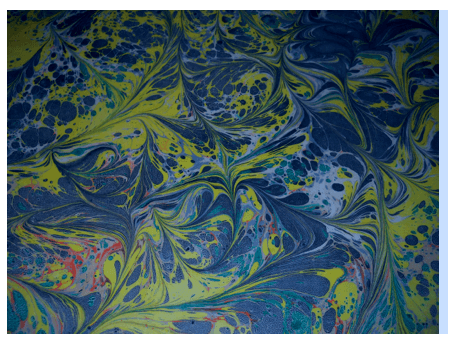
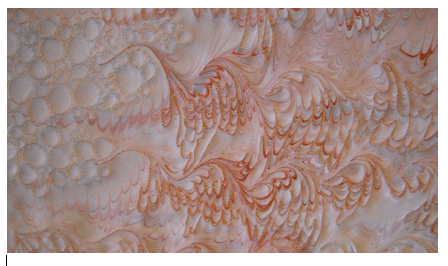
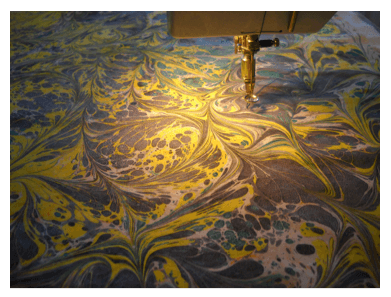
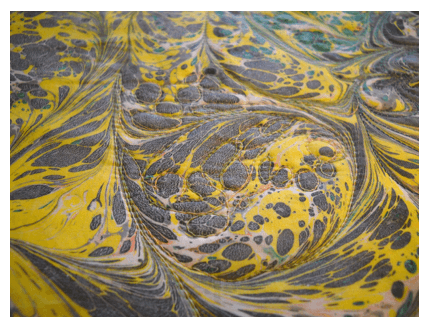
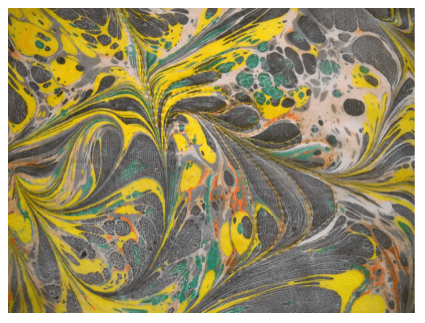
You need a piece of marbled fabric. We’re starting with a freeform pattern, made by creating the stones by dropping paint on the carrageenan bath. Then using a stylus, we swirl the paint around the whole piece. This gives us the effect you see here. This also involves the first very basic marbling pattern, the very organic-looking stone. From this pattern, using a variety of different combs and rakes, you can get very complex patterns. But let’s start with this pretty basic pattern.
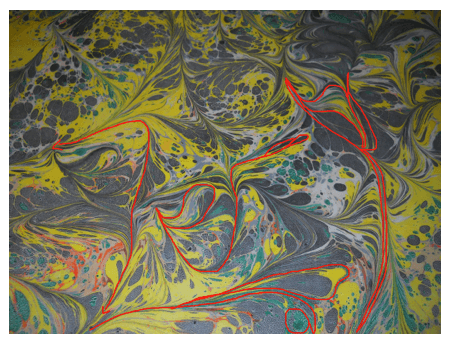
 When you have a marbled pattern, look at it closely for lines that lead to other sections of the pattern. This is a different type of free motion quilting. You aren’t deciding the whole quilting schema, like in most regular quilting; you are just analyzing and deciding where you want to go with your thread. A pattern like this one has gentle curves to it, unlike more complex marbling patterns. This is a good one to start with.
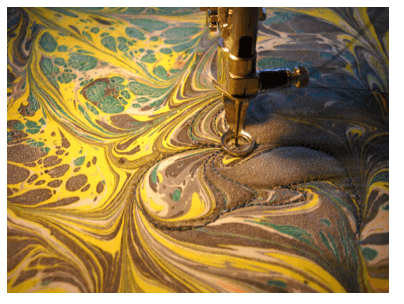
Using this next picture, see how you can travel from one end of the pattern to another. Once you’ve studied a pattern, you can decide if you will do individual sections or travel across some pattern lines to do a new section. With this first marbled pattern, you have several possibilities. You can outline the little stones. You can follow most of the curved lines. You can do a combination.
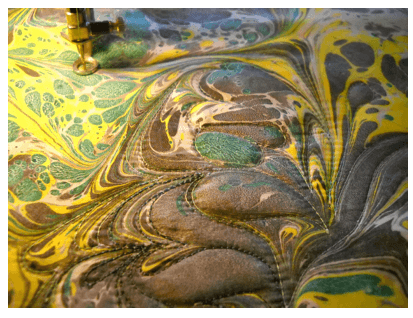
 Some marbled patterns are pretty intense, and you end up doing a lot of quilting in very small areas. These take more control, but the results are fabulous.
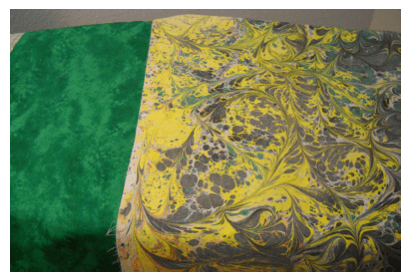
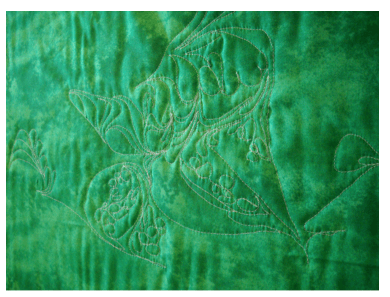
 You have some decisions to make at this point: backing, batting, thread choices. I chose a green cotton for the backing so it would play off the green in the marbling. I used a left-over piece of Fairfield cotton low-loft batting, and Superior Thread’s Bottom Line in the bobbin. I chose a white thread, because for the purposes of this tutorial I wanted you to see the design aspect on the back. You get some very interesting quilting effects on your backs.
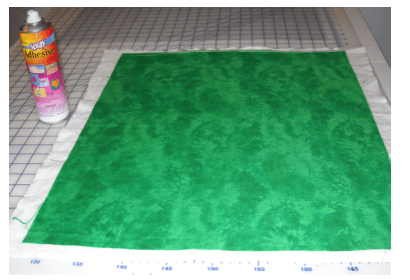 When I put my pieces together, especially if they are small, I spray baste top and bottom to the batting. For larger pieces I also use safety pins.
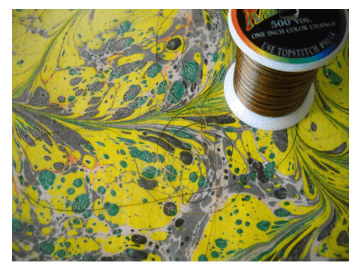
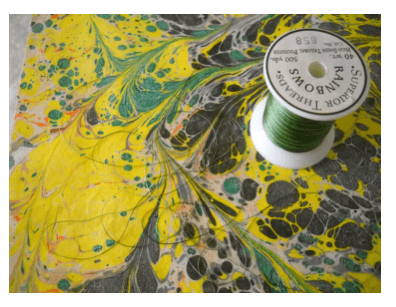
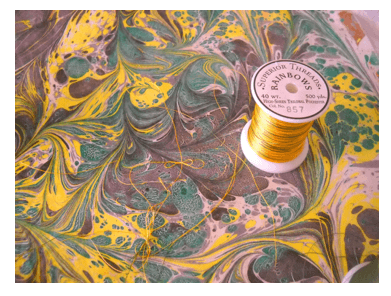
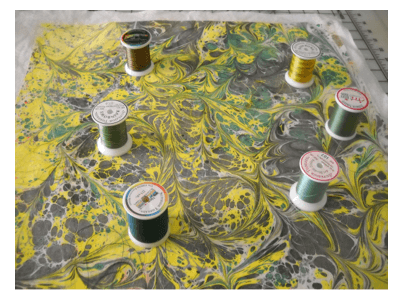 All of these are various threads from Superior. I am a bit of a thread snob, as I only use Superior Thread and needles (their titanium needles are pretty amazing). Ever since I did the School of Threadology in St. George, Utah, I have been hooked on their threads…and I NEVER have thread break. The threads above are Rainbows, Brytes, and Art Colors.
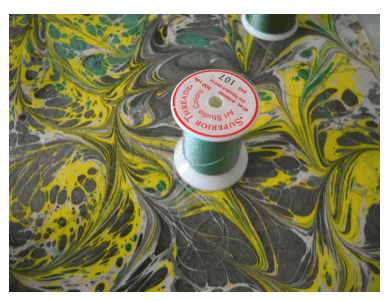
 I thought this bottom thread, Bryte, would work the best, so that’s what I started with. I thought the dark green would emphasize, but not be obvious.
I checked my tension, according to Dr. Bob’s thread guide for Superior Threads. Then I picked a place to start the free motion, did about an inch, and checked my tension again.
 You can see how I just followed the basic line of this first swirl. I usually pull my threads to the back and tie them off or bury them, depending on how the piece is going to be used. With the next photo, you can see how I chose another swirl and followed that particular curve.

 You can move around the fabric and pick different areas to quilt, but if you are going to quilt the whole piece, continue quilting out from the area where you started.
 I also decided to change colors of thread, as I wanted something lighter to accent the pattern. Don’t hesitate to do this if you feel it will add to your design.
 In this next example, I have changed thread color again, and this time I am outlining the smaller circles. The circles are part of the “stone” pattern, which is the first layer of paint in developing a marbling pattern. The circles take more control in your free motion, but you get great results in texture. You will want to plan your “traveling” stitch as you move from small circle to small circle.
 Every now and then take a look at your back. Check for tension, secure your knots, and just admire the developing design. I used white in my bobbin because I wanted you to see the actual stitching on the back. You may choose something else, but the backs of marbled quilting can look spectacular.
 Hopefully you will enjoy this technique. Email us with questions, and we are always interested in seeing your finished projects. To get you started, you can order fat quarters in this swirl pattern at a discount from us. Just email deanm@marbledfab.com, and tell us you want the quilting special fat quarter for this tutorial, and give us an idea of the three or four colors you would like. Cost is $6.00 per fat quarter, plus $2.00 shipping and handling, up to three fat quarters.
Keep in mind that this marbled quilting works best if you have some definite contrast with your color choices.
Copyright 2012 – 2016 by Linda Moran and Marble-T Design. You may NOT reproduce this handout in any format without express permission from the author or Marble-T Design.