Posts Tagged ‘marbled fabric’
A New Video!!
We have decided to do our own videos and set up a YouTube channel with them. We want to show the creation of the various marbling patterns. The first video was more an overview of creating a design…and gave me a chance to play around with iMovie. The second one looks just at the very beginning pattern – the stone. Every piece of marbling starts with this pattern. I am using royalty-free music under Creative Commons. It’s fun, labor-intensive, and when you have weeks between videos you forget all the things you figured out before…like getting the music to play. Plus, this time I cut out pauses where hubby was getting paint, so I learned to delete frames and add a connector. Now it’s learning to use titles and such for additional information.
Here we go!
Art in 2016 – Part 6 in Review – More Small Works
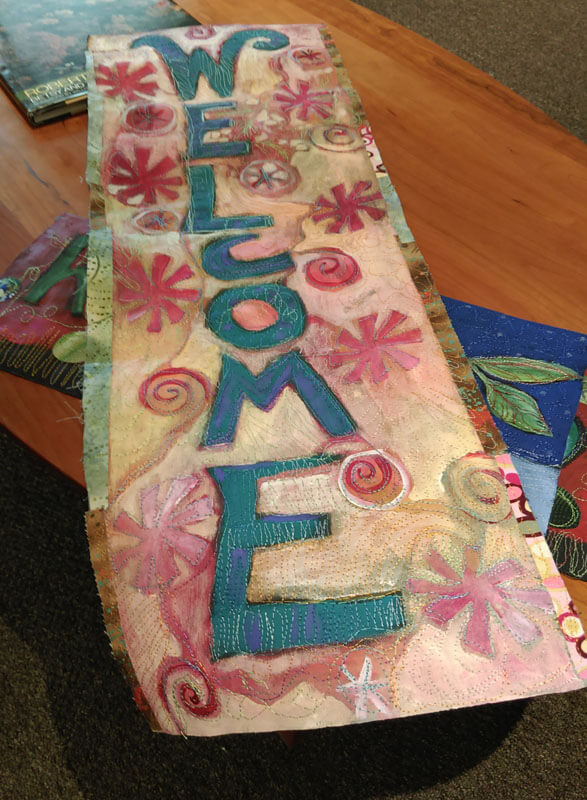
 There were a lot of other small items completed – some UFO’s and some brand new. The small piece at the left (24 0nches square) was an OLD top from many years ago – part of a pattern kit for customers using marbled fabrics. The quilt top had some serious rolls of fabric where the iron (and the user…) had pressed wrong. So I to0k out all the stitches, fixed it, made the sandwich, and then requilted it with my practiced free motion skills. A lot of new patterns from Lori Kennedy’s The Inbox Jaunt – she has amazing tutorials.
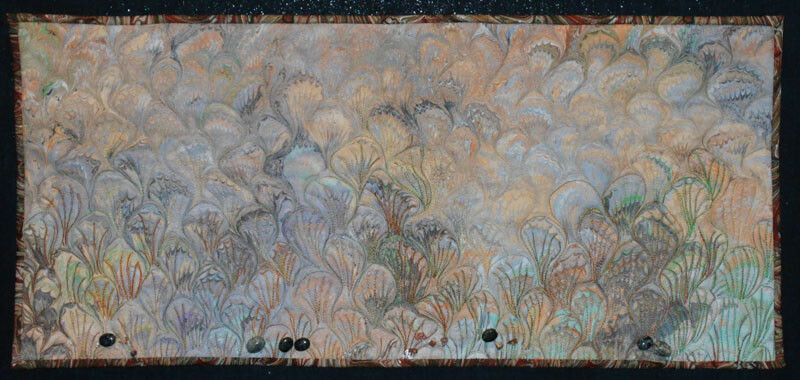
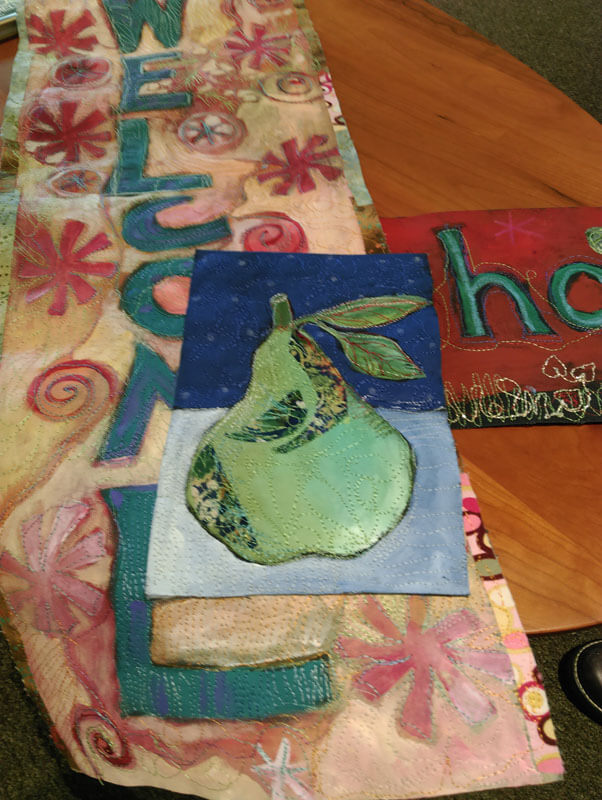
Then there were pieces where I looked through pieces of marbled fabric we had saved and waited for one to speak to me. A lot of them did in the course of the year. “Sonoran Desert” was one of those. this was done on white denim, and it was a pattern I’ve not quilted before – but it spoke to me of the saguaros of the Sonoran Desert.
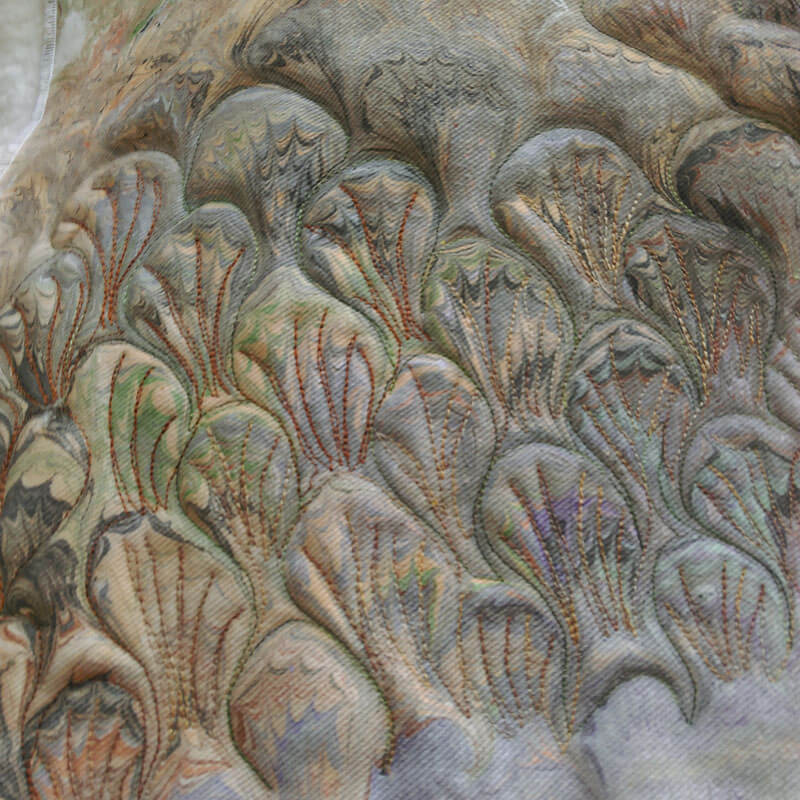
 Didn’t like this binding – too sloppy to control, so did a regular fabric binding. It hung in our library show and now has a new home with a woman who lived in Tucson for a number of years. Added a few semi-precious pieces of turquoise, agates and lava.
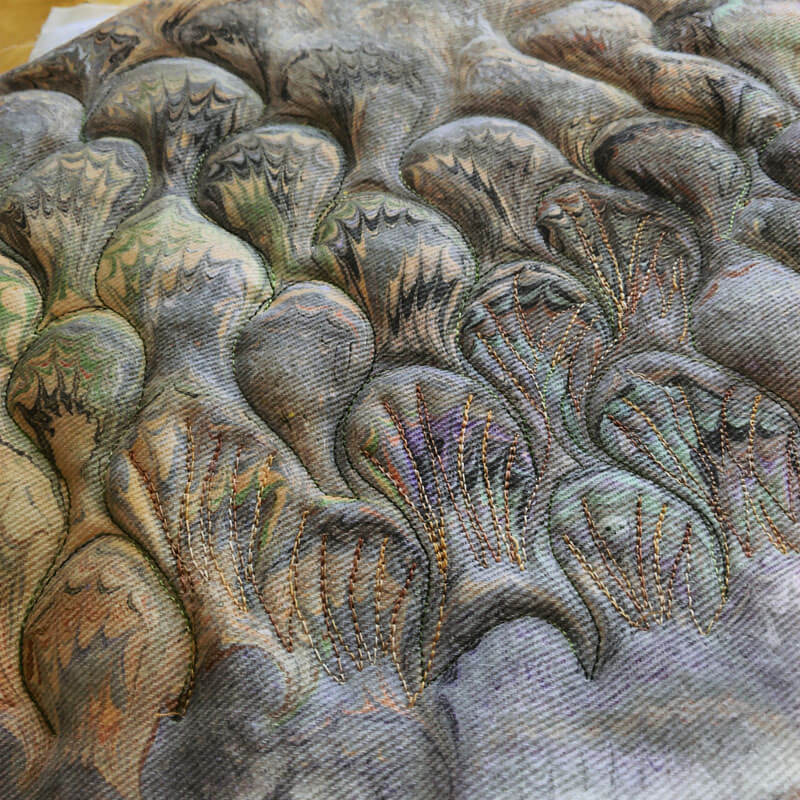
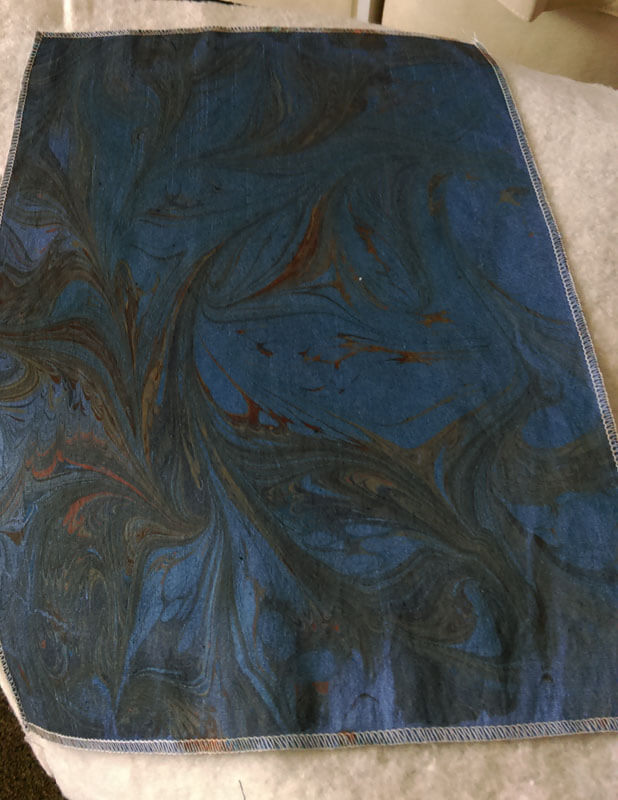
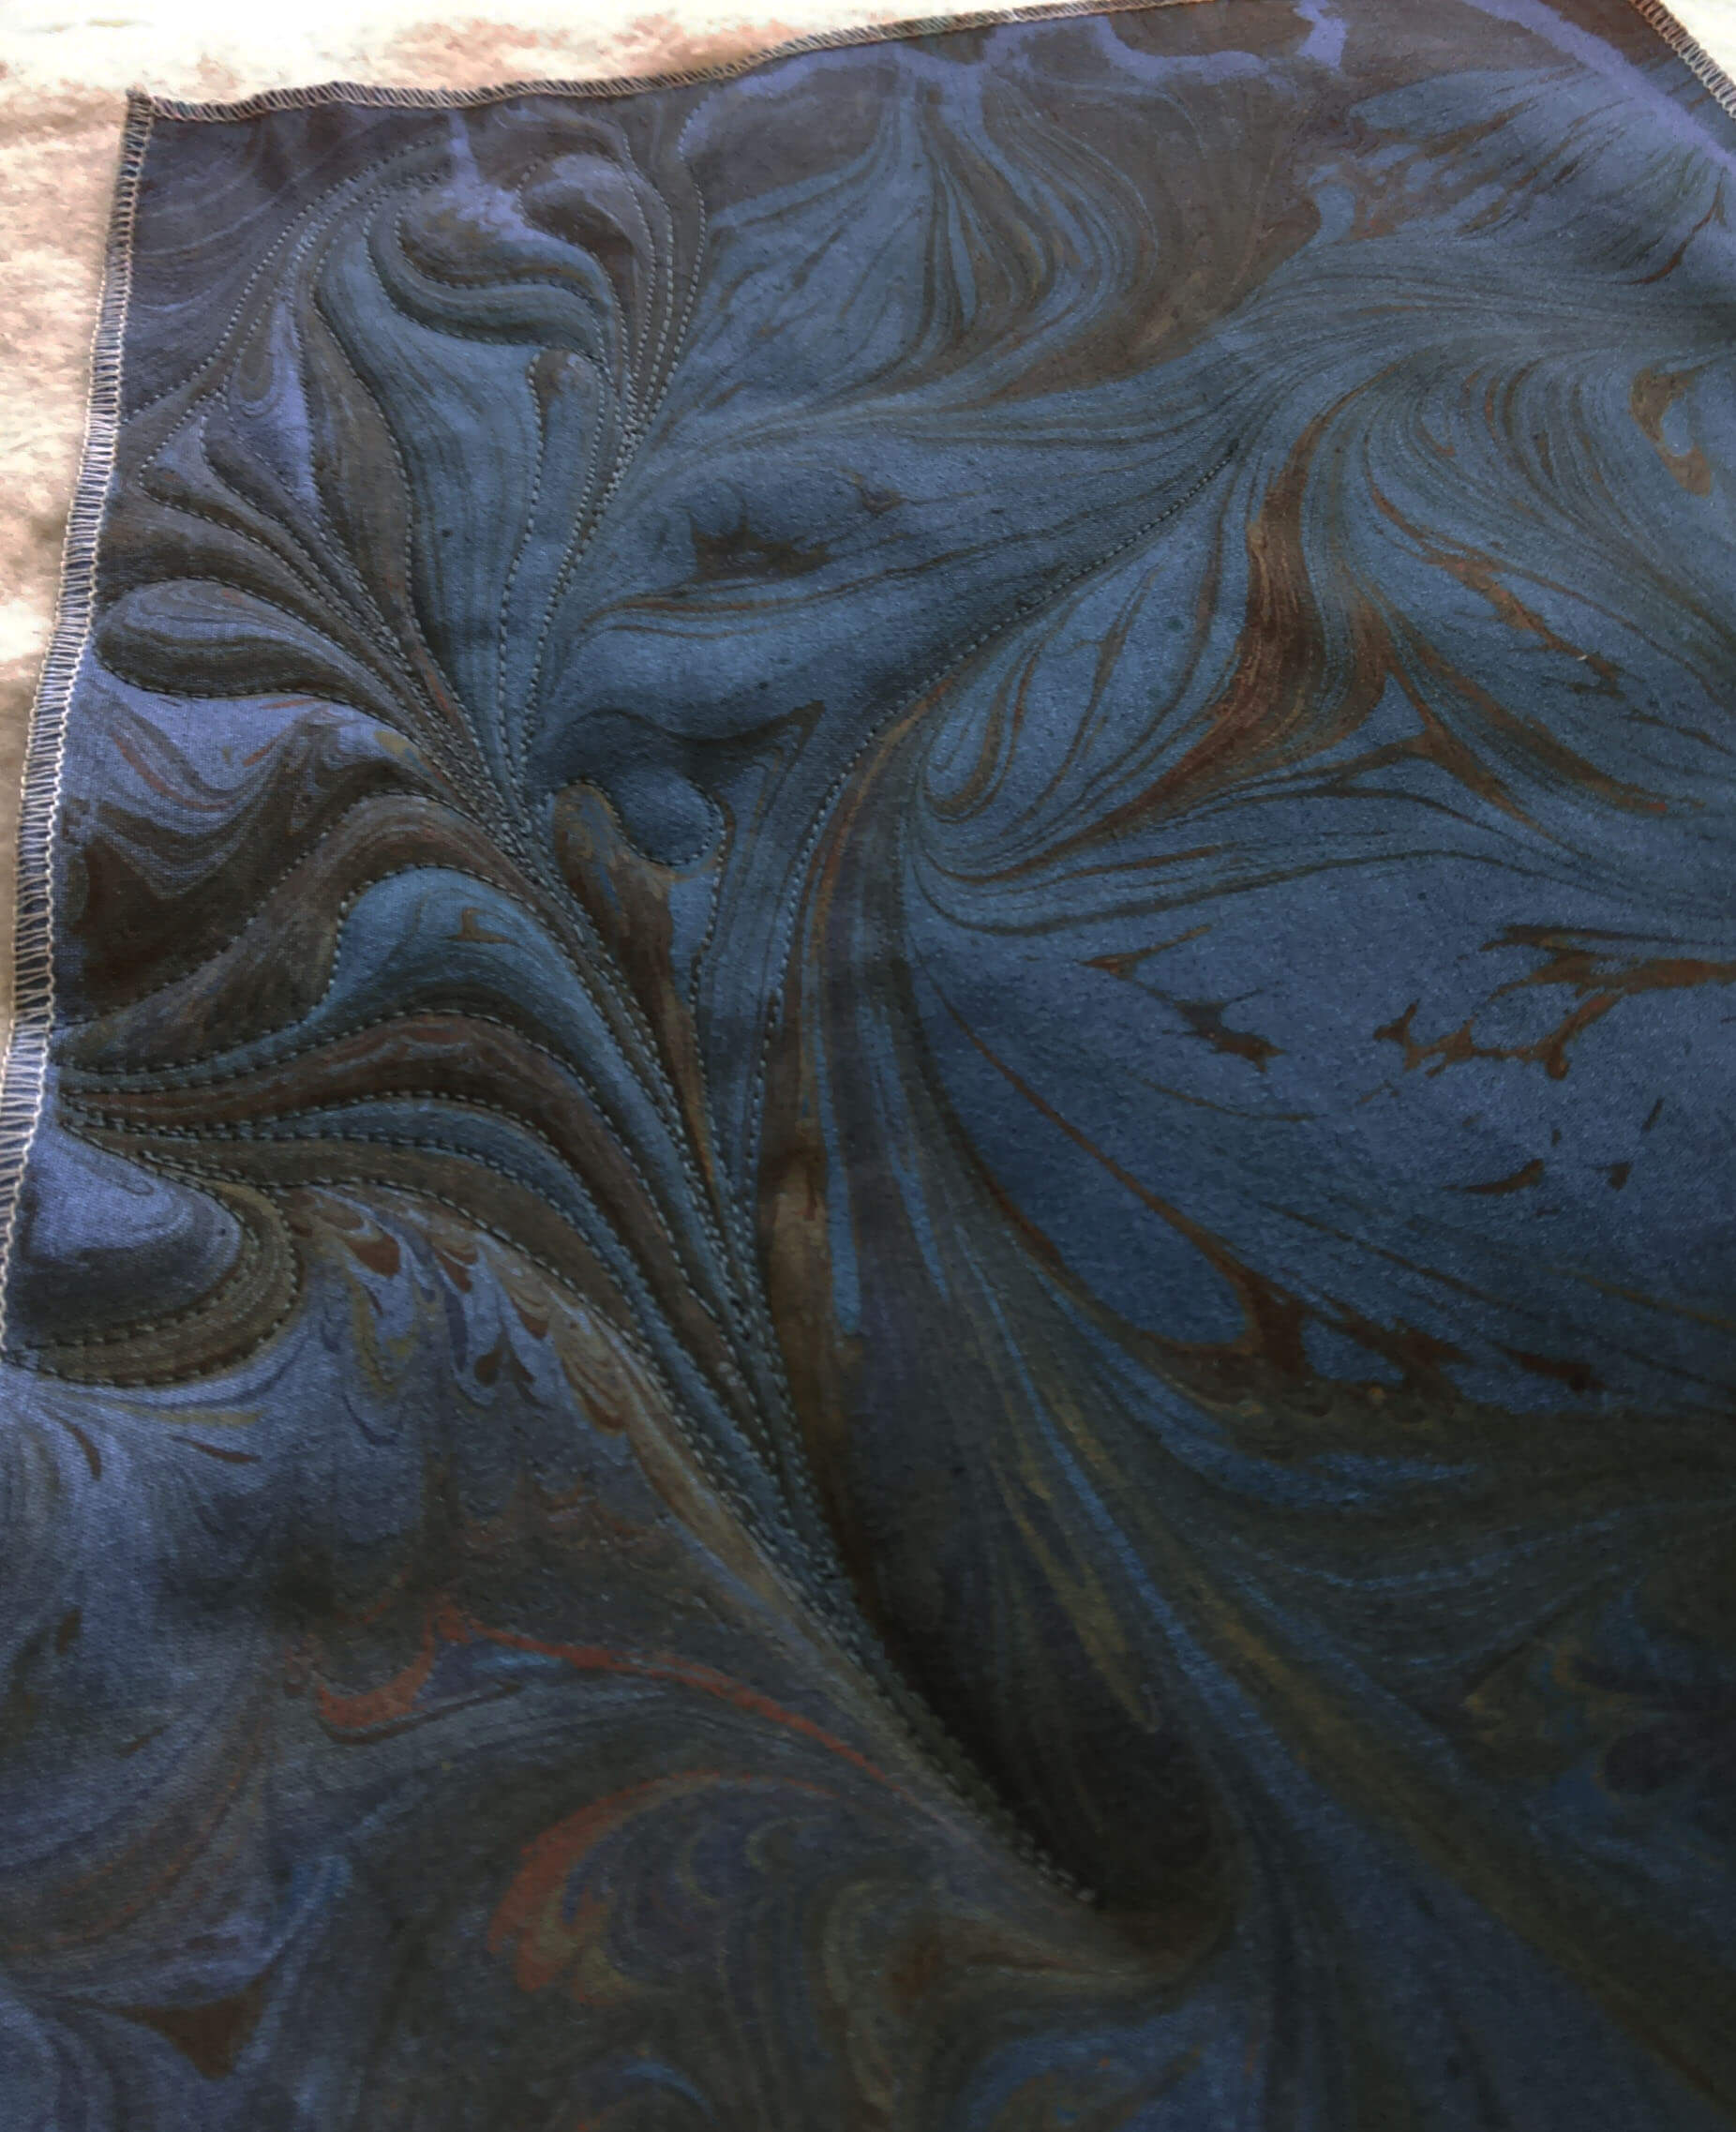
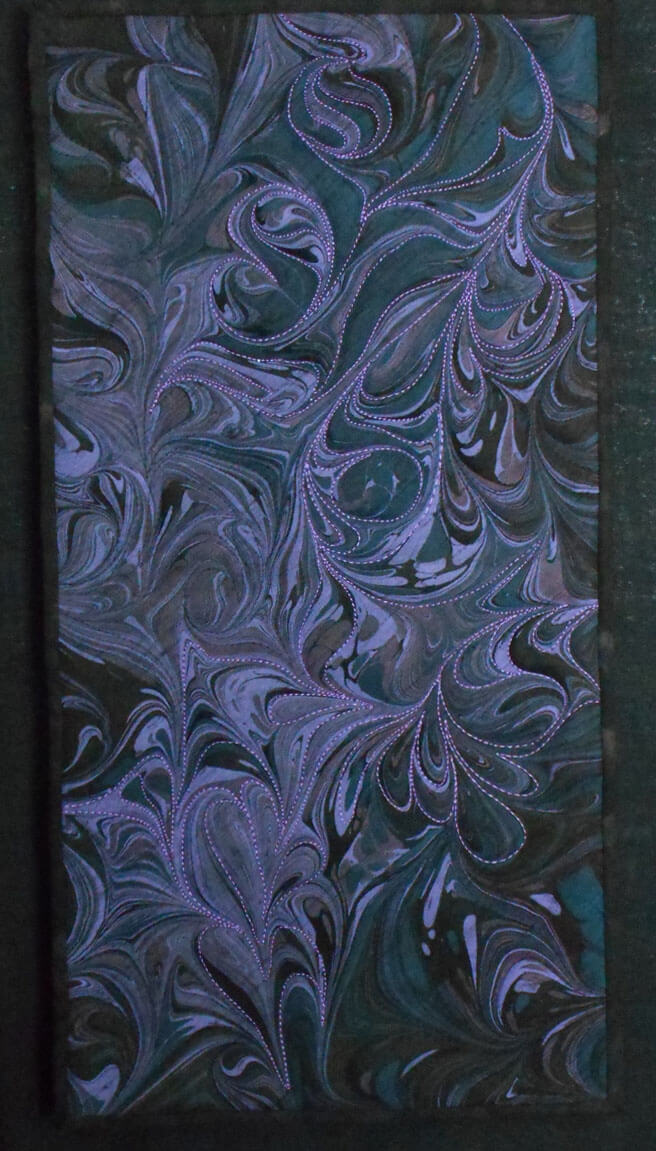
A friend keeps us supplied with all sorts of remnants of cottons, polys and silks. We used a couple to see if they would marble – and they did – spectacularly. One of them went immediately to our son in Seattle – he loved the dark colors – said they were “sexy.” The one he received was “Sliver of Moonlight.” First pic is of the plain marbled fabric, second is seeing the stitching. Unfortunely no final pic of it mounted.
This one is same fabric – black poly-silk, and is called “Whispers in the Moonlight.”
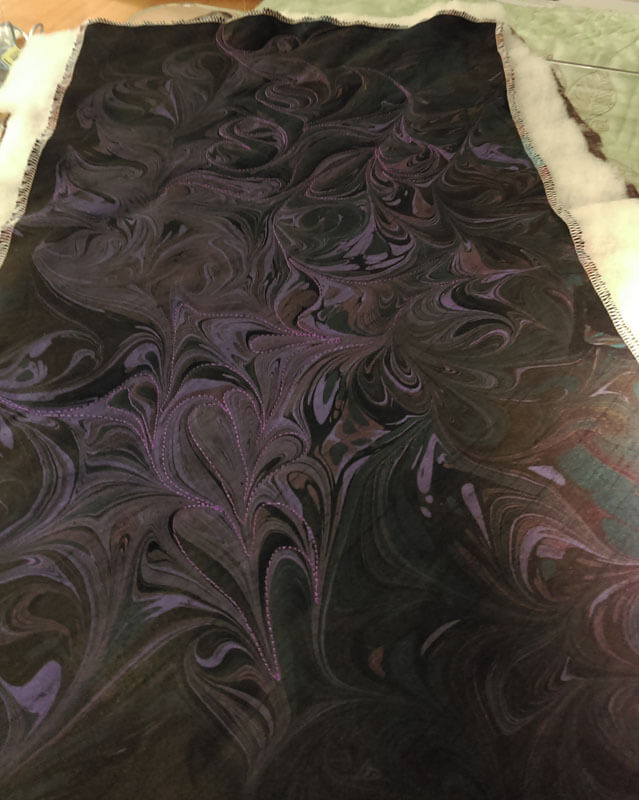 The finished piece is mounted on a canvas frame covered in black linen, and it “floats” about the frame.
There are more pieces, but I need to move on to new projects…..more on an upcoming sale we are having – next blog post!
hitting 1000 b logposts……
Art in 2016 – Part 4 Review – Classes and Shows…and a Book!
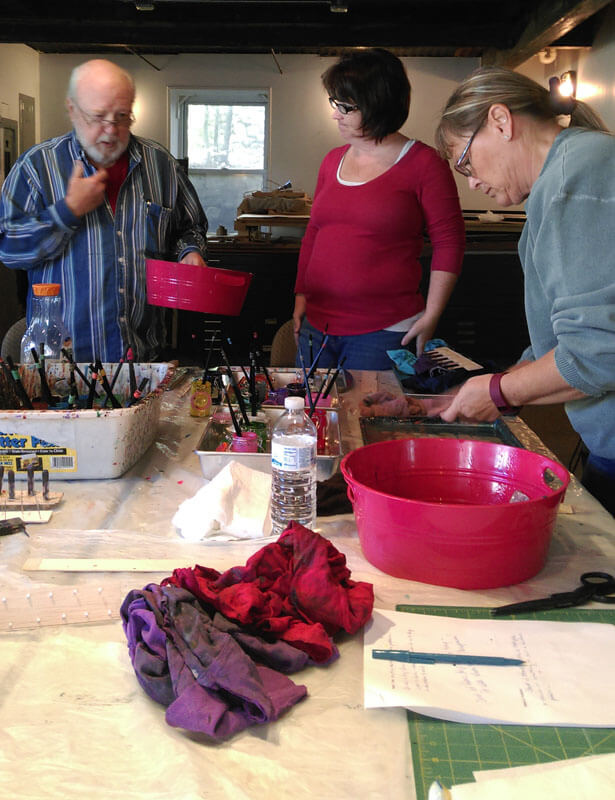
This was a big year for showing our work – many more options and acceptances than most of our time in Arizona. We taught a beginning marbling class at BluSeed Studios in Saranac Lake, NY, and in the process of chatting, we became part of their arts curriculum grant project. I’m really looking forward to this activity; I miss the days of working with The Kennedy Center to bring integrated arts into the classrooms in the Chittenden East School District in Vermont.A lot of great memories from the conferences, and then great memories from arts work within the district (need to do a blog post and reflect on the work we did….)

A couple of pictures from our Saranac Lake class, followed by an individual machine quilting class I did for a fellow artist who wanted to expand her techniques. Mary Hill is a mixed media artist, with vibrant work.

We spent Vermont Open Studios sharing space with Mary over Memorial Day Weekend. LOTSSof great discussions on marketing!!
It was a challenge to plan for what could take Mary’s already wonderful art to the next level.
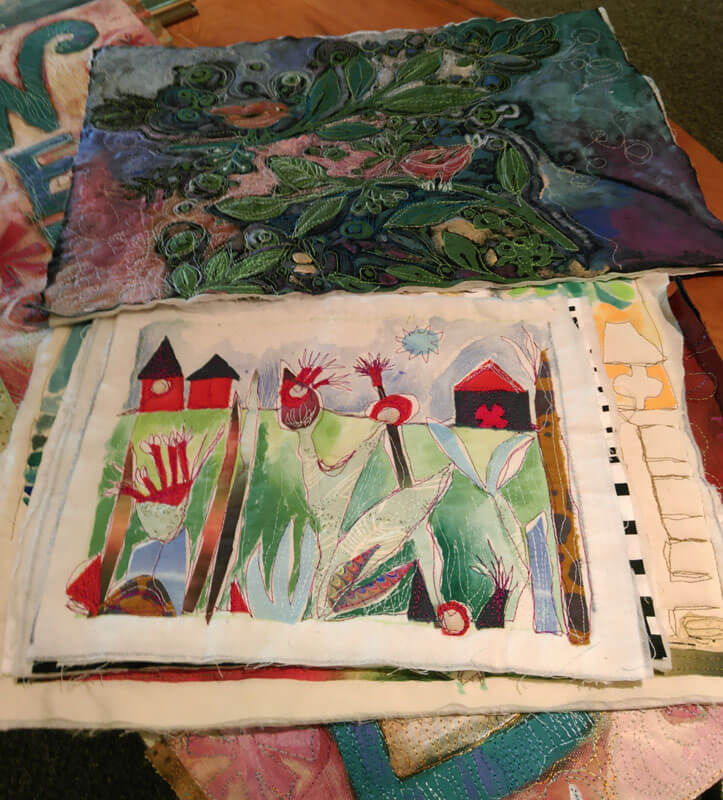
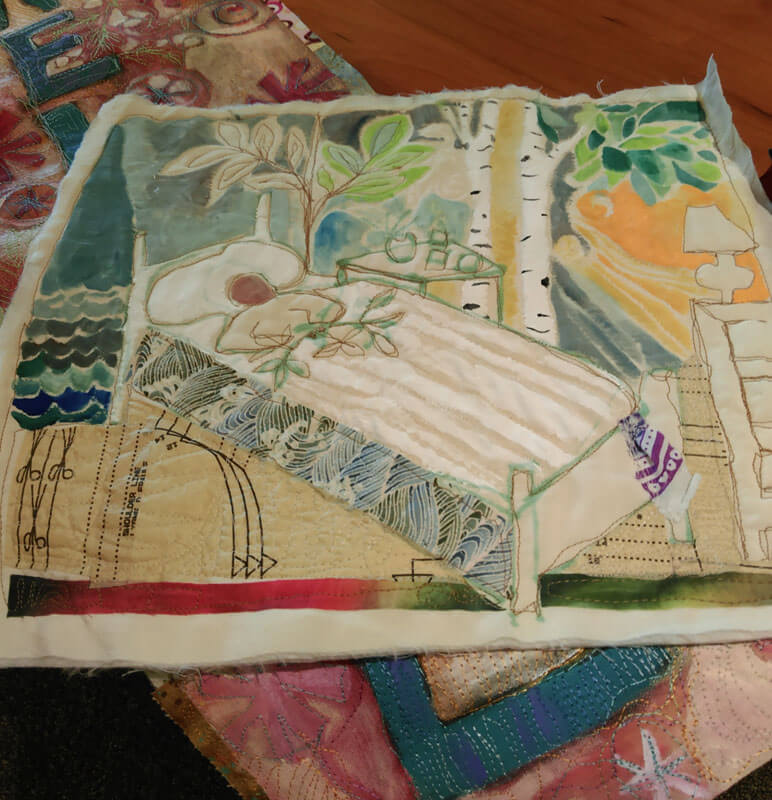
 Mary Hill’s “experimenting as a result of our machine quilting class:
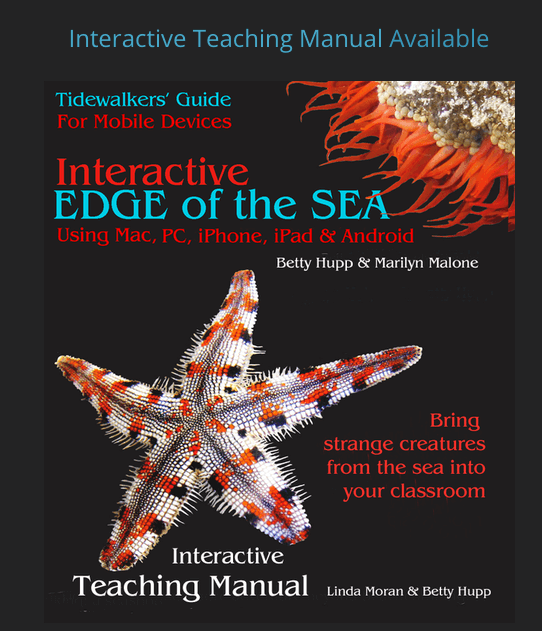
Plus, since May I have been working on an interactive teaching manual for the ebook Interactive Edge of the Sea. This takes all I have worked on in curriculum in 40 years of teaching and brings it together for teachers, with a modern update on using all forms of new assessment and social media within the classroom. My hope is that this manual becomes a template for other disciplines, as there are a lot of useful interactive teaching techniques – and everything is correlated to current educational standards. A labor of love with my second mom, Betty Hupp. Here’s the cover:
 A snippet of the lesson plan section….

We are just about done with final edits, and after the first of the year it heads off to coding. I have a lot of links to check to be sure they all work!
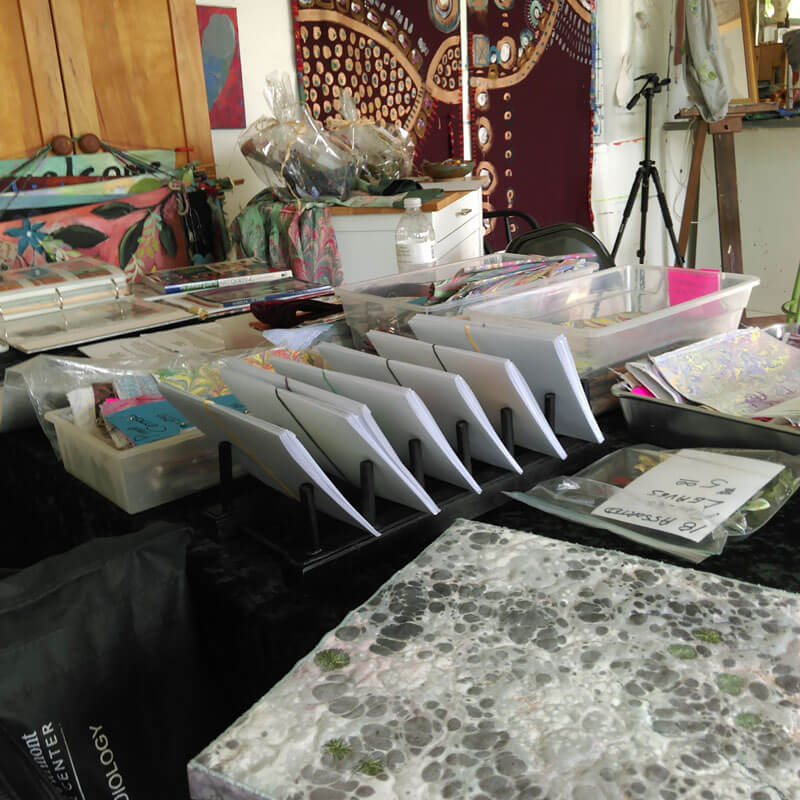
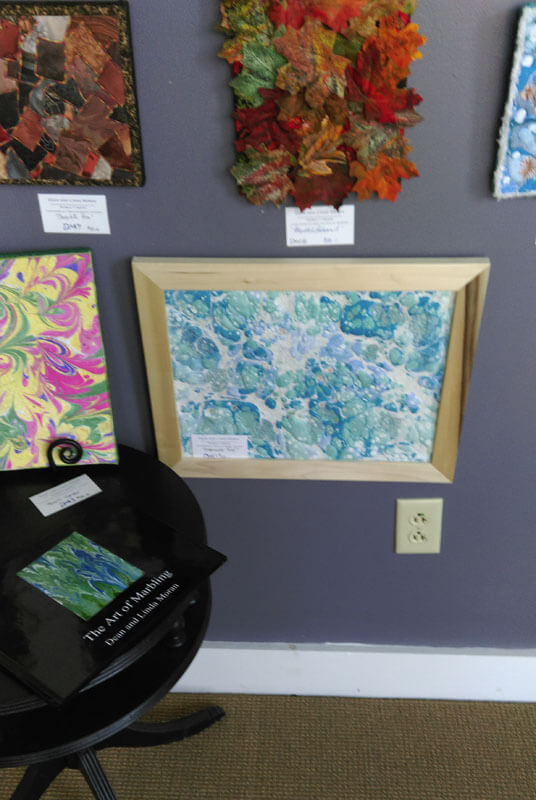
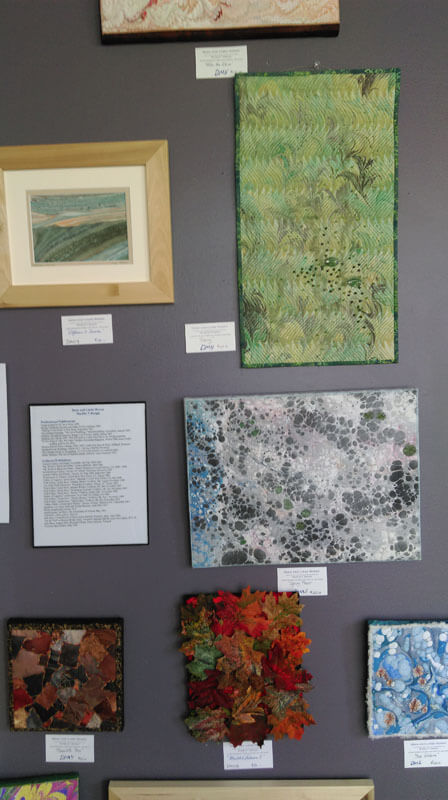
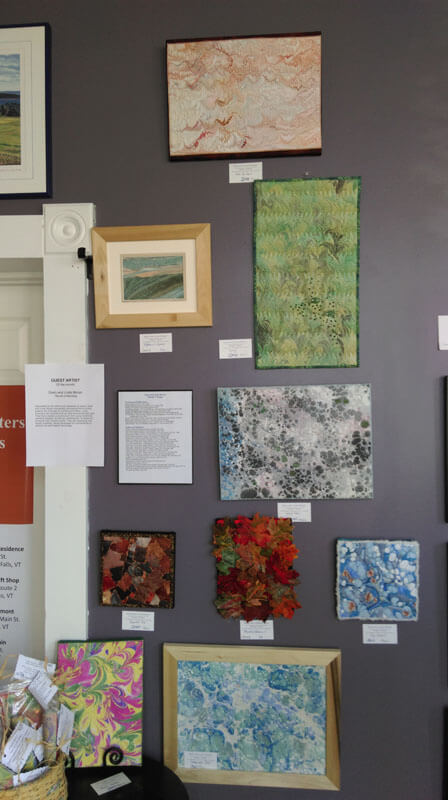
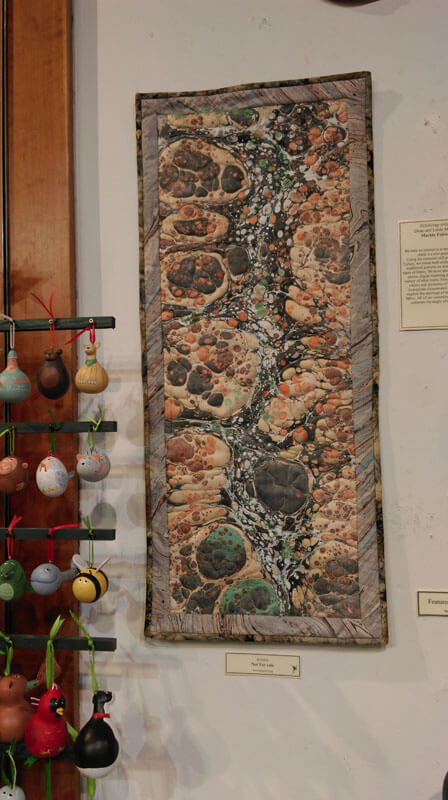
Bunches of shows…..here are pictures of our small pieces at Sweet Grass Gallery in Williston, VT for the month of November.
There’s still more…..stay tuned!
Art in 2016 – Part 3 Review – A Few Other Commissions
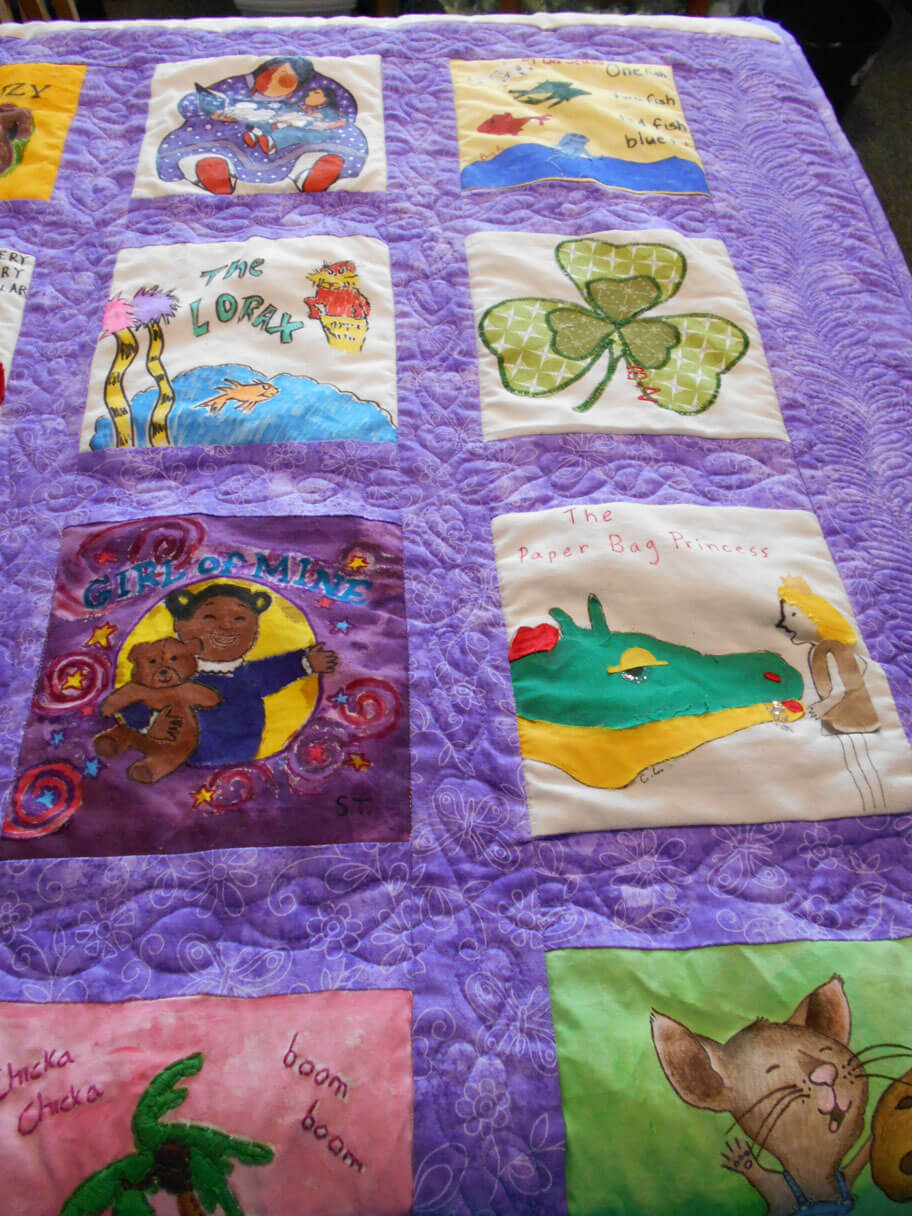
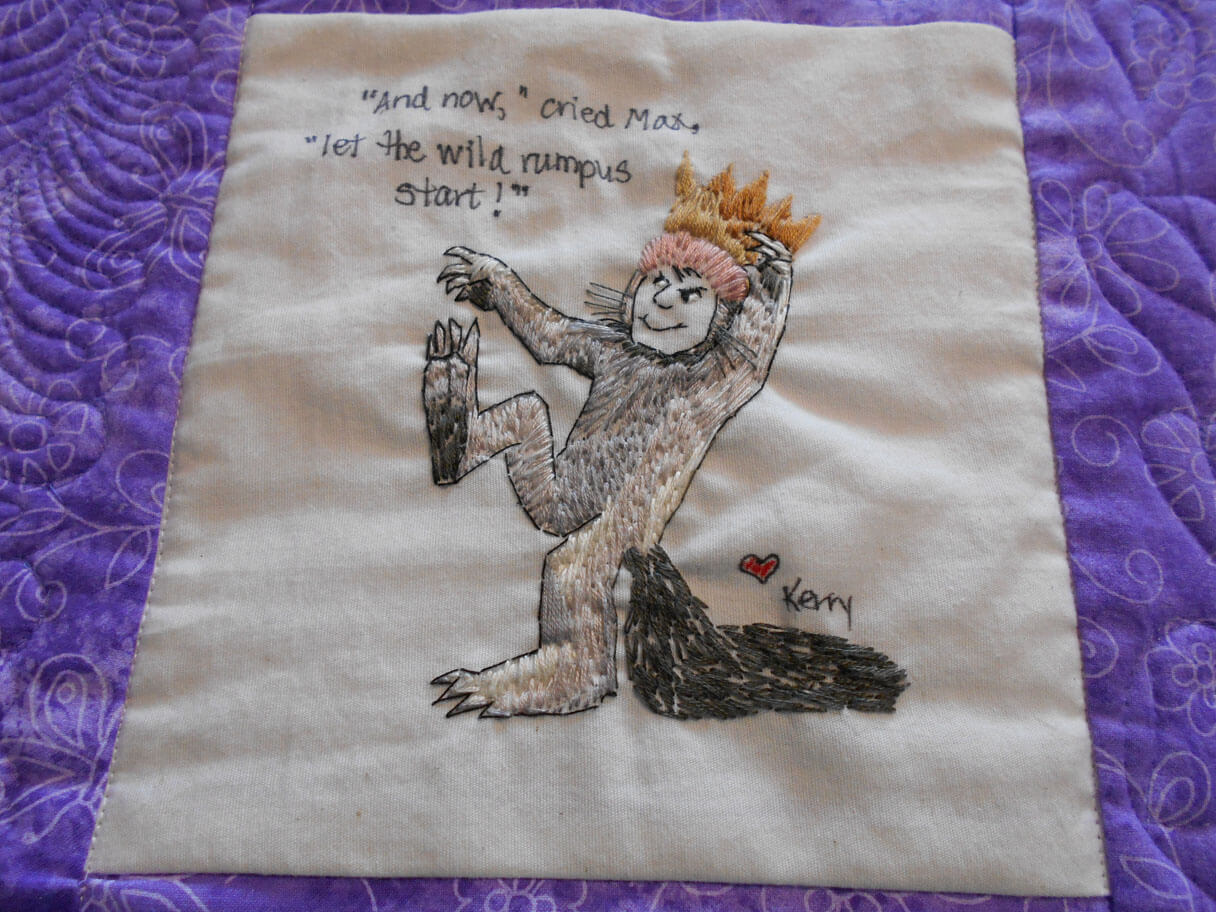
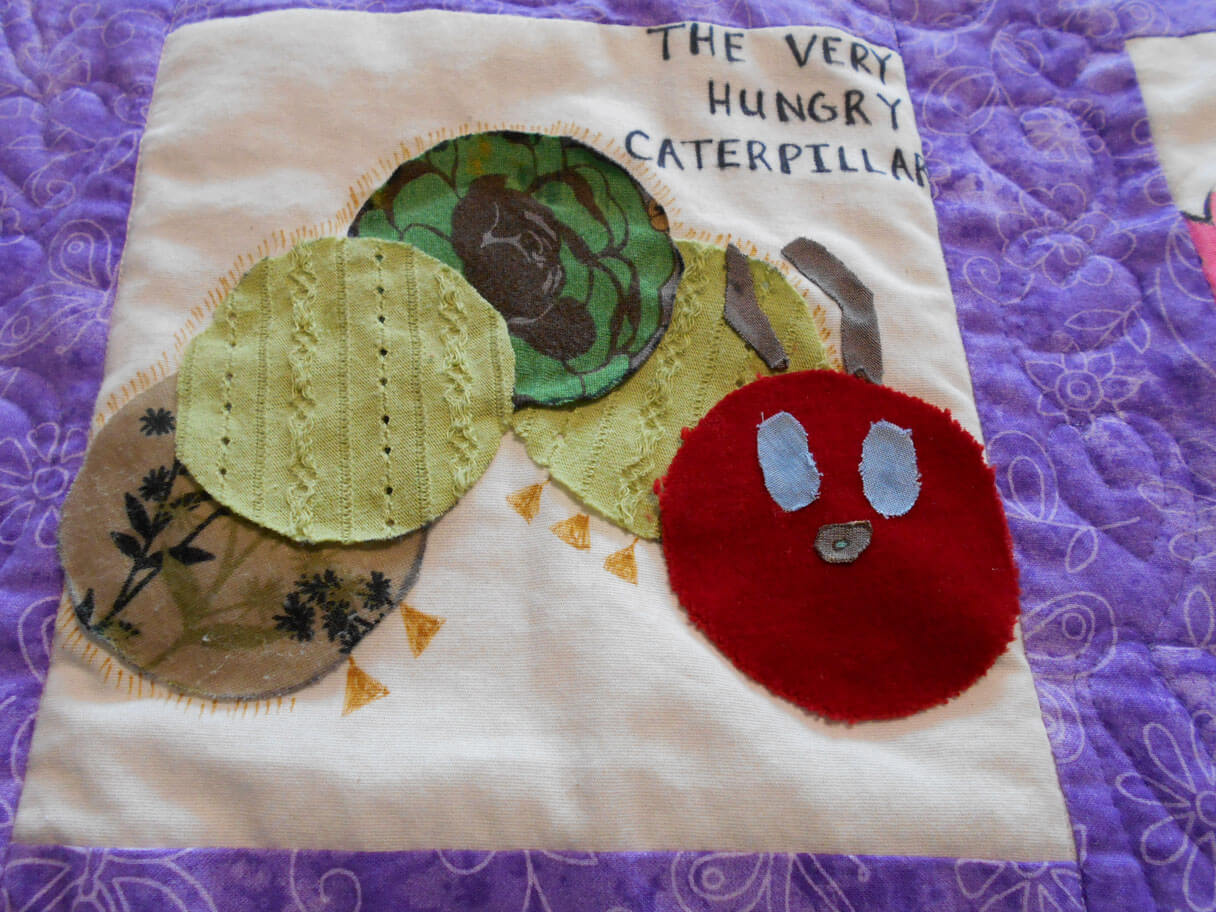
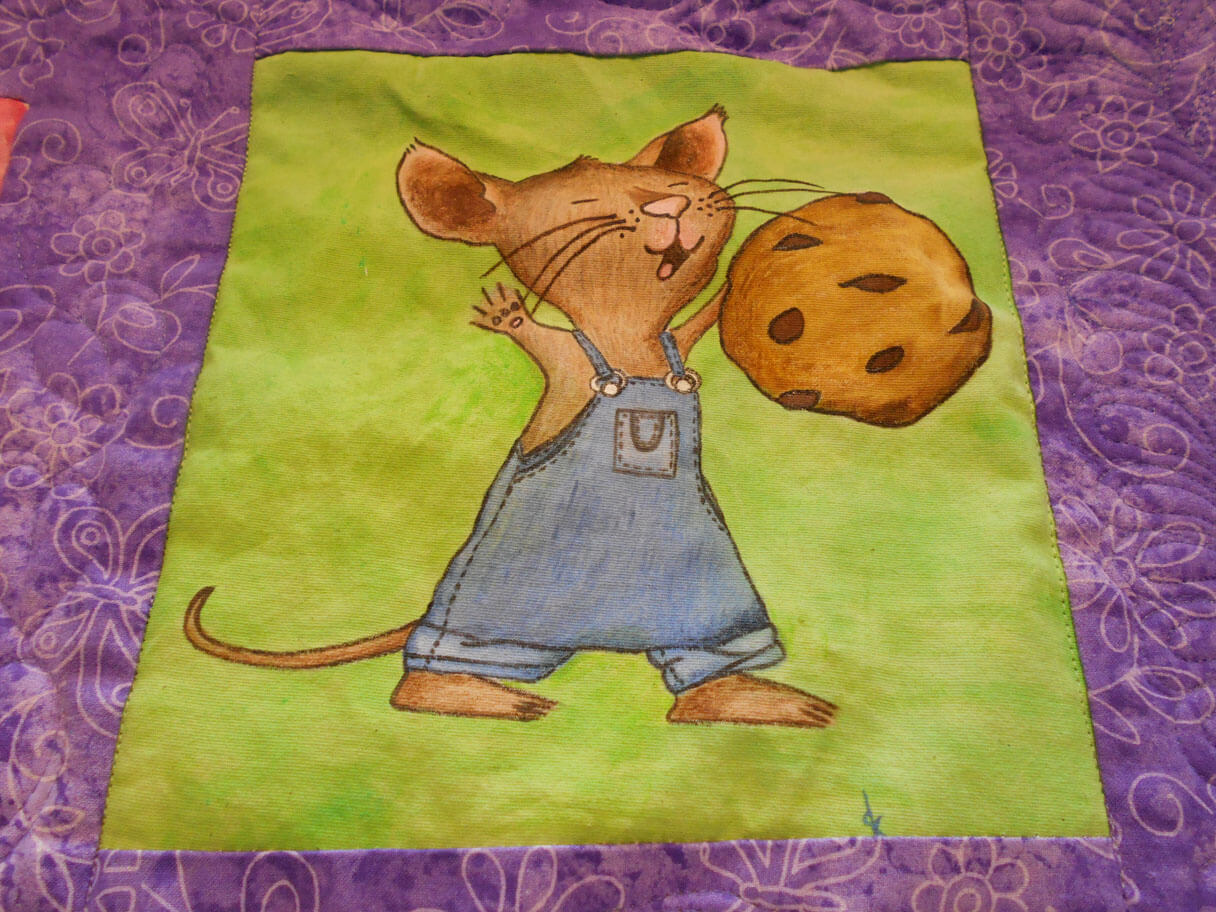
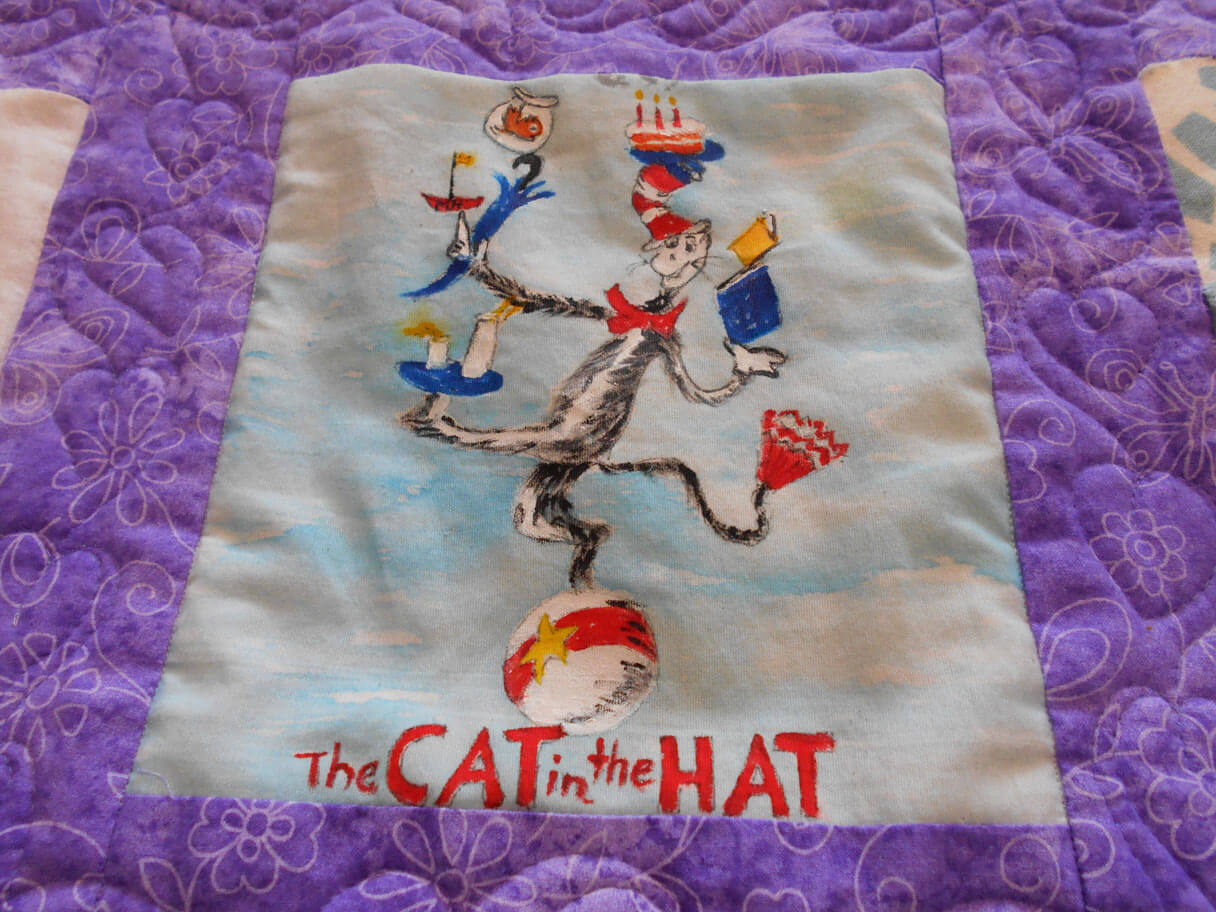
I was very involved this year in helping others create some wonderful fiber art. First up was a baby quilt for a teacher at a former school of mine. The teachers all created blocks based on children’s books, and then along with the baby quilt, gave the books to the new mom. It came out so cute!
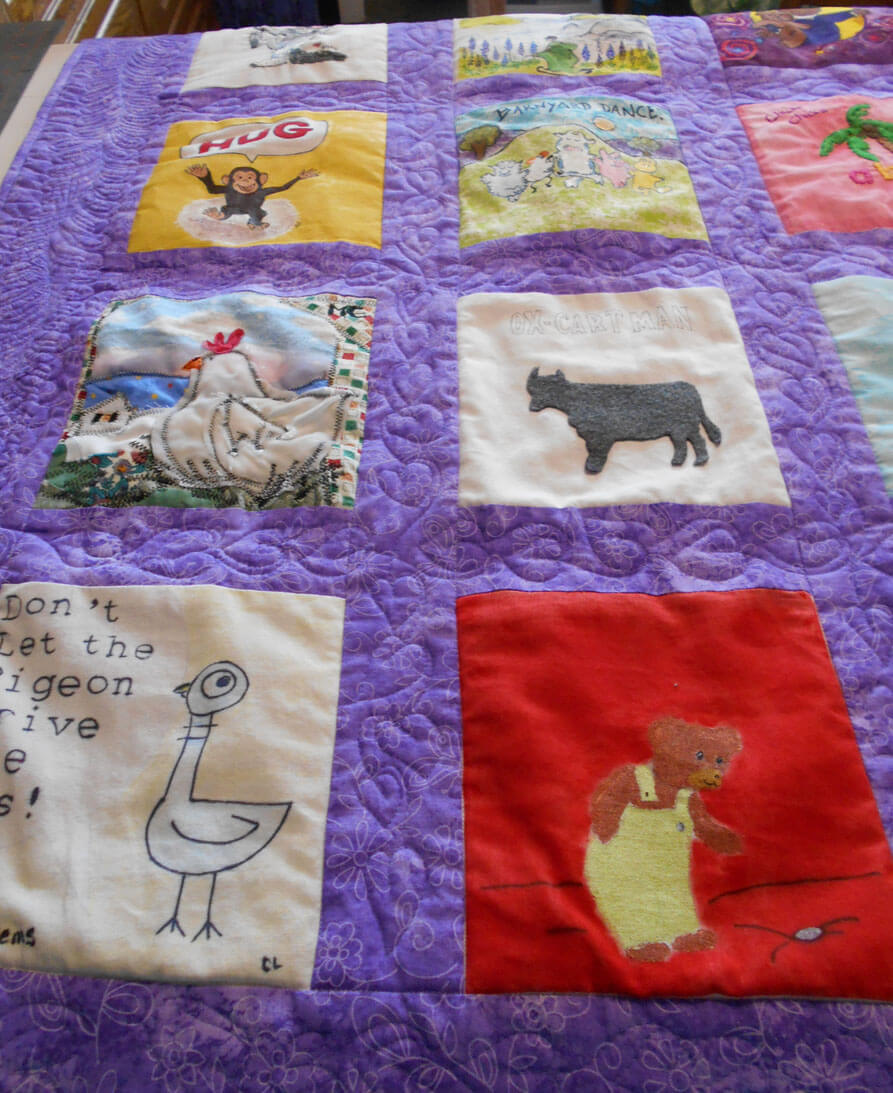
Children’s Book Baby Quilt
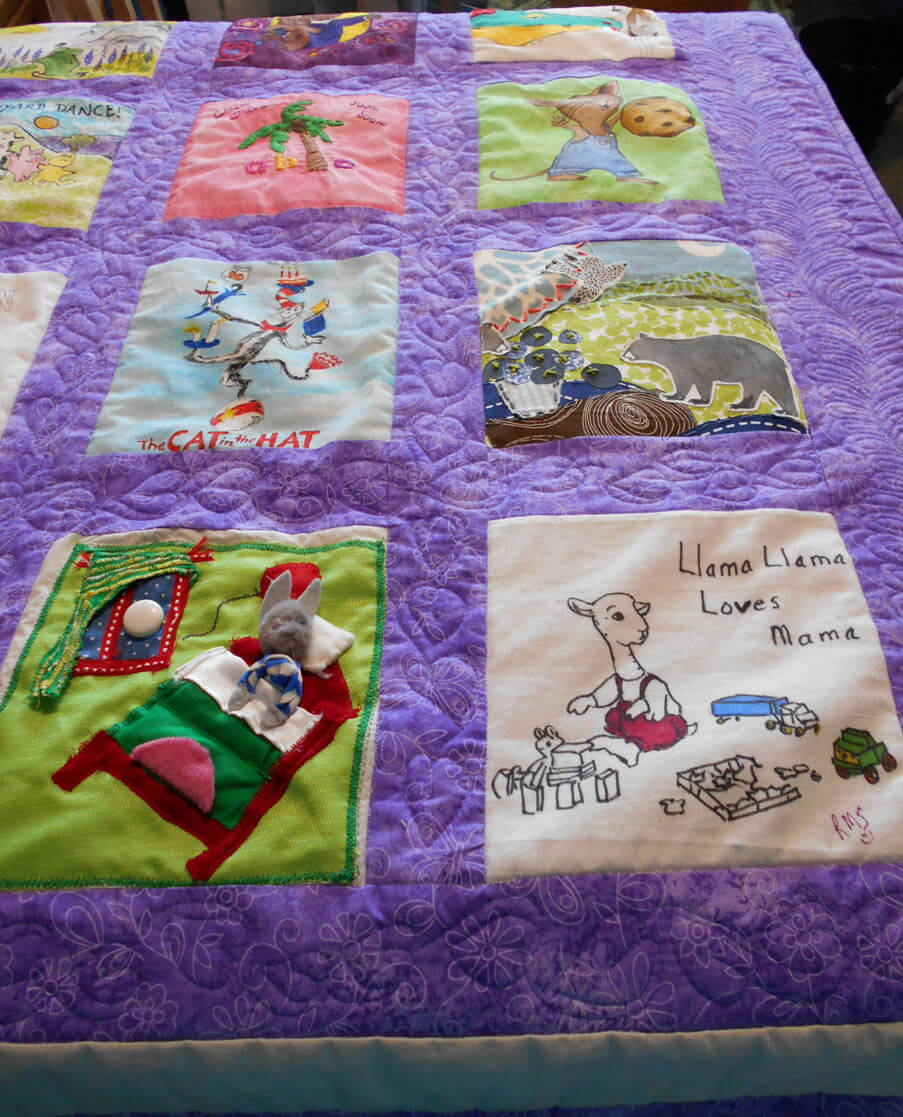
You can see the machine quilting – “leaves” for the pages of books – the leave of a book……a lot of fun to quilt. Next time….stabilize the pieces before they are sewn into blocks….

How many books can you identify?

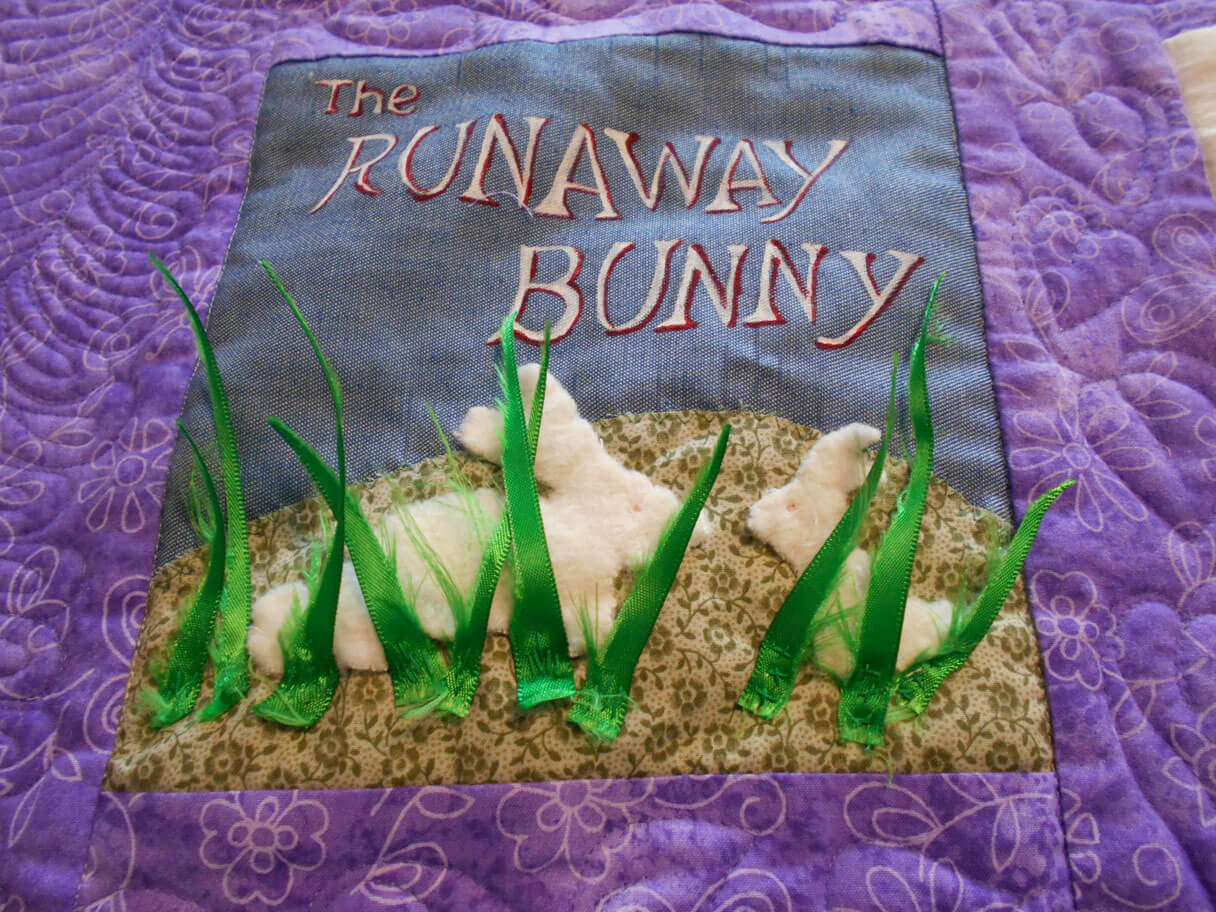

LOVE Patricia Pallaco!
Two more baby quilts scheduled for the new year….prolific bunch at Camels Hump Middle School!
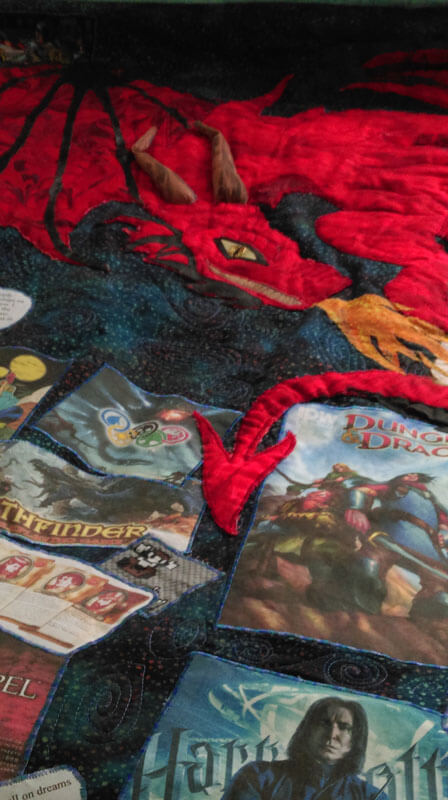
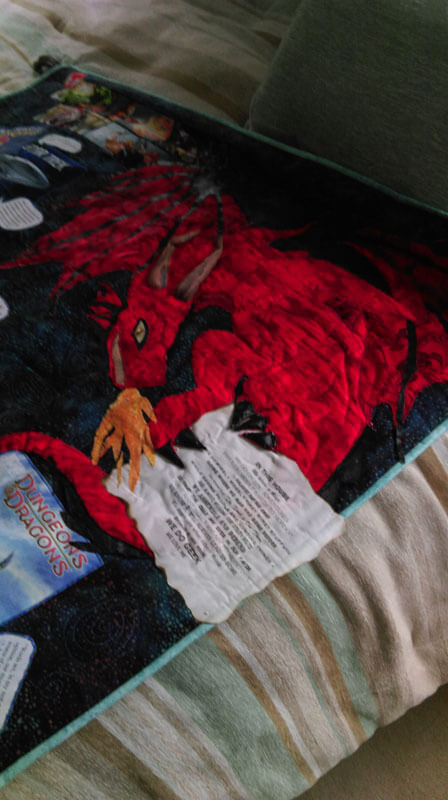
A good friend made a “science fiction” quilt for her son – a gamer, doctoral student, and avid reader. It was SO MUCH fun helping in the process, from using spray basting, to zigzagging quotes, to creating the dragon (a “must-have in this quilt). It hangs from a curtain rod that is very “Lord of the Rings” in design. I was responsible for the machine quilting of dozens of galaxies within the quilt. The dragon has a lot of marbled fabric within it, and it works so well! Kathy did an amazing job. Teeth, flame, wings, and horns all crafted from marbled fabrics. Hubby Dave did the design for the pattern, Kathy did the contruction with vinyl and a few other fabrics.
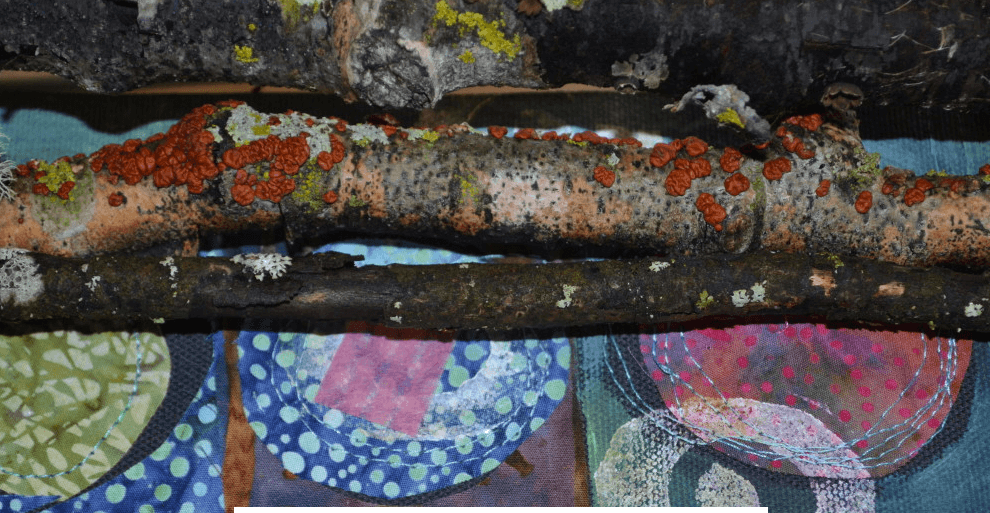
 The last heavy sewing/quilting happened when my friend Kathy wanted to recreate a marbled wall hanging of ours that one of her daughters loved. Sure…..to find she wanted it reversible…and a few other changes….
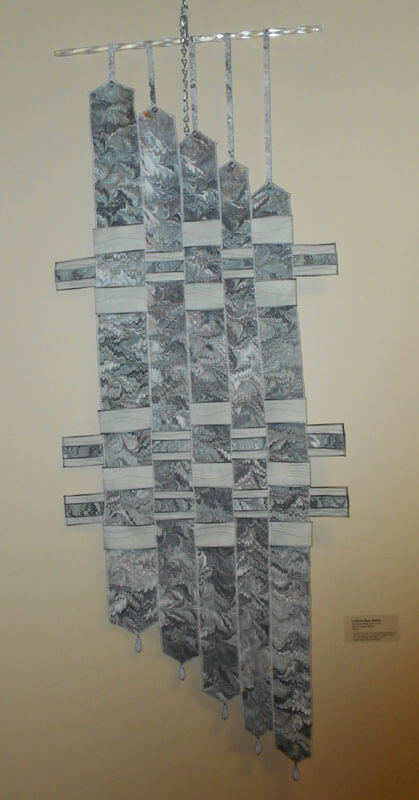


 The story of the original piece is here.
I don’t have any finished pics at this point – just an in-progress. Oh, did I forget to mention she wanted one for each daughter? Different colors for reversible? Different quilting patterns? It really was a lot of fun, and it challenged me to revisit a reversible binding….but I made Kathy do all the hand-stitching……
A close-up of in-progress……
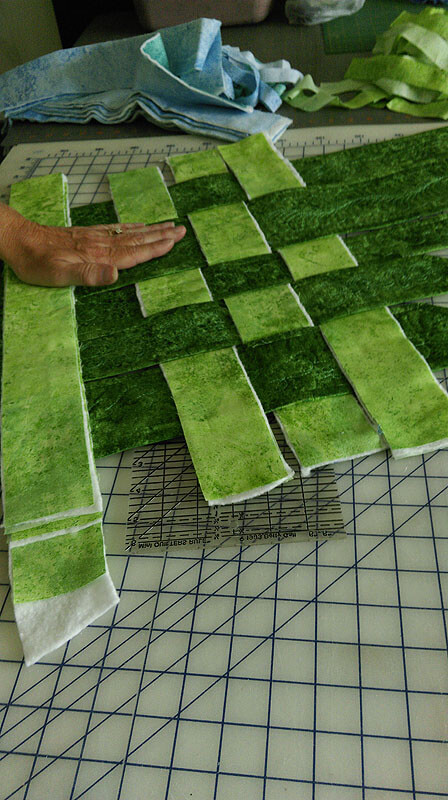 Can’t wait for pictures of both the blues and the greens!
The year started with this commission: The Arroyo –
Starting stitching
Embellinging
On the wall at Frog Hollow Gallery
…and we’re not done for the year!!
Quilting Marbled Fabric – A Tutorial
![]()
Ever since we started marbling in 1993, people have asked us “What do you do with the fabric? It’s too gorgeous to cut in to.”
We’ve made lots of quilts, both traditional and art-quilts so that folks can see how marbled fabric can fit into a quilt or wearable garment. That got us started, but there was always the feeling that we could be doing more with the fabric itself. A friend took a fat quarter to “play with,” and the following week she came back with a gorgeous piece of completely quilted marbled fabric….simply by following the line of the pattern.
Well, that was truly the beginning of taking marbled fabric and really working with it in a quilt. My first attempt was to work with a freeform pattern, just following the lines of the pattern. This uses the stone pattern, as well as a beginning chevron pattern, both of which are easy to follow.

This piece, “Gaia 1: Interdependence,” used a free motion foot, as well as a regular basic stitching foot. Because the strips are relatively narrow, and the batting was thin, I chose not to use a walking foot. Your mileage may vary; if you are comfortable with a walking foot, by all means use one. I find I almost exclusively use my regular foot and my free motion foot.
Here is an example of quilting a line using a regular foot. I like having the even stitches, which I don’t always get with my free motion quilting (and no stitch regulator….).

You can have a great piece of marbled fabric, but sometimes it just needs something. I’m finding that more and more…it is an addiction…..
Getting Started
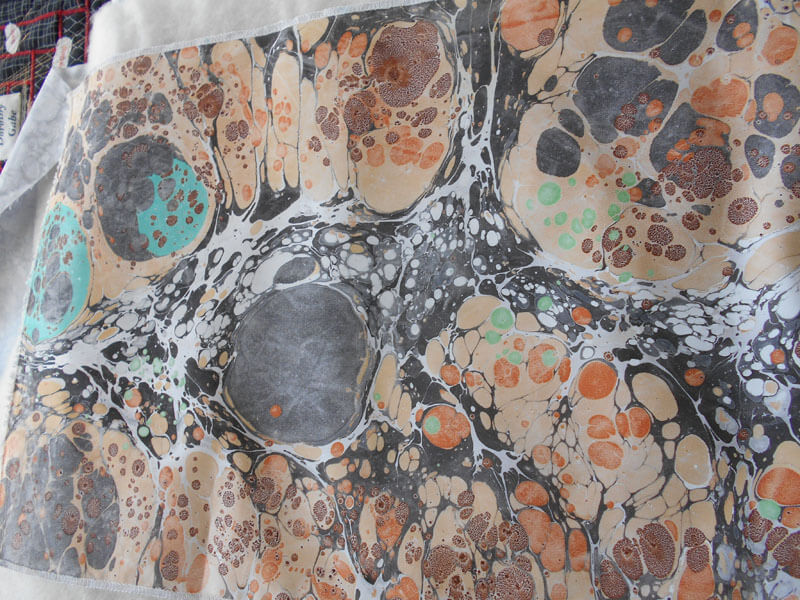
You need a piece of marbled fabric. We’re starting with a freeform pattern, made by creating the stones by dropping paint on the carrageenan bath. Then using a stylus, we swirl the paint around the whole piece. This gives us the effect you see here. This also involves the first very basic marbling pattern, the very organic-looking stone. From this pattern, using a variety of different combs and rakes, you can get very complex patterns. But let’s start with this pretty basic pattern.

When you have a marbled pattern, look at it closely for lines that lead to other sections of the pattern. This is a different type of free motion quilting. You aren’t deciding the whole quilting schema, like in most regular quilting; you are just analyzing and deciding where you want to go with your thread. A pattern like this one has gentle curves to it, unlike more complex marbling patterns. This is a good one to start with.
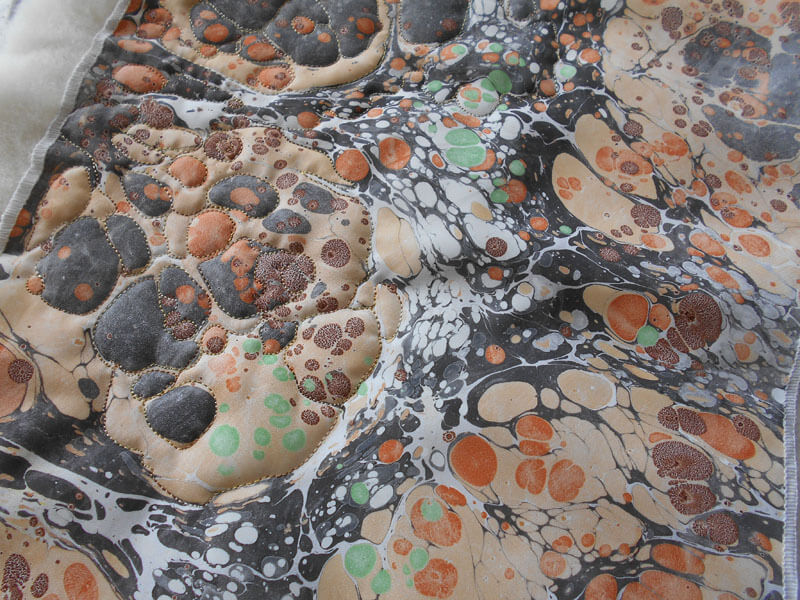
Using this next picture, see how you can travel from one end of the pattern to another. Once you’ve studied a pattern, you can decide if you will do individual sections or travel across some pattern lines to do a new section. With this first marbled pattern, you have several possibilities. You can outline the little stones. You can follow most of the curved lines. You can do a combination.

Some marbled patterns are pretty intense, and you end up doing a lot of quilting in very small areas. These take more control, but the results are fabulous.

You have some decisions to make at this point: backing, batting, thread choices. I chose a green cotton for the backing so it would play off the green in the marbling. I used a left-over piece of Fairfield cotton low-loft batting, and Superior Thread’s Bottom Line in the bobbin. I chose a white thread, because for the purposes of this tutorial I wanted you to see the design aspect on the back. You get some very interesting quilting effects on your backs.


When I put my pieces together, especially if they are small, I spray baste top and bottom to the batting. For larger pieces I also use safety pins.

All of these are various threads from Superior. I am a bit of a thread snob, as I only use Superior Thread and needles (their titanium needles are pretty amazing). Ever since I did the School of Threadology in St. George, Utah, I have been hooked on their threads…and I NEVER have thread break. The threads above are Rainbows, Brytes, and Art Colors.


I thought this bottom thread, Bryte, would work the best, so that’s what I started with. I thought the dark green would emphasize, but not be obvious.
I checked my tension, according to Dr. Bob’s thread guide for Superior Threads. Then I picked a place to start the free motion, did about an inch, and checked my tension again.

You can see how I just followed the basic line of this first swirl. I usually pull my threads to the back and tie them off or bury them, depending on how the piece is going to be used. With the next photo, you can see how I chose another swirl and followed that particular curve.


You can move around the fabric and pick different areas to quilt, but if you are going to quilt the whole piece, continue quilting out from the area where you started.

I also decided to change colors of thread, as I wanted something lighter to accent the pattern. Don’t hesitate to do this if you feel it will add to your design.

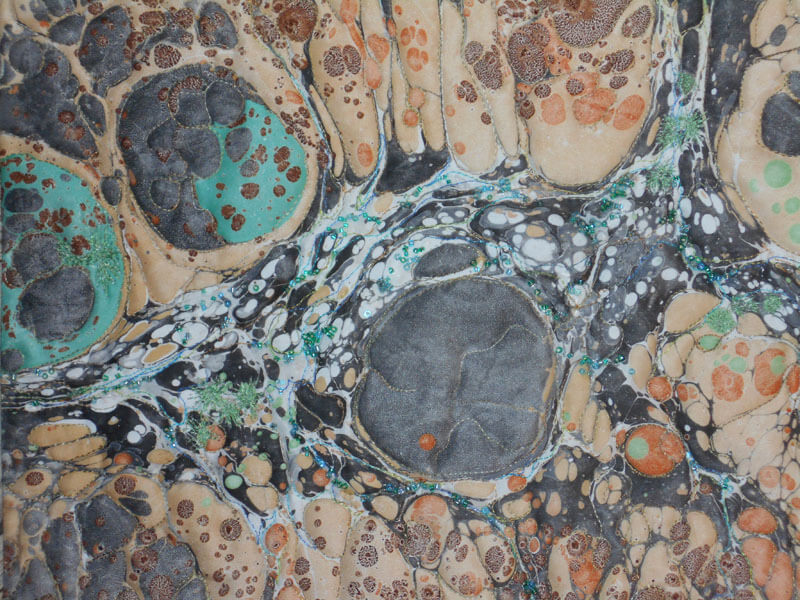
In this next example, I have changed thread color again, and this time I am outlining the smaller circles. The circles are part of the “stone” pattern, which is the first layer of paint in developing a marbling pattern. The circles take more control in your free motion, but you get great results in texture. You will want to plan your “traveling” stitch as you move from small circle to small circle.


Every now and then take a look at your back. Check for tension, secure your knots, and just admire the developing design. I used white in my bobbin because I wanted you to see the actual stitching on the back. You may choose something else, but the backs of marbled quilting can look spectacular.

Hopefully you will enjoy this technique. Email us with questions, and we are always interested in seeing your finished projects. To get you started, you can order fat quarters in this swirl pattern at a discount from us. Just email deanm@marbledfab.com, and tell us you want the quilting special fat quarter for this tutorial, and give us an idea of the three or four colors you would like. Cost is $6.00 per fat quarter, plus $2.00 shipping and handling, up to three fat quarters.
Keep in mind that this marbled quilting works best if you have some definite contrast with your color choices.
Copyright 2012 by Linda Moran and Marble-T Design, LLC. You may NOT reproduce this handout/post in any format without express permission from the author or Marble-T Design, LLC.
Work-in-Progress Wednesday
![]()
So I am totally enjoying the free motion quilting challenge, with a new pattern each month for the year. I LOVE doing feathers – never EVER thought I would be able to do them on my own. Now since I have these new skills, I have all these old quilts that look pretty blah…..and I’m going to take them all apart and use them for practice of all my new patterns. I started with a BOM (with Judy Martin blocks) I did in probably 2000, when we were selling marbled fabric in kits, as it seemed like so many people loved the fabric but didn’t really know what to do with it. I had a new block every two months (I had six small quilts, but I ended up selling two of them. I redid one of them last summer, after I looked at some videos from Sharon Schamber. This was originally all stitch-in-the-ditch quilting. Here’s my Monet’s Marbled Garden:

Next one I took apart was my fish quilt, with fabric marbled probably in the late 1990s. Again, just stitch in the ditch. With this one, I realized I could use a couple of decorative stitched on my machine, along with fmq. This time I actually quilted in the marbled fabric, following the lines of the pattern.

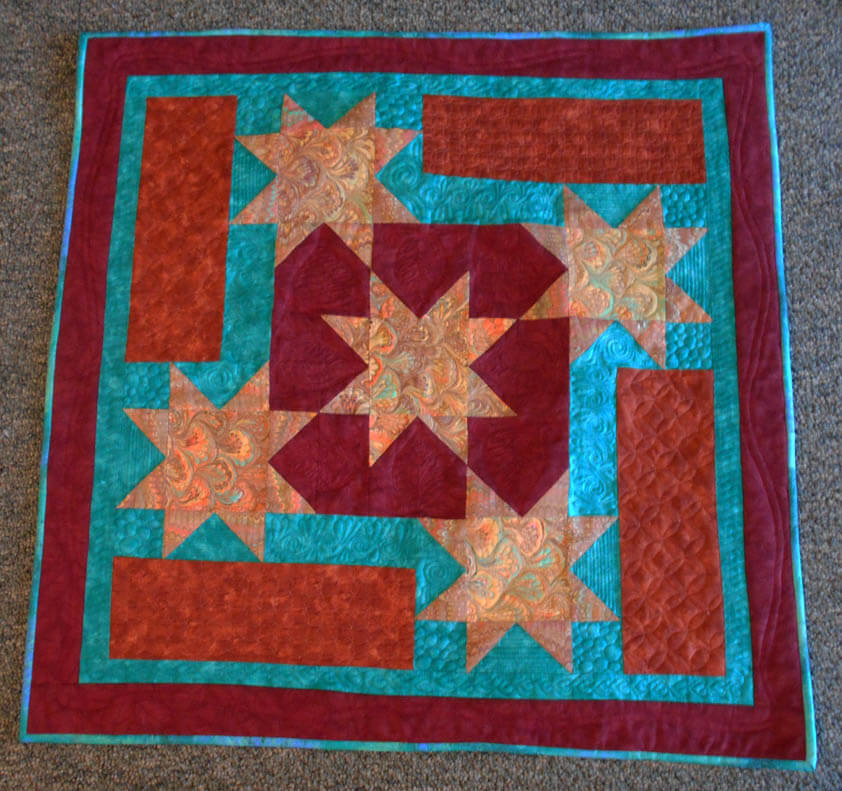
Then I decided to get another little one ready to take to the Seattle show, so I spent a weekend taking out all the stitch-in-the-ditch. No picture of “before,” but here’s the backing fabric:

Part of what was so much fun with this quilt was looking at each of the various sections and deciding what I wanted in each place. I happened to have four different Superior Threads that would blend perfectly, as the purpose with these small quilts was to show off the marbled fabrics. I used the Superior silk thread for the first time in the green sections and loved it. You can see in the stars I did some loops (more like zentangles) in the backgrounds of the stars, and did some free motion curves in the points. Everything is very subtle.

My free motion loops need work here. I think it’s a combination of speeding up the machine, as I do move my hands and the fabric pretty quickly with these loops. I’m not happy with the stitch size – very inconsistent, so I know I need more practice.
Now while I don’t subscribe to the quilt police, I really do like to have a ice back to the quilt. While I had some tensions problems, overall I am THRILLED with the back of the quilt. The whole thing finished is going to be gorgeous!

Of course I had to include some feathers, so each of the green squares has a circle of feathers – more like a rosette. Love them!

I thought I had more pictures, but evidently not. Tomorrow is a picture-taking day, so hopefully I’ll get the rest up. I need the feather borders, the white squares, and the back.
Later – packing for the trip!
Back Again……

Pun intended. I’m back, and the back is bad again…all that moving. We are actually marbling this morning, trying to finish everything for the northwest trip in less than three weeks. The move cost us a month, plus money that could have been spent on fabric. Expensive in several areas. If I hadn’t been doing yoga, I can’t imagine how sore I would be now. It’s sore, but I think that’s because I tried a few too many stretches unsupervised yesterday.
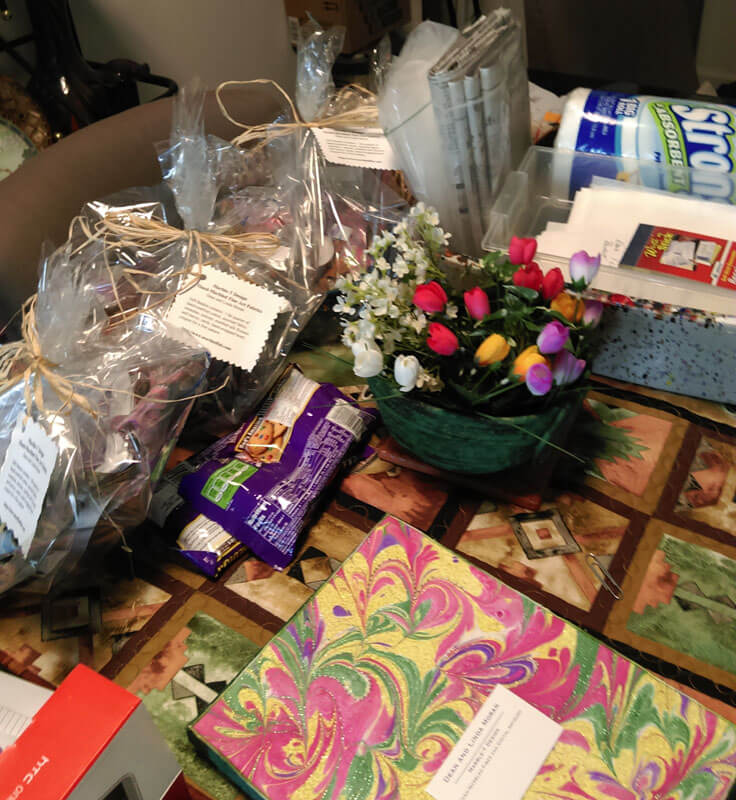
This move really did us in. Now, we are experts at the moving process, having done it numerous times. But this was more condensed – three weeks from signed a new lease, giving notice, and packing. Plus, we transported a lot more boxes than we normally do, and we set up a lot of things ahead of time: kitchen, bathrooms, closets, pantry. A week and a day later, most of the art work is up, and there are a few boxes of books and miscellaneous (my purple fabric….) that are still waiting to be unpacked.
Speaking of fabric……there are pros and cons to having a fabric stash when you’re moving. Pro – lots of soft fabric (no grimy newspaper) for wrapping all the precious items in the hutch. And you get to fondle the fabric. Con – lots of soft fabric that you can fondle again, as you refold and store.
It’s been interesting the reflecting I’ve done over the past week on our various moves. That needs to be a post in itself……got to get the rest of the boxes broken down for the recycling truck tomorrow.
Free Motion Quilting!
I’ve been working on improving my free motion quilting since June, when I took apart an old quilt and redid all the quilting. I am doing a HUGE amount of quilting right now on a piece I’m working on, but with the start of Sew Cal gal’s free-motion challenge for the year, I am plunging right in. We got our first lesson on Sunday, and I started on Tuesday with some practicing. This is a lot of fun. Here’s my first attempt:

Bottom Line by Superior Threads in the bottom, with a Superior Rainbow in the top, feed dogs down. Overall pleased with the stitch length, as it seems pretty even. However, I keep feeling like my stitches need to be smaller. But the pattern is easy to follow, and I like the effect.
Along with this challenge, Leah Day is continuing her pattern-a-day with a Wednesday Quilt-along. Several of her blog posts have talked about getting ready to free motion, and she posted her “wiggle” practice.

So here’s the word on the additional practice. I used Superior LAVA Thread, with some Bottom Line in the bobbin. I was pleased with the design. I even tried a variation on the left side – leaves next to each other.
 This was intriguing for me. Normally with something like this, I try to be exact in the practice, but I found I really wanted to take off and try a few variations. The only reason I think I did this is that I’ve been doing some practice since June, so I felt more confident.
Someone suggested trying to quilt with leaving the feed dogs up. So I tried that today as I was practicing Leah’s wiggle. If you look closely you can see where I removed stitches because the tension on the back was off badly. In fact I removed stitches three times.
 Now I wasn’t having any problems moving the sandwich around with the feed dogs down, and I adjusted tension on the top. Bottom Line in the bobbin, King Tut in the top. It finally occurred to me that maybe for my machine I needed to have the feed dogs down. Yup, that was it. Fixed the feed dogs and everything was fine. You can see that once again I was trying a variation of the two patterns.
I also tried to see how small I could get the leaves.
 Again, overall pleased. I do need to practice going backwards. I like changing the direction of the vines with each leaf. That’s something I will probably keep. One other thing I tried was speeding up the machine, and keeping the hand speed the same. The stitches were smaller and fairly consistent, but I must say I like the somewhat longer stitch length. I think it shows the thread more.
I think this is going to be an excellent way to practice. A lot of my previous free motion practice has been on marbled fabric, where the line of the pattern helps guide you. Some marbled patterns lend themselves to a regular foot (like the chevron), and some need a free motion foot (like the nonpareil and its variations).
 The bamboo stalks are quilted using a regular foot, just following the line of the pattern. The quilting really adds dimension.
![]() In the avatar I use on line, Rainforest, I used the free motion foot and just followed the line of the pattern This particular pattern, which we call free form, is a lot of fun to quilt. You get in a kind of zen-like mode when quilting this.
In the avatar I use on line, Rainforest, I used the free motion foot and just followed the line of the pattern This particular pattern, which we call free form, is a lot of fun to quilt. You get in a kind of zen-like mode when quilting this.
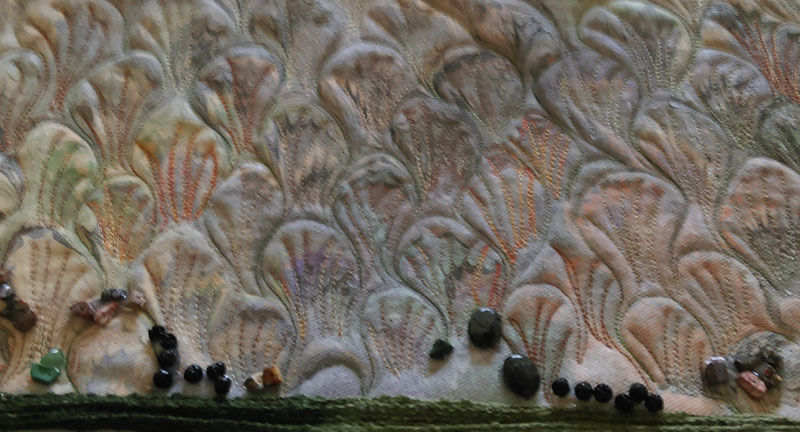
In this closeup of “Ocean’s Bounty,” the traditional stone pattern lends itself really well to free motion quilting. You can see the whole piece with all the free motion quilting after this small shot.

 This is a small piece of turquoise silk that has free motion quilting along the pattern to accent it. Complex pattern to quilt in free motion, but it gives some great effects.

Here’s a closeup of “salmon Run,” accepted into an art show in Alaska. The free motion quilting follows the nonpareil wave pattern.

You can see more of the art quilts at our website.
And….along with everything else today, we marbled 20 fat quarters in preparation for a show in Seattle in March. They are gorgeous. Here they are, folded and ready for packing.


 And then this afternoon, we cut another 10 yards for another 40 fat quarters, along with the 15 we still have, for the next three marbling sessions. Pretreat one day, alum the next, and then marble the next. It’s going to be a busy two months, but oh, are we having a good time!
Work in Progress Wednesday
 Wow, being retired has given me a whole new appreciation for preparing for the holidays. In the past, if I was lucky, I managed to get some things done during the Thanksgiving weekend, but everything else depended on just how tired I was at the end of each school day. Not this year – my cards are designed and ordered – the pic at the left is of a great piece of red silk that I took into Photoshop. Really pleased with them.
Before I go in to the latest project, an update on the deer quilt from last week. We finally got it hung in our bedroom, its designated spot for the last ten-plus years. It looked awful…..there was absolutely nothing redeeming in it at all. Even hubby, who has loved the quilt since I first saw the pic realized it was pretty bad. So Karen S is the winner of the give-away of border trees, and some lucky child is going to get a “huggy” quilt. In the bedroom now hangs our Desert Heat quilt, and it looks perfect.
Now for the new stuff…..Hubby created a really great fat quarter of cotton that reminded me of a New England autumn. We had marbled some silk leaves earlier this fall, and I had in the back of my mind to make an autumn quilt and use the leaves. Well, now I had all the fabric, pulled a couple of browns from the stash, and was ready to go.
 The start of the log cabin….this is the fourth restart….for some reason I wasn’t able to follow my own directions…..


First tentative layout…..

Another tentative layout…sorry for the lousy pic….

The three finished blocks – reminds me of walking through woods carpeted in falling leaves.

Playing around with the marbled leaves….have probably decided on this layout. Love the border fabric, which was very serendipitous. That fabric would not have worked had I gone with a different layout.

I love the leaves!


Ready for batting and quilting……more next week. Suggestions on a quilting design?
What’s for Sale This Week –
![]() It’s Thursday, so let’s take a look at what’s available for MarbleT-Design around the web this week.
It’s Thursday, so let’s take a look at what’s available for MarbleT-Design around the web this week.
On Ebay: I love a couple of the pieces this week, and if they don’t sell, well, I’m a gonna quilt ’em. This one is very organic and would be great to quilt. A fat quarter in Halloween colors, looks very much like an actual piece of marble. We are getting MUCH better at creating that pattern!

Also, a great fat quarter in the traditional peacock/bouquet pattern. Some great colors and lots of movement.

On Etsy this week: a gorgeous fat quarter of unpolished white satin – multi-colored with lots of movement to the piece. Satin requires a lot of work – from pretreating to the actual marbling – you have to be very careful about each step or the pattern washes right off the satin. Once it’s heat-set, you’re fine. All our fabrics are heat-set and ready to go for your projects.

On Cafe Press: a cool little magnet, of the traditional pineapple quilt block, made with marbled fabric. Great little gift for yourself and your refrigerator….

And from Zazzle: a piece of artwork created a year or so ago that you can put on any number of cool items. “I’d Rather Be Making Art!” And wouldn’t we all…I gave this mug to a few of my teacher friends who would lament about not having time to make any art during the school year. I’m still trying to figure Zazzle out, so you’ll have to click on the link. It’s so cool that you can customize this item on whatever you would like – different mugs and so forth.
There will be more – we are making fabric each week now that we both have the time and can work together. So check back – or better yet, let us know if there’s a custom product you are interested in.
Work in Progress Wednesday….The Commission, Part 2
 Two weeks ago I showed the start of a commission here, and I am almost to the end of it. Lots of interesting decisions to make along the way – I am really enjoying the decisions in the design process, especially as they relate to using marbled fabrics. My biggest problem is trying to photograph the colors so they are true.
The quilting of the marbled fabric went really well – I emphasized the white area with bubbles, as though it were a stream working its way through the rocks. Went through two different colors of threads before I decided which one I liked. That’s different for me…in the past I would just let it go.
The first border is a very soft corduroy, and I left it a little “puffed,” rather than pulled straight. I liked that it played off the roundness of the pebbles. I love the batik for the outer border, and I also used it for the backing. I realized again why I’m not fond of mitered corners (but that’s what this piece needed), as I took two of them out several times. I still need to trim the outer border by an inch so that it seems better balanced, but I decided to quilt the outside first. Again, a struggle with what I wanted to use for thread, as well as how I quilted it. I wasn’t happy with following the pattern of the batik, as it looked too crooked. So I opted to play off the idea of the frame, and I’m quite pleased. What faces me tomorrow is making sure the piece is completely square, which I need to worry about, as it is a commission. Thank heavens I know about the diagonal to check for a square.
 I’m going to use the Alzheimer Quilt hanging system – the little triangles in the corners, as I think this will help the quilt lay flat on the wall. I also plan a label for the back with all the information about the quilt, including care. I found a “certificate” on line to use for the new owner of the artwork with all the official details.
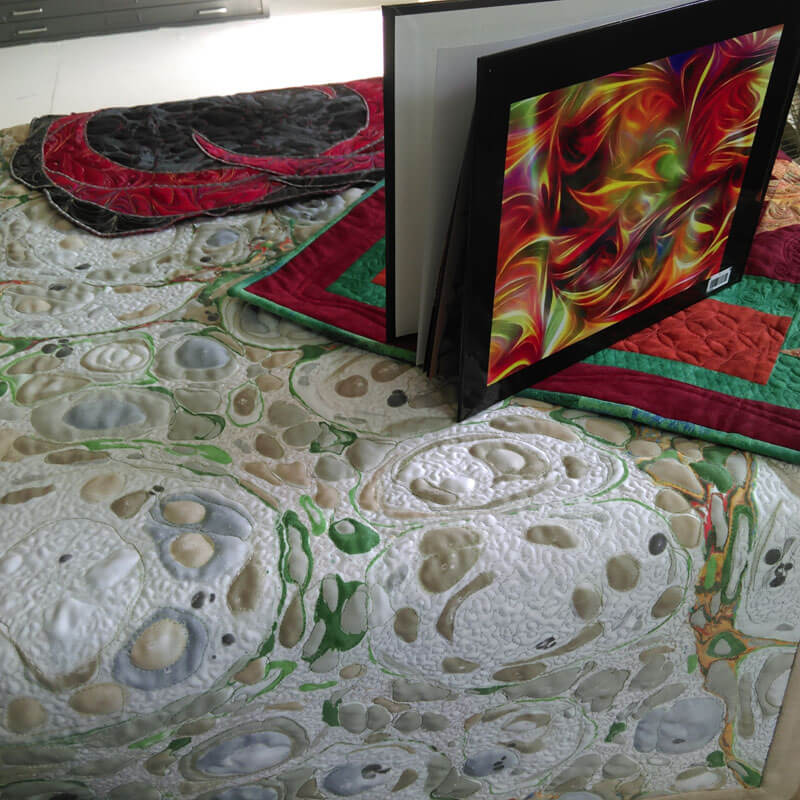
Here’s the large shot, still untrimmed:
 I am really loving this piece, which is actually more true brown and copper than in the picture. Still thinking about some seed beads……see what happens next week…..
Monday Marketing – Creating a Schedule

It’s Monday again….and it seems like all I did was read, look at emails, and set up buttons and the like. This is the “time-sucker.” So my goal for this blog post is to try and identify what needs to be done each week for marketing and set up a kind of calendar to work with.
This is what I’m dealing with: Ebay, Etsy, LinkedIn, Facebook, Twitter, Cafe Press, Zazzle, newsletters, a website, lynda.com, flickr, and a blog. I am trying to avoid doing all of this every day, because nothing else seems to get done. I’m brainstorming as I write, with the hope that by the time this post is done, I will have a plan.
Ebay: hubby handles almost all of this, including postal trips. But…if we are going to increase sales, we need more product, and I would like to help with the actual marbling. So…..marbling weekly. I do need to update the About Me page…..
Etsy: the bulk of the organization is done. But…I need to be adding product on a regular basis, which means I need to keep making things. It would be nice to have one new product up each week, if not more often. One of the goals this week is to add some of the major artwork (even though I don’t expect to sell it on Etsy, it is more exposure) on the site, as the pictures are redone. I want to continue with the circles marketing, which, if I have enough products, could be done every day – 15 minutes for this. Plus, I need to keep working…….
LinkedIn: profile is done, and I have registered for several groups for business. I have found already difficulty in keeping up with reading emails each day from the groups and have already deleted one group. This week I will determine which groups look to be the most advantageous. I also need to complete the setting up of a profile of artwork.
Facebook: I read this several times a day. I have a fan page which needs serious work, as well as Art From The Heart, which is to support healing art after the Tucson shootings in January. I have added FB buttons to my blog and this week to my website. I have read the Terms and looked at all the privacy settings. I also went through the photo stream stuff for FB and fixed photos for both the personal and fan page. I need to really think through what is going to happen with the Fan Page.
Twitter: I am finishing a class from lynda.com on using Facebook and Twitter for business, and I highly recommend the site. For #25 you can choose different trainings all available for a month at your schedule. I picked up all kinds of little tips, most of which have already been implemented. But….and this is a BIG but….the time for tweets and what to tweet. By syncing a lot of the programs, my blog appears on Twitter, FB, LinkedIn, my tweets appear in a couple of places. I don’t think I can go further with this – the tweet button is on the blog and soon to be on the website. This is one area that needs some serious scheduling. Since I use TweetDeck (which is free…), I can schedule and keep track of who’s following and what is getting retweeted. So…I’m going to use Sundays for scheduling business tweets for the week, and I will look through the twitter feed once a day to see if there’s some good stuff to retweet.
Cafe Press: I have a site, a free one, so I am limited as to the number of products I can put up. I haven’t looked at this in several months and it needs serious work. To have a store isn’t much money each month, and I could have a lot more products available, but the issue is marketing and driving people to the site. I have some great digital stuff already to go, and I need to start planning around the holidays, reading about marketing through Cafe Press, and so on.
Zazzle: Ditto for Cafe Press……both are not a high priority right now.
Newsletters: oy, it’s been months since a newsletter went out, and I have all these contacts where nothing is happening. I used Constant Contact last year for a few months, until I couldn’t keep up with the demands and school at the same time. I was happy with it, but disappointed that not many people actually read it. I need to go back to a newsletter and offerings at least once every three weeks, and more during the holiday seasons. I need to check out Mail Chimp, which is free, and I have heard people have good luck with it. I’ll try and make this a priority this week.
Website: Most of the changes to the website have been made by my wonderful web lady Suzan. I need to get a couple of buttons set up, and then do something about newsletters and contacts. I also have some pages to add on Digital Marbling (TN), and I need to evaluate “print on demand” for artwork. This is a “need to think about” topic…..
lynda.com: I have until Friday to finish my month of training. I still need to finish Twitter, and I want to get the html newsletter course done. I am not going to continue with Dreamweaver because it isn’t a priority.
Flickr: I have photos up, not all of them with copyrights, and there is a class on lynda.com if I have time. I’m not really sure what I want to do here….
And finally, my blog, Marbled Musings. I went a bunch of months with no new writing, and I’m at maybe three times a week. I need to get back to at least four times a week, and eventually every day. I have plenty to write about…and I need to stay up with my Google reader – as well as comment more on some of the posts. This is probably the biggest area for marketing that I have to schedule.
Weekly:
* Marbling fabric
* Work on Etsy products
* Sewing and other design
Mondays:
* Add Etsy product
* Add Etsy circle information
* Read newsletters from LinkedIn groups
* Read Twitter feed
* Blog post Monday Marketing
* Google reader and at least three comments
Tuesdays:
* Add Etsy circle information
* Read Twitter feed
* Blog post Top Ten Tuesday
* Google reader and at least three comments
Wednesdays:
* Add Etsy circle information
* Read newsletters from LinkedIn groups
* Read Twitter feed
* Blog Work in progress Wednesday
* Google reader and at least three comments
Thursday:
* Add Etsy circle information
* Read Twitter feed
* Blog – Thursday Thoughts
* Google reader and at least three comments
Fridays:
* Add Etsy circle information
* Read newsletters from LinkedIn groups
* Read Twitter feed
* Blog Photoshop Friday
* Google reader and at least three comments
Saturdays:
* Read Twitter feed
* Blog posting on Specials
* Google reader and at least three comments
Sundays:
* Read Twitter feed
* Schedule Tweets for the week (i.e. Etsy, Ebay…)
* Blog Sunday Stories
* Google reader and at least three comments
Goals for next week:
* FINISH LYNDA.COM
*Update “About Me” page on Ebay
* Update Etsy products, especially note cards
* Evaluate how calendar is working
* See if buttons are added to the website
* Decisions on what will happen with the Facebook Fan page
* Long-term thoughts – what to do with CafePress and Zazzle
* Read and decide about Mail Chimp for a newsletter
* Spend some time thinking about what the website still needs….
Okay, I think I have a handle on this…we’ll see next week as I evaluate how the week goes. And…I’m taking some online classes!
Thoughts??
Midnight Musings
I woke up a few times last night, thinking about this piece – mainly, was there too much quilting? I have avoided looking at it today, as I want to wait till I have better light tomorrow to really evaluate what’s going on. I have so enjoyed quilting this – I love the Superior Threads – NOT ONCE has the thread broken, and there’s a lot of it on this piece. I need to look at the threads I have again, as I think I want to use something for the sky that just gives texture but no emphasis on the stitches. Trouble is, I do not have clear invisible thread, just smoky, and that definitely won’t work. And now that I understand about nylon as an invisible thread, I’m not even considering using the old stuff.
I may cut off about two inches, as I’m not sure about the puffiness at the very bottom – it is the bottom, and I do want the emphasis on the “fish,” and I think the extra texture will work. The big problem is the decisions to be made on the upper part that is supposed to represent more of the sunrise. Definitely less stitching, just don’t know what thread yet.
Here’s link to the original piece, with almost no quilting, and a bad border. I said in the post I would be willing to take the quilting out – which I have now done twice…..I’m looking forward to quilting tomorrow…just need to be done with a border on for pics on Saturday.