Archive for the ‘fiber art’ Category
The Start of a Commission…..
This past April I was asked to do a commission for a friend of a friend, based on three things: 1) she loves our marbled fabrics; 2) she wants a fiber piece for a small area in her bathroom; and 3) she would like it to draw on the colors from the new granite counter tops. So for 6 weeks I’ve been mulling over possible designs, knowing that the final one would be based on what happened with the marbling session.
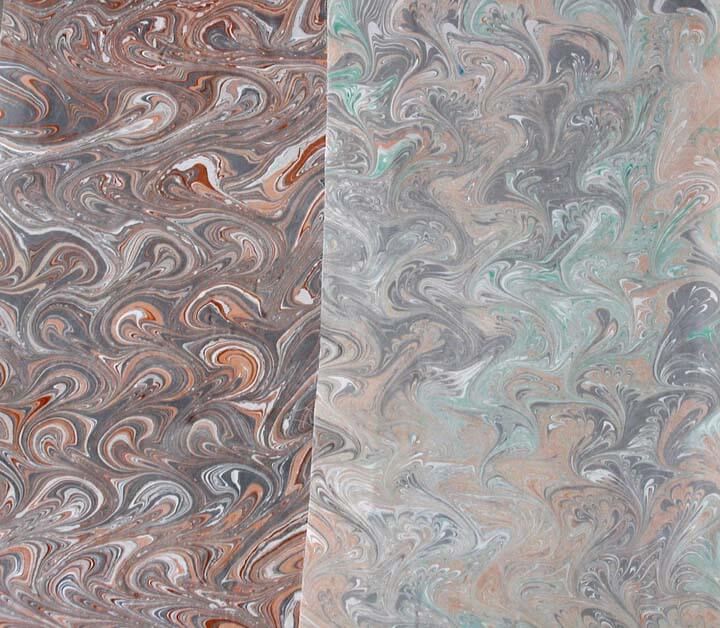
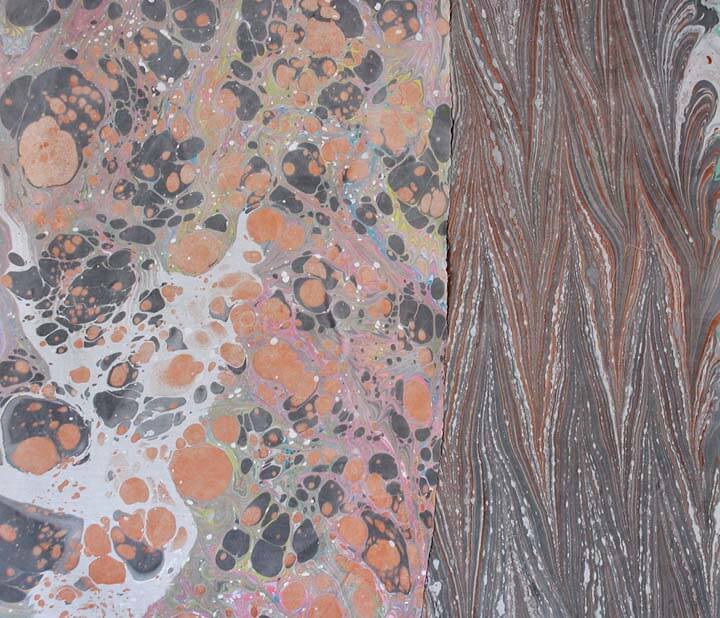
We marbled yesterday, and I worked with the colors I thought would go with the granite – gray, black, brown, russet, copper. I tried a couple of different patterns, and what follows are the pieces I came up with. Warming – they’re pretty blah in the pictures….
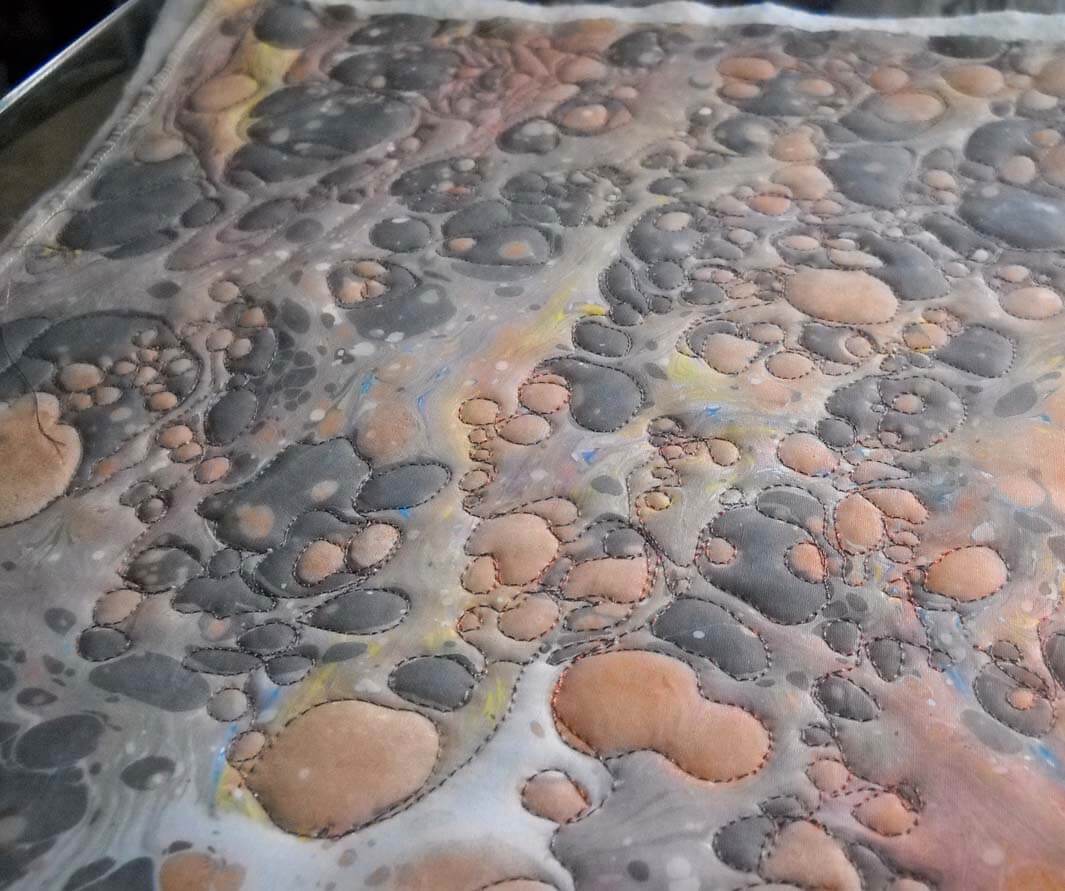
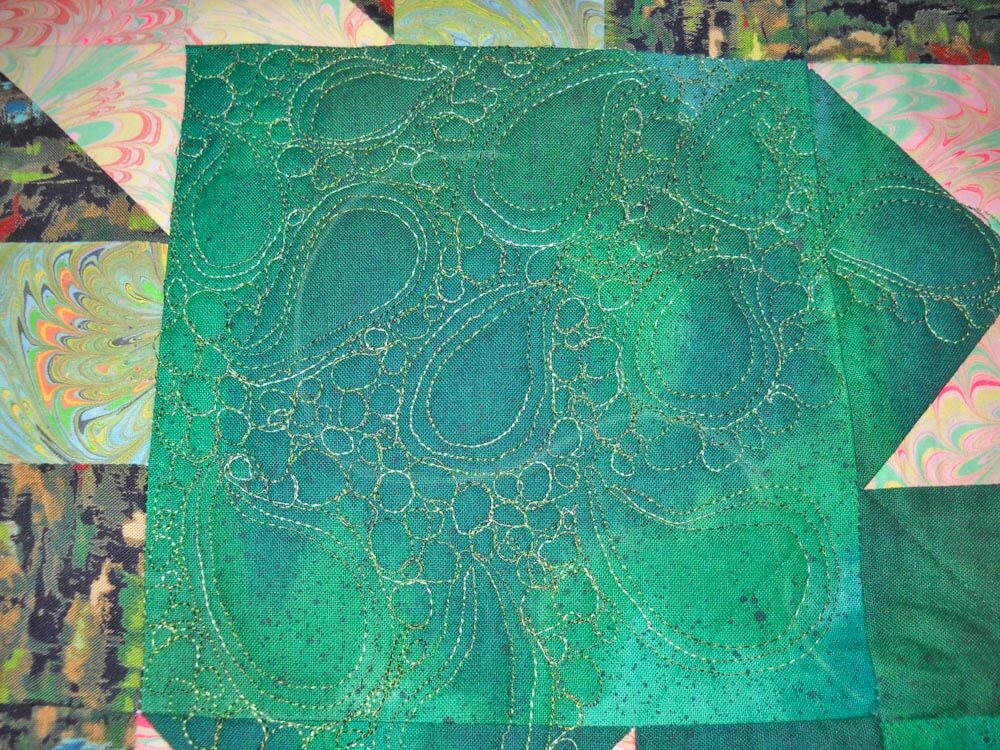
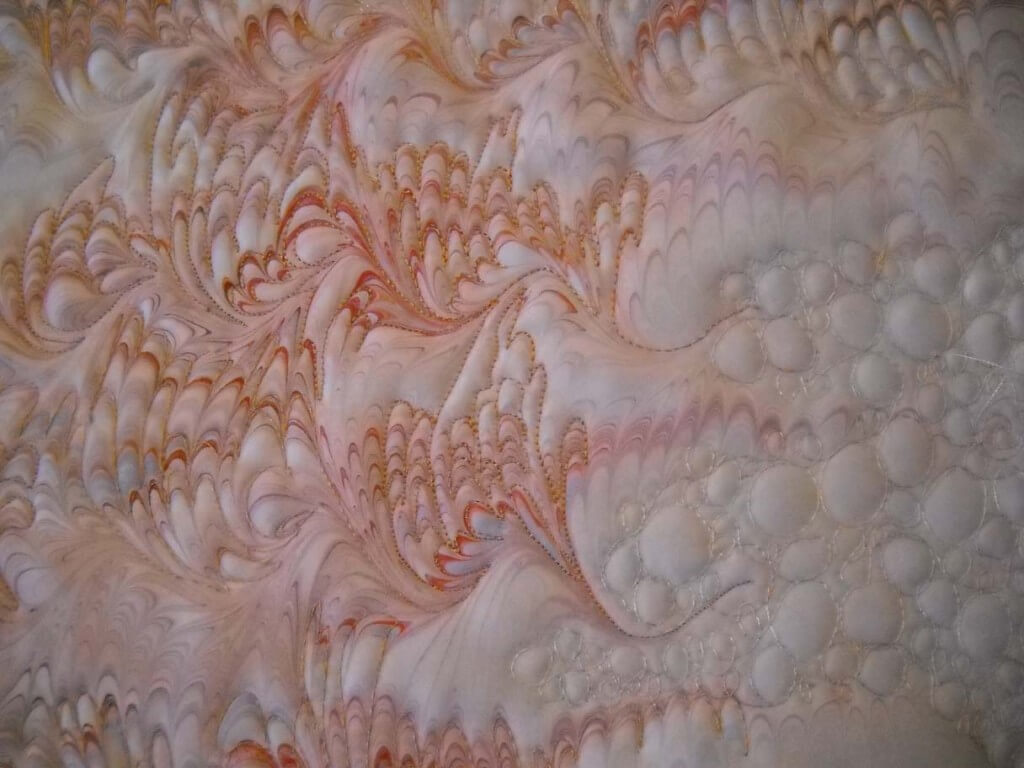
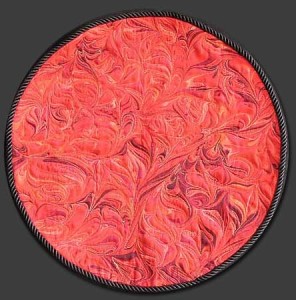
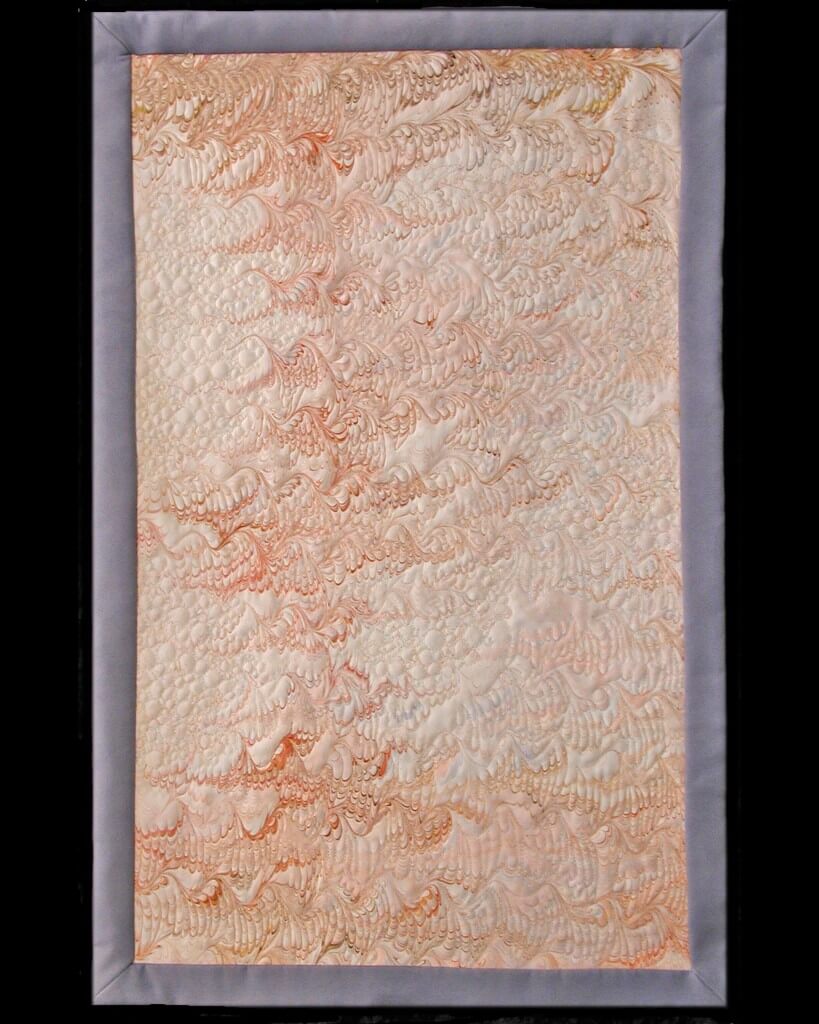
I chose the stone pattern to begin, for two reasons. One, I like quilting that pattern, and two, I figured this would give me some ideas. Well…..it sure did. I started snapping pictures as I was quilting. I used a Rainbow thread from Superior (of course) in a rust shade to bring out the rusts in the painting on the opposite wall of the bathroom. It was just what it needed.
The texture is incredible and no longer flat. The piece also now has a title, “Hiking,” as its future owner hikes the mountains and canyons of Arizona – and especially Sedona – often.
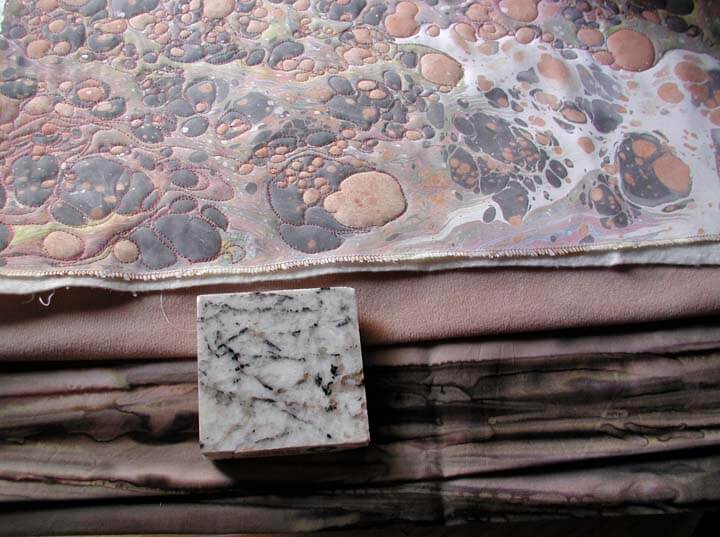
This is so totally different from what I had originally been thinking. I know that this will act as the center medallion of the piece, so I went looking for coordinating fabrics – in my newly organized studio, so selecting was a breeze.
Lots more ideas, as the white area is probably going to become a small bubbly stream, and I pretty much know what’s happening with the borders, but that’s for another post.
Ideas???
Monday Marketing – Restarting the Engines
It’s Monday, week four into retirement, and I’ve been getting lots of loose ends accomplished on the home front. But the biggest is starting to attack what I want to do in marketing the business. It’s probably a good thing I have been thinking on this, as I need to answer a very big question first – just what do I want to accomplish for Marble-T Design, as well as my personal art goals? I can’t really start marketing successfully and fruitfully until I make some of these decisions.
I have started a list of some potential galleries and shows I would like to enter, but I find myself asking “is that really the route I want to go?” I probably should have looked seriously at this a long time ago, but, hey, school got in the way. And since Marble-T Design is 17 years old and in a new phase, I should probably also consider what we’ve done in the past and what was successful.
We’ve actually been on line with our website since 1997. We were some of the earliest in e-commerce, without even realizing it. I went through a bunch of computer programs to get the original site up, starting with Pagemill. Eventually I realized I needed to turn the design over to a professional, and Saltwater Systems has handled that beautifully over the last seven years. And we had a much wider line of products available – close to 12 sampler packages. we did a lot more marbling in our large tray, as well as a lot more custom work.
So that’s part of the “thinking” I need to do. More large trays? More shows? More product? Classes and workshops again? Just where are we taking this business? I need to be honest in my thinking about the future. Marbling in the large tray is very tiring as we have gotten older, and with the price of cotton and carrageenan going up, prices will have to go up.
Whew…..that’s a lot of questions to answer. Once again, starting to write is helping me focus on the bigger picture. So I need to start….
What do I really want to do with my art and my business? I want to make art, no question about it. I would like to sell my art, whether it be on line or actually in some galleries. I think I am realizing I don’t want to do a lot of shows. I do have enough on my resume to show the work has been accepted, but I will probably only look at two or three a year. As for the actual business, I want to be able to bring in a certain amount of money each month to help with traveling during retirement. I’m starting with the idea of $500 additional a month, and moving from there.
That means looking seriously at outlets. Ebay has been steady, but I would like it to do more. So we need to marble more pieces and packages. I have sold a few pieces of fabric on Etsy, but this needs to be seriously marketed. We’ve been selling on Ebay for probably 7 years and we have a good steady family of customers, but I want it to generate more sales.
I haven’t really looked seriously at marketing my work on Etsy, and I think with the TAFA List, I can make a good start. So I think at this point a goal for this week is to list potential products for Etsy and read everything I can about Etsy and The Textile and Fiber Arts List.
The other big thing is we are a sponsor for The Sketchbook Challenge for July, and probably for a few months after that. This will drive more traffic to our website, The Art of Fabric. This means getting the site updated and ready for additional traffic in July. So also this week is spending time learning Dreamweaver to take care of a lot of small changes that will update the site.
THIS WEEK:
Finish Dreamweaver class for making changes to my website
Make the changes to the website
Etsy products, increased Ebay ideas
Reading about Etsy selling and developing strategies
Reading through everything on The Textile and Fiber Arts List and developing concrete plans
I’m interested in the thoughts of those of you selling on line – favorite sites? Suggestions? Pitfalls?
Work in Progress Wednesday
Sometime this past autumn, I posted a picture of a quilt completed at least 10 years ago, asking for suggestions on quilting it. I had used invisible thread (waaaayyyy before the improvements in threads) and did basic in-the-ditch quilting. Pretty darn blah. So I took ALL the quilting out, including taking the binding off, and washed it to hopefully remove the shadow lines.
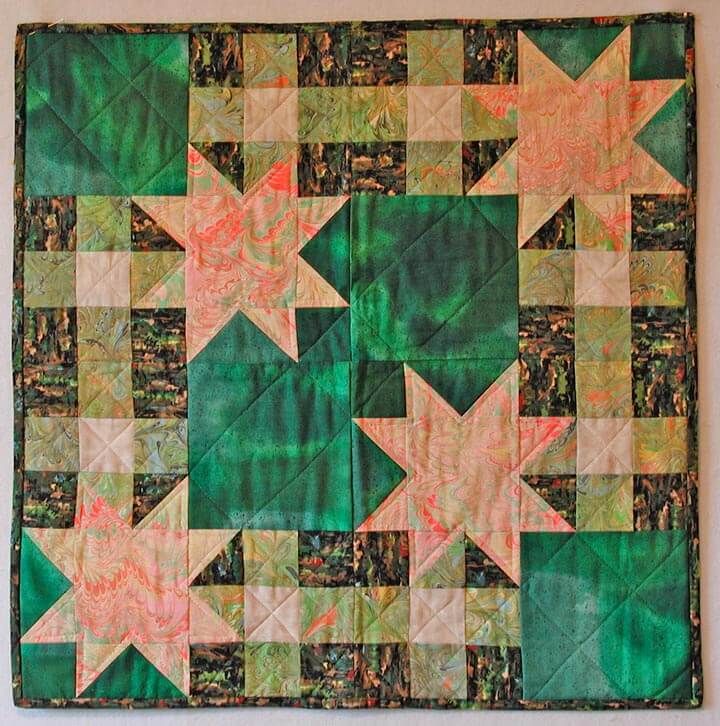
Silly me, I was thinking of having it available for sale at the art show we did in November. Well, that didn’t happen, so it moved to my “to do” list for when I retired, and then to the top of the list as I saw the studio coming together. I thought of attempting some feathers, because most of what I have done for quilting has been stippling or stitch-in-the-ditch.
Before I could start, I discovered this video on stippling, and I was hooked. Sharon Schambler had an hour-long video (actually longer) with 9 free motion patterns she has used in one of her quilts. Easy to watch and very easy to do!
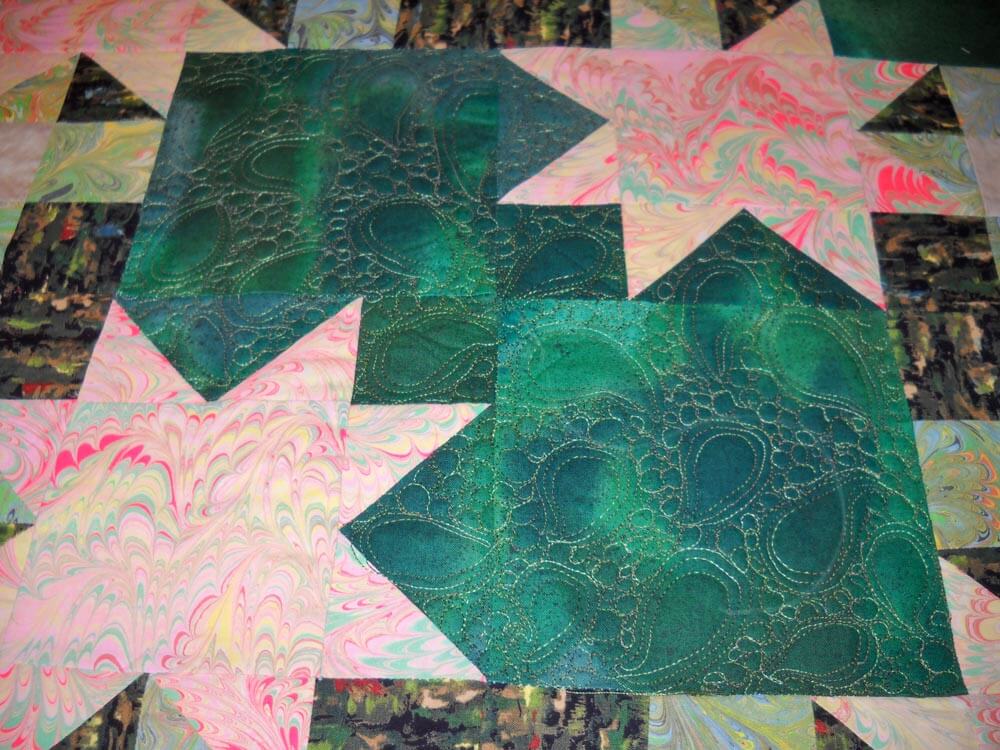
I chose the second pattern, used some variegated thread from Superior (of course – I am totally hooked!), and started. I wasn’t sure I could really do this. So voila –
I was thrilled at this point, because I realized 1) I could do this, and 2) the quilt was going to look SO much better!!
This is the completed center. I’m not going to quilt the marbled stars (unless someone has a really good idea for me?? Hint hint…). I ABSOLUTELY love it! I’m doing a variation of the pattern on some of the side strips, and it’s coming along well. Hopefully pictures this weekend…..
The Studio Reveal……
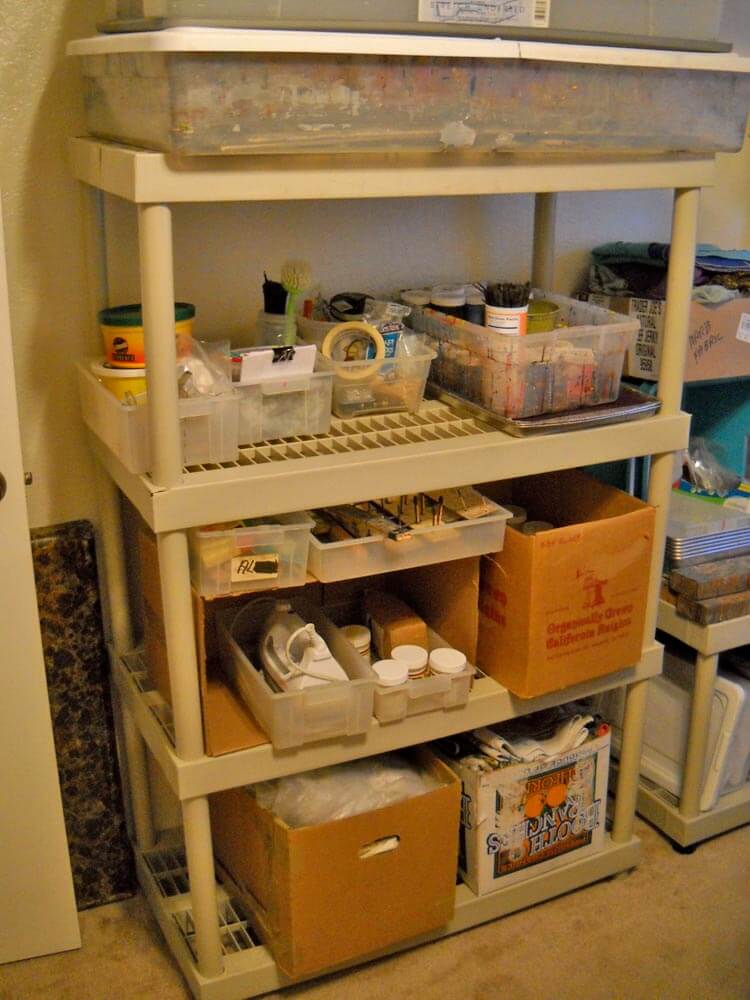
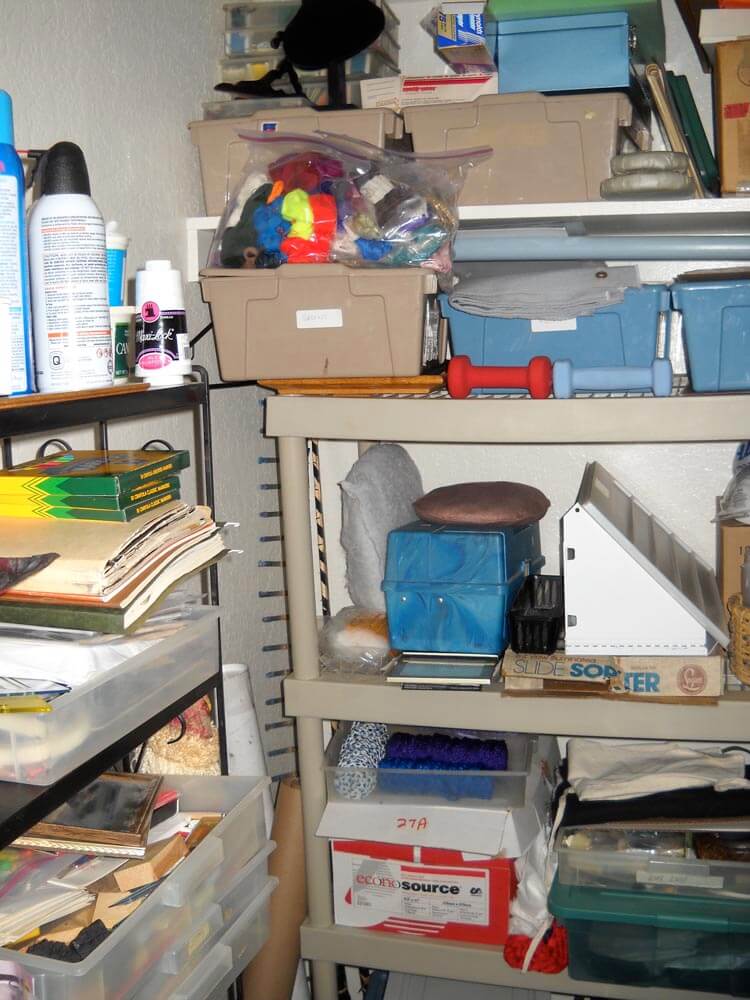
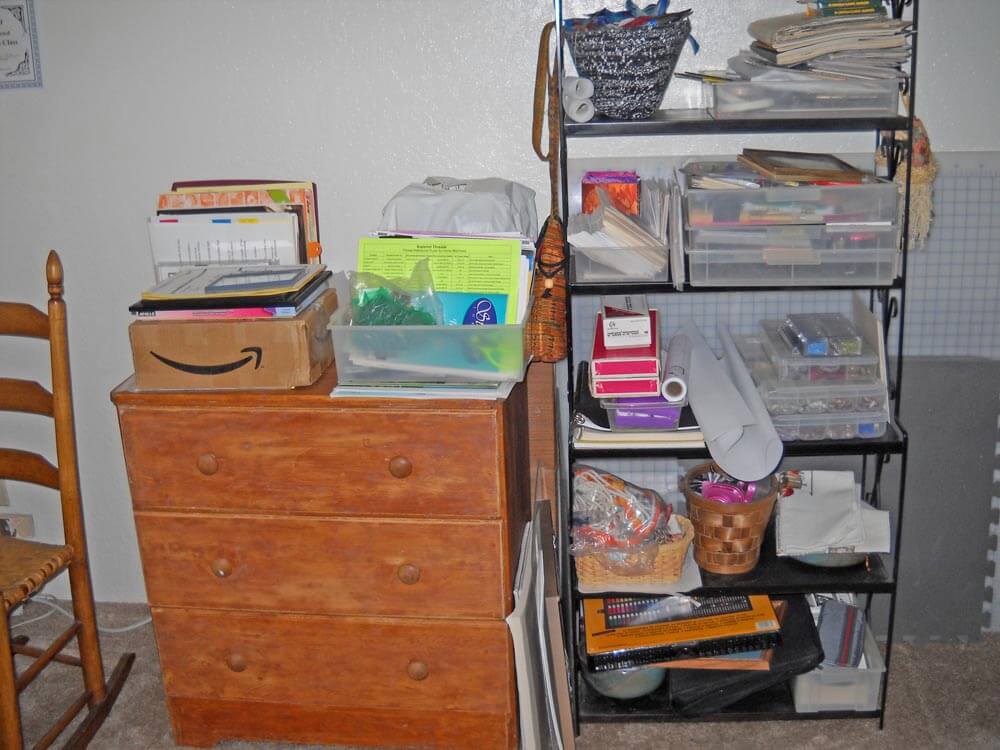
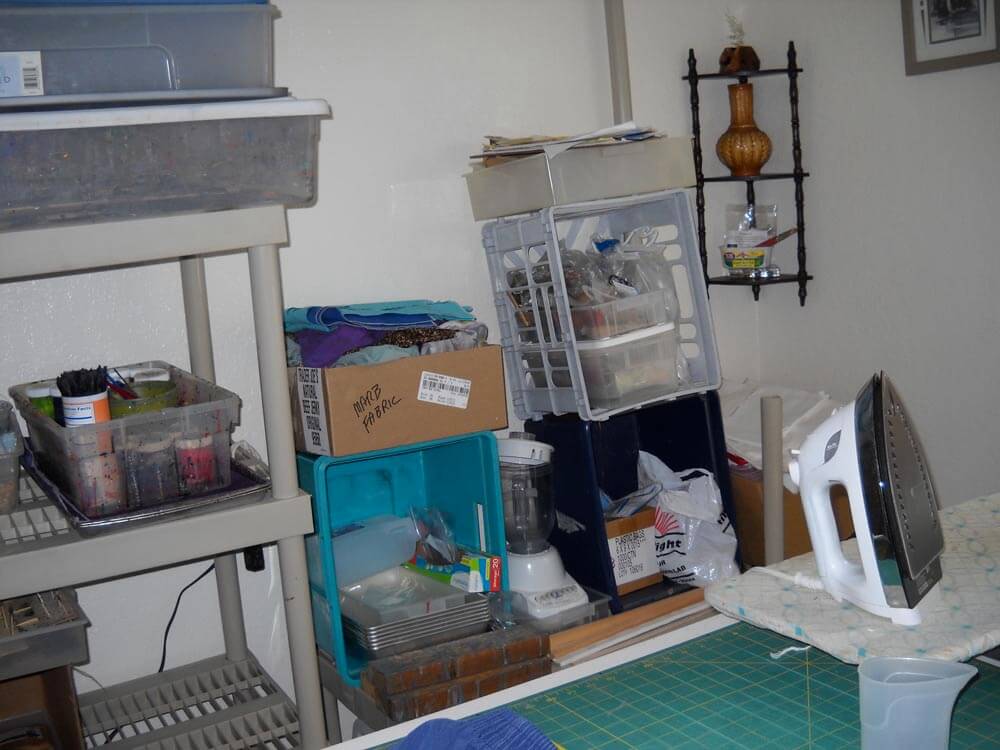
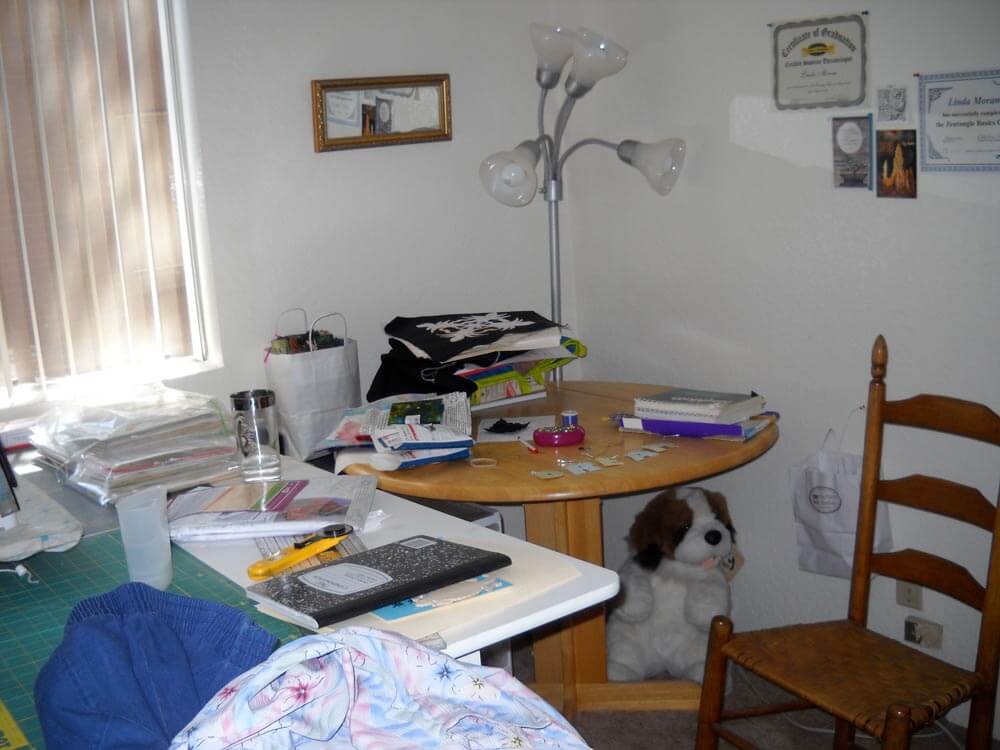
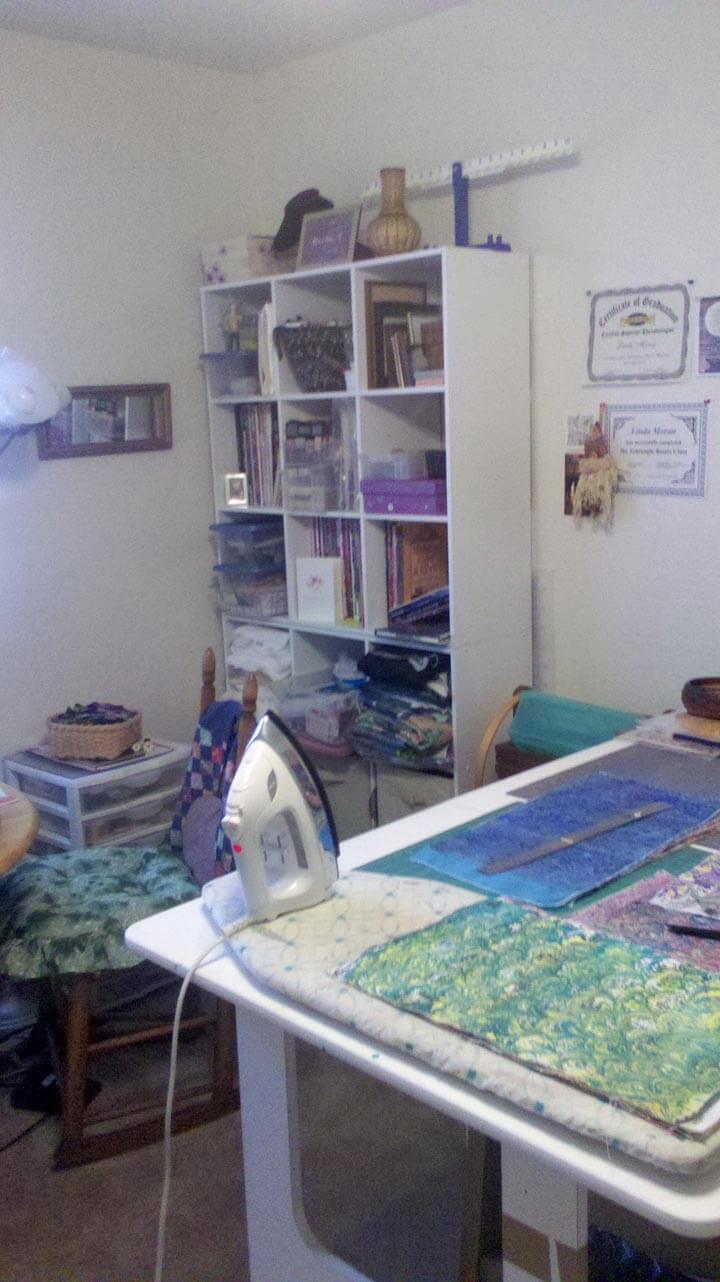
As of yesterday I was finally able to finish the studio remake by actually cleaning off my sewing table, which had become the repository for all the loose ends. I can finally start working again. Hubby marbled on Thursday and enjoyed having a more organized and larger space. Here’s the “before” pictures….
We have (well, had – it’s gone the way of Craig’s List) lots of storage shelves that could be configured in a variety of ways. This is most of the marbling stuff, just kind of packed into various boxes, and not really easy to find anything. The shelves continue next to it, with more cloths, plastic, and trays. We had more of this shelving in the closet.
So much storage in the closet – lots of different containers and boxes collected over the years – fabric is kind of organized by color, but it’s a pain to get to. To the left is an old baker’s rack (like about 36 years old – from before I got married, and it has a new home).
The small chest of drawers belonged to my dad – it is now in the closet, with all the cloths and plastic and towels. Much easier to get to things and it’s now keeping everything more organized.
This was the worst part of the studio – my actual sewing area. I felt enclosed and couldn’t really move around. It was not a comfortable area, and this was the main reason for re-doing the studio.
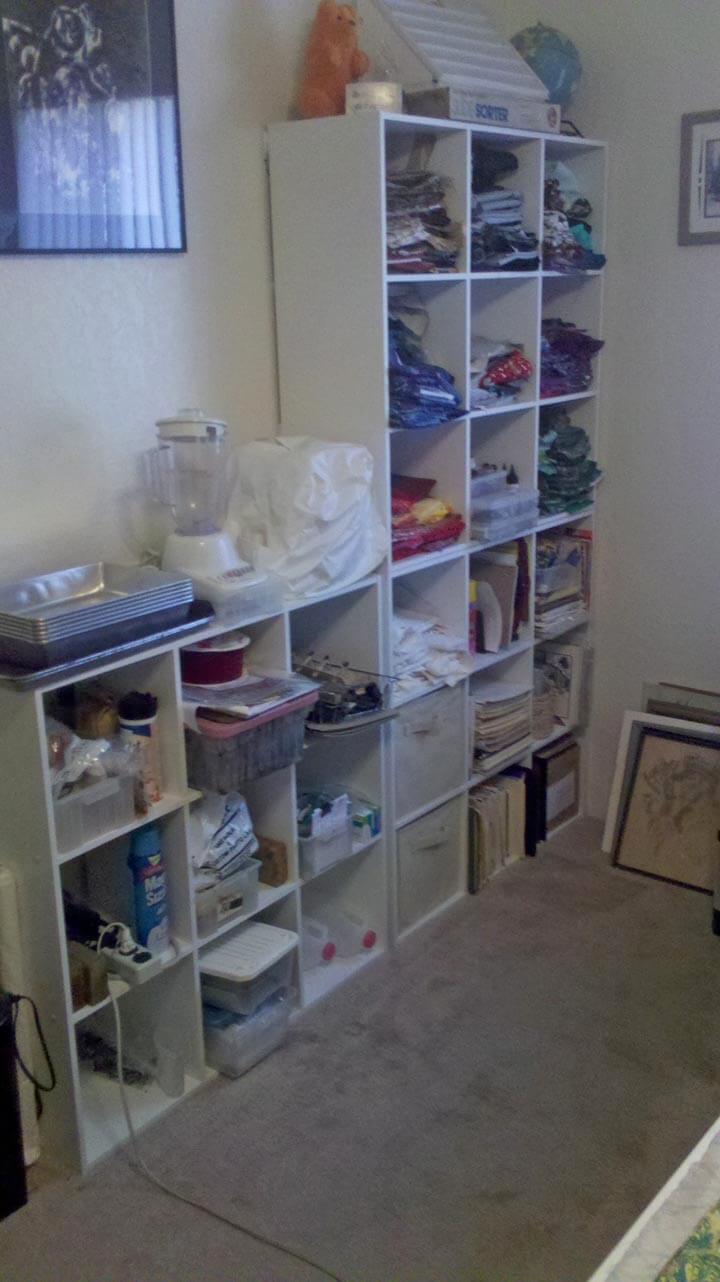
And now……
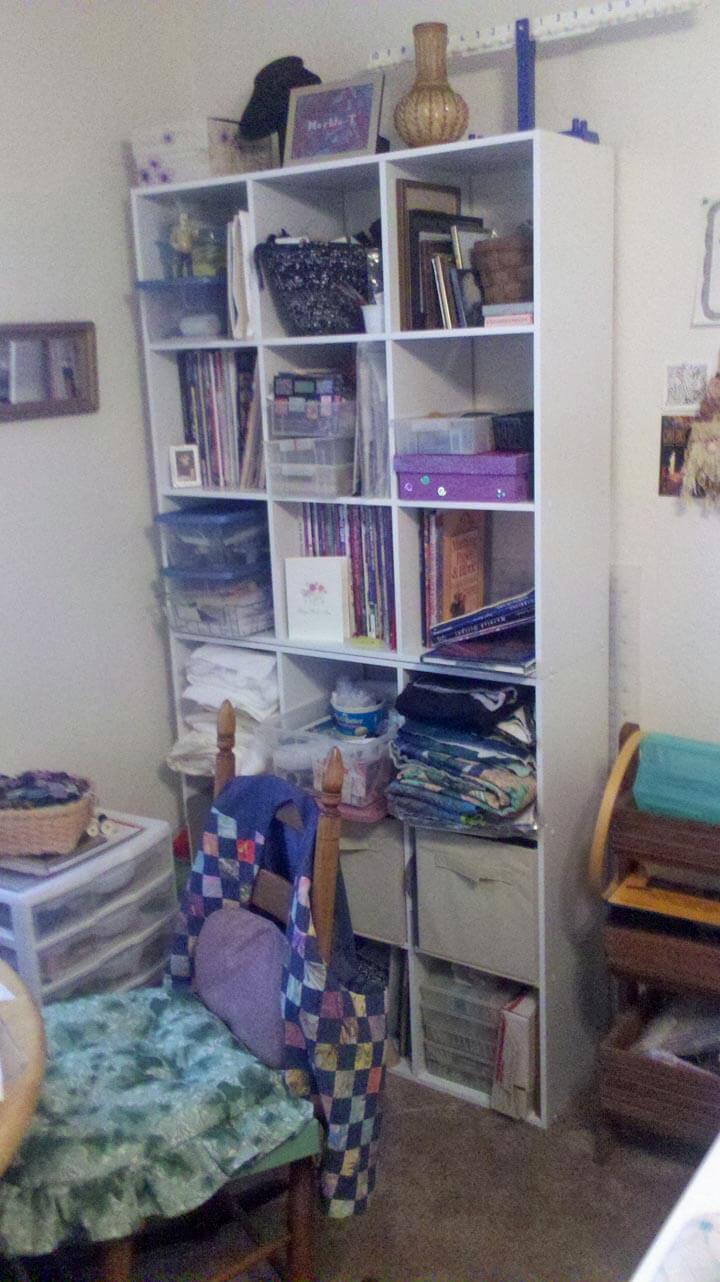
This is where all the marbling supplies were – in storage that is more efficient and actually takes up less floor space. I have fabric out by color, files from school, art supplies in one of the canvas storage bags, and patterns all sorted.
My sewing table is now under the window with much better light and room to move around. I am now right next to the cutting board and ironing board. Art books and lots more storage.
You can see more of the sewing area here.
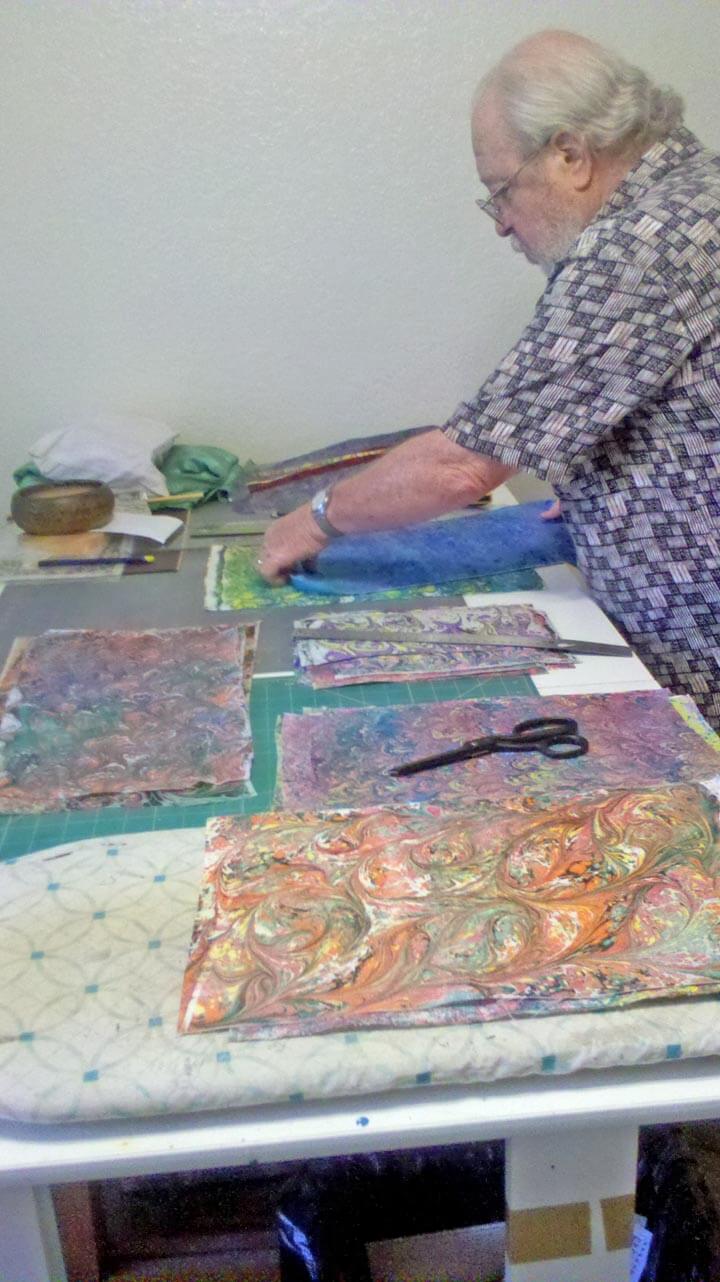
Hubby in his new space, organizing the latest marbled fabrics. Lots of stuff is stored under that cutting table! You’ll see some of the fabric up on eBay this week……
A Life-Changing Few Months
 To say that it has been a while is an understatement. My last posts dealt with the Tucson shootings, and the aftermath for the community has been ongoing. Many in the community have been dealing with personal issues surrounding the events, from getting updates on Gabby Giffords and coping with the weird Arizona legislature to trying to understand our roles as humans working together.
For me, it has meant two months of a pretty severe depression, trying to cope with understanding so many of the historical aspects of this country coming in to play, trying to manage what the economy is doing to individuals, and getting ready to retire from a career of 40 years in education. I had to remove myself from almost everything extra in my life beyond the day-to-day coping within the classroom. I did a lot of sleeping and a lot of being sad. I didn’t even do a Fish Follies entry this year.
At Christmas we decided to move the retirement date to June of 2012. Hubby had some major health issues in January that will eventually lead to major surgery, and all I could think about was not having time together. His next CT scan will be in August, right when school starts again. That was probably the tipping point to look at retirement this May. I made the final decision the end of February to retire after working all the numbers with the retirement folks, and then a month ago applied for SSI.
Gotta tell ya, when I made the decision, it was like a weight had lifted. I started packing my classroom the next day – and it took the three months to get it all finished. Most of my math manipulatives, books, and supplies went to an organization called Treasures4Teachers – will be a nice tax deduction, and they were very grateful for all the goodies and posters.
In April, during spring break, we spent time with our friends up north who now have a place in Cornville, AZ, just south of Sedona right along Oak Creek. It is a gorgeous, restful spot. I was admiring all of my friend’s storage, and the conversation turned to the fact that maybe one of the problems getting back into the studio was the need to reorganize. Which got me thinking, and over the next month I started cleaning and organizing, and looking for new storage that would work. We’re about half-way through at this point, and the place looks great – and even better – feels great. Two more sets of shelves and we should be just about done. But I don’t think I’ll be waiting to get in there to sew.
So I’m recovering slowly from the depression, starting the rest of my life on my terms, planning on a nice run of happiness. And I’ll be back to blogging and creating and marbling and reading and writing and Photoshop and traveling and being with people and working for peace….
Revisiting China – Part 1
![]() One of my projects as a result of our recent move is to sort and organize slides and pictures: one because of the need for the extra space, two to eliminate anything that still has smoke from our fire 20-plus years ago, and three to find a way to enjoy all these memories. Now that I have a home for “recycling” slide mounts and boxes, I am ready for this project. Slides are sorted into a slide box we had been given years ago and never used; there’s one drawer of China slides and a second drawer of personal slides. I’m starting on the China slides.
One of my projects as a result of our recent move is to sort and organize slides and pictures: one because of the need for the extra space, two to eliminate anything that still has smoke from our fire 20-plus years ago, and three to find a way to enjoy all these memories. Now that I have a home for “recycling” slide mounts and boxes, I am ready for this project. Slides are sorted into a slide box we had been given years ago and never used; there’s one drawer of China slides and a second drawer of personal slides. I’m starting on the China slides.
How to organize? One of the most impressive memories from this trip in 1978 (before normalization of relations with the US) was the visits to the schools, so that’s where I am starting. Some background: I was teaching middle school science at the time in Phoenix, Arizona, when I became involved with the US-China People’s Friendship Association, a group working to bring about normalization (the recognition of “Red China”) as a legitimate country. This has been a passion of mine for years, since early high school, and especially influenced by a book by William Lederer (senior moment – lost the name) about the “truth” about Chiang Kai-Shek. I won a number of debates in high school based on the strenghts of my pro arguments, which didn’t make me any more popular. Oh well, I WAS right.
In 1978 I was selected as one of 20 people from the western part of the United States to travel for 3 weeks in China. I had never been anywhere, and China was at the top of my travel list. I was in heaven! I was gone for nearly a month, have a full notebook of interviews and impressions, and probably well over a thousand slides (all of which are being weeded down to the best. Each place we visited (fron Guangchou – the “old” Canton” to Beijing) we were able to meet and ask questions. I was in charge of all the school stops, since I was the only teacher in the group. It was the most amazing adventure.
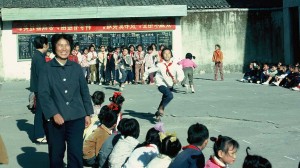
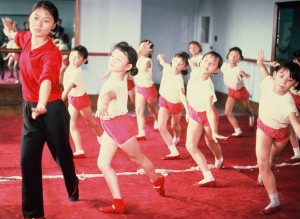
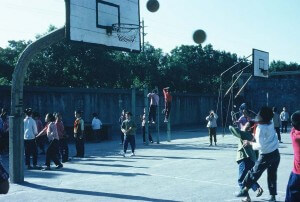 Our first visit was an elementary school, and the playground looked suspiciously like the typical US school ground. Teachers were wandering around, organizing activities, like tug of war. Notice the blues and grays for colors, especially on the adults. We were there at the end of the Cultural Revolution; the Gang of Four had just been imprisoned. Bright colors were a “western” problem, and we had been asked in doing our packing to look at basic browns, blues, and grays for colors, pants, no dresses, to respect the Chinese. We only saw bright colors on the children, until we hit Tokyo on our way back – our senses were literally assaulted with color.
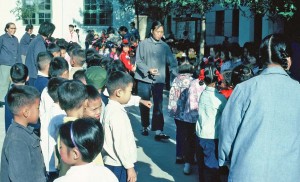 If you notice make-up on the children, it’s because many of them were going to be performing for us during our visit. We were treated to amazing displays of arts and athletics, and at the time China was not a player in sports on the world stage. We all know that has changed.
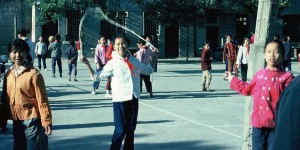 I was particularly taken by the blackboard at the end of the playground, with all the announcements. It was pristine; no damage, vandalism, or the like. One of the questions I asked at our first meeting with the teachers and administrators of the school was how they dealt with vandalism. I ws asked to rephrase the question, and then asked to define vandalism. The teachers looked at each other, not understanding the word…or the concept. The reply was “why would anyone want to destroy what they need?” Why indeed….
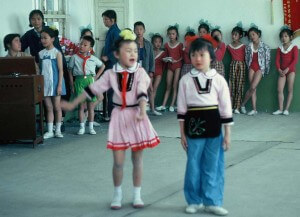
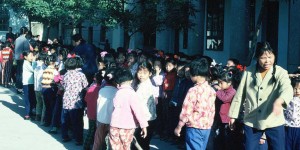 We saw all types of entertainment, from the little singers, singing songs of leading the good life according to Chairman Mao….
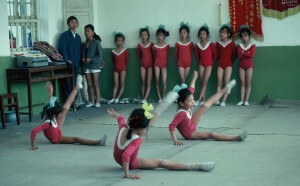
 …to guymnastic displays of all ages. Look carefully at their equipment. Floors covered with skinny rugs, bare walls – nothing like we would expect for building athletes.
 Some performances were more formal. This was a group of young ladies performing basic magic tricks for us, and they were very good. Stage presence was something I remarked upon at the time, and I still think it’s pretty amazing how poised they all were. I know how difficult it is to develop that in young children during theater.
 This dance/song number talked about importance of water and work to develop a good cotton crop.
 This is the classroom that sticks with me so many years later. Sixty students in the classroom, no textbooks in sight. If you look closely, you will see double-digit multiplication problems on the board. No paper visible among these second graders. Students would raise their hand with a solution they had worked out in their heads, be called upon, come to the front of the room, and respond. We don’t even begin teaching basic multiplication facts until third grade….
 We had certificates made up of our trip before we left the United States. We brought along a Polaroid camera to take pictures of our hosts and the group, which would then be affixed to the certificate. This is still one of my prized possessions. (I’m second row on the left….)
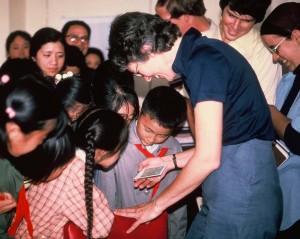
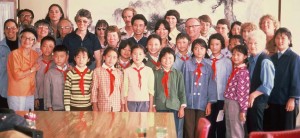 The children crowded around us to watch the picture develop – absolute magic!
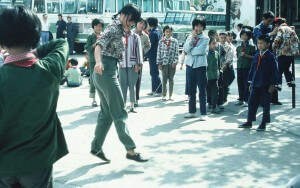
 Shanghai, as well as most other cities, had what were called Children’s Palaces, a place for students to go after school for more activities. A good many of them were focused on the arts, but many others were practical. Here’s one of our group members playing – of all things – Chinese jump rope.
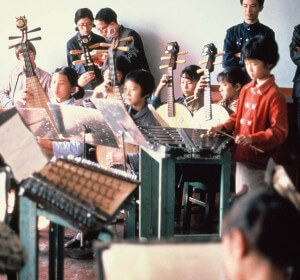
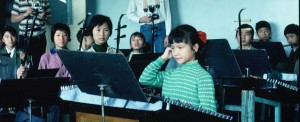
 Lots of musical instruction, as well as impromptu concerts for us.
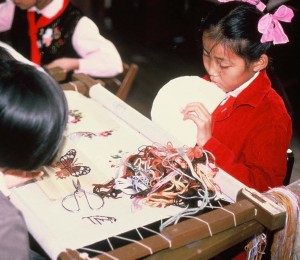
 The needlearts are very strong in China at that time, especially needlepoint.
 Lots of martial arts demonstrations….
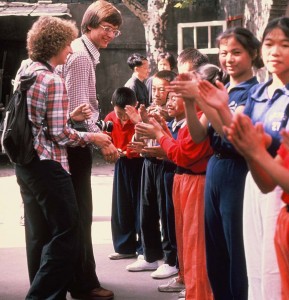
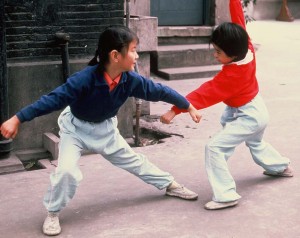 …and every where we went we were sent off to applause. For so many people we were the first Westerners they had ever seen.
Ballet had been banned during the Cultural Revolution, so it was encouraging to see this, and then one evening a classical ballet performance.
This is going to be wonderful, retracing this amazing trip. I will be culling the best of the slides to put together in a photo book so that I can look at these images more often. I’ll post more as I proceed with this project…and a glimpse of a China just beginning to modernize and embrace capitalism.
Work-in-Progress Wednesday – Seasons: Ice
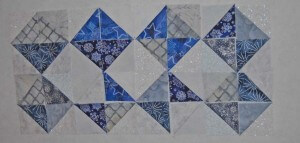
I am enjoying not feeling pressure to finish or make something under deadline. So I started another new quilt that I would like to make into a pattern. That’s one thing that’s been appealing to me…ever since I sold off the rights to several early quilt patterns. This one just seems to be happening.
It started with my Desert Heat Quilt.
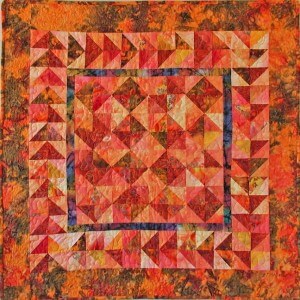 I really like how this came together, and everything I wanted it to do (especially radiate heat), I was able to get it to do. Once it was up on the wall, I decided I needed a companion piece, called Winter Ice. So since the move happened, and I had to rearrange and clean the studio, I pulled all the fabrics that spoke to me of “cold.”
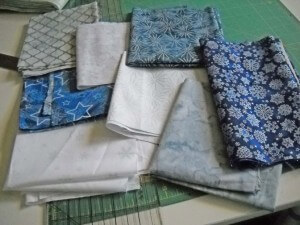 A beginning selection to work with. The center white one is full of glitter.
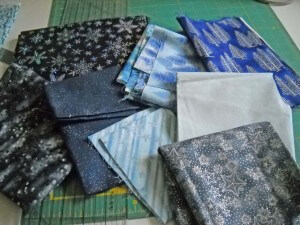 Except for the bottom right, ones that didn’t make it into the selection. I try to match a light and a dark, a light with a medium, a medium with a dark. I make waaayyyy more triangles than I need, because I like to have a variety to choose from. My center block with be eight by eight in triangles. You can work in groups of fours to keep a square: 4 by 4, 8 by 8, 12 by 12, and so on. I like the 8 by 8.
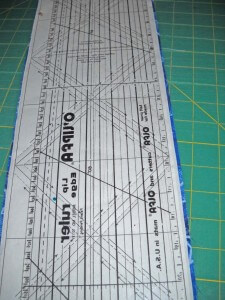
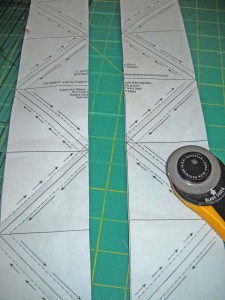
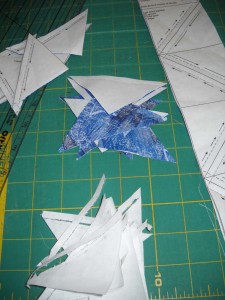
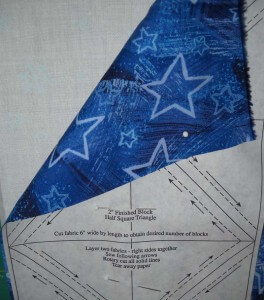 I like using the Triangles on a Roll, because you can do some mindless sewing. I cut pieces the long length of the fat quarter, about 6 inches wide. Put the right sides together. I tend to carefully pin, but if you don’t iron well first, you can get lumps in the back that may not come out with ironing, and may cause some stretching.
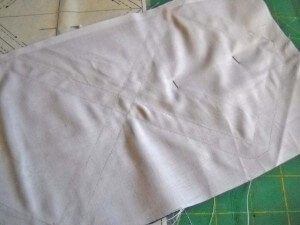 But the great thing about sewing these triangles is that you can just follow the lines. Use a small stitch, because you will be tearing the paper off each smaller triangle when you are done.
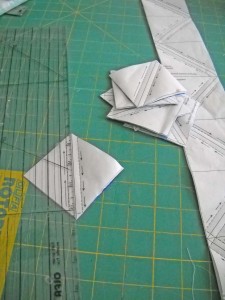
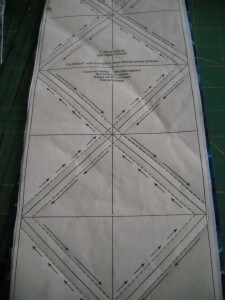 What’s nice about this also is that you can have several stages going at the same time…..sewing on the paper, cutting the triangles apart, tearing off the paper, pressing, cutting off little ears. Some at different times, or all at once. I like doing the stages.
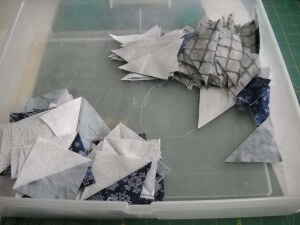
I iron to the dark piece. I tried on Desert Heat to iron all the seams open, and I ended up with major lumpy bumps, so this time through I am ironing everything to one side. I use a small container to keep my triangles, ironed and un. I just slowly work through the ironing. Once I have them all cut, I play around with a design. Below you can see how the initial triangles worked out.
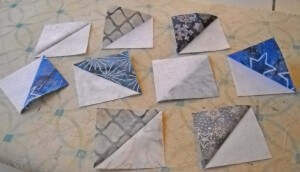
First part of a layout, just playing around…..
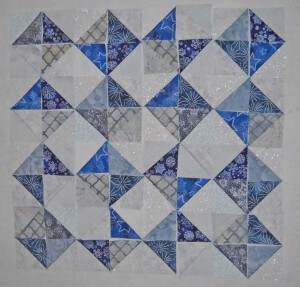 The last is the potential final layout.
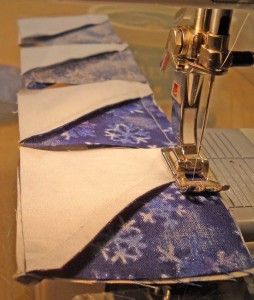
Then I strip-piece the rows together. This can be a bit tricky, as you are matching the seams on top of each other.
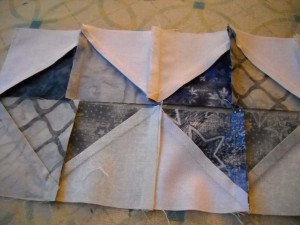
At this point you need to make some decisions again about ironing.
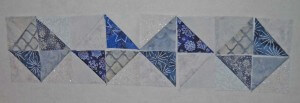
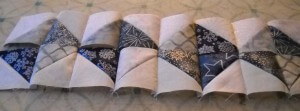 Here’s two rows pieced together, waiting for ironing. One row I press seams in one direction, the other row the seams in the other direction. Then you can “butt” each of the seams together for virtually perfect points.
 And that’s where we are at this point. I now have a draft of the beginning of the pattern, and I know all the places where I want to add more hints. So we’ll see where I am this time next Wednesday.
Any pattern-writing hints you want to share? Let me know – I’m interested in any and all ideas!
Other Work-in-Progress Wednesdays:
Monday Marketing – It’s the Packaging, Stupid….
 You would think, based on a hubby in retail for so many years, that I would have given packaging more of a priority. Well, no…seems like I’m always rushing to get items ready for shows, and I neglect the packaging. That’s not to say I don’t give a lot of thought to the overall set-up of the art space…just not the packaging.
I had a bit of an epiphany with this upcoming show. I’m sitting in the meeting about the show, listening to explanations of selling, how good a show it is, and the great location. When suddenly I hear “People are gift-buying. They’ll splurge for folks back home with gifts for the holidays.”
Okay, seems obvious. Then hubby says, “Well, they’re not going to buy pieces of fabric, so I’m not sure just what we’ll bring.” That made me fairly depressed. Fabric is what we do: fabric for quilts, wearables, framing – we’ve spent a lot of time brainstorming how folks could use our marbled fabric.
Then it hit. Buy fabric as gifts for the folks in your life who do fiber-related arts. Just package it so it looks like a gift from the heart, not just a piece of fabric in a plastic bag.
Duh. Why did this take so long? We have done so many small shows over the years, including demonstrations, and not once have we packaged ourselves for gift sales. This was definitely something to think about. How could we take a gorgeous piece of fabric that to a non-fiber person just looks like extra pieces of cloth on the table? I started thinking about how I buy small pieces of art, as well as how my local quilt shop packages your purchases. I love having the “back story” or a piece of artwork. In my hutch sits a container of all the small papers of stories collected over the years.
Okay, put together the story of the fabric, the care of the fabric, and ways to contact us (hard to believe we haven’t done all of that in the past). Wrap the fabric piece with a bow so that it looks special, with the “story” tucked into a fold of the fabric. When purchased, wrap in tissue paper before bagging it.
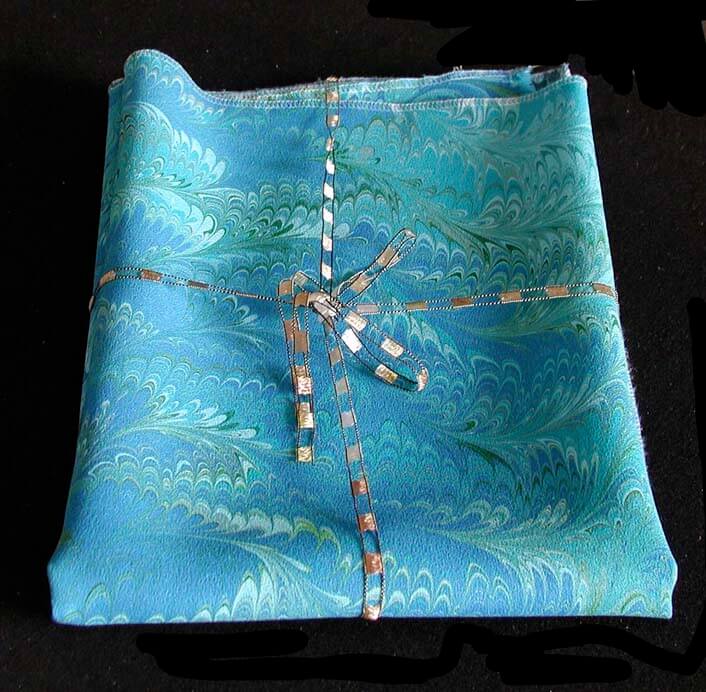
I played on the computer to come up with something that would have contact information as well as a story about the creation and care of the fabric. With aiming at non-fiber purchasers, I need to provide as many reasons as possible while a piece of “art cloth” would be a great gift. Here’s the “story:”
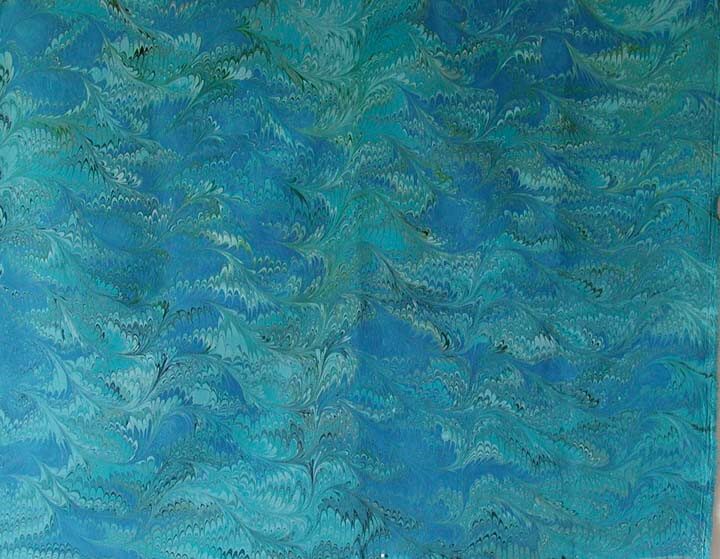
“This art cloth is a blue silk crepe georgette fabric, hand-marbled in a contemporary wave pattern, 19 inches by 21 inches. Edges are serged solely to prevent fraying of the fabric. This material has been pre-treated and heat-set, so it is ready to go for your project. If you need to clean this fabric, use warm water and a gentle soap – no Woolite or harsh cleaners, no dry cleaning. Use a dry iron and some Magic Sizing to eliminate wrinkles. Try this as a table-topper, just the way it is, quilt it, or use it in an art quilt for nature elements– lots of imaginative possibilities! This is a great pattern to quilt by itself with lots of decorative threads.”
Along with this is every contact piece – Twitter, Facebook fan page, blog, email and website. Save everything to your computer, and then all you need do is add the new story for each of your pieces.
Here’s the fabric and its packaging:
I will say the piece was up on Etsy for less than an hour before it sold, and all the new pieces of fabric packaged this way have had more views than previously in the shop.
The proof will be the show on November 20; how will people react, and will they buy?
Thoughts? What have you done to package your items? Have you noticed a difference in sales?
Work in Progress Wednesday – Two New Quilts
Awright, so they’re not technically WIPs. But I haven’t shown all of them on here before, and I really do love them. And close observers will recognize the blog heading as the fabric in “Salmon Run.”
“Salmon Run” returned from its several-month engagement in Alaska at the Cordova Historical Museum. I love having it back – I am so fond of the fabric.
 Here’s a close-up of the quilting.
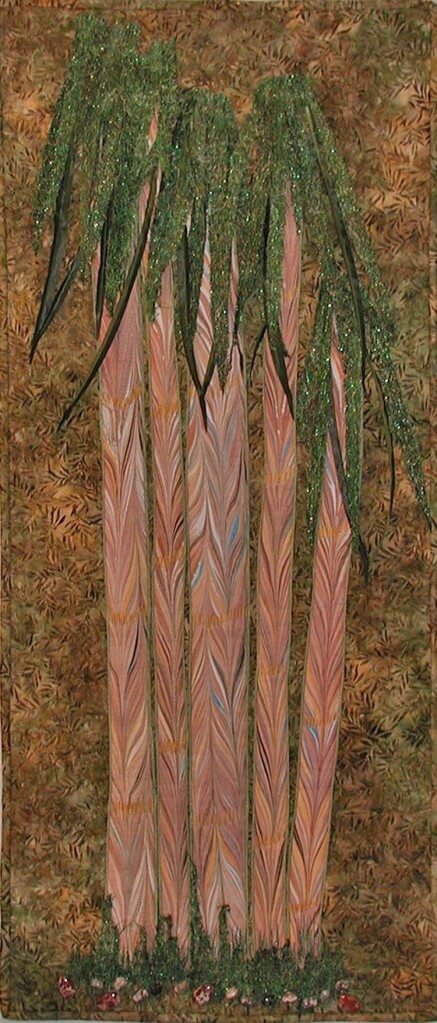
You also haven’t seen my latest piece, “Bamboo Grove,” in a full shot.
This piece had so many techniques I hadn’t tried before. I am reconsidering the tops of the bamboo stalks…I may decide to take the leaves off and try another way of attaching them to increase their fullness. So I guess it still is a “work in progress.”
What am I working on now? I am doing an art show on November 20 with the Tucson Art and Craft Association, so I am preparing fabric for that, as well as requilting a few small quilts. I am thinking of revising my still-unfinished “Iceberg” piece from several years ago into a series of Icicles for Road to California – I have till December 15. I can still use all the techniques I had planned, just in some different forms. I am still thinking about the next “large” piece with marbled fabric and don’t quite know what it’s going to be……I have some really great large pieces of fabric lying around.
But…I also have about four other quilts in various stages that I need to get to! Such decisions we all have….what’s waiting on your list of to-do?
Top Ten Tuesday – Cool stuff on the Web
 Ya gotta admit, that’s a catchy picture….the slippers on first glance look like little aliens checking things out. But this indicates it’s something cool from Dumb Little Man, which readers of the Tuesday posts will know always has something cool. This one is 30 Ways to Make TV Watching More Productive. There are some really great ideas here…for you sewing folk I would add “seam ripping stitches” – productive and therapeutic!
 Also from Dumb Little Man, 61 Ways to find Inspiration When You’re Stuck and Feeling Down. We can always use a little practical inspiration. Number 13 suggests browsing through Flickr photos, which I have just started to do – serious eye candy. If you want marbled goodies, here’s our Flickr site:
 From Maria Brophy comes How to Create Anything Even When You’re Scared, Inexperienced, and Don’t Believe in Yourself. It’s a mouthful, but it’s all about baby steps….
From PlugIn ID comes a great article on the butterfly effect, quoting Gandhi saying “Be the change you want to see in the world.”
Problogger is a great source of ideas for writing a blog. Here’s some info on making it easier for customers to buy from you. Great ideas here.
Here’s some fabulous fiber art to look at – the fabric collages of Wycliffe Lincoln.
 These guys always have great stuff – I’ve posted from them before. This is 60 Creative Examples of Infographics. If you like data presented in a very visual manner, check this out.
 Now who among us hasn’t given some thought to making art from Post-Its? I create little cubes when I’m bored, but this kind of goes waaayyy beyond that! Check out Georgia O’Keefe…..
From Selfgrowth.com comes a really helpful article on pricing digital painting, something I’m becoming very interested in.
And finally, treating yourself like a Ferrari – something we should all do!
What have you found as you’ve been surfing?? Pass it along – I love looking at new stuff!
Sunday Stories – Entering Fiber Shows
![]() Over the last thirteen years I have been entering fiber shows and the occasional quilt show with some success. The “Fish Follies” show each year at the Cordova Historical Museum in Cordova, Alaska has been very good to me, with acceptance both in fiber and digital categories each time I enter. I really think through the pieces I enter to be sure they fit the theme – I think I’m just not crazy enough in the “Follies” area to place.
Over the last thirteen years I have been entering fiber shows and the occasional quilt show with some success. The “Fish Follies” show each year at the Cordova Historical Museum in Cordova, Alaska has been very good to me, with acceptance both in fiber and digital categories each time I enter. I really think through the pieces I enter to be sure they fit the theme – I think I’m just not crazy enough in the “Follies” area to place.
In 2004 I took a BIG chance and entered the Expressions in Textiles show in New Haven, CT. My “Rock Garden” piece made it in, much to my delight, and when I saw the list of acceptances, I was kinda stunned. All of a sudden I was in the “big girl” league. I was thrilled. This was essentially a whole cloth quilt, a half yard of a stone marbled pattern that seemed like it was quilted to death.
This is just a small portion, but everything in this quilt came together perfectly. I had initially bordered it in a black satin, thinking of the Japanese laquerwork, but eventually Iplicked out a smooth sand-ish fabric so the stones wouldn’t seem “hemmed in.”
That same time I had my “Mandala 1: Core” accepted into a quilt show, Fabric of Legacies, in Ft. Collins, CO.
This was another whole cloth quilt, but at this point I was thinking that there were going to be a lot of venues that would look at very non-traditional fiber. I have since had my “Low Tide” piece juried into that show.
Most of my quilts were rejected over the next few years, and I pretty much stopped entering shows. I think some was due to poor slide quality, some to the whims of the juror…one piece I did for a show about changing the world’s problems. I chose endangerment/extinction and did a piece on the rain forest and was told it didn’t fit the theme. So I guess the learning from this was to continue, that not everyone interprets things the same way.
When we went through our “dry period” of marbling, when nothing was working, I didn’t even work on pieces, like my bamboo, that had already been started. Now, though, I have started to look ahead to shows, quilt and art, and plan for new pieces, since most of what I have is too old. If my early pieces were accepted, and I’ve improved a hundred fold in my skills since then, then I should be on track for a few more acceptances.
We’ll see…deadline for the bamboo is September 3, with notification around September 15. Time to make a list of new deadlines and what will be entered…and what will be new creations.
Design Decisions in Fiber Art
 So it’s been an interesting Saturday, with almost giving up at 1o this morning, thinking I would just submit one piece, rather than trying to show my overall style – which is certainly unique – any maybe too different…. My leaves are done, and my strips are done. I know how I’m going to make the grass and what stones I am going to use. But it’s the actual layout….
I want a stand of bamboo. My original idea, some eight years ago, was to have it free-hanging – strips of bamboo, with some type of hanging system at the very top. Well, I figured if I did the leaves all at the top, I could put a casing behind them for a rod. When I actually had it on the design wall this morning…didn’t really grab me.
Then I tried one of the jungle background fabrics, figuring I could make a background and attach the bamboo on top of it. Well…I ironed, pinned to the wall, added the strips, and then added leaves at the top….and…it was better, but certainly not a grabber. I tried shortening the strips – after all, they were at least 50 inches – nice, tall bamboo. Somewhat better.
I played around with a different leaf arrangement. Nope. Tried more strips beyond the five. Nope. While I like 8 because it’s a Fibonacci number, there was too much bamboo.
Last Sunday I went to my local quilt shop, Quilter’s Market (the BEST store, except for G Street….) with strips in hand to look at some other potential background fabric. I found one that was fairly “jungle-y” and worked with the browns and the greens. I pulled that out, ironed it, and cut it in half – top and bottom. I pinned the strips back on…this time I had them straight, but I had the top angled into the forest….five strips kind of angled downward from left to right….added the leaves in some different arrangements, and voila – I LIKE it! Now it’s more what I had in my mind. I needed to shorten the strips and angle them – while bamboo grows straight, it ain’t perfect.
I need to go buy about another third of a yard for binding. (They were almost at the end of the bolt last week…hmmm…) I’ve been going back and forth about a frame or not. I am thinking a simple binding, as I don’t want to constrain the bamboo with a frame around the jungle, especially as I plan to have leaves out and about the edging. There is a possibility I will need to make more leaves – I have most of what I need, but they are pretty time-consuming. At this point I can see myself making the deadline, especially with another whole weekend available. And I’m pleased…so we’ll see about progress tomorrow. I promise a small picture when it’s a little more together.
This whole process is extremely interesting. I find myself making more and more complex decisions as I learn new techniques and expand what my sewing workhorse (Bernina 1080) and serger (Bernette) will do – or what I will make them do. I will say my serger wasn’t totally happy with my choice of threads (some really fancy light-weight ones) for the edging…but except for re-threading the needle, I was in pretty good shape. I just need to remember to put the serger back into its original sewing condition for hubby to serge the new fabric for the Labor marbling…he’s not real thrilled with having to thread the machine….
Sunday Stories – Gaia 2
I love this piece, absolutely my favorite so far of everything I’ve ever done. I really had no idea going in to this just what would emerge…everything was trial and error, but thankfully, very little error.
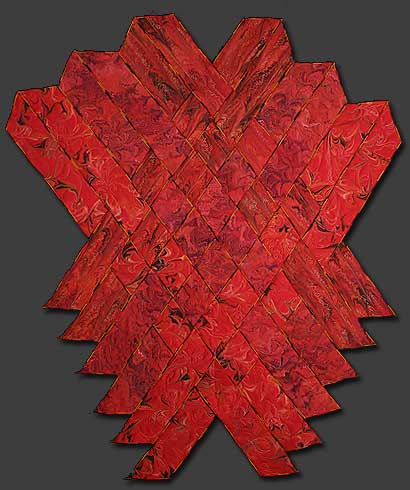
This piece started as a result of finishing a commission that was done on red unpolished satin. Six half-yard pieces were marbled, with my using a total of four of the finished pieces. My idea was to create a piece that would represent the volcanic origins of the earth and the goddess Pele. For the longest time this piece was known simply as “Pele.” I used a different marbling pattern on each of the half-yards, as I wanted interest within the piece.
Ever since my first teaching job on Maui, I have been fascinated with the stories of Pele, the Fire Goddess, and I was always on the lookout for the Lady in White when I drove home over the Pali at night. I didn’t realize it then, but Pele and fire have woven their ways through much of my work.
I really had no idea how these were going to weave together. I experimented and ended up with this weaving, starting with a tighter bottom and then “exploding,” much like magma does as it reaches the surface and becomes lava. The only problem with this shape came as I realized I had to figure out a way to anchor everything together. The strips are heavily hand-stitched together on the back – twice, as I discovered I had to make it much tighter to hold the weight of the piece.
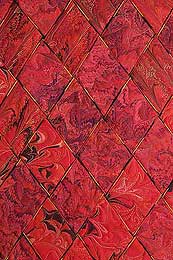
A free-form pattern makes up the bottom four strips. The next four strips are the “wave” pattern, and the last four strips are what we call the ”fountain” pattern. A fourth pattern of a very small feather was ultimately not used in the weaving.
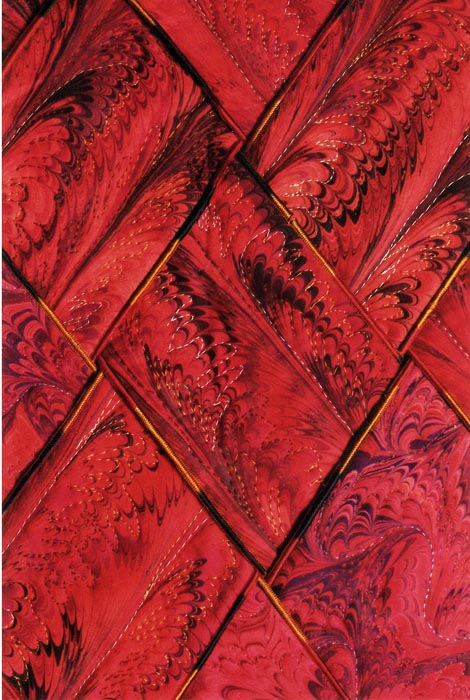
Each piece was sandwiched and serged with a variegated thread before any quilting was done. I liked the effect from the variegated thread, and I use that technique a lot now. But I have since changed how I put the individual strips together, with serging only one side or none at all, leaving another design element for later. The free-form strips were quilted using a variegated Sulky thread to accent the pattern. The four “wave” strips were quilted by following an initial curved line throughout each of the pieces and then coming back with a different metallic thread to accent the marbled pattern. The four “fountain” pieces were quilted in a distinctly different shade of thread to accent the eruption of lava.
Now, you have to understand I hadn’t done a whole lot of machine quilting to this point, beyond stitch-in-the-ditch. This was brand new territory for me! But ultimately I was hooked….I quilt most of my marbled fabrics now, and the patterns can be very zen-like to quilt. Here’s another close-up:
I truly love this piece, and I know I’ll never get another one just like it. It’s a little bold for any of our walls where we are living now, but one day, when I retire and the place is a little bigger, it will hang again!
For those of you who haven’t subscribed to our newsletter, we are doing a drawing again from all our subscribers for a FREE Sampler Package 1. You can visit our website to see this. Be sure to sign up – the form is at the top on the right.
And…tell me the story of one of your favorite pieces. I’ll include stories in a future “Sunday Stories” post.
Work-in-Progress Wednesday
I have been thinking about the leaves for the bamboo piece. As I mentioned last Wednesday, I think the silk leaves would be too plain, and I didn’t like how they marbled, and I think thread leaves would be too fragile for such a sturdy plant. Then it occurred to me to do what I do in the classroom – it’s not an either/or, so why not combine the two.
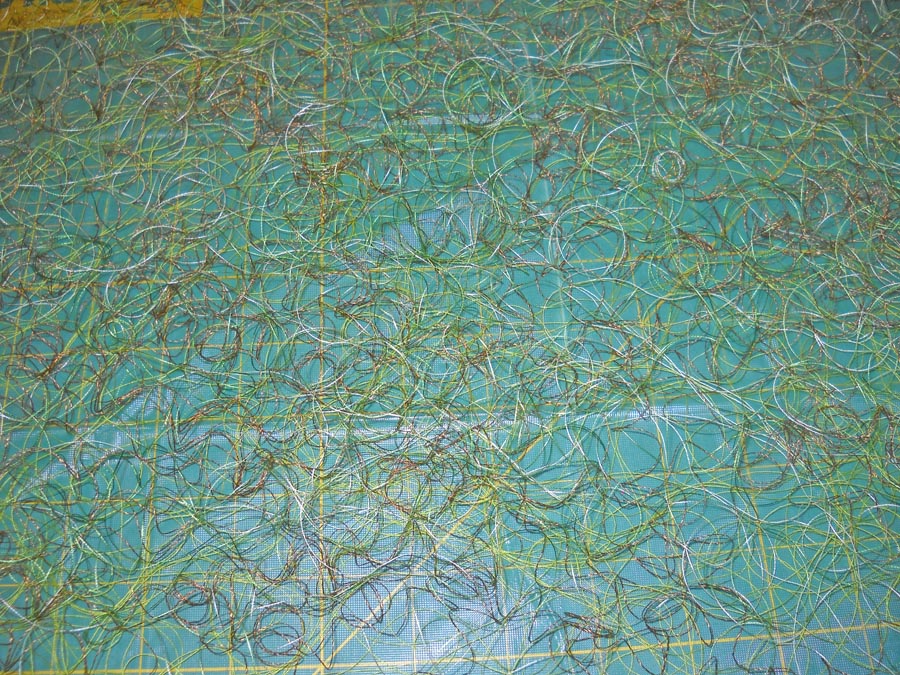
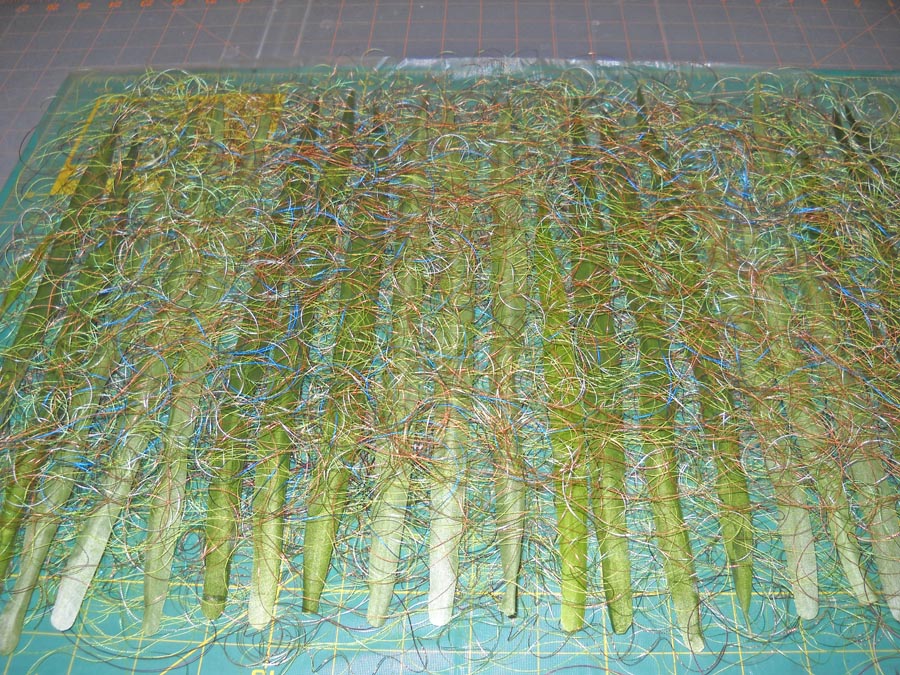
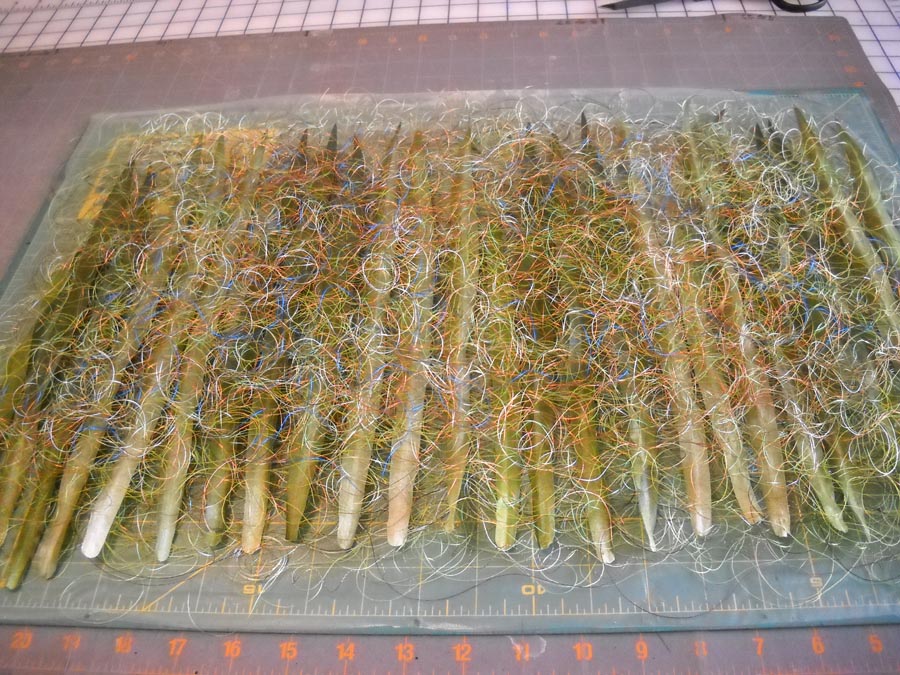
I started by cutting a piece of Dissolve from Superior Threads and taped it to an old cutting mat – that stuff is slippery. Then I started layering some of the old yucky threads I have.
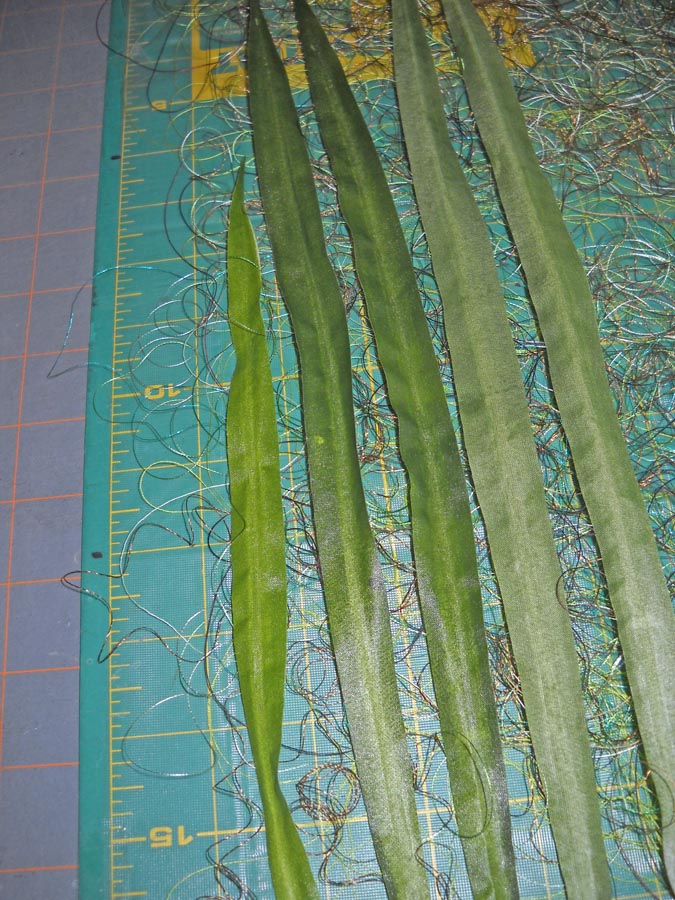
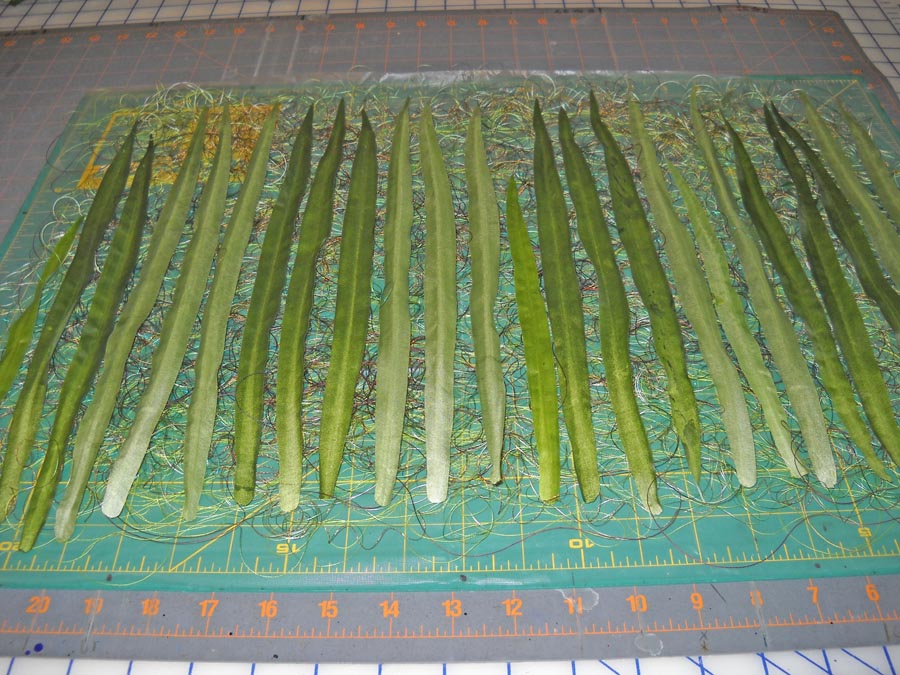
At this point it occurred to me that I could layer the silk leaves across this base of thread, after I pulled off the wire from the backing.
I turned some of them wrong side up, figuring I would be stitching on both sides of the sandwich, so I would get some additional effects front and back.
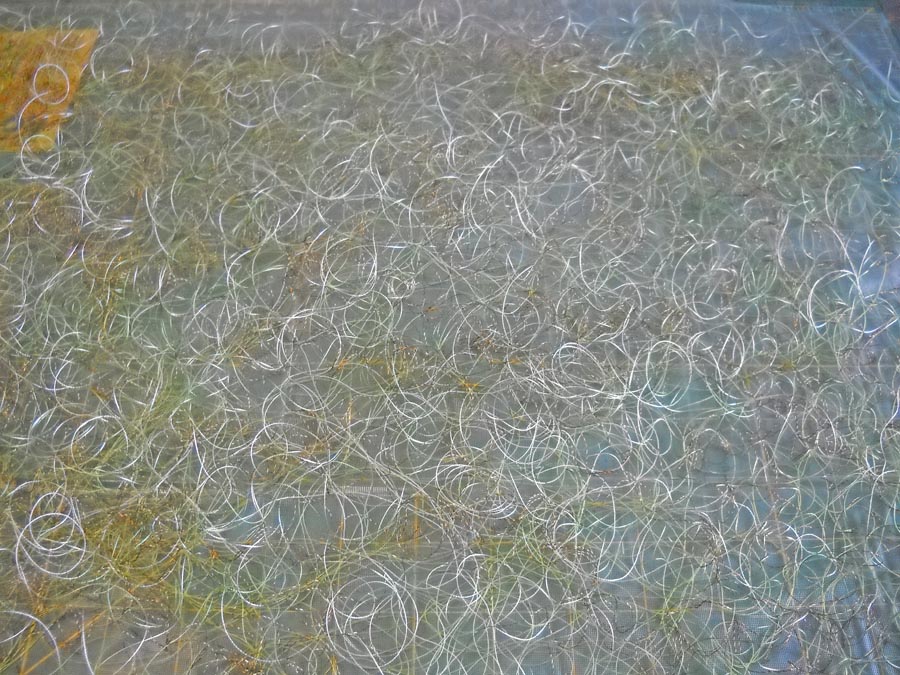
I am pleased to say it occurred to me earlier not to run the overhead fan in the studio while I was working on this….At this point I am ready to layer more thread on the top of this. Keep in mind I have no idea if this is going to work….
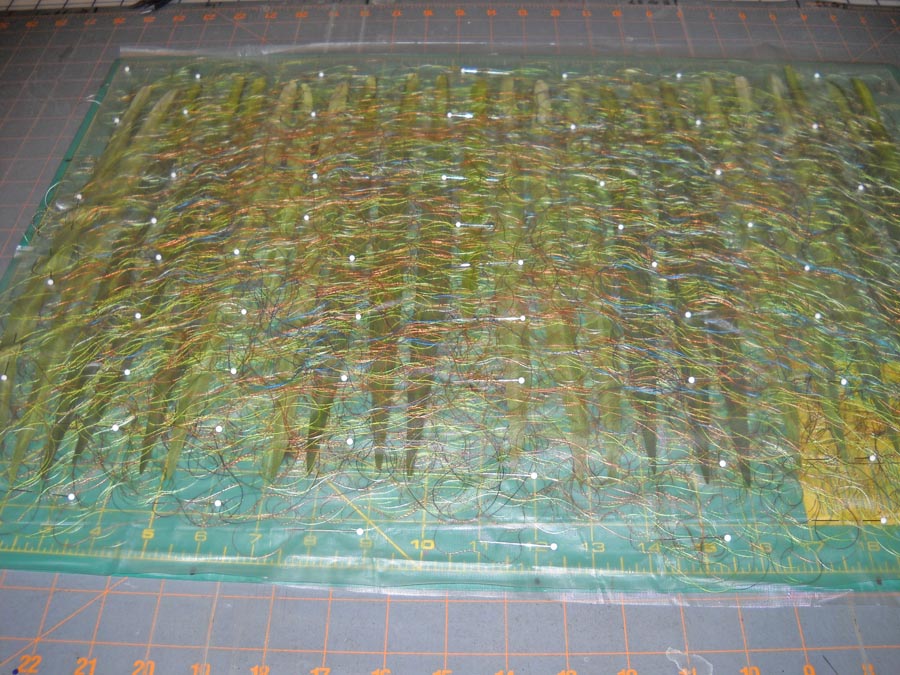
Now at this point I need to cut another piece of Dissolve to go over the top of this.
Now it is ready for stitching. I need to order some thread – Razzle Dazzle to use in the bobbin, and some green Lava for top and bottom. I figure I can order this week and while I’m waiting, I can finish up the bamboo strips. Once I cut everything apart, all the little slivers will become part of the base where the strips are mounted. I don’t know if I will need more leaves. I am counting on the leaves at the top to hide the hanging system. I do have plenty of silk leaves – I would need to get some more cheap thread if I need to do more thread work.
Any of you try anything like this? Suggestions? Ideas? Pitfalls? Inquiring minds and all that….
(Think Horschak) Oooh, Oooh, Oooh……I have some great tree agate I have been collecting from the gem shows….they would add some interest and weight to the bottom of the piece…I knew there was a reason I was collecting them……
Sunday Stories
I love reading blogs about the stories behind the art we create. It occurred to me I could document (primarily for myself) the process and story behind some of our pieces in our gallery on the website. There is a page on the site with some very early quilts, including an original design for a math program I participated in.
This is the PRIME quilt – the name of the program was Promoting Reform in Mathematics Education, and it was a total of 6 weeks over three summers at the University of Arizona. We gave this quilt to our professors at the end of the third summer, and it still resides in the math department.
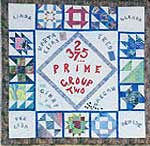 The center is the program itself, with the first few prime numbers. Each triangle attached to it is the name of one of the professors, with a little graphic representing each one; Fred, for example, had the calculator. The four corners are the teacher assistants we had, and each of the blocks is made with marbled fabric and a PRIME number of pieces. Let me tell you, the block with 37 pieces was a doozy to do.
We all signed the back of the quilt and presented it with the message that a puzzle was built into the quilt. Five 9 years later I filled in two of the professors as to what the puzzle was – the prime number of pieces. This was a fun quilt to design.
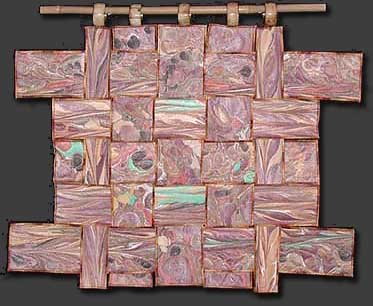
The quilt that started me on my present journey with marbled fabric is Gaia 1: Interdependence.
This is kind of a cross between a traditional stone pattern, some basic combing of paint, and some chevron pattern. When the fabric came out of the tray, I liked the interplay of the turquoise with the earthy colors. The turquoise reminded me of the gifts from the earth. I don’t know why I started to cut into strips – maybe just because I wanted to try weaving something. I really don’t remember.
I had five strips and nothing was working. Then I decided to just weave it back and forth and see what would happen. I liked where it was going and cut the strips in half so I would have more to work with. I used a thin batting (which I since use exclusively) and backed it with a fossil fern fabric. Then I started to quilt, just by following the lines of the fabric. I went for three hours without stopping because I was loving how it was working.
I didn’t want bindings. I thought it would detract from the message of interdependence of all the elements on earth. Then I hit on serging the edges. Now this was before I really understood what a serger can do. I still hadn’t figured out rolled edges. But I knew I wanted some type of variegated thread, so I just experimented.
Then came trying to hold it together. I used a LOT of pins and very carefully pulled the weaving off the design wall onto the quilting table upside-down and started to stitch all the strips together. Let me tell you, that took forever….
Well, the problems weren’t over. A basic sleeve wasn’t going to work for hanging, so I spent a few weeks trying to figure that out. I ended up buying a set of napkin rings with an earthy feel to them and looked for a piece of bamboo. The big problem was anchoring the napkin rings to the strips – with a lot of delicate sewing….but the piece has hung for five years in an office in Tucson with not a single problem.
I knew when this was finished I was on to something. The bamboo I am currently working on will be the fourth in the Gaia series of weavings. I do want to do more…the images I saw of rice paddies in southern China would make another interesting weaving…..
