Archive for the ‘serging’ Category
Sunday Stories – My Sewing Machines
 At one point I had three, with another on layaway. I guess four, counting my serger. It was the HUGE, HEAVY Singer that my mother had that first intrigued me. I sewed mostly at college on a small Singer a sorority sister had, but when I went home for holidays it was that old heavy Singer that I used – I don’t think the needle was ever changed, and it only went forward and back, but it was enough for wardrobe.
My first teaching job was in Hawaii, and after buying my very first car, I bought a Singer sewing machine. When I left Maui, I donated it to the drama club for costumes – that machine had done all the holokuus we used for two musicals, plus a lot of muumuus for me over the years.
Back in Vermont I needed a new sewing machine, so I bought a fancy Singer – with stretch stitches…yup, time for polyesters and stretch knits. This was when I took every Stretch and Sew class I could, and pretty much bought out all their patterns. I learned a lot of design, and for the next decade I made all my clothes…and a leisure suit for hubby. I wanted the capability to do fancy stitches, so when the funds were there, I got a new Singer – computerized, with lots of decorative stitches. And…a bobbin that wound itslef right in the machine.
My dear mother-in-law got the older Singer, as she would sew doll cloths and bags for the grandchildren. That new Singer did wonders and got me started in quilting. When my mother-in-law died, the machine reverted back to me, along with her Featherweight. Finances were such that I had to sell the featherweight, much to my regret, but it went to a good home – a quilter friend of mine.
I discovered that using the zigzag to edge cotton before marbling wasn’t really working on my old Singer. I seemed to always overheat the motor, so I went looking. Enter my serger, a Bernette. Two great ladies who had a fabric store and bought marbled fabric from us fronted a used serger for me. It’s still going very strong, although I must confess a profesisonal cleaning would probably be a good idea, even though I am good to it….
Between the marbling and the quilting, my other two Singers weren’t doing it for me, so I began to investigate Berninas forther, since I loved the serger. We were fortunate in that the local Bernina folks, Bruce and Mary Sue, were very supportive of our marbling. I put a hundred dollars down on a 1080 Bernina workhorse, figuring I could get it in a few months. Well, several years later I got my machine and it’s been purring since then.
In order to fund some basic expenses we had a yard sale, and the two old Singers went to new homes, feet and all. I miss them, but I do love my Bernina. There are times when I wish it did more – like needle-down and stitch regulator, but my basic skills have improved tremendously. In fact, when I was at the School of Threadology I was using a new Bernina and I wasn’t happy – mainly because I didn’t fully understand what it could do – I knew the limits of mine and wanted it with me.
I’m still lusting for new machines – my serger is nearly 15 years old, I want an embroidery machine, I want a machine that can take designs and new stitches along with a stitch regulator, but that’s in the future. For now I love my Bernina and all it’s teaching me.
Sunday Stories – Black and White with a Hint
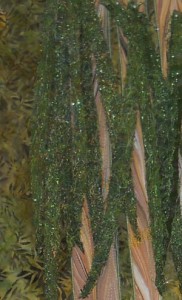
Yesterday I wrote about what’s happening with the bamboo piece. Here’s a sneak piece of it in VERY rough form:
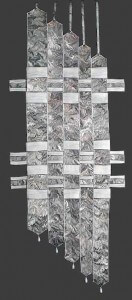
Now to today’s story – my piece for “My World in Black and White,” a show curated by Anne Copeland, like around 2003. This was a challenge issued on the QuiltArt list, and I decided to try something. Here’s the piece:
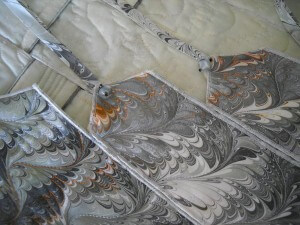
This was the first show where I realized I had to pay more attention to the theme. Mine was a more abstract look at black and white. We marbled a three-quarter-yard piece of unpolished white satin in blacks and whites. There was still a little orange left in the tray from a previous piece, so the name became “Black and White with a Hint.” I cut five strips and quilted them, following the marbled patterns. You can see the hints of orange.
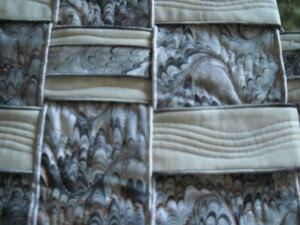
At this point, I really didn’t know what form this was going to take. I decided to stagger each of the strips, but it was pretty boring with just the strips. That’s when the “hidden” architect in me took over. I marbled some ribbon, serged the edges of the ribbon to carry the serging motif through, and attached it to some strips of gray cotton. I did eight strips all together, some of them plain with just a meandering quilting line, and some with the ribbon, and then I wove them through the other strips.
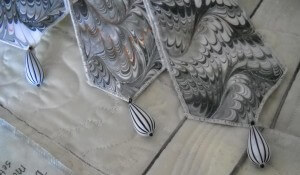
I liked how it was shaping up, and now I had to deal with a hanging system, as well as finishing the bottom. I figured I wanted some beads to hang at the bottom. I went to the local bead store and found these teardrops – have NEVER seen anything like them since then.
If you look closely, you can see how each strip gets hand-stitched to the ones around and underneath it. I figured I would use a plexiglass rod for the hanging system. I marbled some thinner ribbon, and with careful measurements attached the various lengths at the top, with a bead embellishment.
I learned a lot, as I seem to do on every piece, and this is still one of my favorites – my first piece to travel (to Ontario, CA as well as the online exhibit), my first piece that was professionally appraised, my first piece that “hung” in a very different style, and my first ribbon (for entering, but none-the-less still special!).
I am really enjoying revisiting these pieces and their stories. I hope you enjoy as well.
Design Decisions in Fiber Art
 So it’s been an interesting Saturday, with almost giving up at 1o this morning, thinking I would just submit one piece, rather than trying to show my overall style – which is certainly unique – any maybe too different…. My leaves are done, and my strips are done. I know how I’m going to make the grass and what stones I am going to use. But it’s the actual layout….
I want a stand of bamboo. My original idea, some eight years ago, was to have it free-hanging – strips of bamboo, with some type of hanging system at the very top. Well, I figured if I did the leaves all at the top, I could put a casing behind them for a rod. When I actually had it on the design wall this morning…didn’t really grab me.
Then I tried one of the jungle background fabrics, figuring I could make a background and attach the bamboo on top of it. Well…I ironed, pinned to the wall, added the strips, and then added leaves at the top….and…it was better, but certainly not a grabber. I tried shortening the strips – after all, they were at least 50 inches – nice, tall bamboo. Somewhat better.
I played around with a different leaf arrangement. Nope. Tried more strips beyond the five. Nope. While I like 8 because it’s a Fibonacci number, there was too much bamboo.
Last Sunday I went to my local quilt shop, Quilter’s Market (the BEST store, except for G Street….) with strips in hand to look at some other potential background fabric. I found one that was fairly “jungle-y” and worked with the browns and the greens. I pulled that out, ironed it, and cut it in half – top and bottom. I pinned the strips back on…this time I had them straight, but I had the top angled into the forest….five strips kind of angled downward from left to right….added the leaves in some different arrangements, and voila – I LIKE it! Now it’s more what I had in my mind. I needed to shorten the strips and angle them – while bamboo grows straight, it ain’t perfect.
I need to go buy about another third of a yard for binding. (They were almost at the end of the bolt last week…hmmm…) I’ve been going back and forth about a frame or not. I am thinking a simple binding, as I don’t want to constrain the bamboo with a frame around the jungle, especially as I plan to have leaves out and about the edging. There is a possibility I will need to make more leaves – I have most of what I need, but they are pretty time-consuming. At this point I can see myself making the deadline, especially with another whole weekend available. And I’m pleased…so we’ll see about progress tomorrow. I promise a small picture when it’s a little more together.
This whole process is extremely interesting. I find myself making more and more complex decisions as I learn new techniques and expand what my sewing workhorse (Bernina 1080) and serger (Bernette) will do – or what I will make them do. I will say my serger wasn’t totally happy with my choice of threads (some really fancy light-weight ones) for the edging…but except for re-threading the needle, I was in pretty good shape. I just need to remember to put the serger back into its original sewing condition for hubby to serge the new fabric for the Labor marbling…he’s not real thrilled with having to thread the machine….
Sunday Stories – Gaia 2
I love this piece, absolutely my favorite so far of everything I’ve ever done. I really had no idea going in to this just what would emerge…everything was trial and error, but thankfully, very little error.
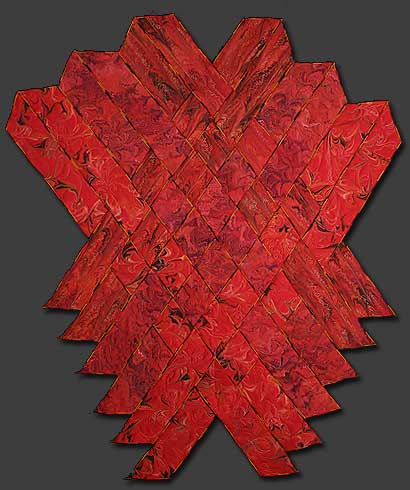
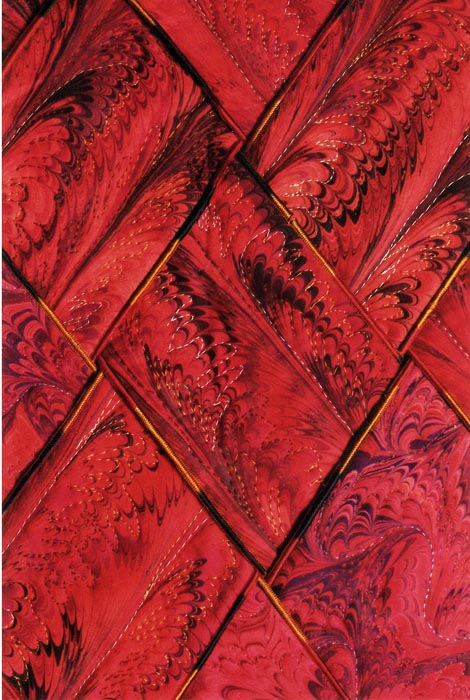
This piece started as a result of finishing a commission that was done on red unpolished satin. Six half-yard pieces were marbled, with my using a total of four of the finished pieces. My idea was to create a piece that would represent the volcanic origins of the earth and the goddess Pele. For the longest time this piece was known simply as “Pele.” I used a different marbling pattern on each of the half-yards, as I wanted interest within the piece.
Ever since my first teaching job on Maui, I have been fascinated with the stories of Pele, the Fire Goddess, and I was always on the lookout for the Lady in White when I drove home over the Pali at night. I didn’t realize it then, but Pele and fire have woven their ways through much of my work.
I really had no idea how these were going to weave together. I experimented and ended up with this weaving, starting with a tighter bottom and then “exploding,” much like magma does as it reaches the surface and becomes lava. The only problem with this shape came as I realized I had to figure out a way to anchor everything together. The strips are heavily hand-stitched together on the back – twice, as I discovered I had to make it much tighter to hold the weight of the piece.
A free-form pattern makes up the bottom four strips. The next four strips are the “wave” pattern, and the last four strips are what we call the ”fountain” pattern. A fourth pattern of a very small feather was ultimately not used in the weaving.
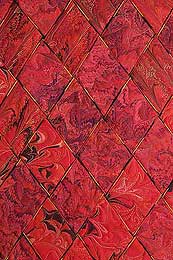
Each piece was sandwiched and serged with a variegated thread before any quilting was done. I liked the effect from the variegated thread, and I use that technique a lot now. But I have since changed how I put the individual strips together, with serging only one side or none at all, leaving another design element for later. The free-form strips were quilted using a variegated Sulky thread to accent the pattern. The four “wave” strips were quilted by following an initial curved line throughout each of the pieces and then coming back with a different metallic thread to accent the marbled pattern. The four “fountain” pieces were quilted in a distinctly different shade of thread to accent the eruption of lava.
Now, you have to understand I hadn’t done a whole lot of machine quilting to this point, beyond stitch-in-the-ditch. This was brand new territory for me! But ultimately I was hooked….I quilt most of my marbled fabrics now, and the patterns can be very zen-like to quilt. Here’s another close-up:
I truly love this piece, and I know I’ll never get another one just like it. It’s a little bold for any of our walls where we are living now, but one day, when I retire and the place is a little bigger, it will hang again!
For those of you who haven’t subscribed to our newsletter, we are doing a drawing again from all our subscribers for a FREE Sampler Package 1. You can visit our website to see this. Be sure to sign up – the form is at the top on the right.
And…tell me the story of one of your favorite pieces. I’ll include stories in a future “Sunday Stories” post.
Sunday Stories
I love reading blogs about the stories behind the art we create. It occurred to me I could document (primarily for myself) the process and story behind some of our pieces in our gallery on the website. There is a page on the site with some very early quilts, including an original design for a math program I participated in.
This is the PRIME quilt – the name of the program was Promoting Reform in Mathematics Education, and it was a total of 6 weeks over three summers at the University of Arizona. We gave this quilt to our professors at the end of the third summer, and it still resides in the math department.
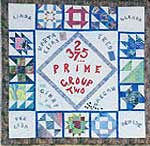 The center is the program itself, with the first few prime numbers. Each triangle attached to it is the name of one of the professors, with a little graphic representing each one; Fred, for example, had the calculator. The four corners are the teacher assistants we had, and each of the blocks is made with marbled fabric and a PRIME number of pieces. Let me tell you, the block with 37 pieces was a doozy to do.
We all signed the back of the quilt and presented it with the message that a puzzle was built into the quilt. Five 9 years later I filled in two of the professors as to what the puzzle was – the prime number of pieces. This was a fun quilt to design.
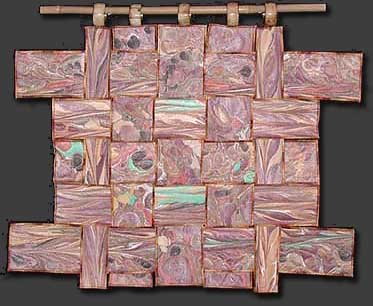
The quilt that started me on my present journey with marbled fabric is Gaia 1: Interdependence.
This is kind of a cross between a traditional stone pattern, some basic combing of paint, and some chevron pattern. When the fabric came out of the tray, I liked the interplay of the turquoise with the earthy colors. The turquoise reminded me of the gifts from the earth. I don’t know why I started to cut into strips – maybe just because I wanted to try weaving something. I really don’t remember.
I had five strips and nothing was working. Then I decided to just weave it back and forth and see what would happen. I liked where it was going and cut the strips in half so I would have more to work with. I used a thin batting (which I since use exclusively) and backed it with a fossil fern fabric. Then I started to quilt, just by following the lines of the fabric. I went for three hours without stopping because I was loving how it was working.
I didn’t want bindings. I thought it would detract from the message of interdependence of all the elements on earth. Then I hit on serging the edges. Now this was before I really understood what a serger can do. I still hadn’t figured out rolled edges. But I knew I wanted some type of variegated thread, so I just experimented.
Then came trying to hold it together. I used a LOT of pins and very carefully pulled the weaving off the design wall onto the quilting table upside-down and started to stitch all the strips together. Let me tell you, that took forever….
Well, the problems weren’t over. A basic sleeve wasn’t going to work for hanging, so I spent a few weeks trying to figure that out. I ended up buying a set of napkin rings with an earthy feel to them and looked for a piece of bamboo. The big problem was anchoring the napkin rings to the strips – with a lot of delicate sewing….but the piece has hung for five years in an office in Tucson with not a single problem.
I knew when this was finished I was on to something. The bamboo I am currently working on will be the fourth in the Gaia series of weavings. I do want to do more…the images I saw of rice paddies in southern China would make another interesting weaving…..
Work-in-Progress Wednesday
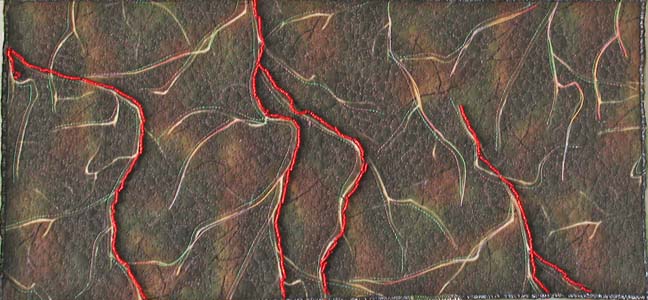
I have to say, I have been busy. I originally was thinking nothing was going to happen art-wise in July because of so much work on the business. I was wrong…the last week has been incredibly productive. Last Wednesday I wrote about my lava piece just telling me it really wasn’t finished. Here’s last week:
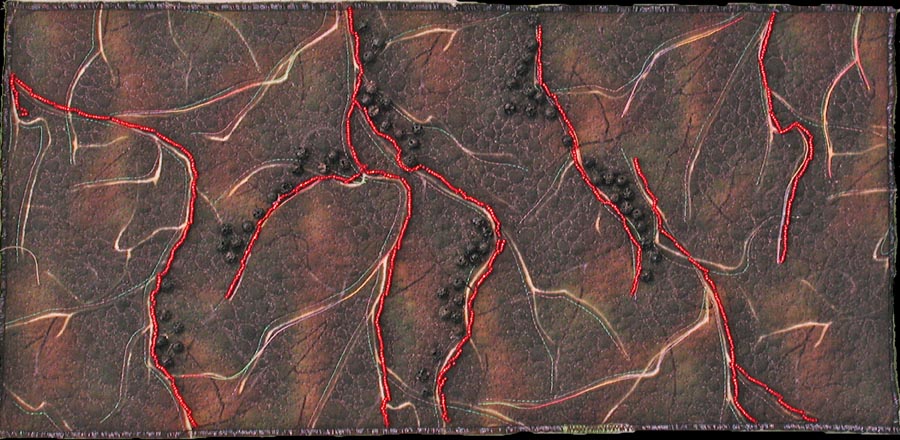
And here it is now, since it told me it was “finished:”
Turns out it needed actual lava – those little round pieces are actual chunks of lava I collected over a couple of visits to the Tucson Gem Show each February. I also added more lava flows, and nothing really interferes with the quote on the back. This is going to go up in the newly-developing Etsy store.
My “purse” didn’t make it as a purse…I loved the play of the fabrics together, but I couldn’t get handles to work the way I wanted them to…so now it’s a nice new basket for collecting fabric scraps.
If you were reading on Sunday, you saw the finished “Desert Heat” quilt, now on the wall in our bedroom.
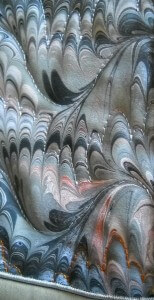
Now I am working on my “bamboo” quilt, started about 5 years ago with a piece of marbled fabric in the chevron pattern. One of the things I like about this quilting is that it is very zen-like, in that you can just follow the lines of the patterns. You can see the original piece of fabric here. You’ll see what I mean about the lines of the pattern.
As I was quilting yesterday, it occurred to me to take pictures of the process, and then that led me to think about putting together a tutorial on quilting marbled fabric. There is an interesting story behind the quilting. Years ago I pretty much just put marbled fabrics with blacks, as I wasn’t sure at all about my color sense. I did slowly branch out, but it was Quilt artist Ellen Kohen who took a piece of fabric and quilted it. I knew there was more I could do with the fabric, but I wasn’t sure how to approach it. Once I saw what Ellen had done, I was hooked, but it took confidence to start the free motion needed to accent these patterns. Starting this Sunday, I’m going to introduce “Sunday Stories,” and I’ll take a look at the story behind each of the pieces in my gallery on the website.
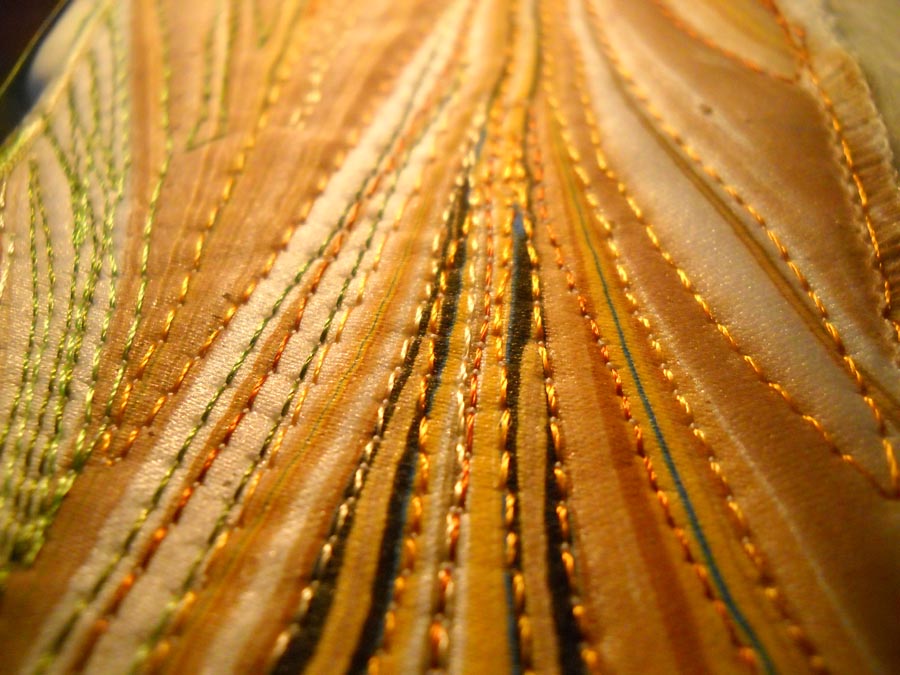
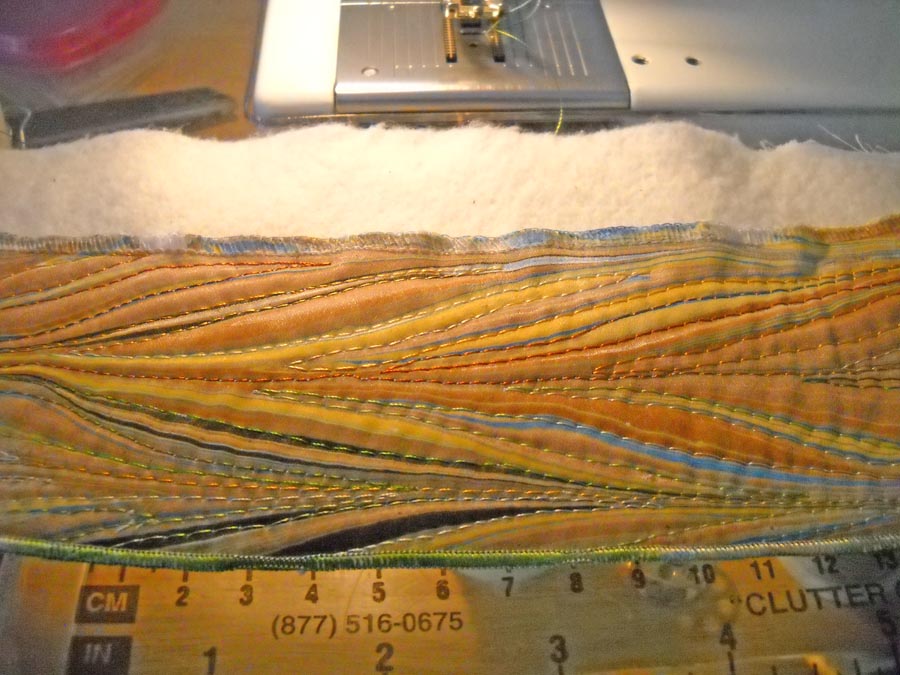
For today, here’s a close-up look at one of the bamboo strips (which I am aiming to finish by mid-August, as I want to enter it into an art quilt show with my “Ocean’s Bounty.”) You can easily see all the “lines” in the pattern and how I have followed the lines with a variety of different colored threads. The problem you might run into (as I have) is when to stop with the lines – you can get easily sucked in to quilting everything.
You can see the serged edge in this piece – which is how I usually finish these weaving pieces. I’ve learned over the years not to serge until I am finished with the machine quilting.
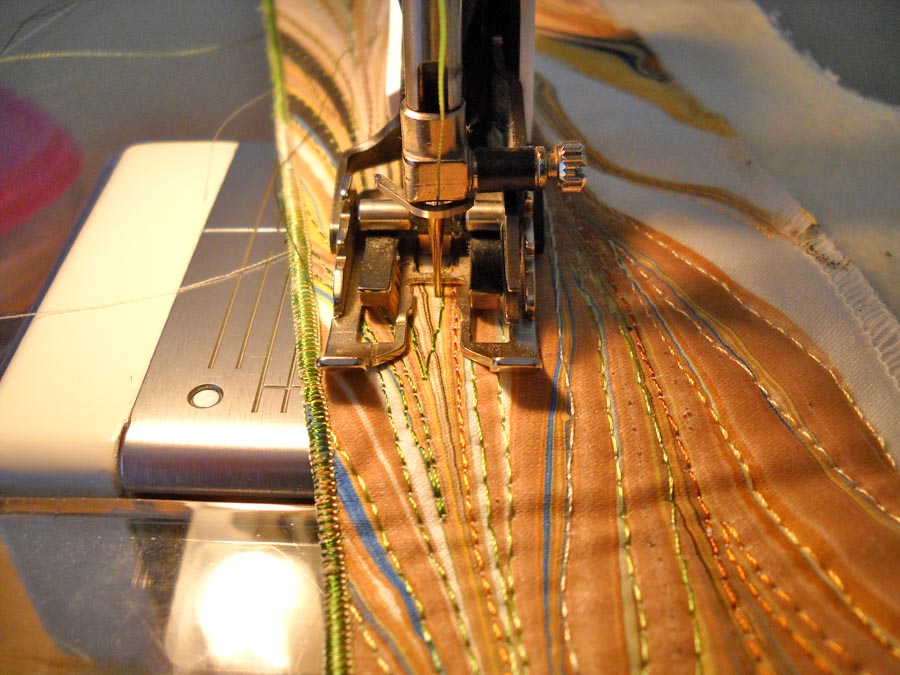
This is with my walking foot, but I’m not totally happy with the control with this foot. Because there are slight curves to these lines, I use my regular foot and am quite happy with it. I think this is probably a personal preference. I tried the free motion foot on this, but I didn’t have the control and even stitches I wanted for this design.
I have four and a half “strands” of bamboo finished at this point. I can quilt for a couple of hours, listening to some John Denver and just kinda zone…as I mentioned earlier this week, I am amazed at just how much I get done when I think a project will take forever. Now what probably will take forever will be the leaves. I’ve tried marbling some silk leaves – not happy with them. I am thinking some thread leaves, but they may not seem “sturdy” enough for this hardy plant. I do know thread leaves would be a great use of all my lousy threads I have hanging around. I haven’t broken any threads with some 6 hours of quilting – have I told you how much I love my Superior Threads?
If you would be interested in a tutorial on quilting marbled fabric, please leave me a comment and let me know. If you’ve got pictures of some marbled fabric that you have quilted, I would LOVE to see it.
