Archive for the ‘art quilt’ Category
It All Started with the Yucca…..Wednesday Work in Progress
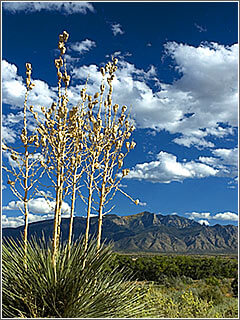
This new piece has had an interesting origin…..we were in Cornville , AZ visiting friends, and our driver wanted to stop in the high desert and see about getting some yucca stalks for walking sticks. If you look at the picture, the stalks are what’s left after the gorgeous blooms are done. They are evidently extremely strong and hold a lot of weight. So we have two collected stalks in the car, and I’m thinking, hmmmmm – these could make interesting wall hanging “hangers.” Turns out we got as a gift two really strong, perfect-height-for-hiking sticks from another friend we were off to visit, so I decided to keep these two, one as a walking stick for me (I just need it for balance) and one for a potential hanger for a wall piece.
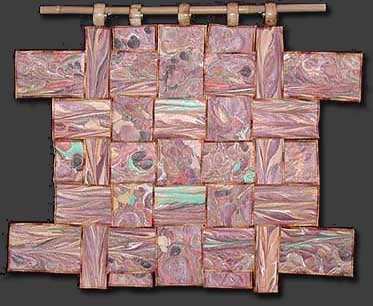
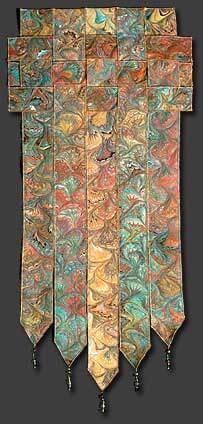
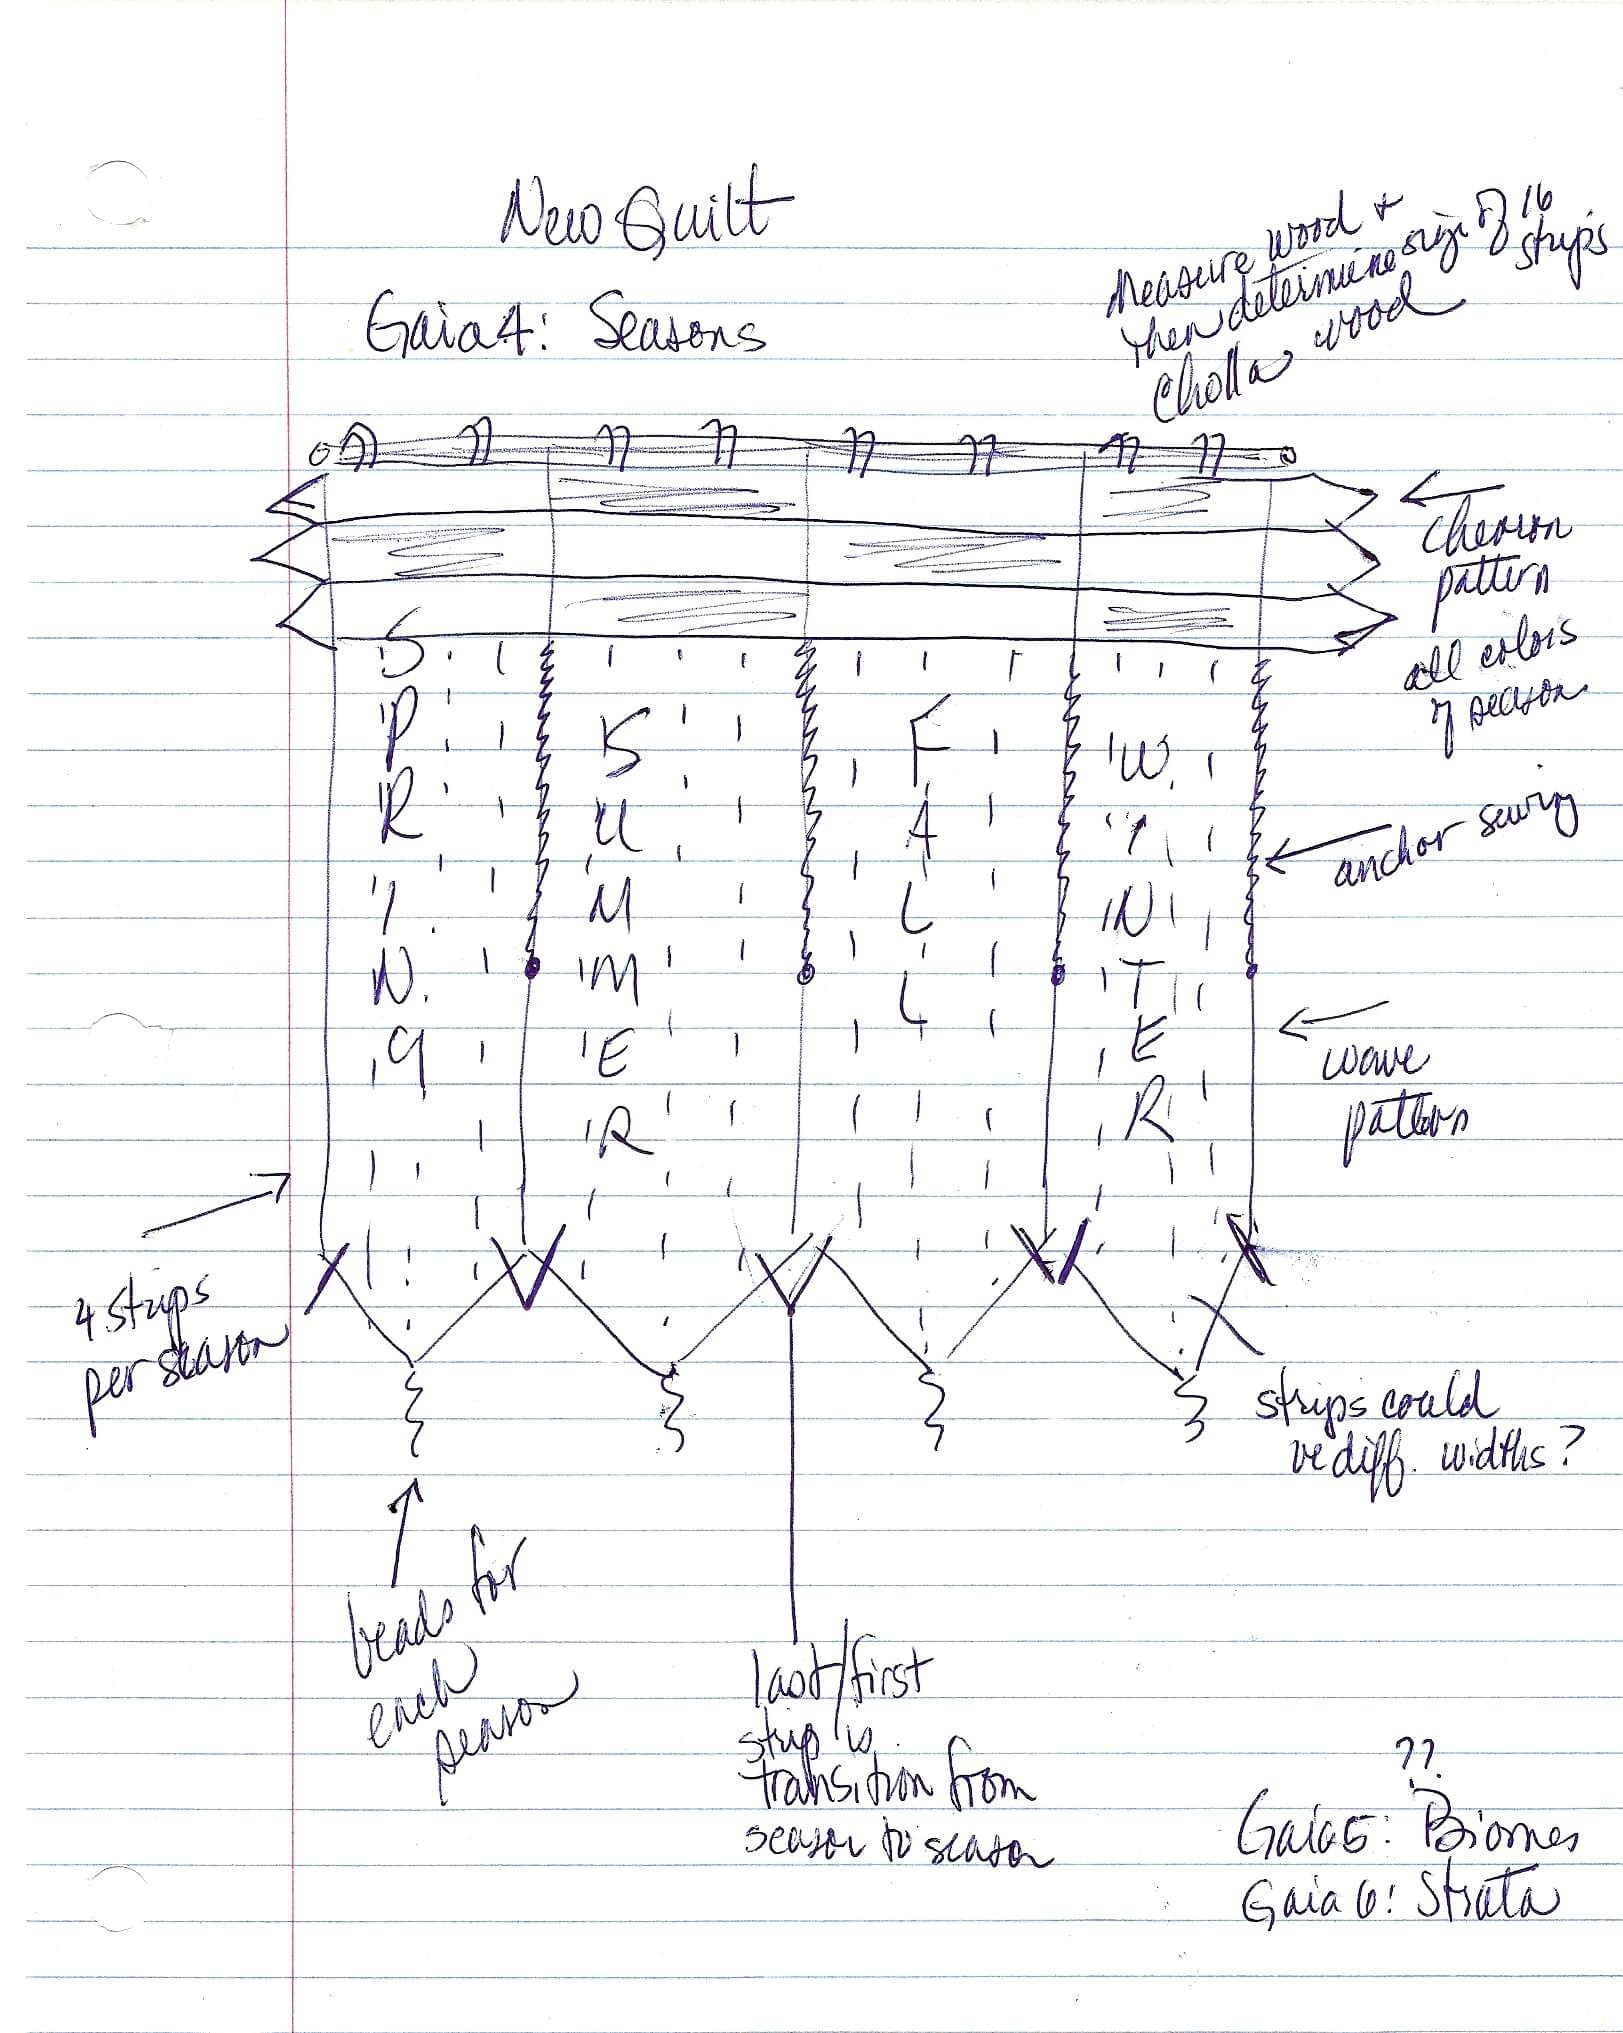
I was looking at it today, as I was kicking around another weaving piece. It would make a good “topper” for a new piece. I had in mind a set of seasons pieces, and then suddenly I got the thought to create the fabric and weave them all together for a year of seasons.
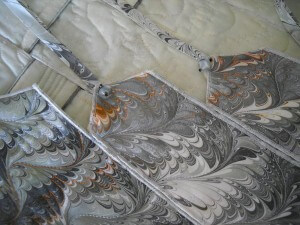
Here are two samples of some of the weavings I have done with marbled fabrics. The first is my very beginning one, Gaia 1: Interdependence. The second is Gaia 3: Autumn.
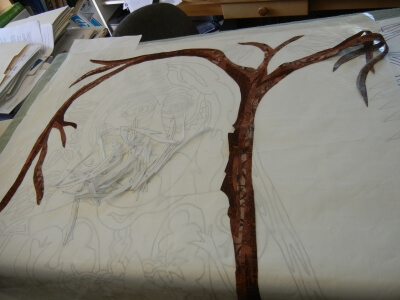
All of a sudden the design was in my head, and I sketched it out, something I don’t normally do. Here it is:
Creating the fabric will take some time, and I know with other projects in the pipeline, I won’t get to this until mid-September. Hubby is the main marbler, so he will have his work cut out for him. I will need to also watch the proportions in this piece – ever mindful of Michael Kors and Nina Garcia from Project Runway…..
Stay tuned for progress. In the meantime, here’s a few stories for past weavings in the Gaia series.
Top Ten Tuesday – Art Blogs I Read Regularly
 You may have noticed a new page on the blog – Art Blogs. I tried to go through the MANY blogs I follow through Google Reader to give you some added goodies to view. That said, I don’t always get to read everything every day, but there are some folks I read, regardless of how busy the day has been. So here they are:
Anne Huskey-Lockard – El Milagro Studio: Little Miracles of Art – photography that is absolutely magnificent, and tutorials that will have you itching to try new techniques.
Blue Moon River – Susan Brubaker Knapp – I wanna be Susan when I grow up…..
Art and Quilting in Camden – Sarah Ann Smith, author of Threadwork Unraveled; lots of process on how she finishes quilts.
Art and Quilts, Cogitations Thereon – Elizabeth Barton; explanations of processes plus some great philosophy
Art Biz Blog– Alyson Stanfield – the business of art you NEED this site.
Joen Wolfrom – the color lady – I have all her design books, and I love reading her blog – LOADS of great info on color.
Kathy Nida– I understand the workings of her mind…it takes another teacher to really understand! And her work is WONDEFUL!
The Free Motion Quilting Project – how can you not love a site that has a new free motion quilting video almost every day?
Mary Helen Fernandez Stewart – a wonderful lady who does art with children – you can see the absolute joy on the kids faces.
Enjoy these wonderful people!
Work-in-Progress Wednesday – DONE!
And so here it is, my “Sedona 1: Hiking.” I am definitely going to do a series of the things I like about Sedona – and there are many! The new owner is a hiker and is constantly out on the trails all around Arizona. Sedona is special because of its gorgeous red rocks. From 360 Adventures comes this iconic image:
 Sedona is one of the really special places, not just for scenery, but for those who believe in vortexes and all things New Age. I do have a piece of fabric that I’m going to call “Vortex.” It’s on the list at about number 4.
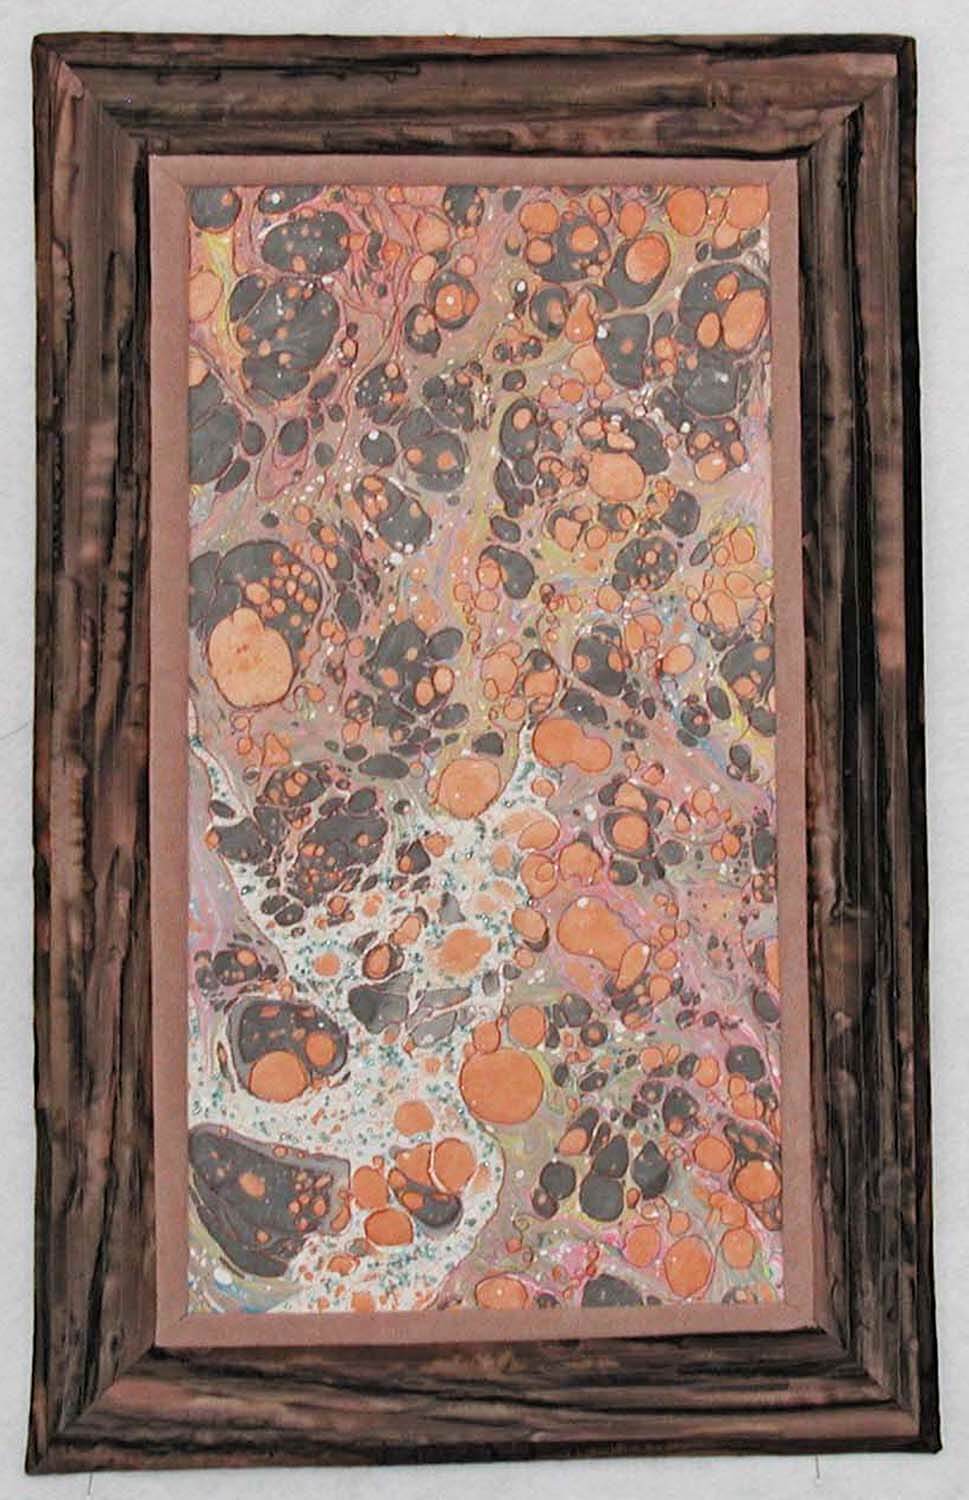 The coppers, browns, and reddish-oranges are very strong in this piece – no matter what I do with the light, I still seem to get hints of mauves, and there isn’t any of that in here. The piece is about 15 by 23 inches. At least I know I will be able to visit this piece on occasion!
Next up….”Spark” for the 3 Creative Studios challenge; a piece for Tikkun Olam due in September; an idea for Art Quilts Elements due end of September; and then there’s four good pieces for the next Sedona pieces….I am SO glad I’m retired!
Work in Progress Wednesday….The Commission, Part 2
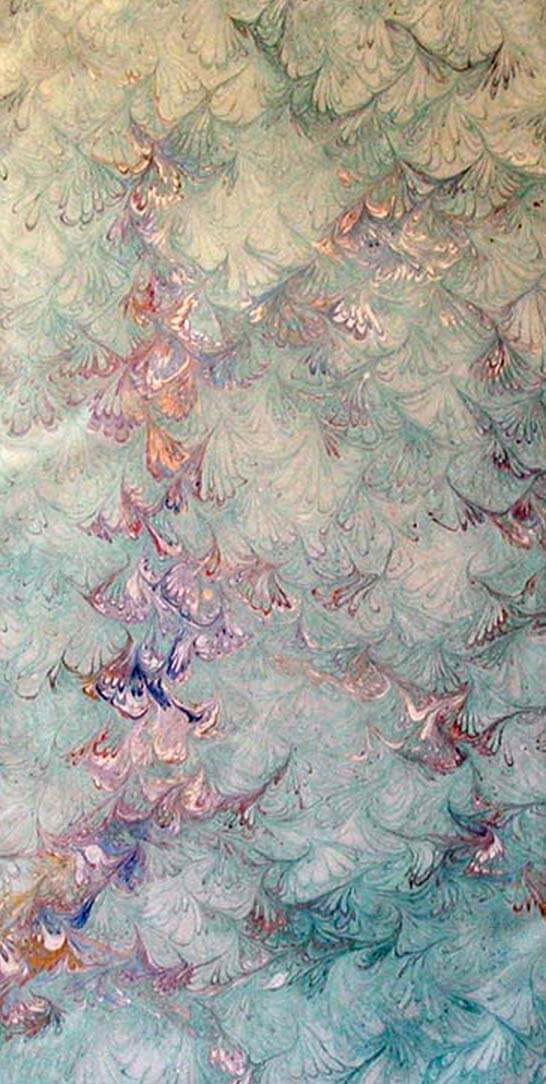 Two weeks ago I showed the start of a commission here, and I am almost to the end of it. Lots of interesting decisions to make along the way – I am really enjoying the decisions in the design process, especially as they relate to using marbled fabrics. My biggest problem is trying to photograph the colors so they are true.
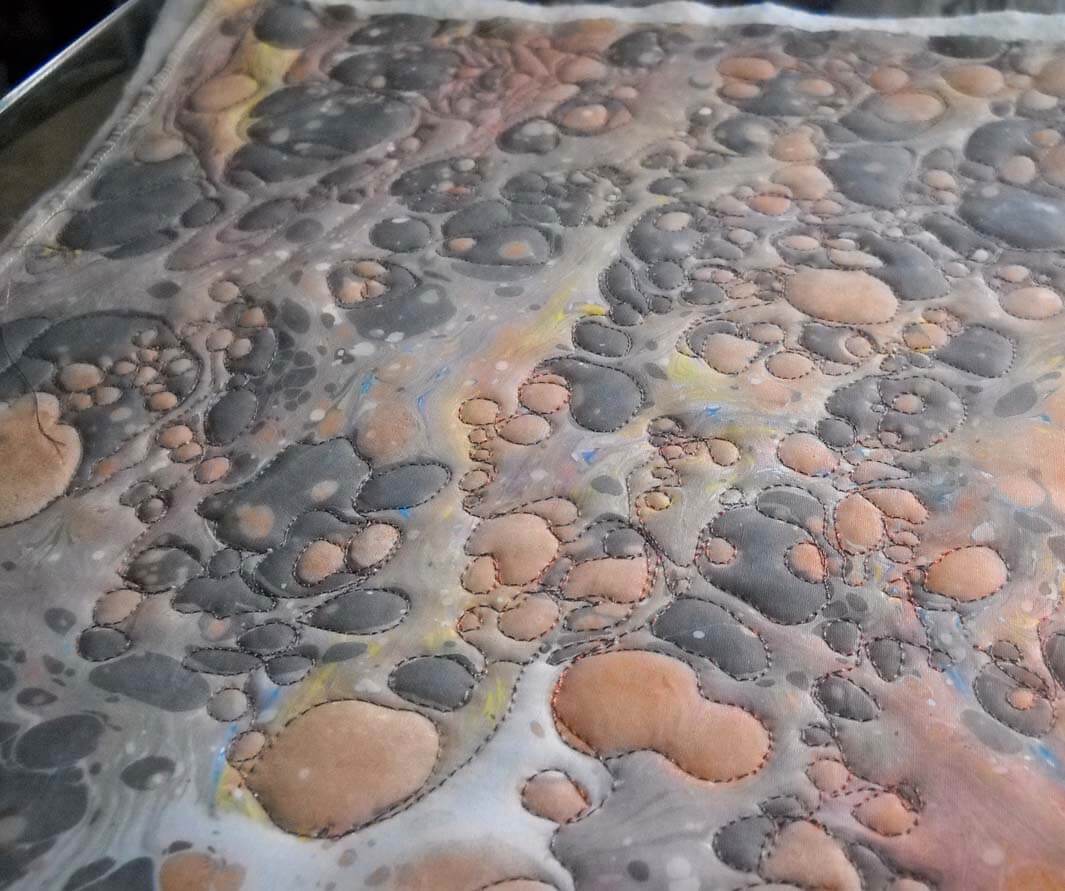
The quilting of the marbled fabric went really well – I emphasized the white area with bubbles, as though it were a stream working its way through the rocks. Went through two different colors of threads before I decided which one I liked. That’s different for me…in the past I would just let it go.
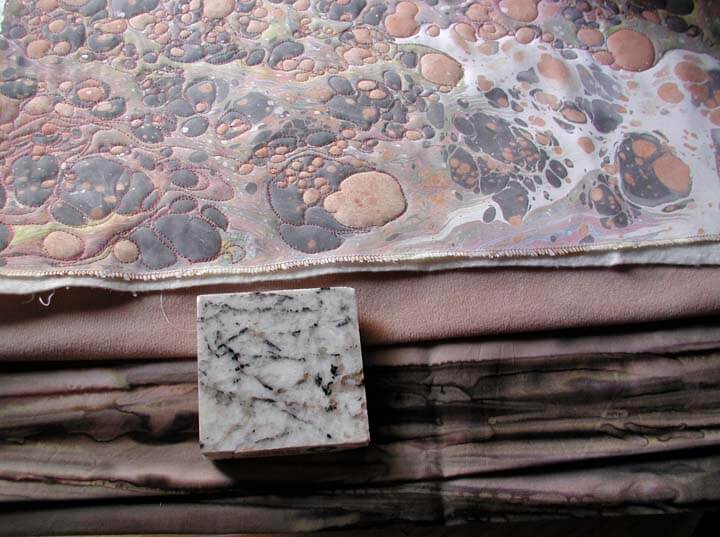
The first border is a very soft corduroy, and I left it a little “puffed,” rather than pulled straight. I liked that it played off the roundness of the pebbles. I love the batik for the outer border, and I also used it for the backing. I realized again why I’m not fond of mitered corners (but that’s what this piece needed), as I took two of them out several times. I still need to trim the outer border by an inch so that it seems better balanced, but I decided to quilt the outside first. Again, a struggle with what I wanted to use for thread, as well as how I quilted it. I wasn’t happy with following the pattern of the batik, as it looked too crooked. So I opted to play off the idea of the frame, and I’m quite pleased. What faces me tomorrow is making sure the piece is completely square, which I need to worry about, as it is a commission. Thank heavens I know about the diagonal to check for a square.
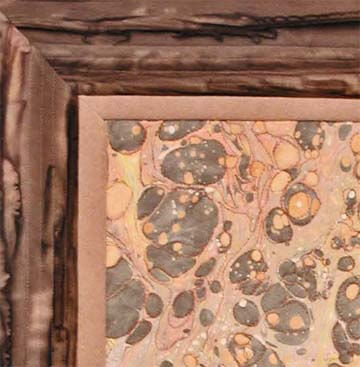 I’m going to use the Alzheimer Quilt hanging system – the little triangles in the corners, as I think this will help the quilt lay flat on the wall. I also plan a label for the back with all the information about the quilt, including care. I found a “certificate” on line to use for the new owner of the artwork with all the official details.
Here’s the large shot, still untrimmed:
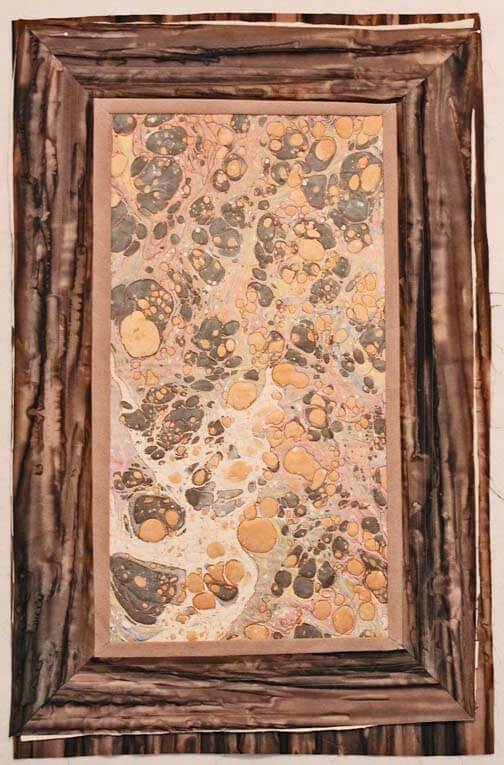 I am really loving this piece, which is actually more true brown and copper than in the picture. Still thinking about some seed beads……see what happens next week…..
The Start of a Commission…..
This past April I was asked to do a commission for a friend of a friend, based on three things: 1) she loves our marbled fabrics; 2) she wants a fiber piece for a small area in her bathroom; and 3) she would like it to draw on the colors from the new granite counter tops. So for 6 weeks I’ve been mulling over possible designs, knowing that the final one would be based on what happened with the marbling session.
We marbled yesterday, and I worked with the colors I thought would go with the granite – gray, black, brown, russet, copper. I tried a couple of different patterns, and what follows are the pieces I came up with. Warming – they’re pretty blah in the pictures….
I chose the stone pattern to begin, for two reasons. One, I like quilting that pattern, and two, I figured this would give me some ideas. Well…..it sure did. I started snapping pictures as I was quilting. I used a Rainbow thread from Superior (of course) in a rust shade to bring out the rusts in the painting on the opposite wall of the bathroom. It was just what it needed.
The texture is incredible and no longer flat. The piece also now has a title, “Hiking,” as its future owner hikes the mountains and canyons of Arizona – and especially Sedona – often.
This is so totally different from what I had originally been thinking. I know that this will act as the center medallion of the piece, so I went looking for coordinating fabrics – in my newly organized studio, so selecting was a breeze.
Lots more ideas, as the white area is probably going to become a small bubbly stream, and I pretty much know what’s happening with the borders, but that’s for another post.
Ideas???
Work in Progress Wednesday
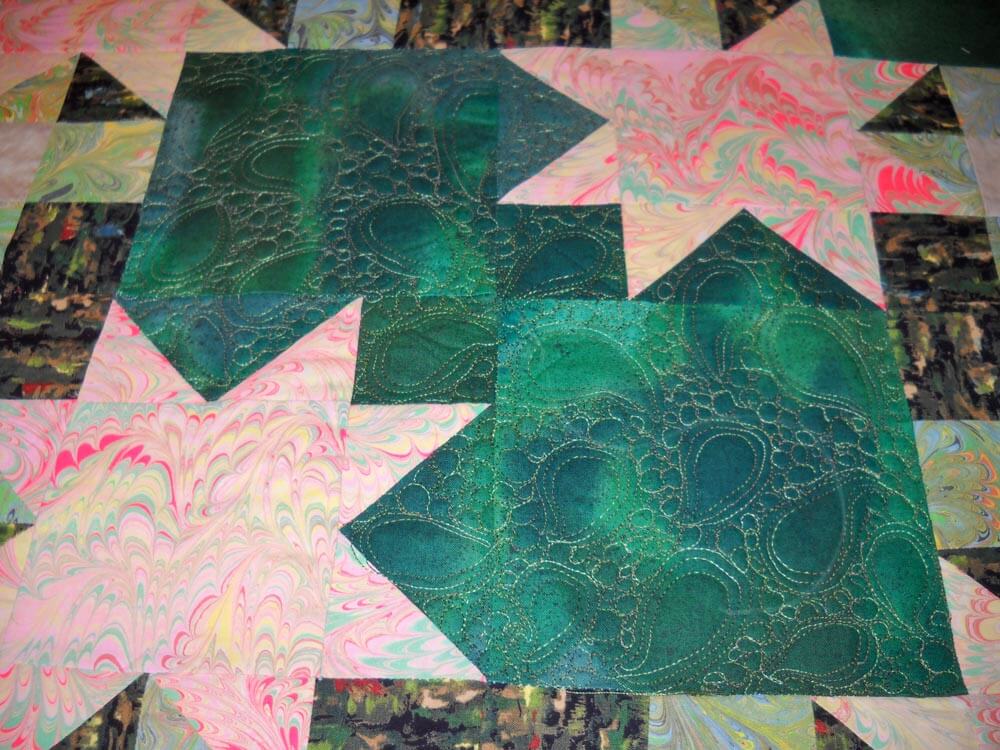
It has been a productive week, and I have two new projects on the agenda, but first – my finished quilt from last week. This is waaayyyy better! It was originally done many moons ago as a marbled BOM, and I wanted the quilt, which I have always liked, to reflect the new skills I have. It’s from a block pattern from Judy Martin’s Around the Block.
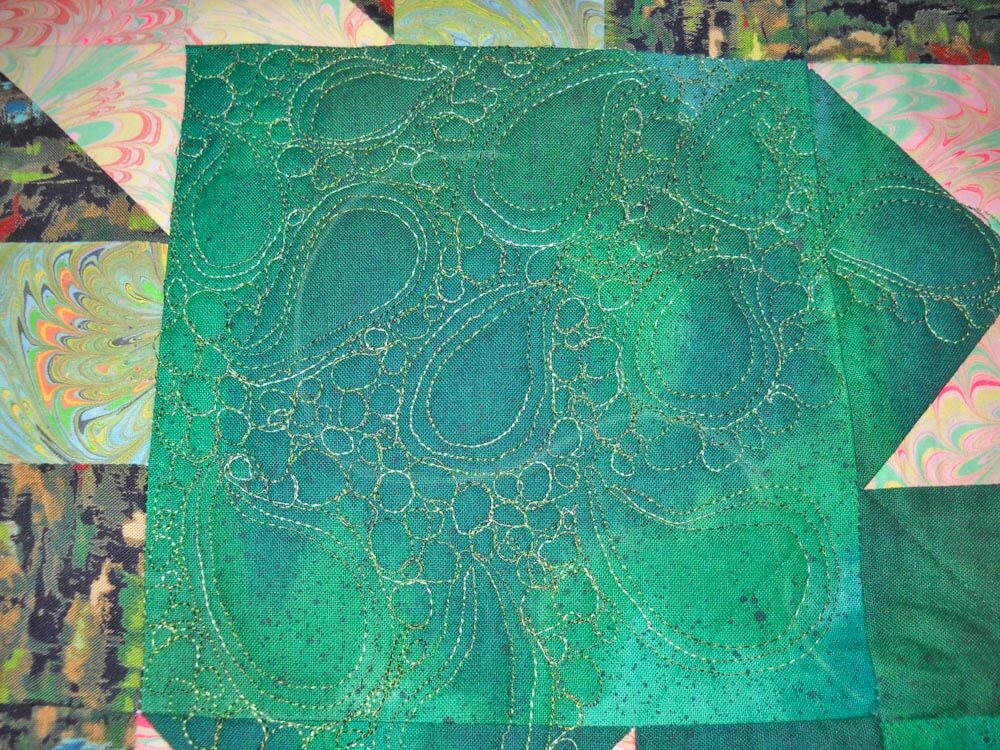
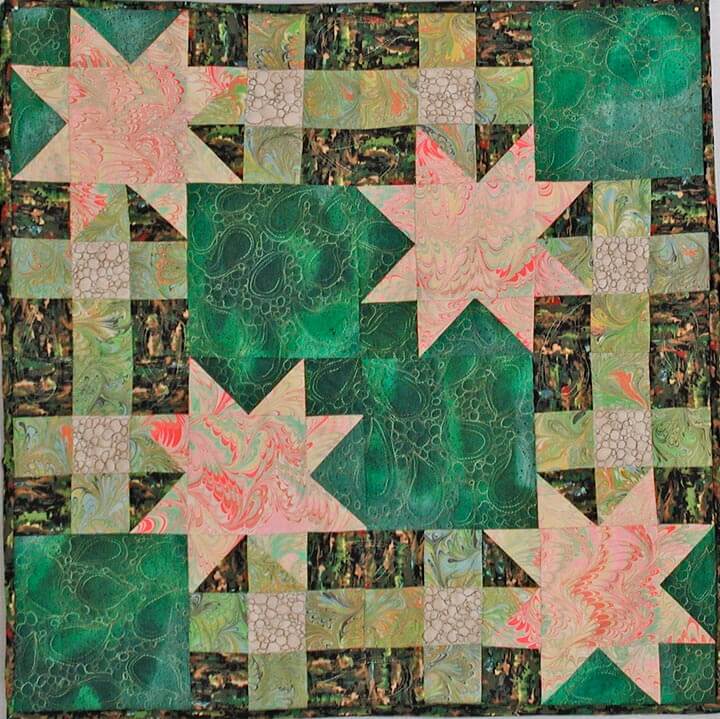 I’m calling it Monet’s Marbles, based on the mottled green fabric, which I bought years ago because it reminded me of Monet. I didn’t quilt anything in the stars, because I wanted them to stand out from the rest of the quilt. Here’s a close-up:
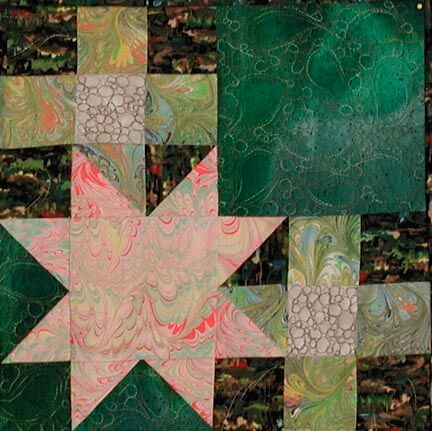 This is one of the blocks from Judy Martin – the quilt has four and uses two different marbled fabrics.
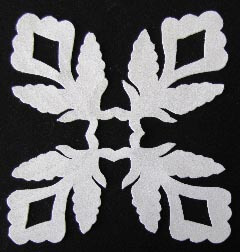
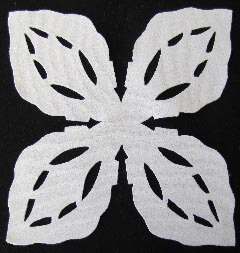
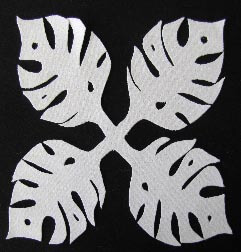
The next project is to finish up some small wall hangings for my second mom. She spent one winter in Vermont cutting out Hawaiian designs for a potential quilt – they never made it into a quilt, and I am trying to put them into something that Momcat can use. There is one major problem….these amazing blocks are all cut out of a heavy white polyester fabric…that ravels…………so I am using a lot of satin stitch, which also adds a slight bit of color to the blocks.
We decided on a black background to emphasize these wonderful patterns. I am hoping for one of the small wall hangings to be done for next Wednesday….we shall see…..
Many of these are original designs , and they are certainly a challenge in corners, heavy polyester, and satin stitch….but they will be gorgeous!
Work in Progress Wednesday
Sometime this past autumn, I posted a picture of a quilt completed at least 10 years ago, asking for suggestions on quilting it. I had used invisible thread (waaaayyyy before the improvements in threads) and did basic in-the-ditch quilting. Pretty darn blah. So I took ALL the quilting out, including taking the binding off, and washed it to hopefully remove the shadow lines.
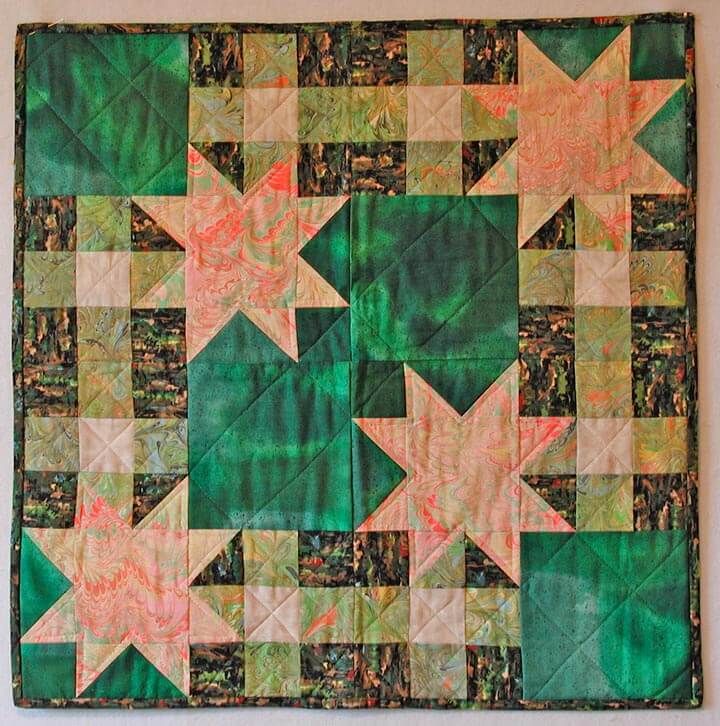
Silly me, I was thinking of having it available for sale at the art show we did in November. Well, that didn’t happen, so it moved to my “to do” list for when I retired, and then to the top of the list as I saw the studio coming together. I thought of attempting some feathers, because most of what I have done for quilting has been stippling or stitch-in-the-ditch.
Before I could start, I discovered this video on stippling, and I was hooked. Sharon Schambler had an hour-long video (actually longer) with 9 free motion patterns she has used in one of her quilts. Easy to watch and very easy to do!
I chose the second pattern, used some variegated thread from Superior (of course – I am totally hooked!), and started. I wasn’t sure I could really do this. So voila –
I was thrilled at this point, because I realized 1) I could do this, and 2) the quilt was going to look SO much better!!
This is the completed center. I’m not going to quilt the marbled stars (unless someone has a really good idea for me?? Hint hint…). I ABSOLUTELY love it! I’m doing a variation of the pattern on some of the side strips, and it’s coming along well. Hopefully pictures this weekend…..
Work in Progress Wednesday – Two New Quilts
Awright, so they’re not technically WIPs. But I haven’t shown all of them on here before, and I really do love them. And close observers will recognize the blog heading as the fabric in “Salmon Run.”
“Salmon Run” returned from its several-month engagement in Alaska at the Cordova Historical Museum. I love having it back – I am so fond of the fabric.
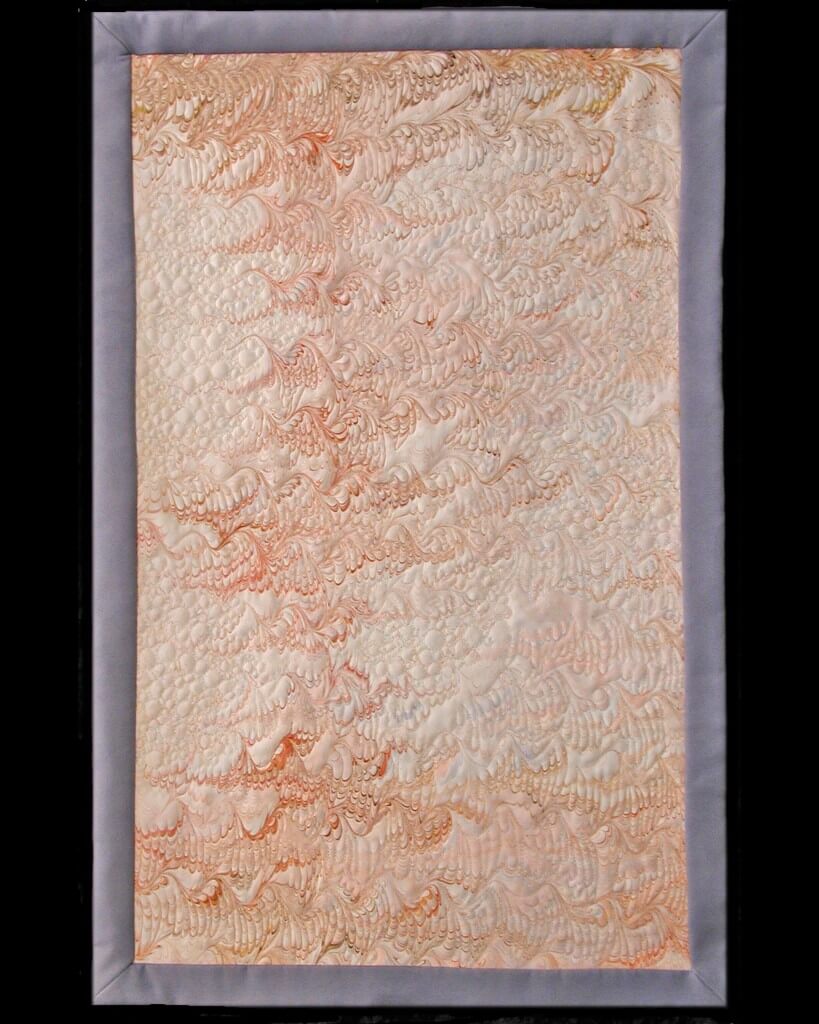 Here’s a close-up of the quilting.
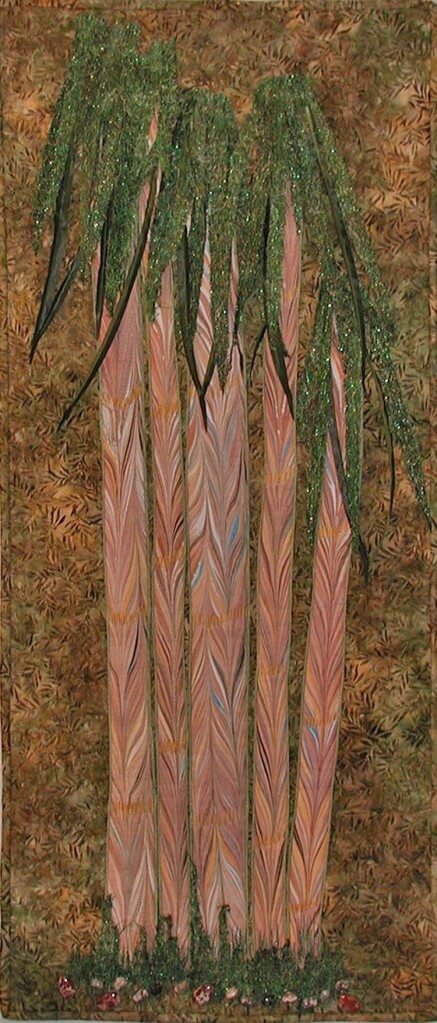
You also haven’t seen my latest piece, “Bamboo Grove,” in a full shot.
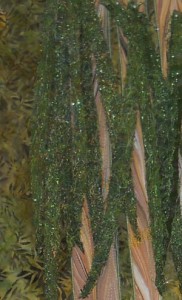
This piece had so many techniques I hadn’t tried before. I am reconsidering the tops of the bamboo stalks…I may decide to take the leaves off and try another way of attaching them to increase their fullness. So I guess it still is a “work in progress.”
What am I working on now? I am doing an art show on November 20 with the Tucson Art and Craft Association, so I am preparing fabric for that, as well as requilting a few small quilts. I am thinking of revising my still-unfinished “Iceberg” piece from several years ago into a series of Icicles for Road to California – I have till December 15. I can still use all the techniques I had planned, just in some different forms. I am still thinking about the next “large” piece with marbled fabric and don’t quite know what it’s going to be……I have some really great large pieces of fabric lying around.
But…I also have about four other quilts in various stages that I need to get to! Such decisions we all have….what’s waiting on your list of to-do?
Sunday Stories – Entering Fiber Shows
![]() Over the last thirteen years I have been entering fiber shows and the occasional quilt show with some success. The “Fish Follies” show each year at the Cordova Historical Museum in Cordova, Alaska has been very good to me, with acceptance both in fiber and digital categories each time I enter. I really think through the pieces I enter to be sure they fit the theme – I think I’m just not crazy enough in the “Follies” area to place.
Over the last thirteen years I have been entering fiber shows and the occasional quilt show with some success. The “Fish Follies” show each year at the Cordova Historical Museum in Cordova, Alaska has been very good to me, with acceptance both in fiber and digital categories each time I enter. I really think through the pieces I enter to be sure they fit the theme – I think I’m just not crazy enough in the “Follies” area to place.
In 2004 I took a BIG chance and entered the Expressions in Textiles show in New Haven, CT. My “Rock Garden” piece made it in, much to my delight, and when I saw the list of acceptances, I was kinda stunned. All of a sudden I was in the “big girl” league. I was thrilled. This was essentially a whole cloth quilt, a half yard of a stone marbled pattern that seemed like it was quilted to death.
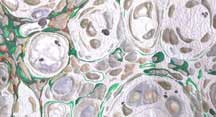
This is just a small portion, but everything in this quilt came together perfectly. I had initially bordered it in a black satin, thinking of the Japanese laquerwork, but eventually Iplicked out a smooth sand-ish fabric so the stones wouldn’t seem “hemmed in.”
That same time I had my “Mandala 1: Core” accepted into a quilt show, Fabric of Legacies, in Ft. Collins, CO.
This was another whole cloth quilt, but at this point I was thinking that there were going to be a lot of venues that would look at very non-traditional fiber. I have since had my “Low Tide” piece juried into that show.
Most of my quilts were rejected over the next few years, and I pretty much stopped entering shows. I think some was due to poor slide quality, some to the whims of the juror…one piece I did for a show about changing the world’s problems. I chose endangerment/extinction and did a piece on the rain forest and was told it didn’t fit the theme. So I guess the learning from this was to continue, that not everyone interprets things the same way.
When we went through our “dry period” of marbling, when nothing was working, I didn’t even work on pieces, like my bamboo, that had already been started. Now, though, I have started to look ahead to shows, quilt and art, and plan for new pieces, since most of what I have is too old. If my early pieces were accepted, and I’ve improved a hundred fold in my skills since then, then I should be on track for a few more acceptances.
We’ll see…deadline for the bamboo is September 3, with notification around September 15. Time to make a list of new deadlines and what will be entered…and what will be new creations.
Sunday Stories – Black and White with a Hint
Yesterday I wrote about what’s happening with the bamboo piece. Here’s a sneak piece of it in VERY rough form:
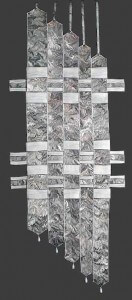
Now to today’s story – my piece for “My World in Black and White,” a show curated by Anne Copeland, like around 2003. This was a challenge issued on the QuiltArt list, and I decided to try something. Here’s the piece:
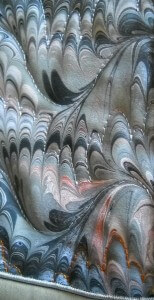
This was the first show where I realized I had to pay more attention to the theme. Mine was a more abstract look at black and white. We marbled a three-quarter-yard piece of unpolished white satin in blacks and whites. There was still a little orange left in the tray from a previous piece, so the name became “Black and White with a Hint.” I cut five strips and quilted them, following the marbled patterns. You can see the hints of orange.
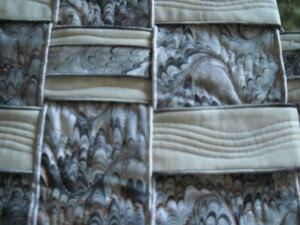
At this point, I really didn’t know what form this was going to take. I decided to stagger each of the strips, but it was pretty boring with just the strips. That’s when the “hidden” architect in me took over. I marbled some ribbon, serged the edges of the ribbon to carry the serging motif through, and attached it to some strips of gray cotton. I did eight strips all together, some of them plain with just a meandering quilting line, and some with the ribbon, and then I wove them through the other strips.
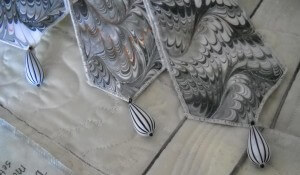
I liked how it was shaping up, and now I had to deal with a hanging system, as well as finishing the bottom. I figured I wanted some beads to hang at the bottom. I went to the local bead store and found these teardrops – have NEVER seen anything like them since then.
If you look closely, you can see how each strip gets hand-stitched to the ones around and underneath it. I figured I would use a plexiglass rod for the hanging system. I marbled some thinner ribbon, and with careful measurements attached the various lengths at the top, with a bead embellishment.
I learned a lot, as I seem to do on every piece, and this is still one of my favorites – my first piece to travel (to Ontario, CA as well as the online exhibit), my first piece that was professionally appraised, my first piece that “hung” in a very different style, and my first ribbon (for entering, but none-the-less still special!).
I am really enjoying revisiting these pieces and their stories. I hope you enjoy as well.
Design Decisions in Fiber Art
 So it’s been an interesting Saturday, with almost giving up at 1o this morning, thinking I would just submit one piece, rather than trying to show my overall style – which is certainly unique – any maybe too different…. My leaves are done, and my strips are done. I know how I’m going to make the grass and what stones I am going to use. But it’s the actual layout….
I want a stand of bamboo. My original idea, some eight years ago, was to have it free-hanging – strips of bamboo, with some type of hanging system at the very top. Well, I figured if I did the leaves all at the top, I could put a casing behind them for a rod. When I actually had it on the design wall this morning…didn’t really grab me.
Then I tried one of the jungle background fabrics, figuring I could make a background and attach the bamboo on top of it. Well…I ironed, pinned to the wall, added the strips, and then added leaves at the top….and…it was better, but certainly not a grabber. I tried shortening the strips – after all, they were at least 50 inches – nice, tall bamboo. Somewhat better.
I played around with a different leaf arrangement. Nope. Tried more strips beyond the five. Nope. While I like 8 because it’s a Fibonacci number, there was too much bamboo.
Last Sunday I went to my local quilt shop, Quilter’s Market (the BEST store, except for G Street….) with strips in hand to look at some other potential background fabric. I found one that was fairly “jungle-y” and worked with the browns and the greens. I pulled that out, ironed it, and cut it in half – top and bottom. I pinned the strips back on…this time I had them straight, but I had the top angled into the forest….five strips kind of angled downward from left to right….added the leaves in some different arrangements, and voila – I LIKE it! Now it’s more what I had in my mind. I needed to shorten the strips and angle them – while bamboo grows straight, it ain’t perfect.
I need to go buy about another third of a yard for binding. (They were almost at the end of the bolt last week…hmmm…) I’ve been going back and forth about a frame or not. I am thinking a simple binding, as I don’t want to constrain the bamboo with a frame around the jungle, especially as I plan to have leaves out and about the edging. There is a possibility I will need to make more leaves – I have most of what I need, but they are pretty time-consuming. At this point I can see myself making the deadline, especially with another whole weekend available. And I’m pleased…so we’ll see about progress tomorrow. I promise a small picture when it’s a little more together.
This whole process is extremely interesting. I find myself making more and more complex decisions as I learn new techniques and expand what my sewing workhorse (Bernina 1080) and serger (Bernette) will do – or what I will make them do. I will say my serger wasn’t totally happy with my choice of threads (some really fancy light-weight ones) for the edging…but except for re-threading the needle, I was in pretty good shape. I just need to remember to put the serger back into its original sewing condition for hubby to serge the new fabric for the Labor marbling…he’s not real thrilled with having to thread the machine….
Work-in-Progress Wednesday
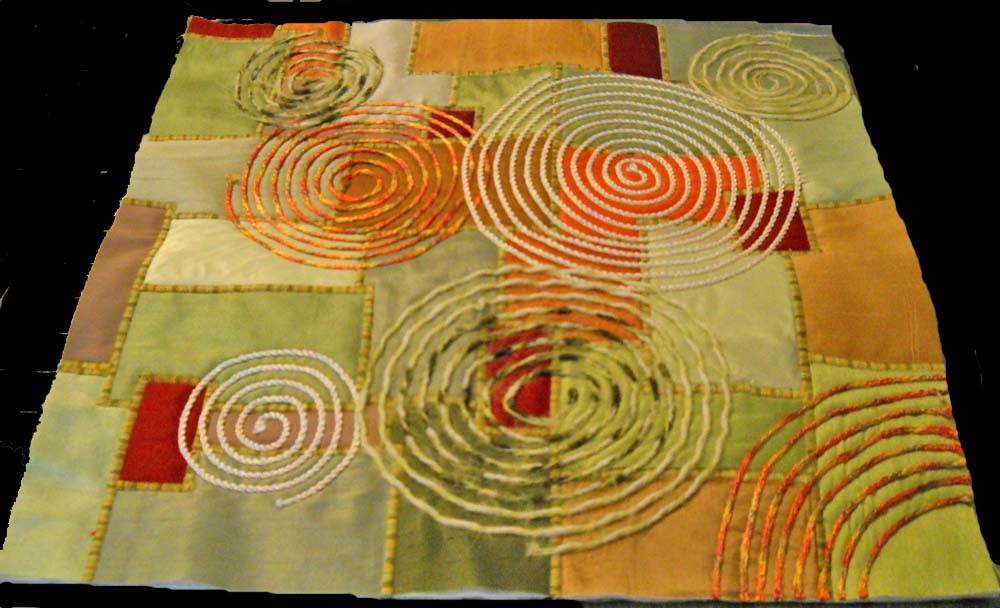
I managed to finish up the two small quilts based on the work of Carol Taylor and her “arc-i-texture” style. The DVD is from Interweave, and they have some scrumptious ones to choose from. I learned a few things, particularly about couching, and I finally got my satin stitch to work. I do want to try one with printed fabrics, but I really like the pay of light on the silk pieces.
Here’s the first finished one, in greens for Shelby, one of the twin girls I have know for a long time.
The edges were finished by adding a facing all the way around. I also showed you last week the beginnings of the quilt for Brianne, the other twin.
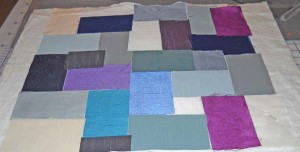 It’s pretty darn bland at this point, and I was worried about how it would finish. I next did my satin stitch to couch down the pieces of silk.
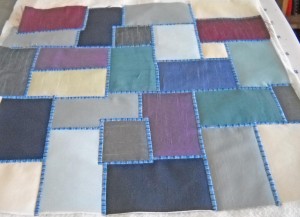 Definitely looking better. I do like the effect of the satin stitch, with a King Tut variegated from Superior Threads. From here I started the couching. I found some fuzzy blue yarns to try, one of which I liked, and one of which I ripped out.
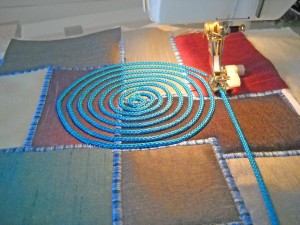 Once I got the hang of how to use the couching foot, I really liked adding the circles. I learned to trust the machine and the foot and not to pull.
Finally the finished product:
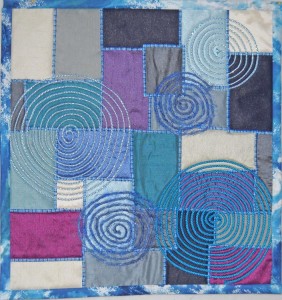 Still not totally pleased with it. It’s missing that certain spark, definitely in the picture. It looks better in person – you can’t see the rumpled silk. I used a regular binding on this one, because I felt the blues helped accent the main part of the design. But this is all part of The Process Pledge…writing about what I am doing and learning, and I did learn a lot. And I know the twins will love them.
This pic is a current shot of the bamboo leaves in progress. I started with those about three weeks ago, sandwiching the thread between sheets of Dissolve to create thread fabric. I started doing the free motion on the top, using a variety of different threads. Still have no idea how this is going to turn out. Hopefully I will have the completed piece next week – or at least the leaves, as I start back to school next Wednesday. We’ll have to see…
DON’T FORGET – sign up for our newsletter to get entered into a drawing for a Sampler 1 package of marbled fabrics! See the sign-up at the top of the page.
Sunday Stories – Gaia 2
I love this piece, absolutely my favorite so far of everything I’ve ever done. I really had no idea going in to this just what would emerge…everything was trial and error, but thankfully, very little error.
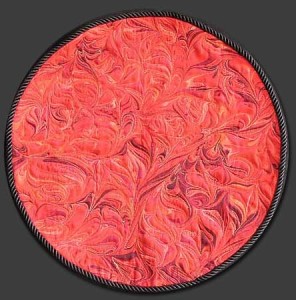
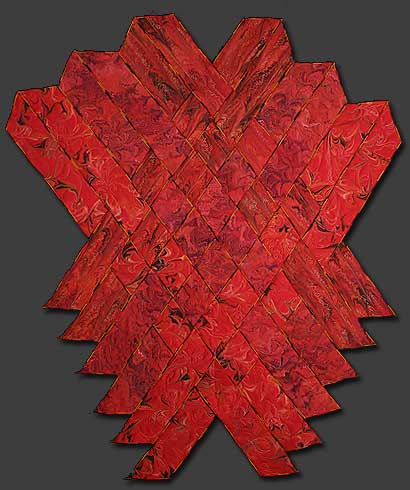
This piece started as a result of finishing a commission that was done on red unpolished satin. Six half-yard pieces were marbled, with my using a total of four of the finished pieces. My idea was to create a piece that would represent the volcanic origins of the earth and the goddess Pele. For the longest time this piece was known simply as “Pele.” I used a different marbling pattern on each of the half-yards, as I wanted interest within the piece.
Ever since my first teaching job on Maui, I have been fascinated with the stories of Pele, the Fire Goddess, and I was always on the lookout for the Lady in White when I drove home over the Pali at night. I didn’t realize it then, but Pele and fire have woven their ways through much of my work.
I really had no idea how these were going to weave together. I experimented and ended up with this weaving, starting with a tighter bottom and then “exploding,” much like magma does as it reaches the surface and becomes lava. The only problem with this shape came as I realized I had to figure out a way to anchor everything together. The strips are heavily hand-stitched together on the back – twice, as I discovered I had to make it much tighter to hold the weight of the piece.
A free-form pattern makes up the bottom four strips. The next four strips are the “wave” pattern, and the last four strips are what we call the ”fountain” pattern. A fourth pattern of a very small feather was ultimately not used in the weaving.
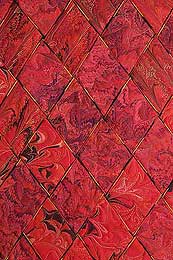
Each piece was sandwiched and serged with a variegated thread before any quilting was done. I liked the effect from the variegated thread, and I use that technique a lot now. But I have since changed how I put the individual strips together, with serging only one side or none at all, leaving another design element for later. The free-form strips were quilted using a variegated Sulky thread to accent the pattern. The four “wave” strips were quilted by following an initial curved line throughout each of the pieces and then coming back with a different metallic thread to accent the marbled pattern. The four “fountain” pieces were quilted in a distinctly different shade of thread to accent the eruption of lava.
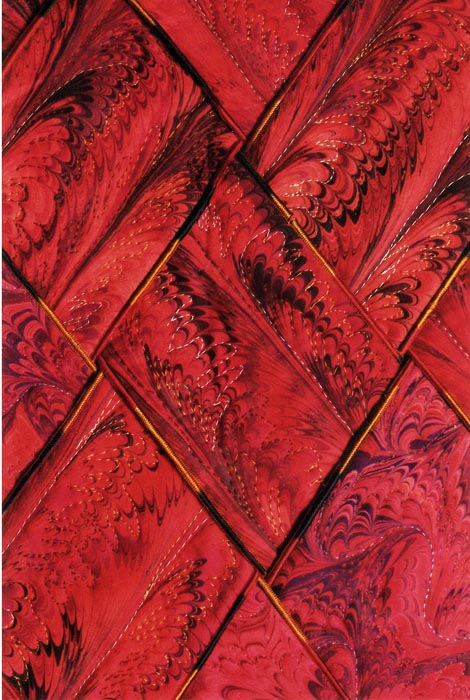
Now, you have to understand I hadn’t done a whole lot of machine quilting to this point, beyond stitch-in-the-ditch. This was brand new territory for me! But ultimately I was hooked….I quilt most of my marbled fabrics now, and the patterns can be very zen-like to quilt. Here’s another close-up:
I truly love this piece, and I know I’ll never get another one just like it. It’s a little bold for any of our walls where we are living now, but one day, when I retire and the place is a little bigger, it will hang again!
For those of you who haven’t subscribed to our newsletter, we are doing a drawing again from all our subscribers for a FREE Sampler Package 1. You can visit our website to see this. Be sure to sign up – the form is at the top on the right.
And…tell me the story of one of your favorite pieces. I’ll include stories in a future “Sunday Stories” post.
Work-in-Progress Wednesday
I have to say, I have been busy. I originally was thinking nothing was going to happen art-wise in July because of so much work on the business. I was wrong…the last week has been incredibly productive. Last Wednesday I wrote about my lava piece just telling me it really wasn’t finished. Here’s last week:
And here it is now, since it told me it was “finished:”
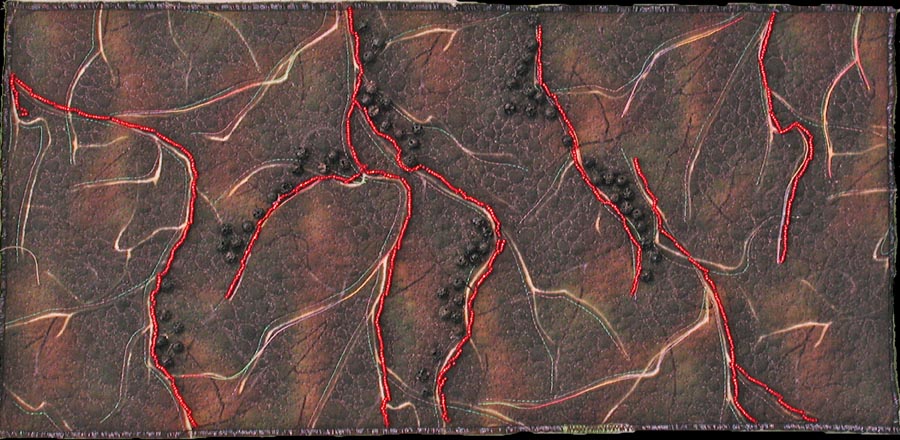
Turns out it needed actual lava – those little round pieces are actual chunks of lava I collected over a couple of visits to the Tucson Gem Show each February. I also added more lava flows, and nothing really interferes with the quote on the back. This is going to go up in the newly-developing Etsy store.
My “purse” didn’t make it as a purse…I loved the play of the fabrics together, but I couldn’t get handles to work the way I wanted them to…so now it’s a nice new basket for collecting fabric scraps.
If you were reading on Sunday, you saw the finished “Desert Heat” quilt, now on the wall in our bedroom.
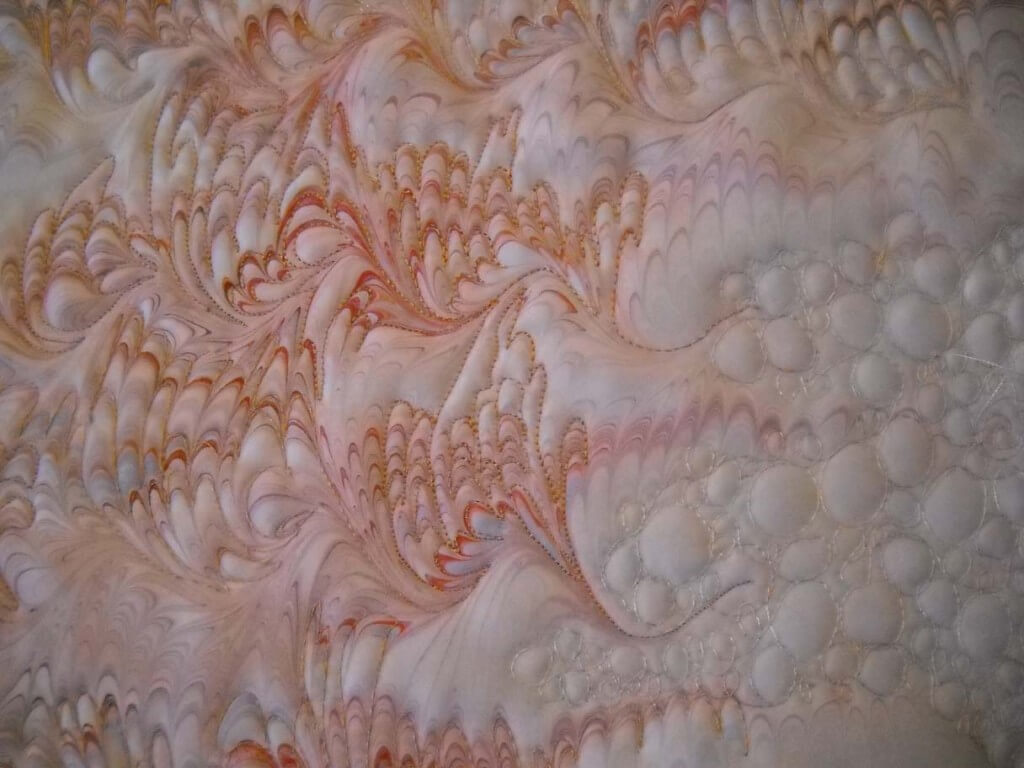
Now I am working on my “bamboo” quilt, started about 5 years ago with a piece of marbled fabric in the chevron pattern. One of the things I like about this quilting is that it is very zen-like, in that you can just follow the lines of the patterns. You can see the original piece of fabric here. You’ll see what I mean about the lines of the pattern.
As I was quilting yesterday, it occurred to me to take pictures of the process, and then that led me to think about putting together a tutorial on quilting marbled fabric. There is an interesting story behind the quilting. Years ago I pretty much just put marbled fabrics with blacks, as I wasn’t sure at all about my color sense. I did slowly branch out, but it was Quilt artist Ellen Kohen who took a piece of fabric and quilted it. I knew there was more I could do with the fabric, but I wasn’t sure how to approach it. Once I saw what Ellen had done, I was hooked, but it took confidence to start the free motion needed to accent these patterns. Starting this Sunday, I’m going to introduce “Sunday Stories,” and I’ll take a look at the story behind each of the pieces in my gallery on the website.
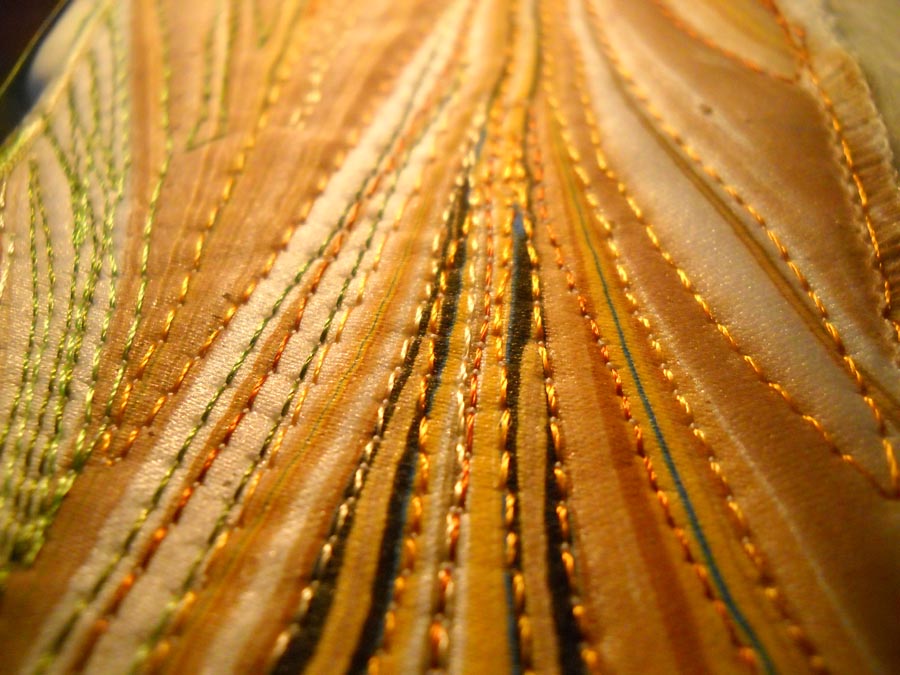
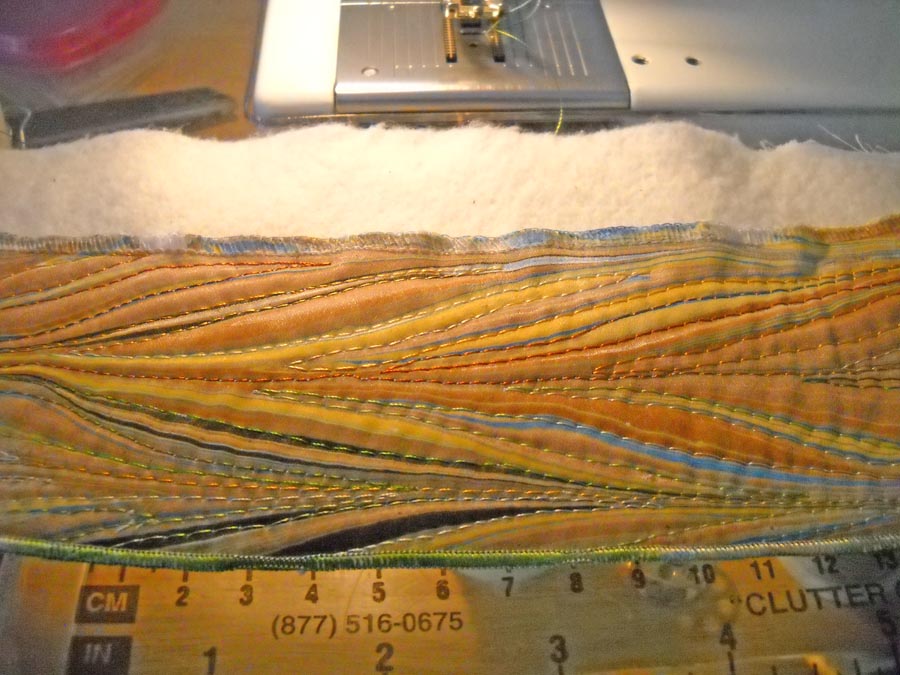
For today, here’s a close-up look at one of the bamboo strips (which I am aiming to finish by mid-August, as I want to enter it into an art quilt show with my “Ocean’s Bounty.”) You can easily see all the “lines” in the pattern and how I have followed the lines with a variety of different colored threads. The problem you might run into (as I have) is when to stop with the lines – you can get easily sucked in to quilting everything.
You can see the serged edge in this piece – which is how I usually finish these weaving pieces. I’ve learned over the years not to serge until I am finished with the machine quilting.
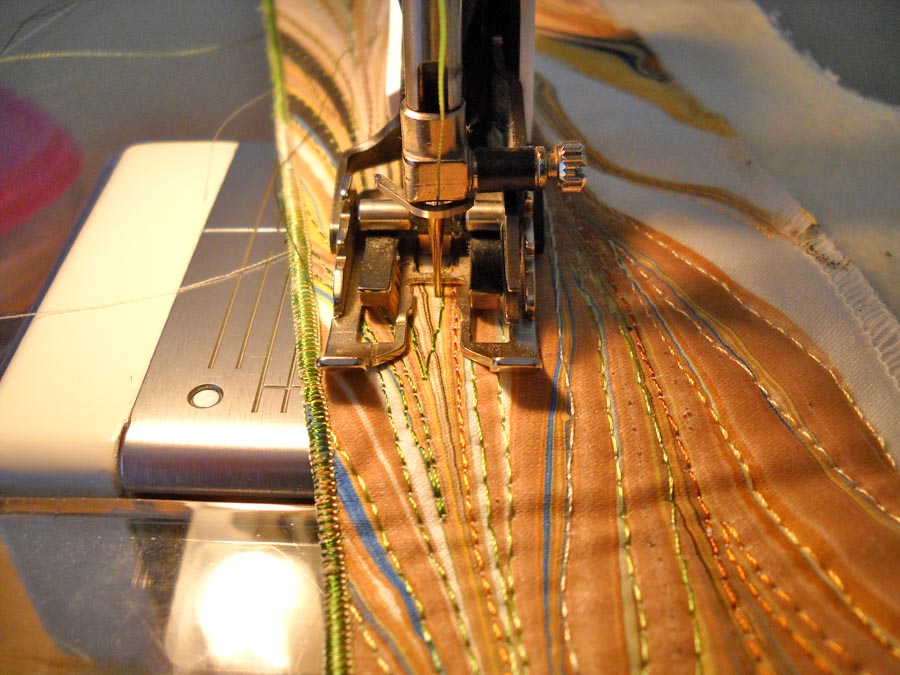
This is with my walking foot, but I’m not totally happy with the control with this foot. Because there are slight curves to these lines, I use my regular foot and am quite happy with it. I think this is probably a personal preference. I tried the free motion foot on this, but I didn’t have the control and even stitches I wanted for this design.
I have four and a half “strands” of bamboo finished at this point. I can quilt for a couple of hours, listening to some John Denver and just kinda zone…as I mentioned earlier this week, I am amazed at just how much I get done when I think a project will take forever. Now what probably will take forever will be the leaves. I’ve tried marbling some silk leaves – not happy with them. I am thinking some thread leaves, but they may not seem “sturdy” enough for this hardy plant. I do know thread leaves would be a great use of all my lousy threads I have hanging around. I haven’t broken any threads with some 6 hours of quilting – have I told you how much I love my Superior Threads?
If you would be interested in a tutorial on quilting marbled fabric, please leave me a comment and let me know. If you’ve got pictures of some marbled fabric that you have quilted, I would LOVE to see it.
Sunday Sampler – Fun with Photoshop!
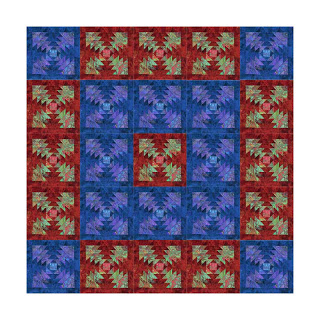
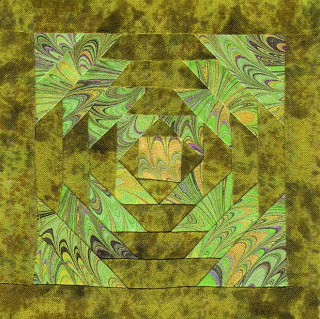
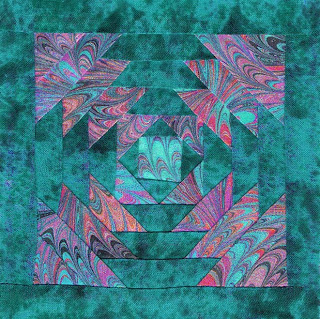
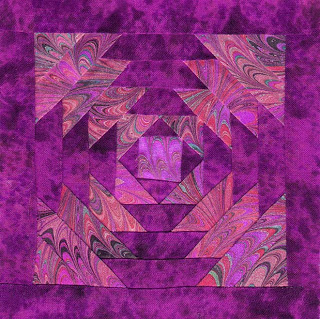
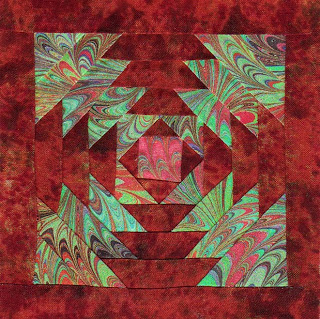 So I didn’t get to Photoshop on Friday – SORE from stairs at school, and generally tired after the first few days back, but boy, did I have fun today! The pineapple block on the left was my starting point for today, in designing a quilt. WAAAYYYY back in 1996, after we had been marbling about 2 years, I knew I wanted to design quilts with marbled fabric, and using Photoshop (obviously a very early version) I wanted to be able to put the designs on t-shirts. Try as I might for MANY years, I just couldn’t seem to get the hang of “pasting” fabrics, let alone creating a grid to work on. Those days are gone – I did it! I took the block on the left and did several iterations of it to change colors:
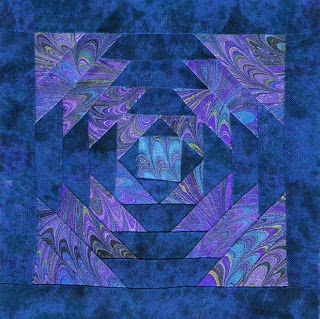
Here’s my first quilt design – I know there’s loads of room for improvement, but this is a good start.
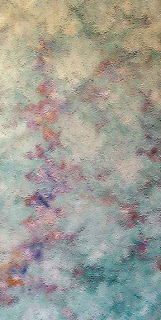
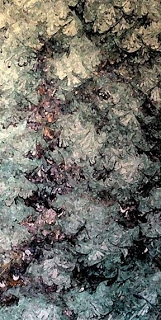
Not content with that playing around, I went back to the photo from Thursday’s blog to see what I could do with that one. The first is the original, the second is “underpainting,” one of the filters. The third is totally different – the watercolor effect. It really changes the meaning of the image. I am quite partial to the second – reminds of the line from the sone “Evergreen” from “The Way We Were” – mysty water colored memories….
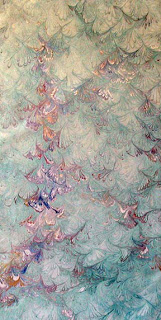
Now to finish up emails and get wardrobe set for the first week with kiddoes!

![ofortuna72_thumb[1]](https://www.marbledmusings.com/wp-content/uploads/2011/08/ofortuna72_thumb1.jpg)
