Archive for the ‘quilting’ Category
Art in 2016 – Part 1 Review
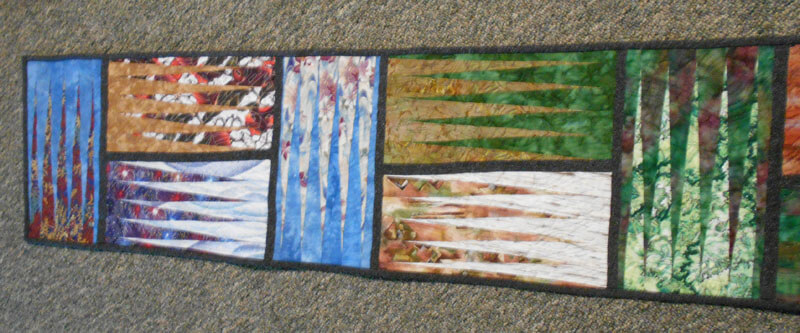
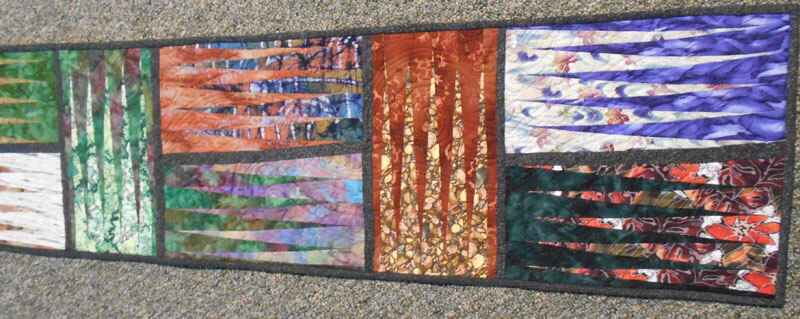
It has been a banner year for art – especially in the making of art. When I stopped to reflect, I realized we created more this year than any other year – some big, many small, and all taught us something! I’m doing several blog posts, since I don’t have pics for a bunch of gifts – awaiting the jpgs in the email….
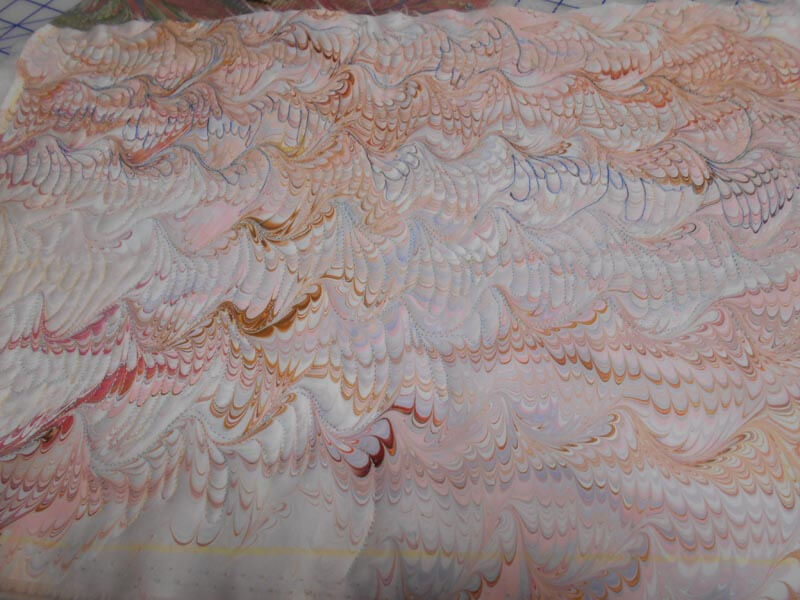
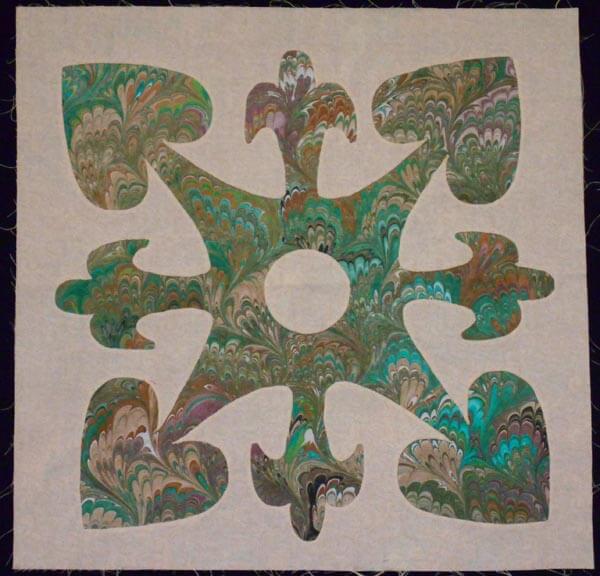
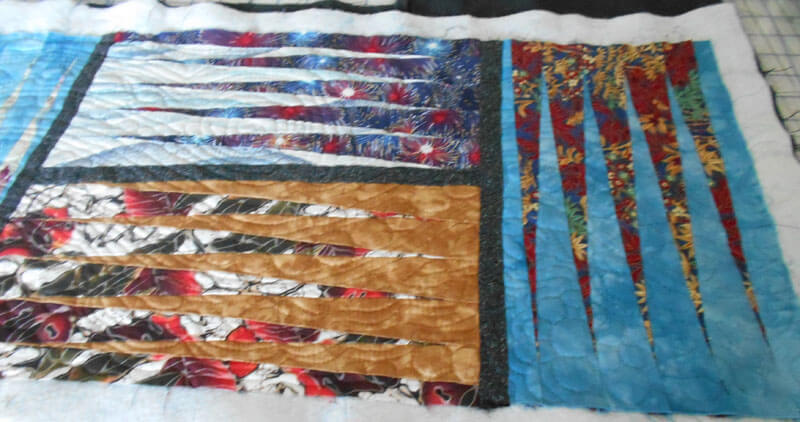
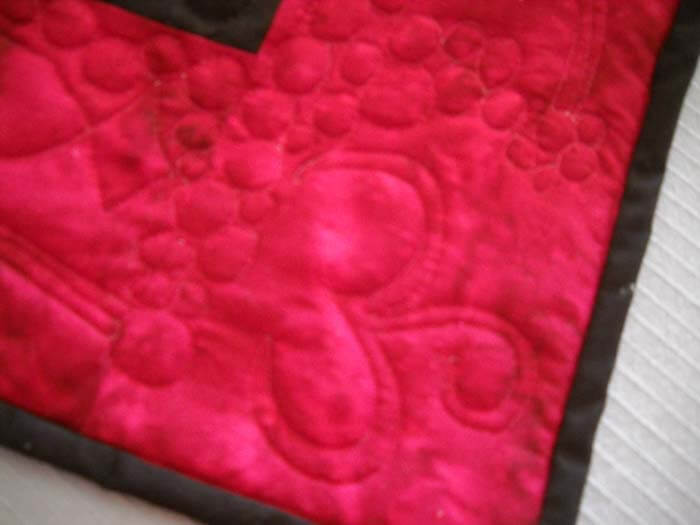
Yesterday was the presentation of a commission for dear friends of ours. It was supposed to be for their anniversary in September, but just didn’t happen….Once knee surgery was over and I could move around fairly easily, I set to work. The marbled fabric had been done since April, and I had been mulling designs since then. It was time….
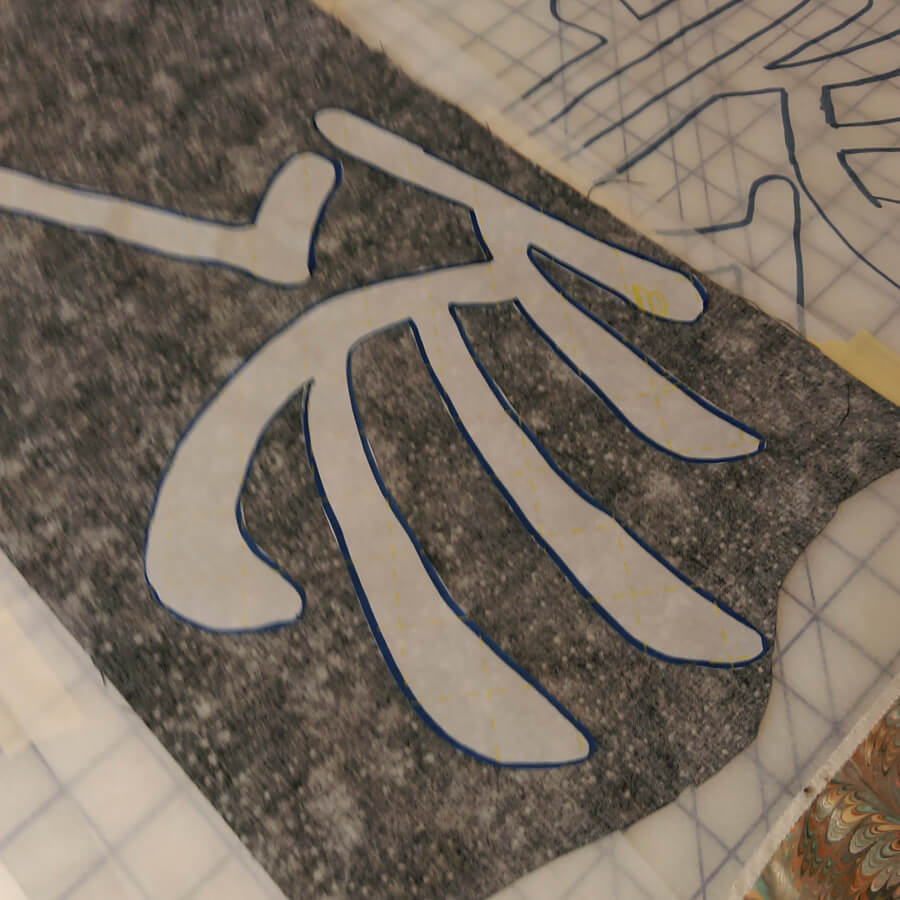
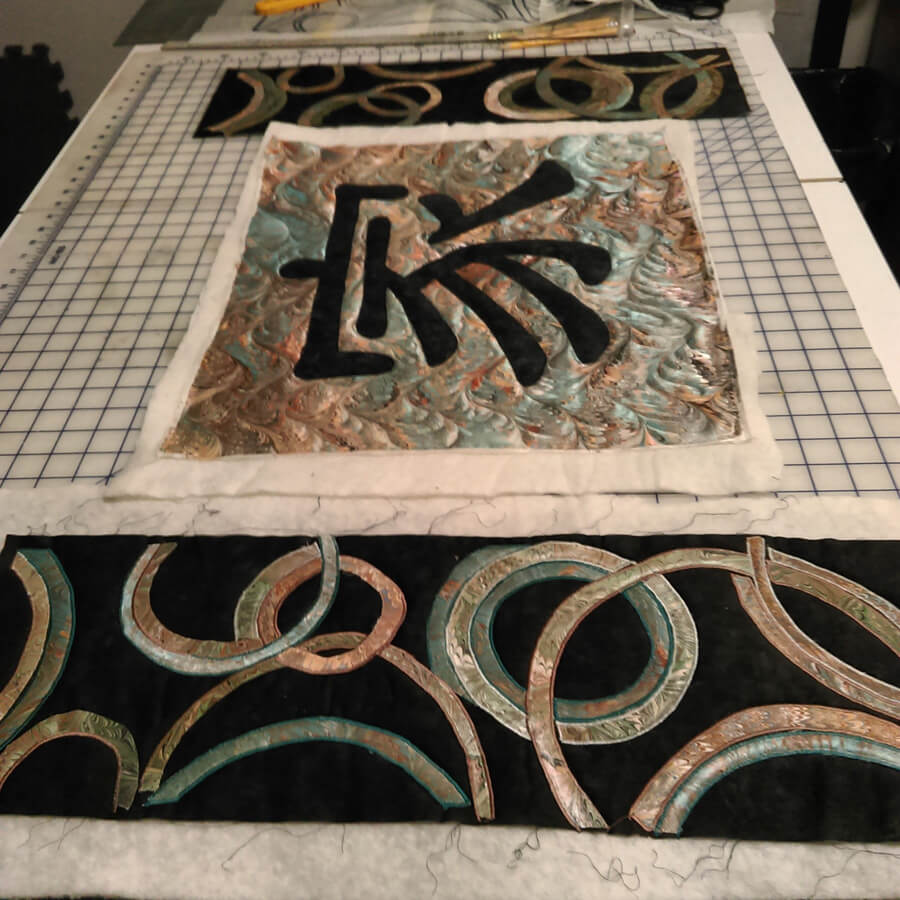
I started working with the Chinese symbol for “family,” and after just this first littyle bit, I have even more appreciation for the art quilts of Kathy Nida. This involved tracing the symbol, determining which side would be “up” when ironing onto the front of the fabric, adding WonderUnder, and then making sure it actually worked – especially since I had a limited amount of the fabric choice for the symbol. First success.
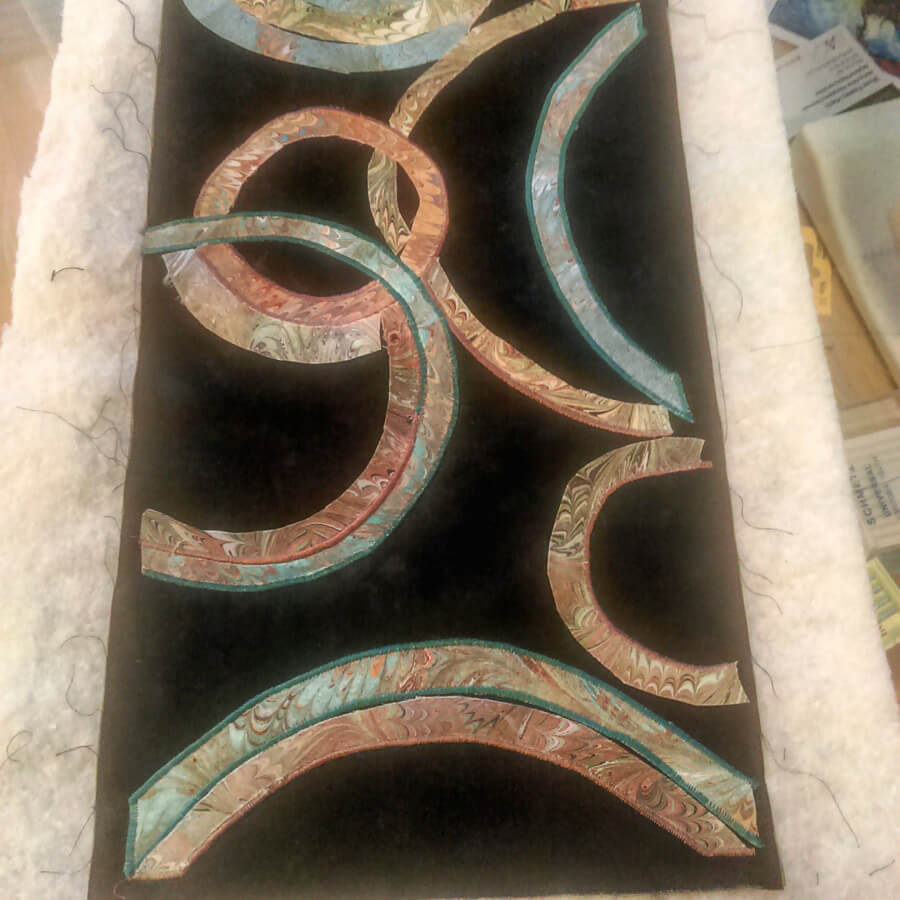
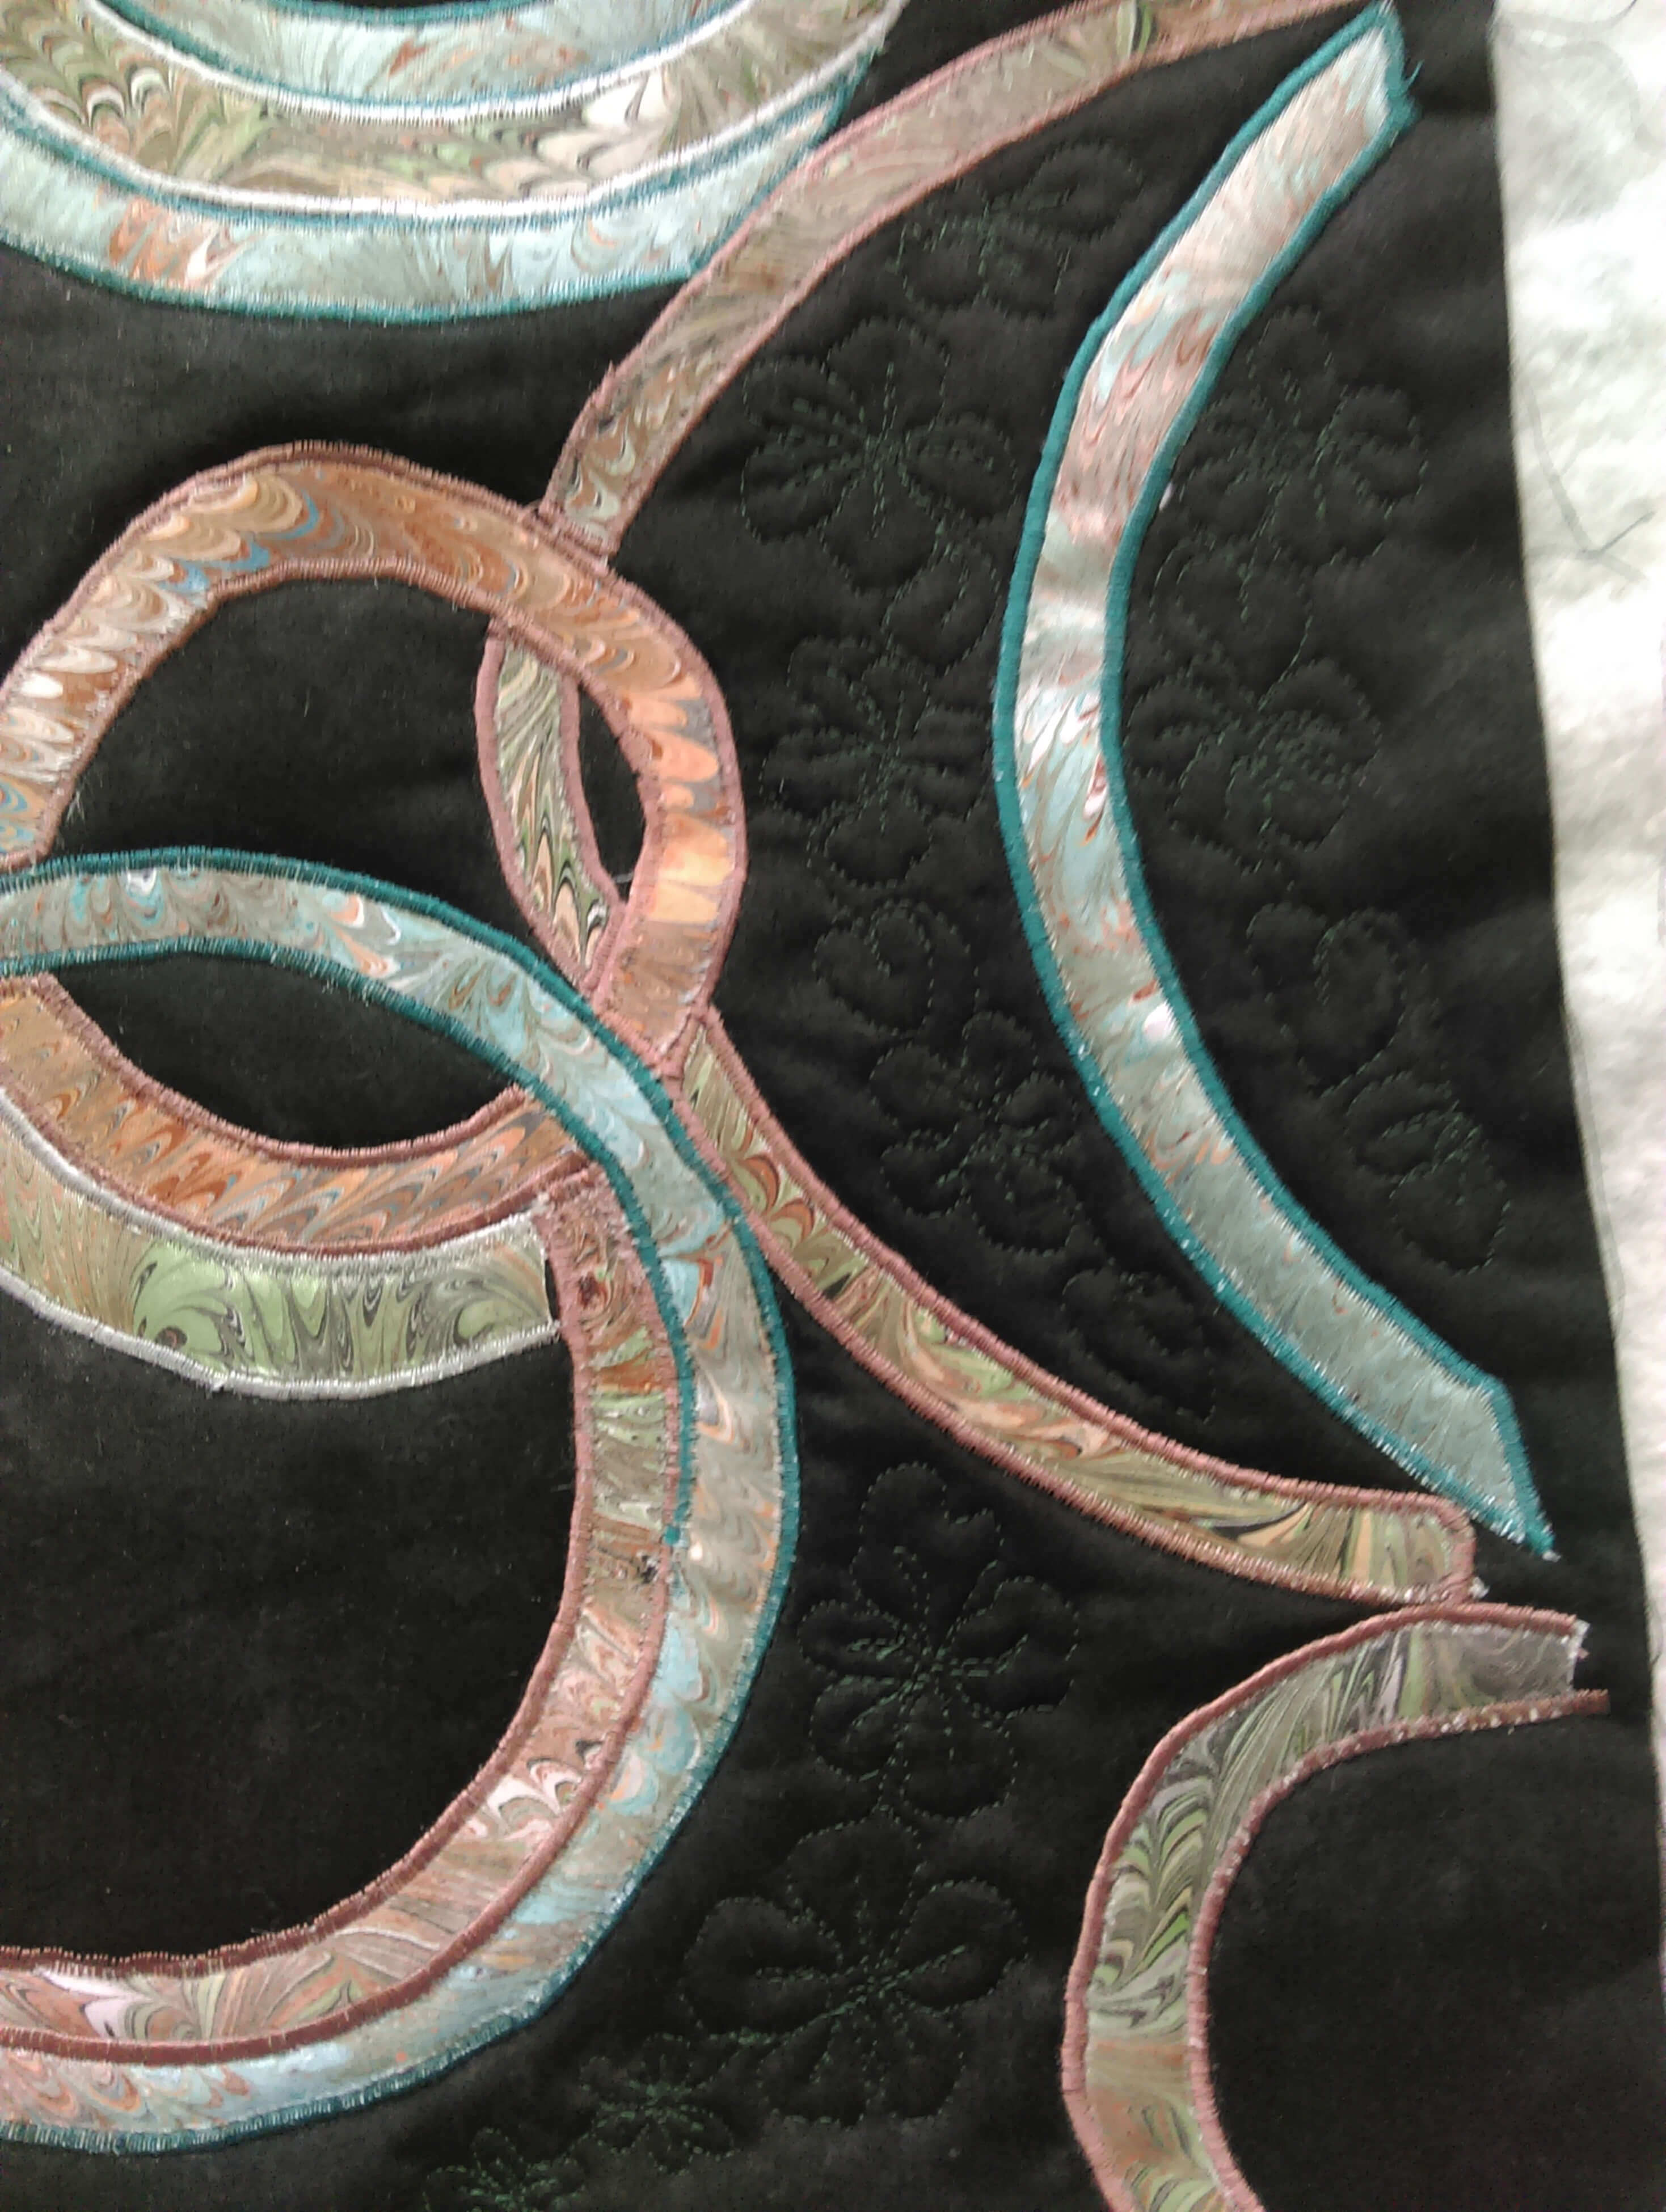
Next was creating the pattern for the side panels, loosely based on a table runner by Lonnie Rossi and definitely made my own. Same issues with being sure of right and wrong side, since there would be two panels, and the designs would mirror each other. Much angst – especially on the choice of the background – I had a peach silk that worked with the overall colors, but looked terrible with the small pieces actually on it. The fabrics were extra marbled fat quarters that didn’t make the cut in terms of main color, but they were all complementary.
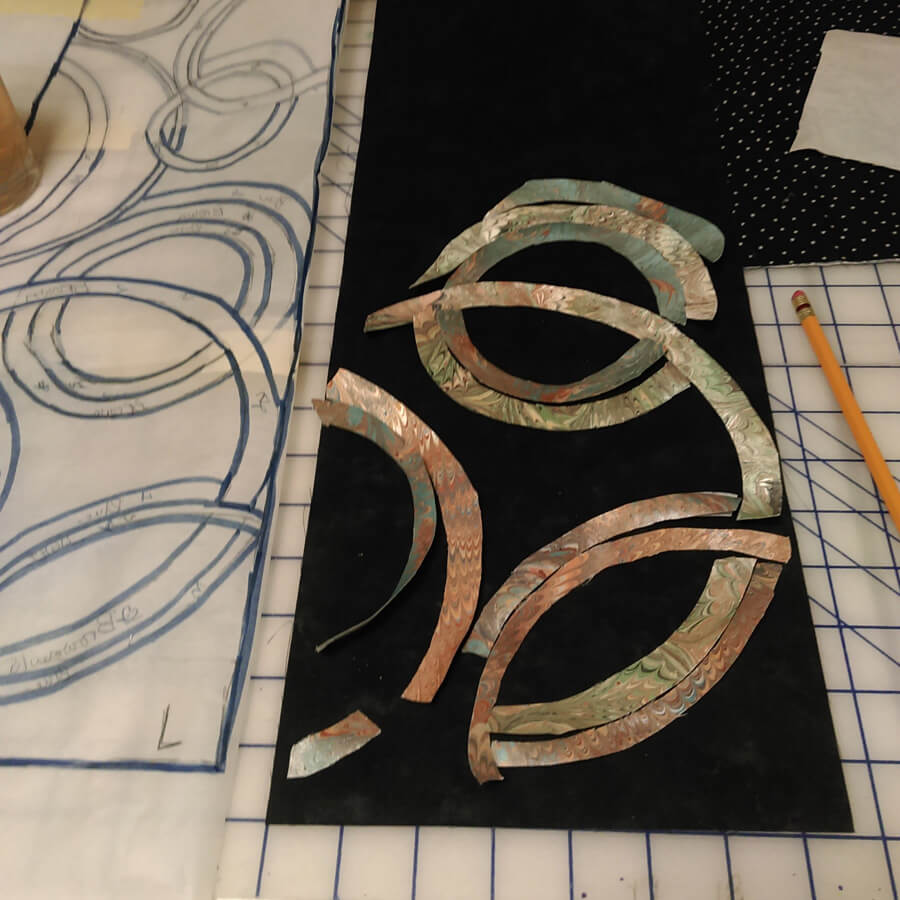
I put off for the longest time doing the zigzag satin stitch and then discovered that the fabric frayed very easily. A lot of adjustment, sharp pointy scissors, and FrayCheck got me through this section.
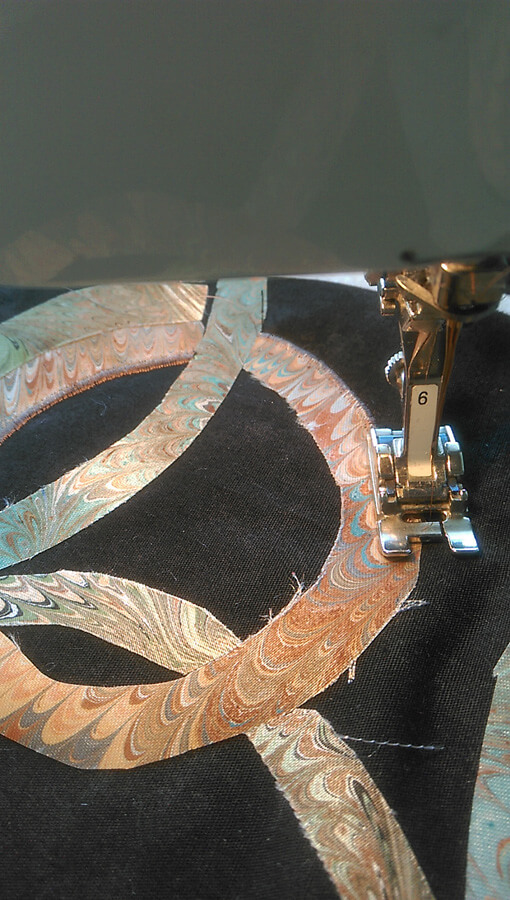
The satin stitch….forever…..
I had one panel completed and then started on the second panel. It probably would have been easier doing them both at the same time, but I wanted to be sure the idea could be executed before I was completely committer.
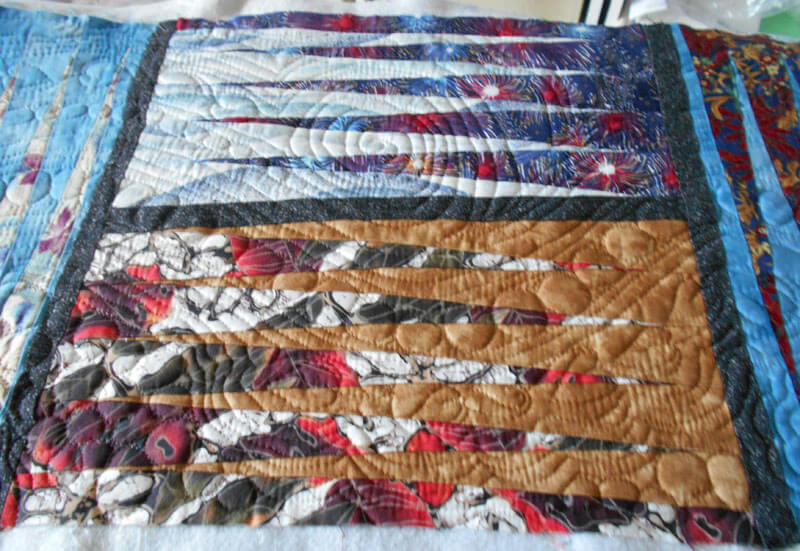
The request was for some apple blossoms quilted into the design – originally to be on the border….but it worked out differently. I Googled images of apple blossoms and determined a free motion pattern, and then began. As long as the petals had ragged edges, the pattern worked.
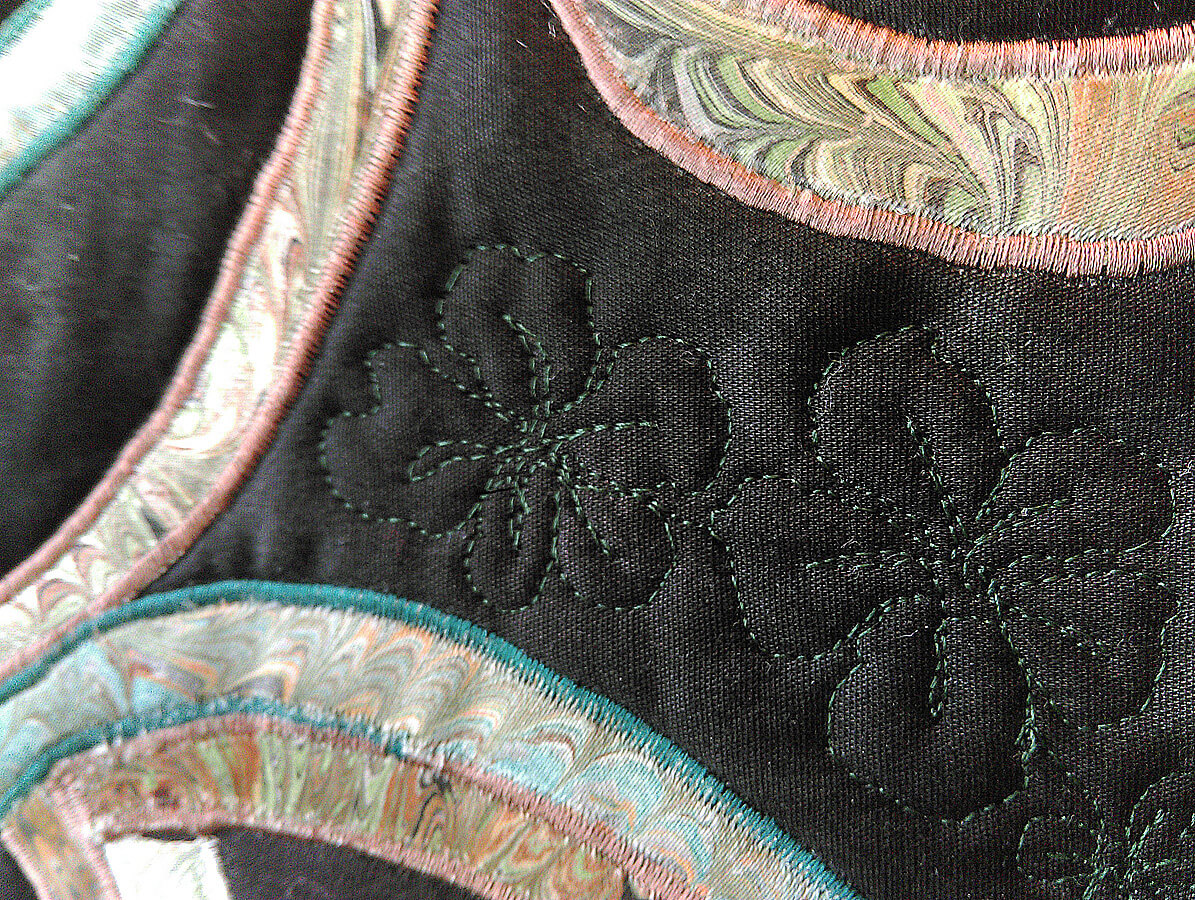
Starting the apple blossoms
Lots of flowers over both panels – really liked how subtle the patterns are.
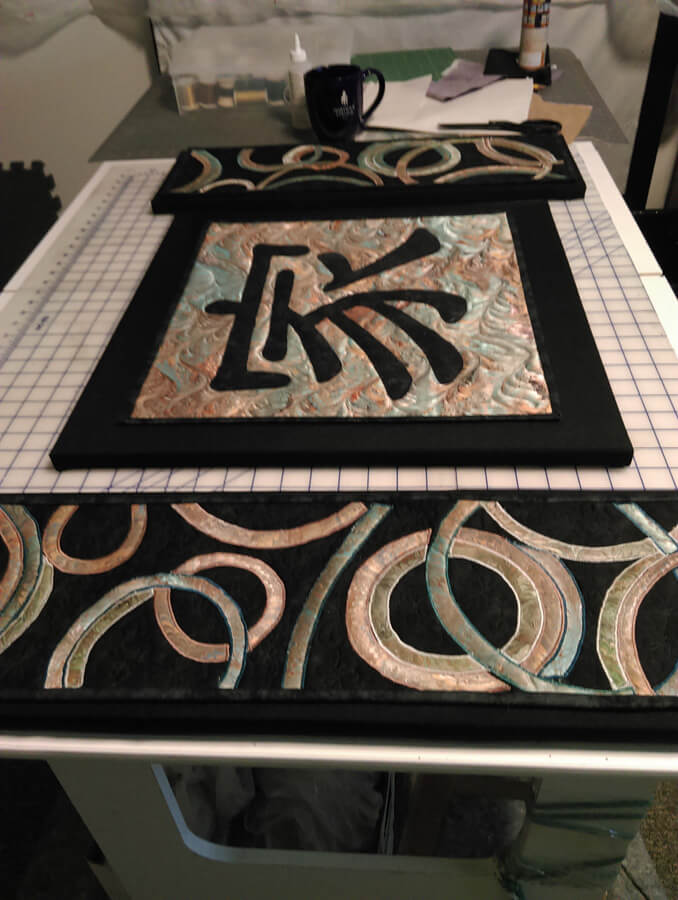
Checking to see if the three panels really do work together….
Time to square off and do the binding – the side panels had a LOT of ironing as they were becoming distorted. Note to self – allow more edging next time around…..
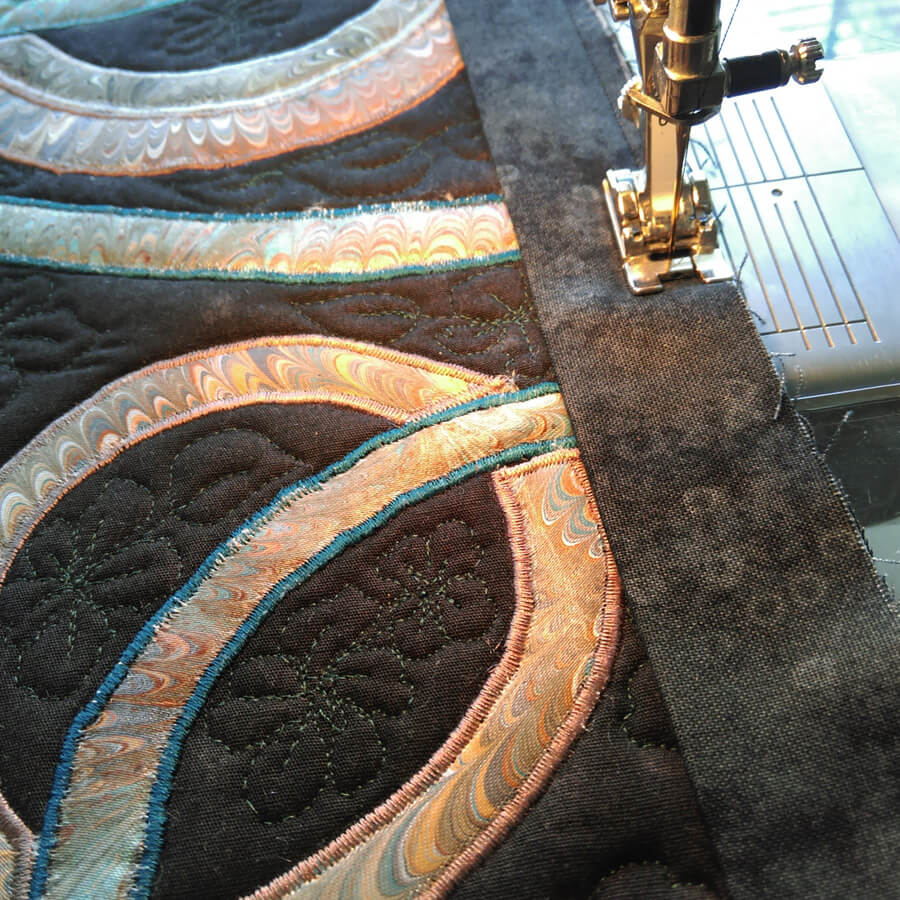
Preparing the canvas for mounting the panels. We have started mounting much of our work on canvas frames covered with a complementary fabric. Much sturdier, easier to hang, and people seem to view them more as “art.”
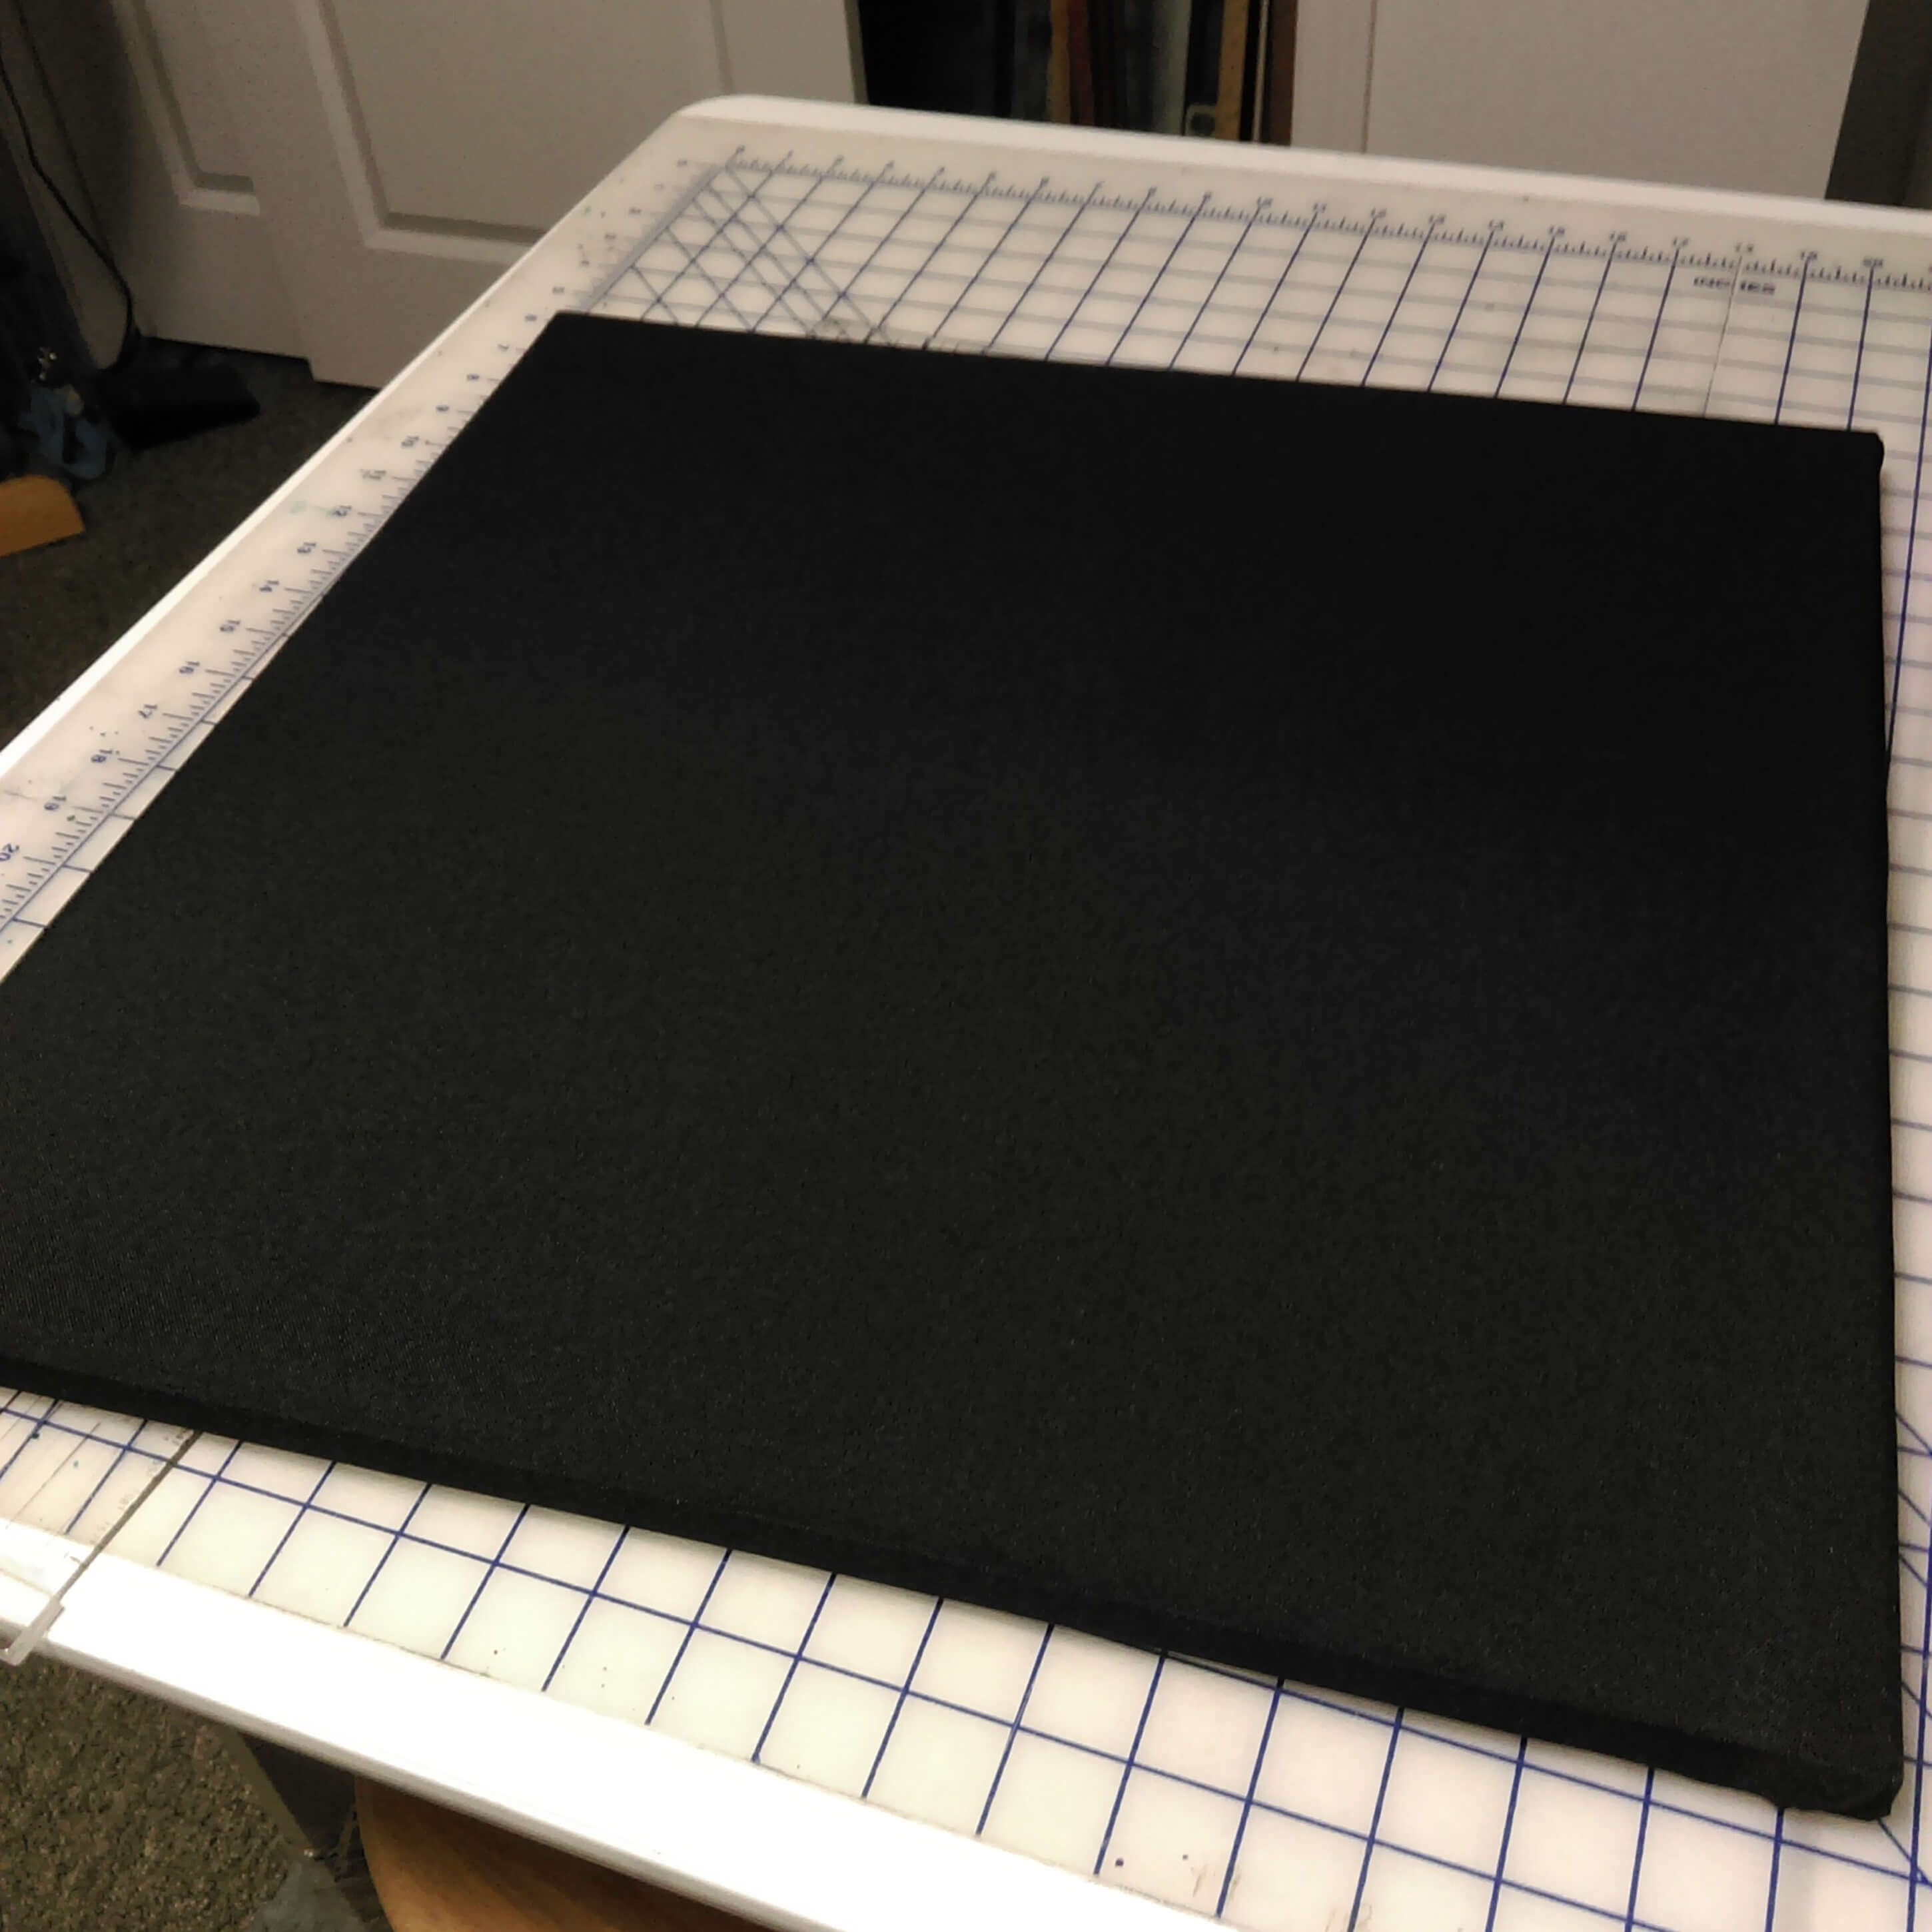
20-inch square canvas covered in poly-linen.
Thinking it’s going to work…….each side panel is three 8 x 8-inch canvases, mounted together and covered.
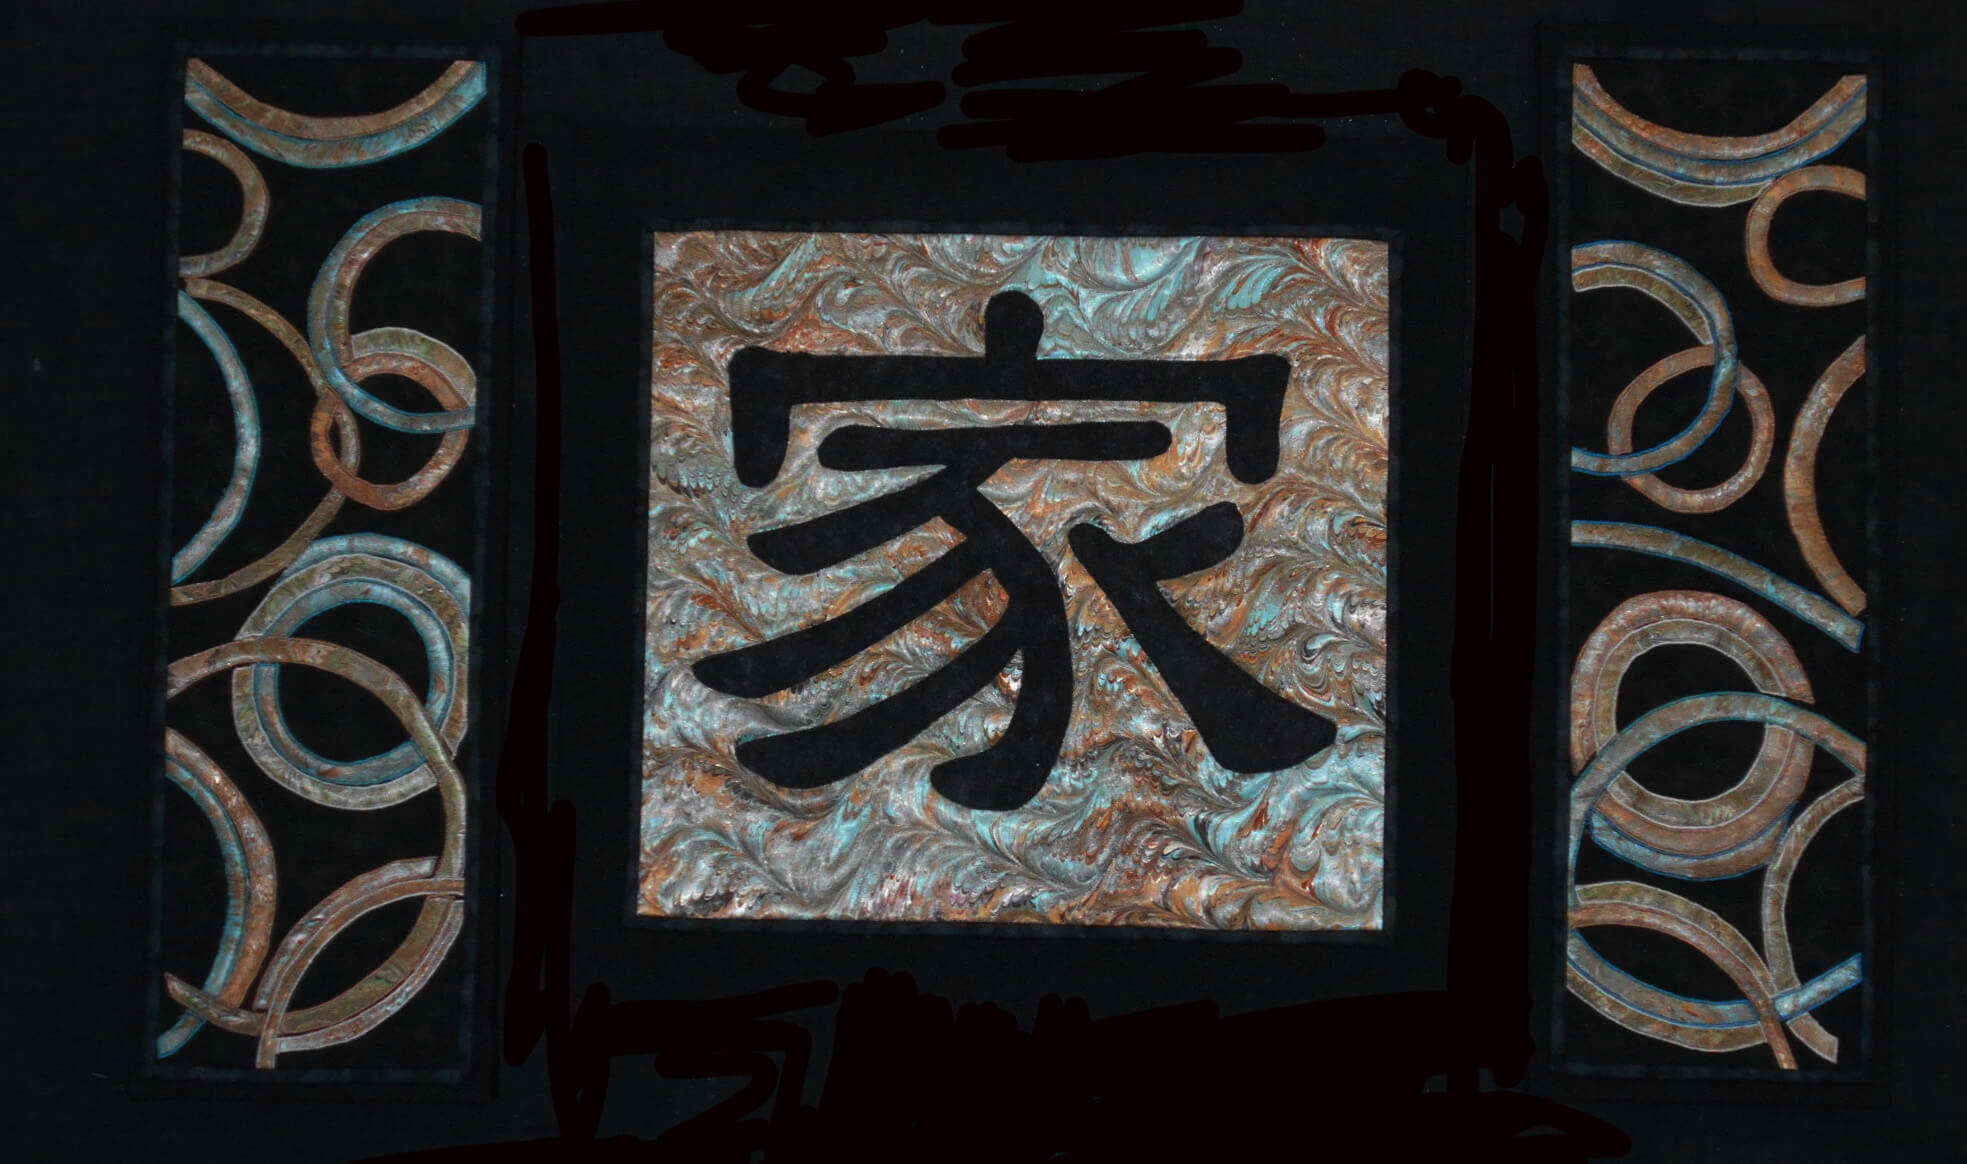
The final product – “Family.”
Making Progress…..
Just a Collection….
So I have finished reorganizing my Bridge folders for all the digital work and storage of all things art. About 6 hours total, but it feels good to have it done – serious loose end. Now I need to go through iPhoto and get some folders made to organize photos there – hopefully won’t take as long. Slowly setting up the to-do list for all things business.
Organized! (Aren’t I just so good?!)
The fist item over the next 12 days is to get every piece ready for a major display for Burlington City Arts. We will have 10-12 of our medium and large pieces on display in the Maltex Building on Pine Street for six months. Quite a nice venue, and our first major exposure in a contemporary gallery in the state. Lots to do – Ocean’s Bounty needs some work with the connecting beads and Gaia 2 (Pele) will be making its debut also, and I need to get it on its new hanging system.
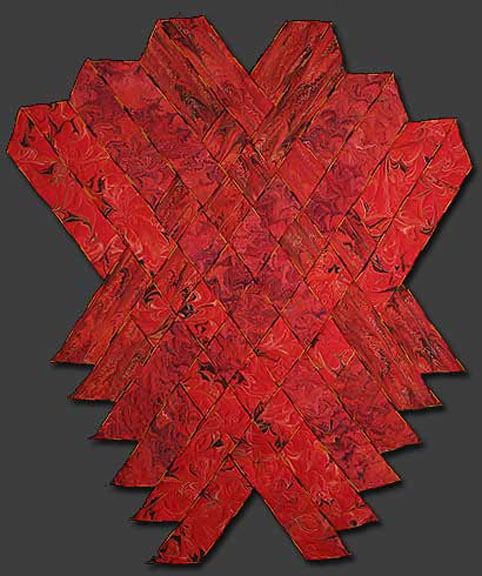
Gaia 2: Beginnings
LOVE this piece and have since it was completed many years ago. Will post when I have the new hanging system….hopefully cholla wood and braiding to hang each of the points.
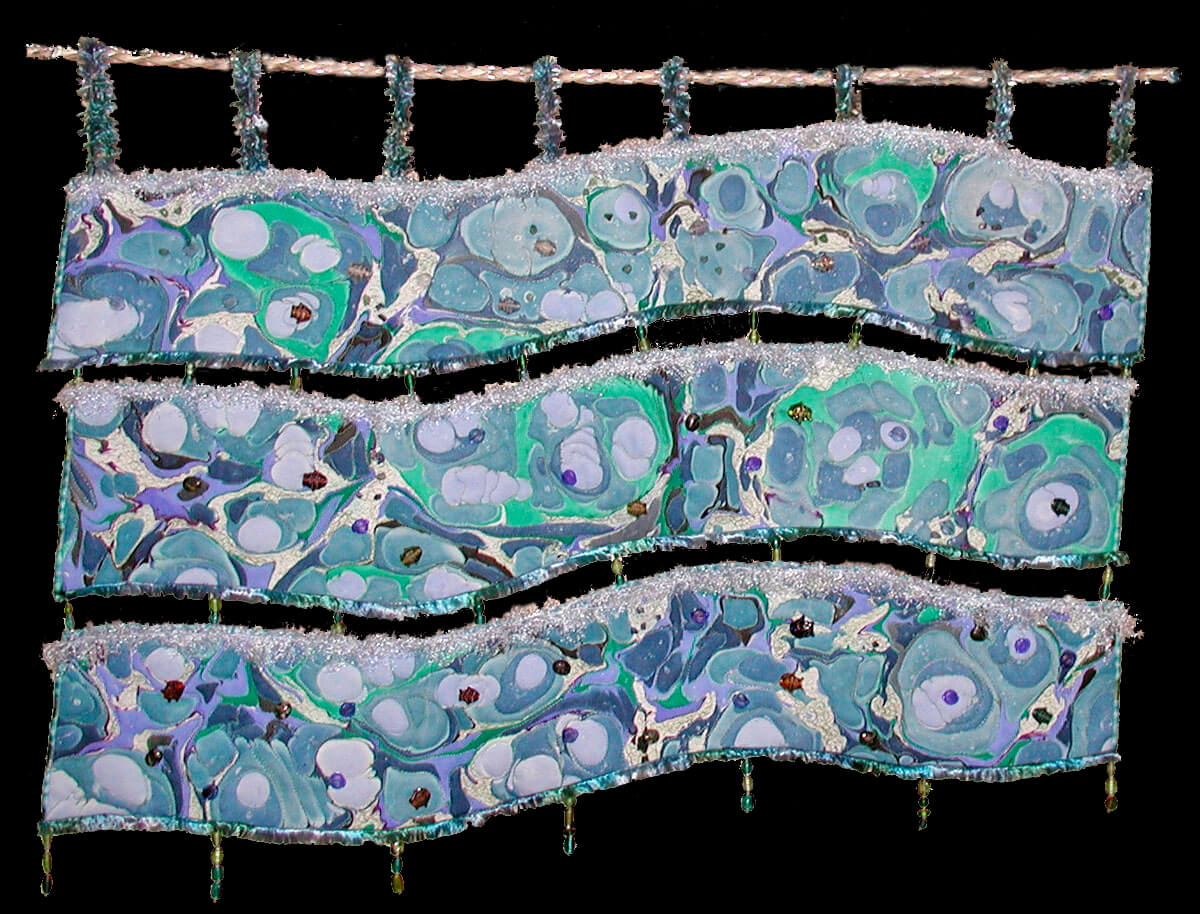
Ocean’s Bounty
Heavy piece with all the beading and layers and stones – but it will be good for it to see the light of a gallery.
(Wow – I just took less than two minutes to get those pictures from the digital folder – nice organization, Linda!)
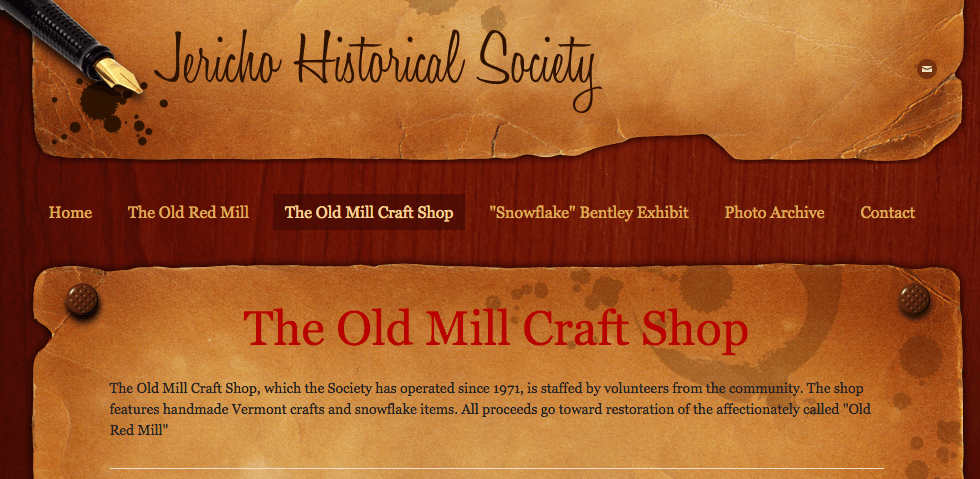
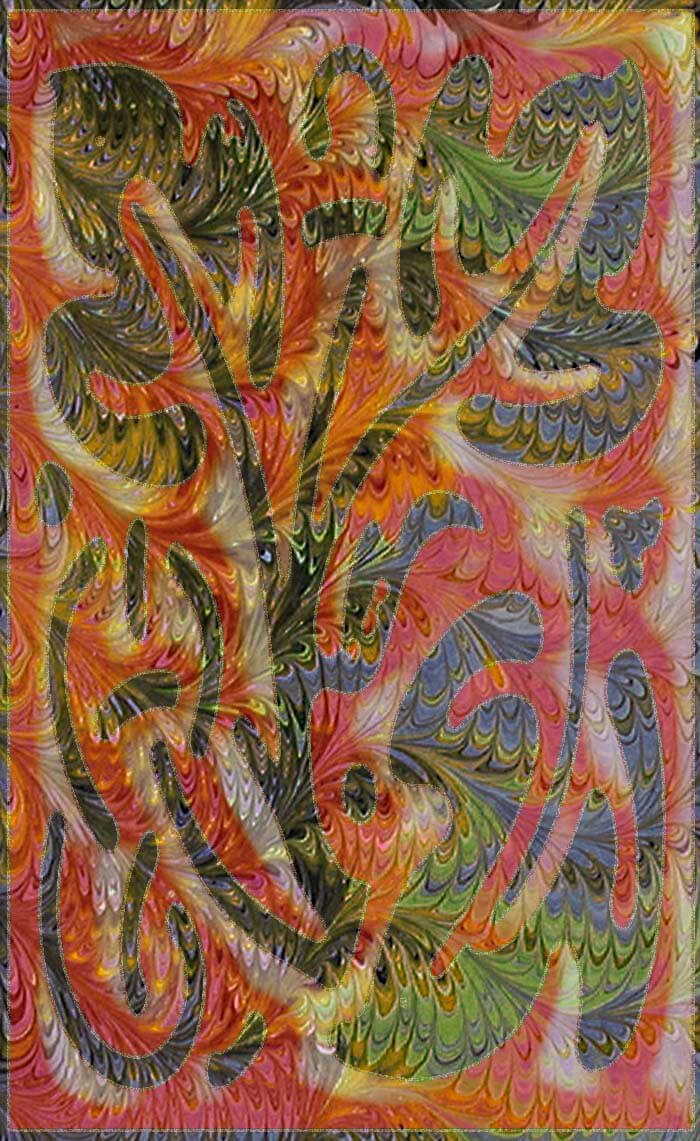
Hubby is marbling a lot, as we have new ways of marketing our fabrics. We are selling marbled fabrics in the Red Mill in Jericho, which is “coming home” again – his family settled this area and now he’s helping to support the non-profit mill craft and art gallery.
Four weeks today is knee surgery, with a three-six month recovery…I want to be back at the sewing machine within two weeks – too much to do!! I am finding guided meditations that will help prep for before and after surgery. My yoga practice is reviving itself as a way of strengthening the knee and thigh muscles for surgery. I found an integrative medicine doctor through the medical center, and I LOVE her. Looking forward to working with her over the coming year.
On to attaching a piece to a covered canvas with fabric glue….will post when it’s finished and dry…..
Playing Catch-Up…..
 A piece I started about 15 years ago and finally finished this summer – will be adding loops to the back to hang on our door for Halloween. I still have plenty more to work on, and slowly,over the winter during knee recovery I plan to work on them – plus lots of new ones.
Speaking of new ones, in organizing Bridge yesterday (some 7000 photos and a lot of saved duplicates, I think I can make sense of some of the new process pictures. This first piece, Chocolate Box, was done YEARS ago, as part of an 8 x 8 challenge from the old QuiltArt list. I think the theme was “brown,” but who knows? Originally I just sewed pieces with a zigzag stitch – and then I realized I needed stabilizer on the back – like I said, a long time ago. This summer I came across it, added backing, re-quilted it in a variegated thread, and added a border. Still love the piece!
Chocolate Box
This piece was done for us years ago as part of a challenge to use marbled fabric in a traditional pattern. I made a sandwich, added waves to the bottom of each boat, and quilted semi-circles around the sails to represent the sun. If you made this for us, please let me know so I can credit you.
This next was also part of a challenge, and I use it as a sampler for using free motion quilting on a traditional block. One of the sections is plain, the others have a variety of patterns, some following the the pattern, and some walking around. I love how the marbled fabric quilts up.
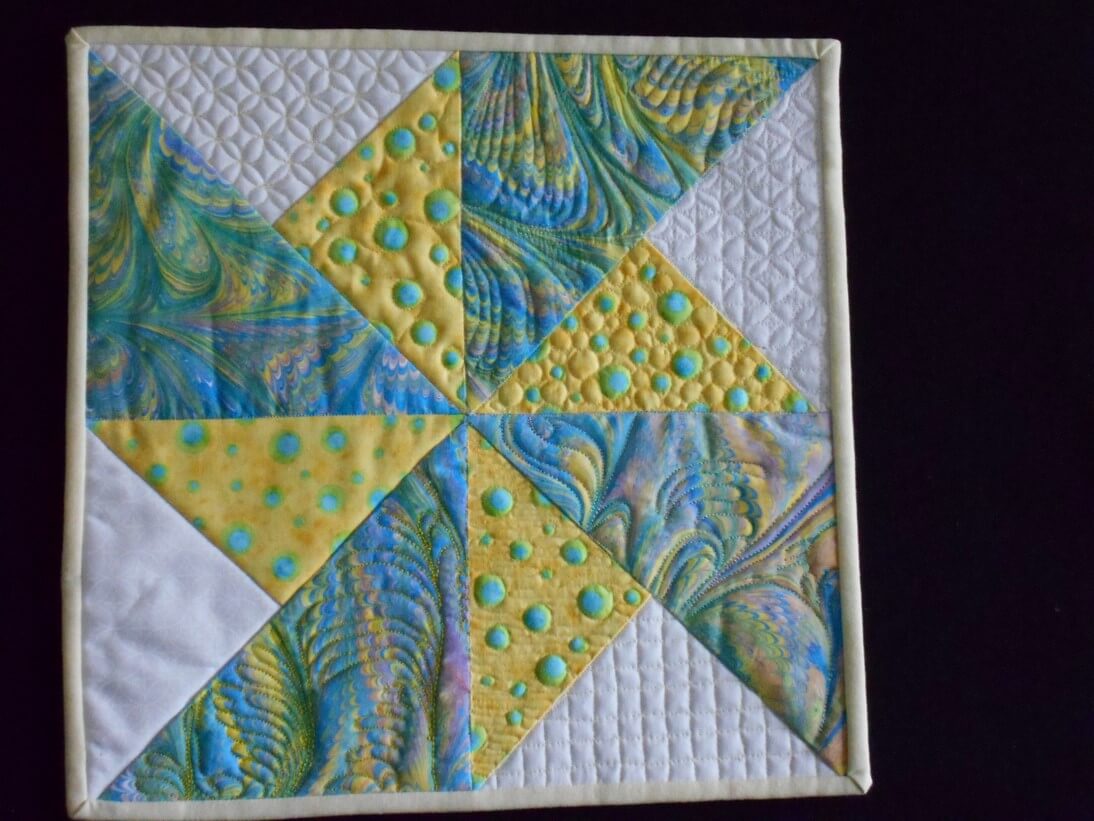
Pinwheel
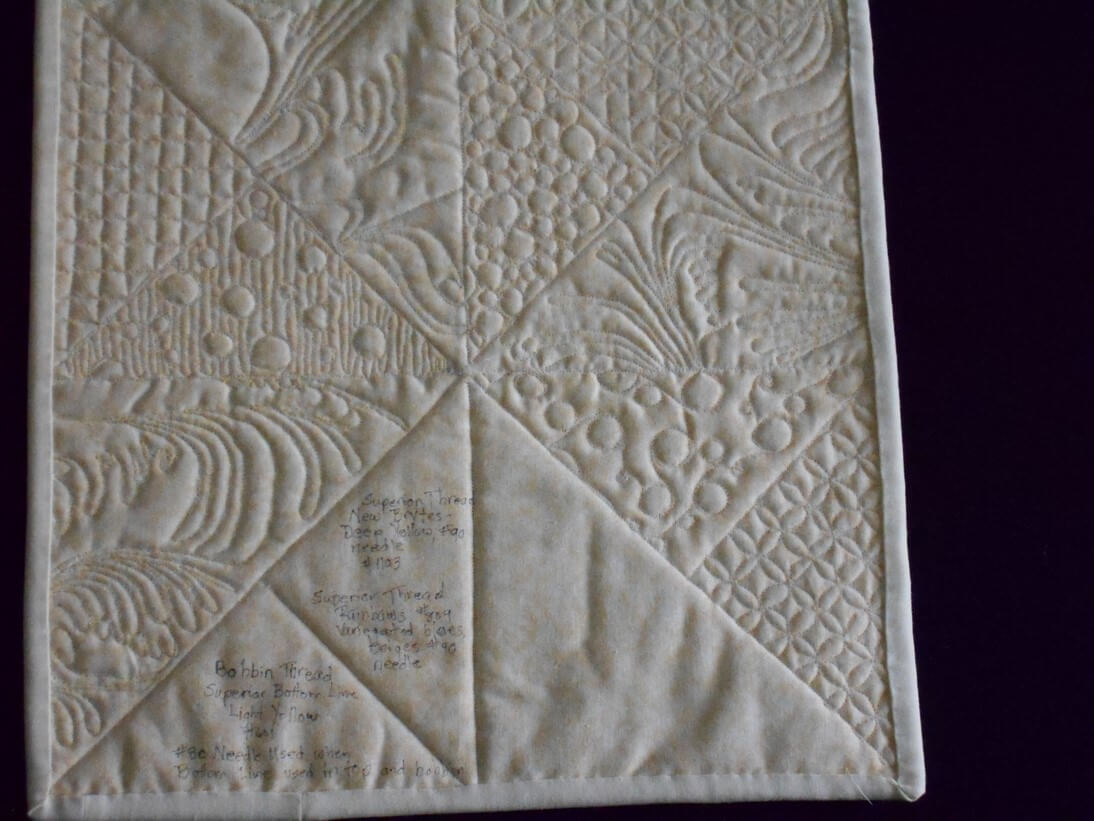
I like to use my backs to show errors- and then in the blank area I added details about threads and needles.
So I continue with cleaning and organizing, and hubby is busy marbling every fabric we seem to have in the house. He’s having a ball!
UFOs No Longer – Thoughts on Cheater Cloth Quilts
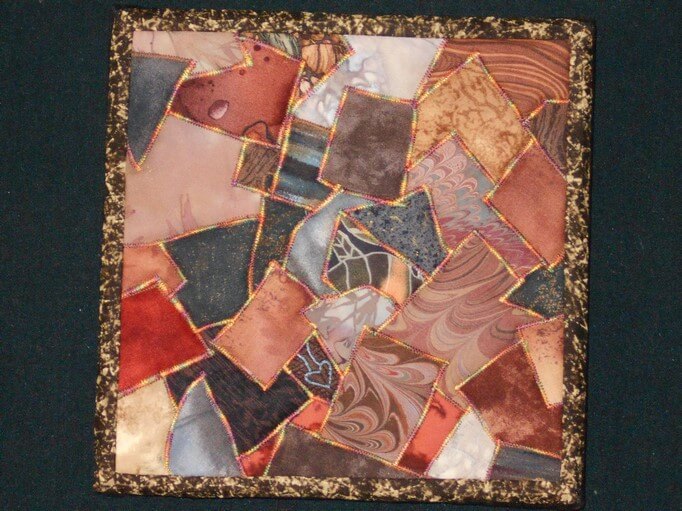
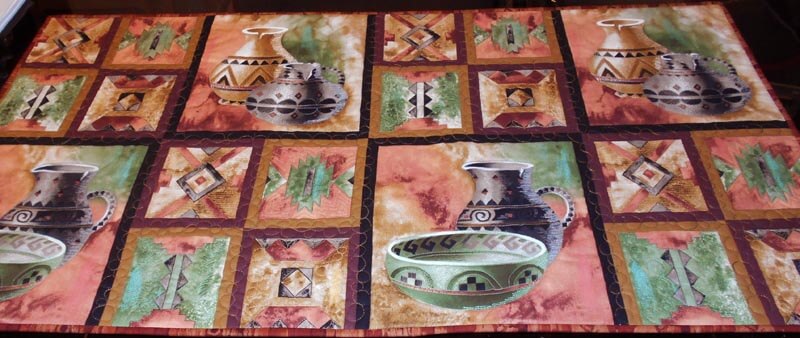
 Yup, two more pieces around for forever…..both needed complete revisions, as my skills have grown quite considerably. The first is a “cheater” cloth, very Southwest, which is why I bought it. Originally it had been quilted in the ditch, and while I loved the co.ors, the piece really didn’t speak to me……so I took it all apart.
And in the process I discovered a ,lot of stuff – pros and cons – about cheater cloth.
One, they are great for practicing free motion quilting. You can get right to the designs without having to worry about putting the whole thing together. I re-sandwiched the top and then studied it for quite a while for ideas.
Two, they can really tax your ability to work with fmq designs. In some of the smaller blocks, I used the same basic quilting motif and changed it up a bit in other blocks of the same design. Great way to practice!
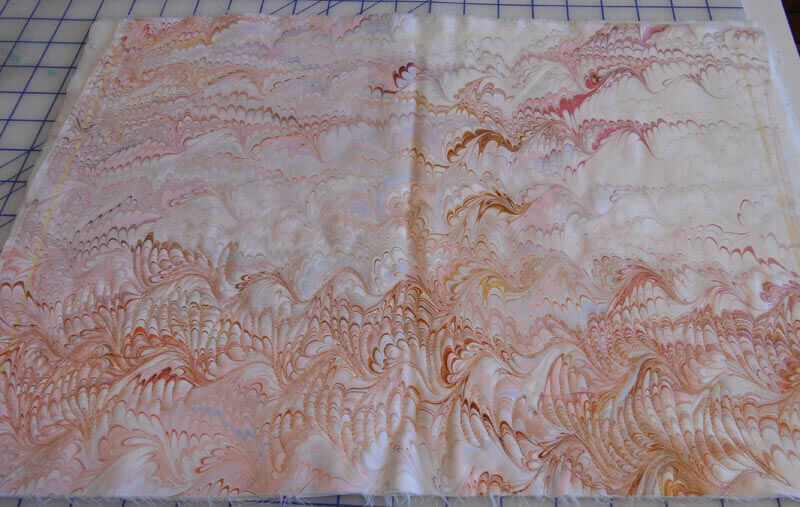
Three, the store doesn’t always do a great job of cutting the panels. On closer examination, you can see where some borders show and some don’t. I really had to work the binding carefully so the piece would look even all around. Plus, the fraying from new usage, poor quality fabric, and age didn’t help at all.
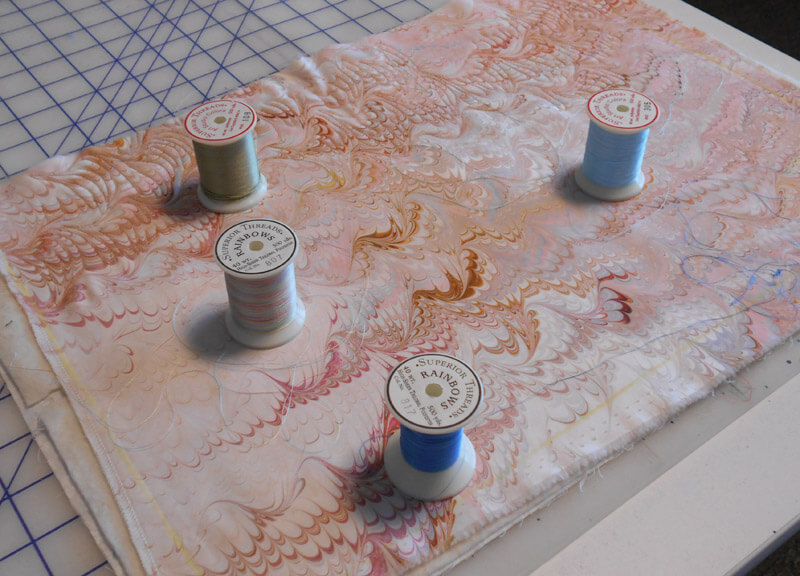
Four, nice decisions about which type of thread to use. I stayed with Superior Art Studios and Rainbows – because I like the sparkle. I did use cotton King Tut because I wanted to experiment with thread painting for shadows, and I didn’t want it really obvious.
Five, I need to get a better photography set-up in our new place…….
Six, discovered I could cover a few binding mistakes with some markers….liking that!
So…..
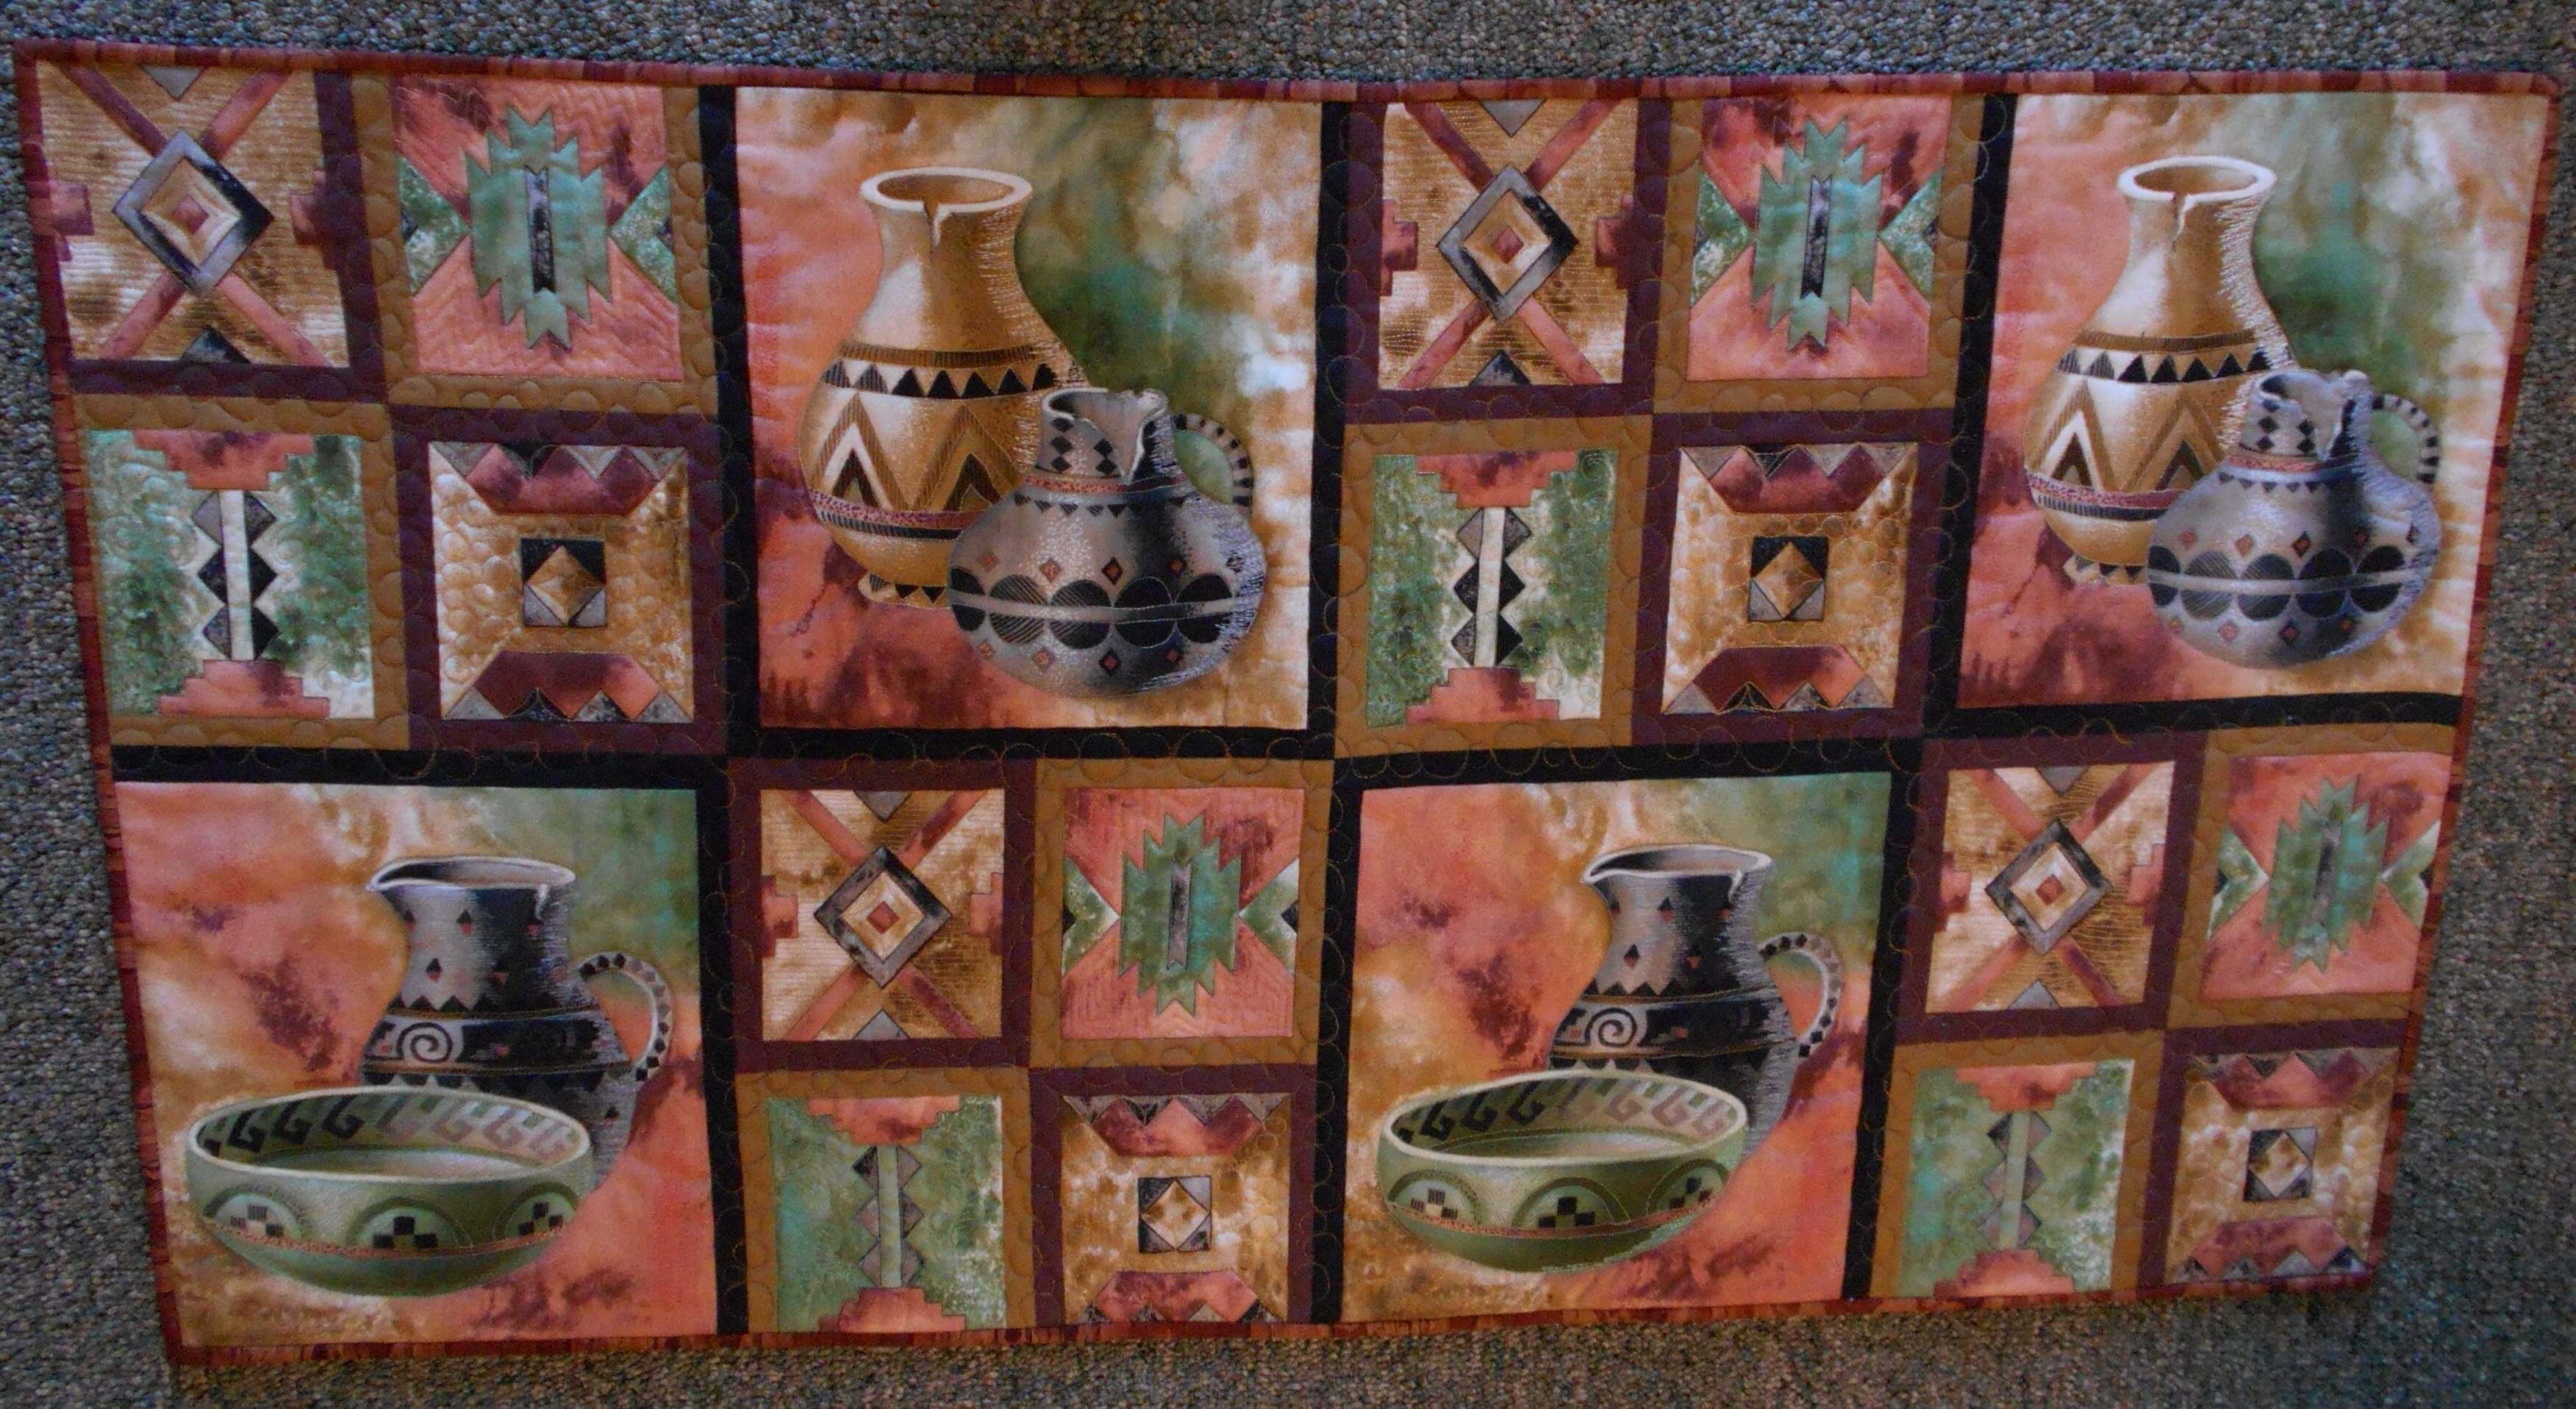
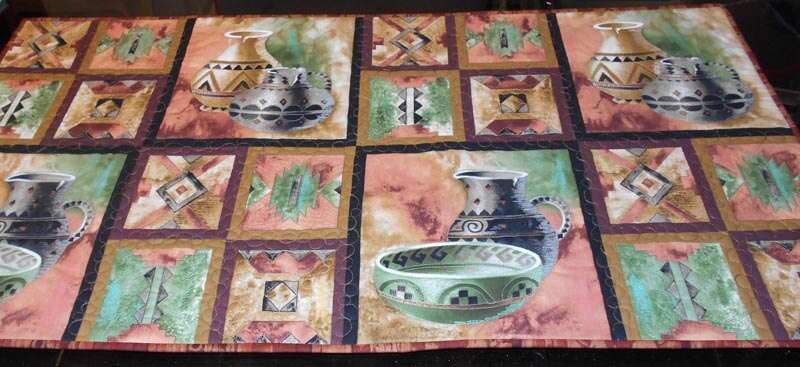
View from the top – couldn’t adjust light like I wanted (really missing the garage set-up at this point). Look at the binding – see what I mean about borders?
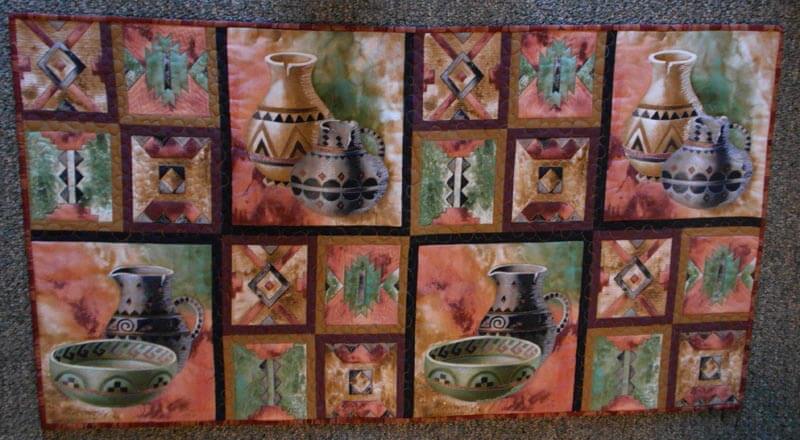
Another view – the backgrounds of the actual pots are left unquilted….I was tempted, but I keep remembering Tim Gunn and “edit.” I didn’t want to detract from the “shading” I did on the pots…I was really happy with how that turned out.
Seven – straight-line outlining isn’t as easy with a free-motion foot…but it is great practice….
UFOs No Longer
Lots of finishes going on of projects that have been around for a VERY long time! I had a productive weekend of finishing three, and next blog post should be about two more, as well as a new project undertaken.
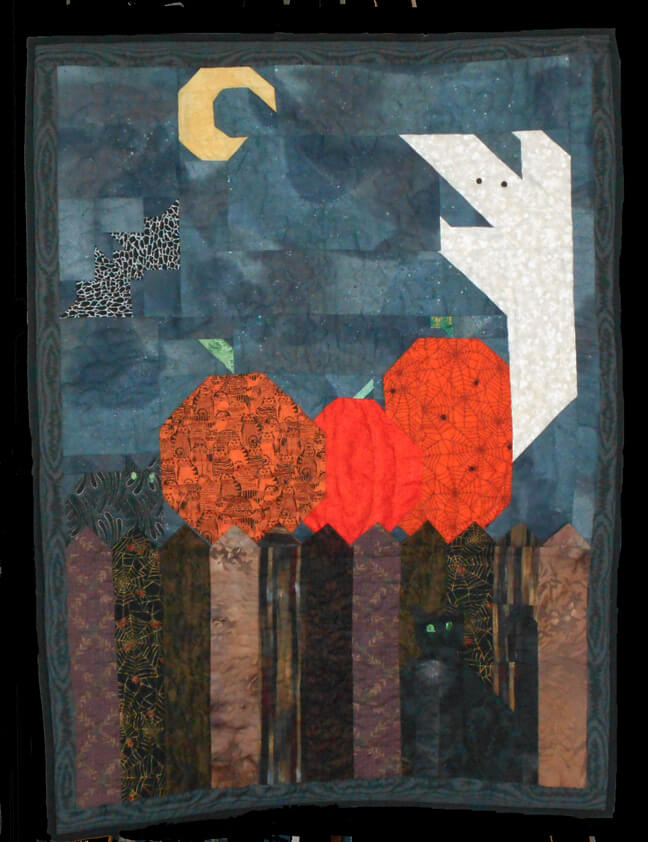
First up – a Halloween quilt I pieced probably 15 years ago, when I was using McCalls Quilting and piecing lots of quilt tops. It didn’t really need much – cats’ eyes (variegated thread) and eyes for the ghost (small pieces of lava). I examined the machine quilting, back from when all I did was stippling – I was very happy with how it looked. I added free-motion words in the sky and then added binding. Really happy –
This small 8 x 8 was done YEARS ago in response to a challenge on the QuiltArt list. The theme was “brown,” and this was way back when I was still pretty literal and linear in putting work together. This is “Candy Box,” and I used a zigzag in variegated thread like you would see in the wrappers in a fancy candy box. Added the binding and much pleased with the finished table-topper.
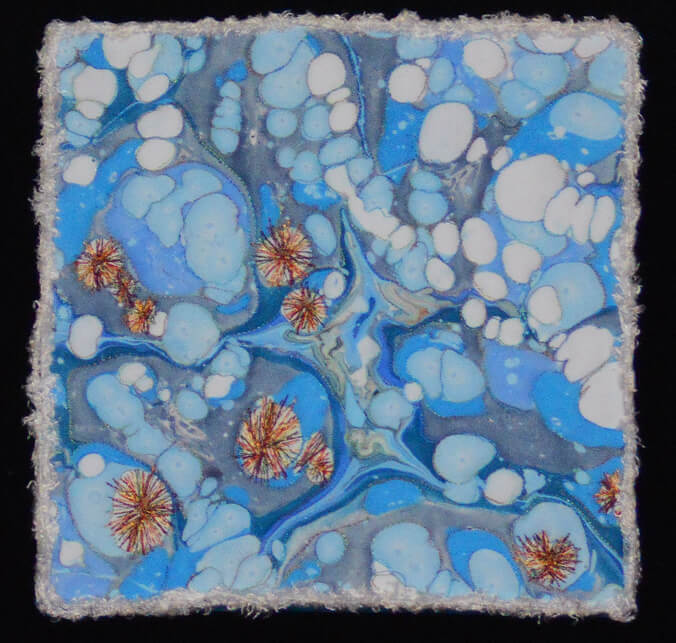
This last piece was a remnant from about 10 years ago. I quilted the bubbles, but it still needed a focal point – so I quilted in some sea urchins…hence the name “Sea Urchins.” Another 8 x 8 stitched to canvas after quilting was finished.
For Sale: $125.00
A great weekend, more happening in the studio…..lots of upcoming opportunities!
“Storm Coming” – New Fiber Piece
Asian Fantasy
I’m unearthing a lot of unfinished projects and pieces of fabrics that can be turned into small art quilts for Etsy, and I also came across a couple of digital pieces (like the above) that need reworking for an upcoming show. It is just amazing to me how productive I have been at getting new – and old – projects completed since we set up the new studio. Here’s pics of the new studio – taken right after we unpacked and stored, so things are cleaner than they are now after three weeks of solid work. Good north light, and lots of surface area.
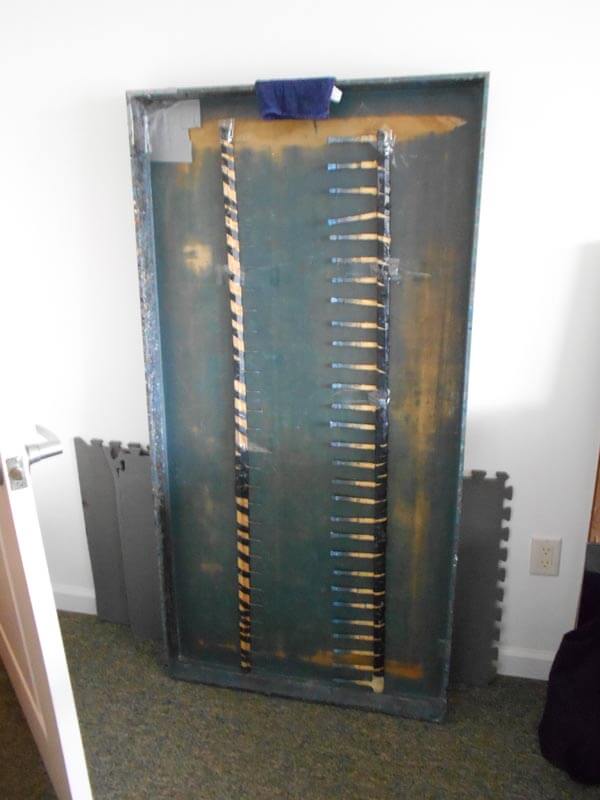
Large marbling tray
Stored behind the door, along with mats and combs…..
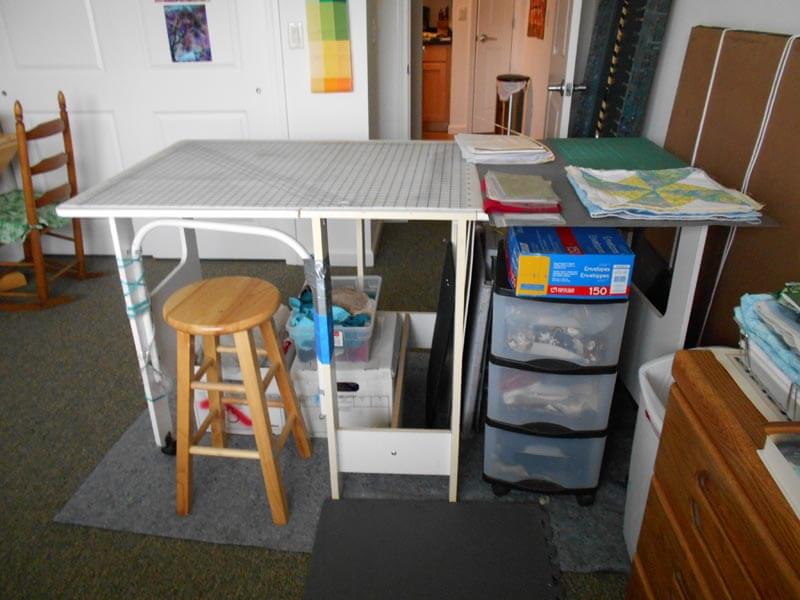
Cutting table and storage
This can be closed up for an air mattress on the floor for company.
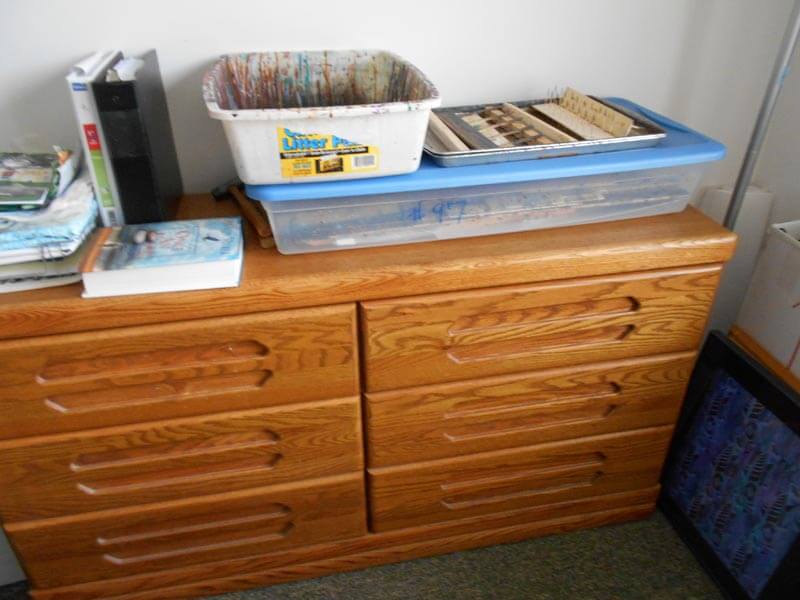
Extra storage
Filled with fabrics and patterns and lots of other goodies….no longer used for clothes!
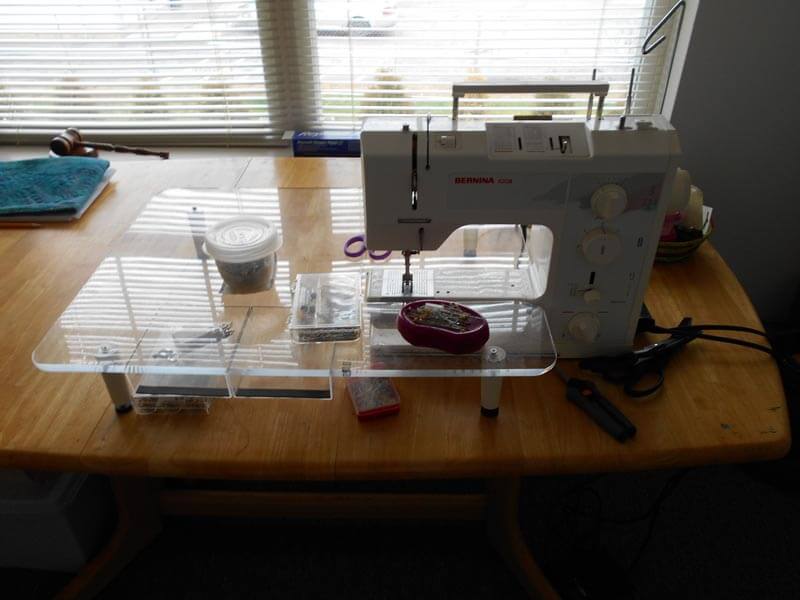
Bernina 1008 and sewing table
Sewing table for the last 15 years, lots of room to the left to support larger quilts….almost impossible to keep clean……
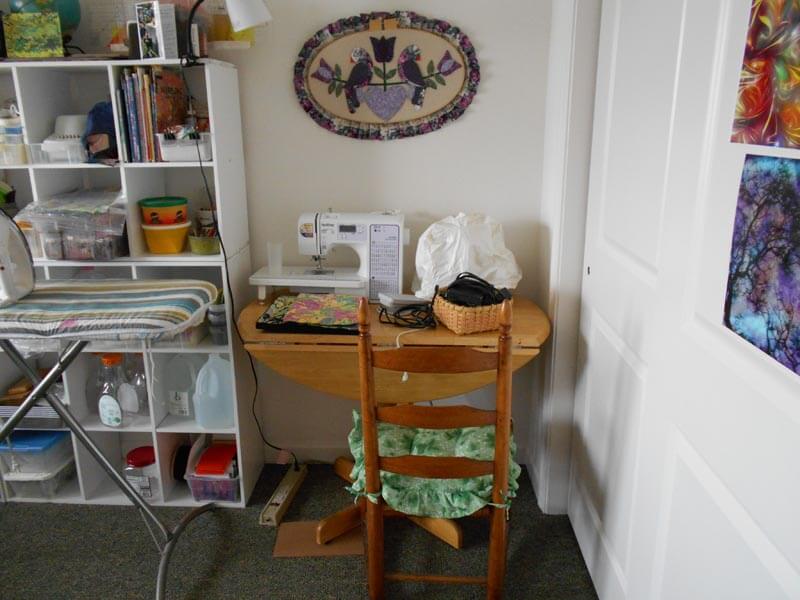
Additional sewing area
For the serger and decorative stitches on the Brother machine….
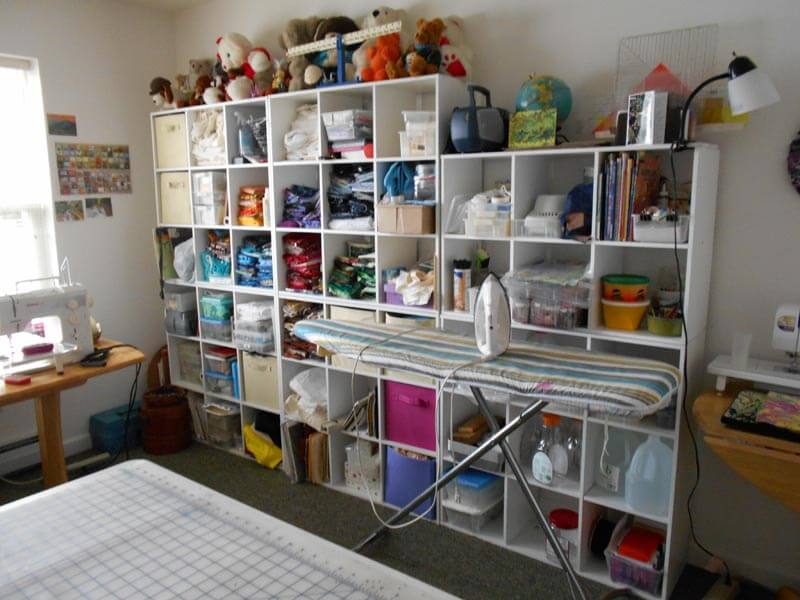
Storage cubbies
Happy as a clam, and now to the piece in progress….which is some leftover from another completed piece.
WIP – Storm A’Brewin’
Thread choices –
Thread choices – Storm A’Brewin ‘
Didn’t use the blue – too much contrast, and not what I liked – ended up pulling out all the threads…one advantage of not checking the tension – easier to pull out.
Thread work
Finished project, available in Etsy. I needed to simplify the design – got caught up in following the patterns, so I ended up leaving the bottom corner free of stitching, so it looks like everything is approaching from the northwest.

Storm A’Brewin’
Serged edges, mounted on wrapped canvas, 12 x 16 inches. Moving right along!!
Suggestions Needed
So I have unearthed a bunch of UFOs in going through one of the containers in the studio. One is up on Facebook, free to a good home for the cost of postage. A couple of them, I need suggestions for what I can do for the quilting. Plus, if you recognize that you made the item, please let me know so I can credit you – it’s been a long time since they were sent to us.
Here’s the first.
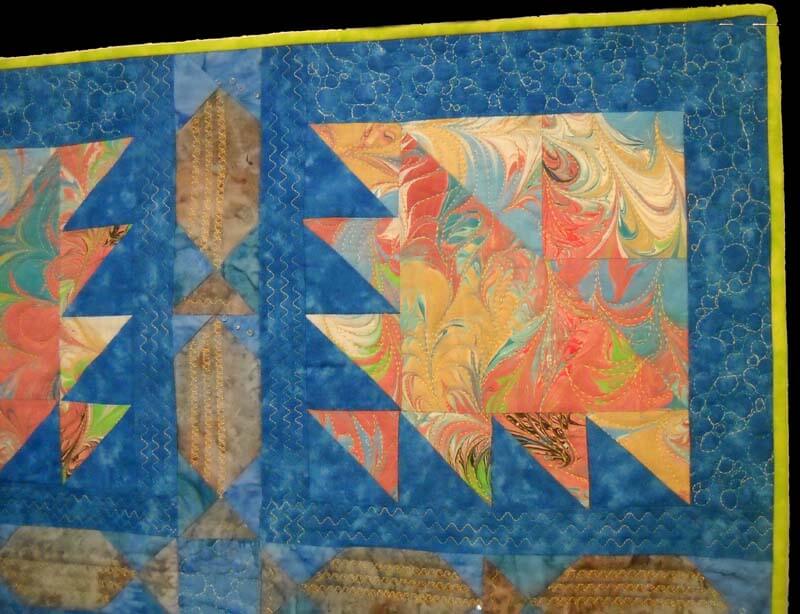
Log Cabin Sampler
This was done for us as a way to use marbled fabric in a traditional block. Now I need suggestions on the quilting. I want to use it as a sampler in my fmq classes. I was thinking of outlining the blue marbling for the waves and then doing something with partial circles around the sunrise/sunset….Ideas?
Here’s number two.
Reverse Applique
This is reverse applique, and I can treat it as a Hawaiian block with outlining, but I’m wondering if there is something else. All suggestions welcome!!
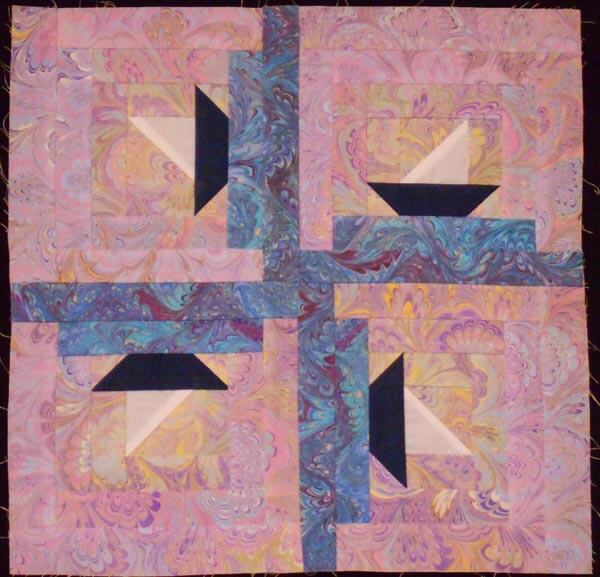
Another Commission Completed
Yoga Susan’s Quilt
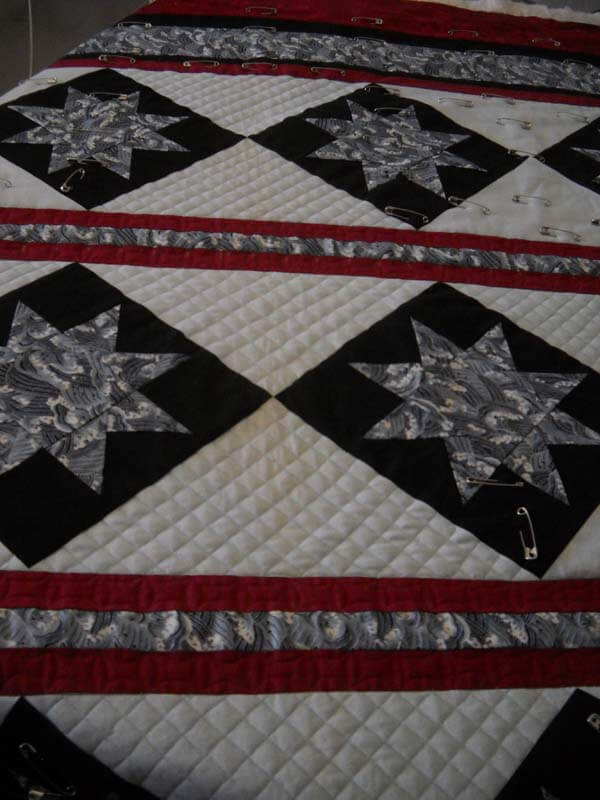
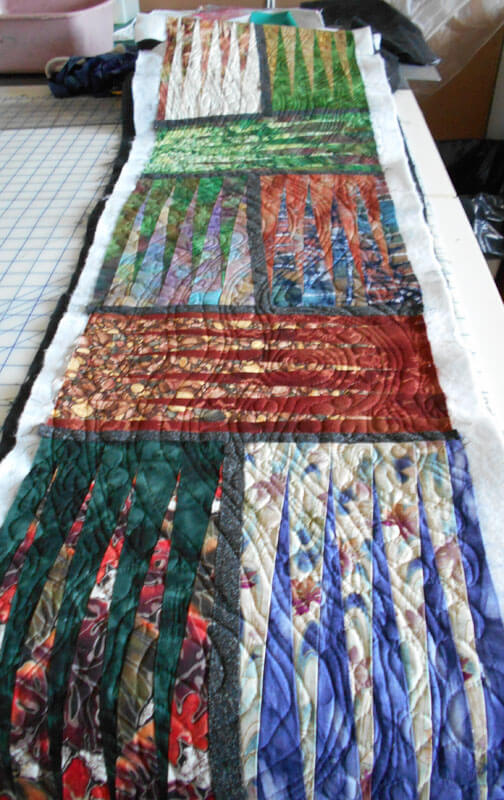
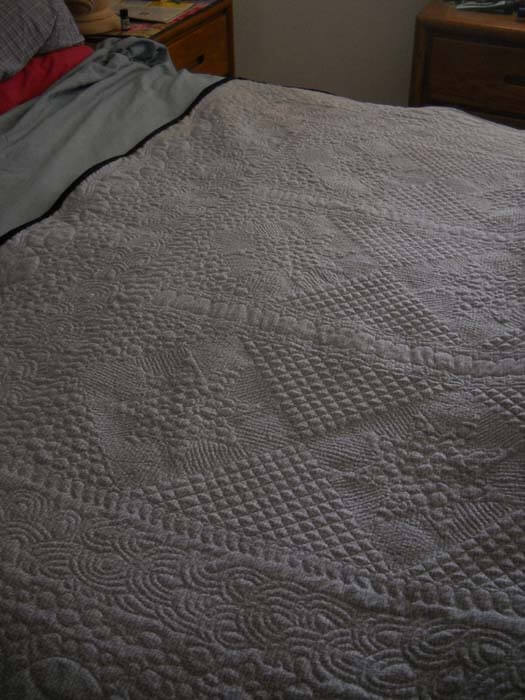
This last quilt commission (which Susan is no doubt getting plenty of use in chilly Tucson, and we have our quilt off the bed, as it’s too warm here in Vermont….) was a challenge for me to fill space with quilting design. I LOVED how it came out, and as usual I learned a few things on it. So when I started this new table runner for a friend for Christmas (left-over pieces from a Judy Niemeyer pattern) I wanted to do an overall quilting pattern that was very organic and would unite all the blocks.
Big lesson – just because you can quilt it, doesn’t mean you should….which harkens back to Road to California in 2012. First time at a big quilt show, and hubby and I kept commenting on the amount of free motion quilting showing up. Some quilts didn’t seem to need that much quilting, and on some the quilting really enhanced the work. This was also when I began taking free motion seriously, and in the last three years I am now teaching basic machine quilting.
But with this table runner, I realized to late (to rip out half the runner) that I had too much quilting. Here’s my table runner that was on the table when our friends came to dinner.
The block pattern is obvious, and at this point I was stumped as to how to quilt it – I ended up using invisible thread with wide circles. Ehh. So I wanted to do something different with this one.
You can see the meandering quilting – I really just played with curved line to offset the sharpness of the design.
You can see here that the quilting design when up close takes over and dominates the pattern. This is where hubby quoted Tim Gunn (yes, too much Project Runway in our house,……): Edit, edit, edit. Yup – bigger curved lines and no leaves or stones.
Like I said before, way too late to take all those stitches out. However……when looked at from certain angles, all you see is the pattern. At other angles the quilting is predominant. And, ultimately I like them both.
Before I actually started the quilting, I was subbing one day and had time on my hands, so I was watching one of my Craftsy classes on machine quilting big projects on a small machine (and my Bernina 108 doesn’t get much smaller….). Spray-basting the WHOLE quilt. Nothing will move. I’m trying this, and lo and behold it worked WONDERFULLY.
The spacing could be better, but NO TUCKS! Well, three little ones that actually ironed out. That’s the way I’m going from now on. My fingers will appreciate no more safety pins – this time a year ago it took hubby and me four hours to pin-baste a queen quilt…..
So more lessons learned, and another commission in the works for March. I am having SO MUCH FUN!!!
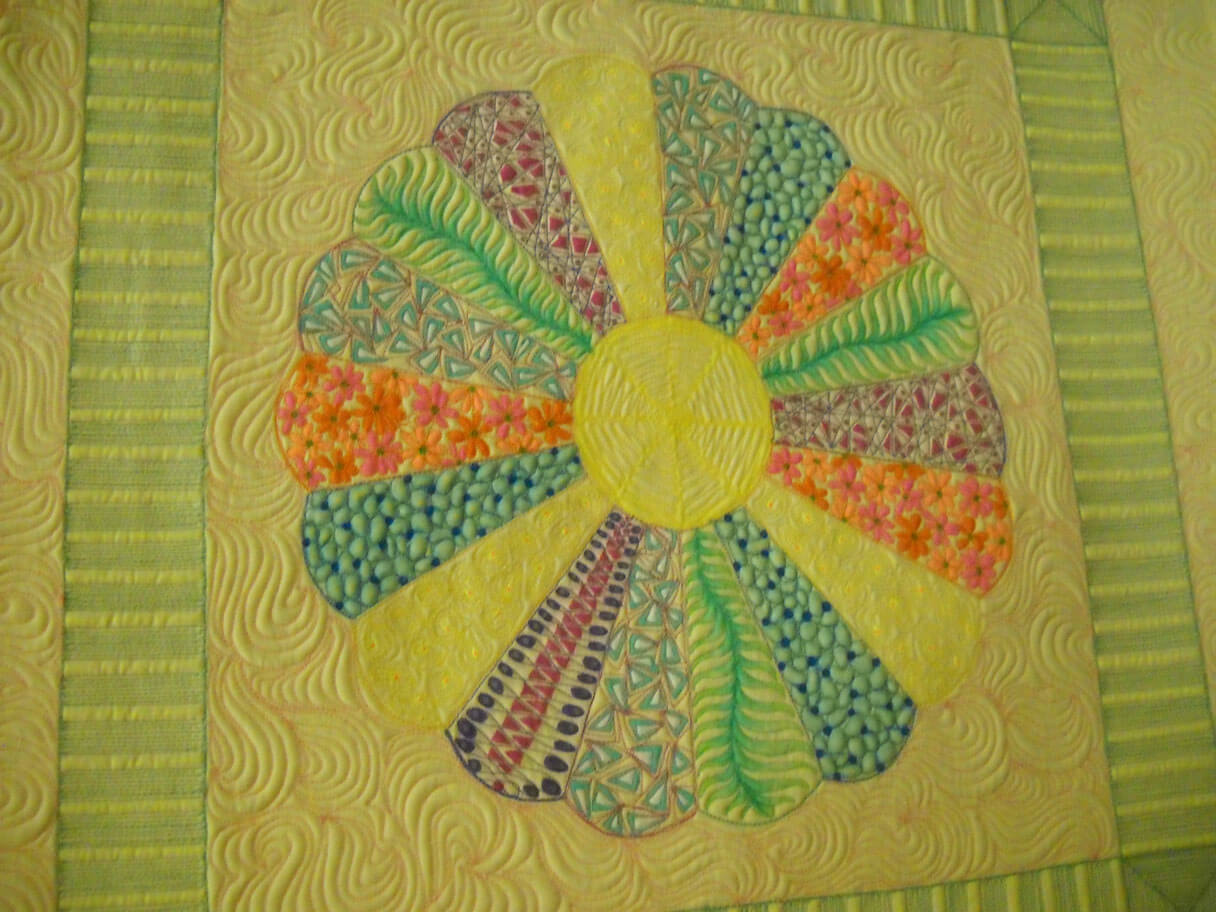
Traditional Sampler Quilting Tutorial
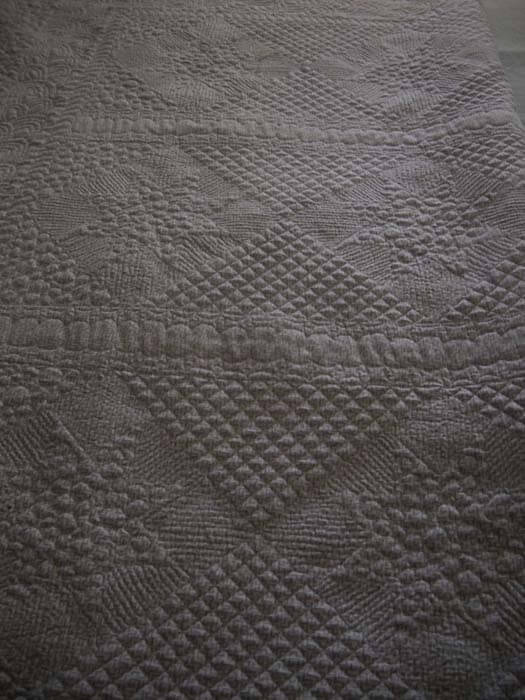
About two years ago I asked for some volunteers to make traditional blocks using marbled fabrics, as I wanted to show what can be done with traditional quilts besides the art quilts I do. Now that I am improving my machine quilting skills, I turned one of the blocks into a new teaching sample for both quilting marbled fabrics as well as using marbled fabric in traditional quilts. First up is the back of the block – a list of all the threads and needle sizes used, as well as any (and all) tension issues, so they could be discussed (and I wouldn’t forget what I used where).
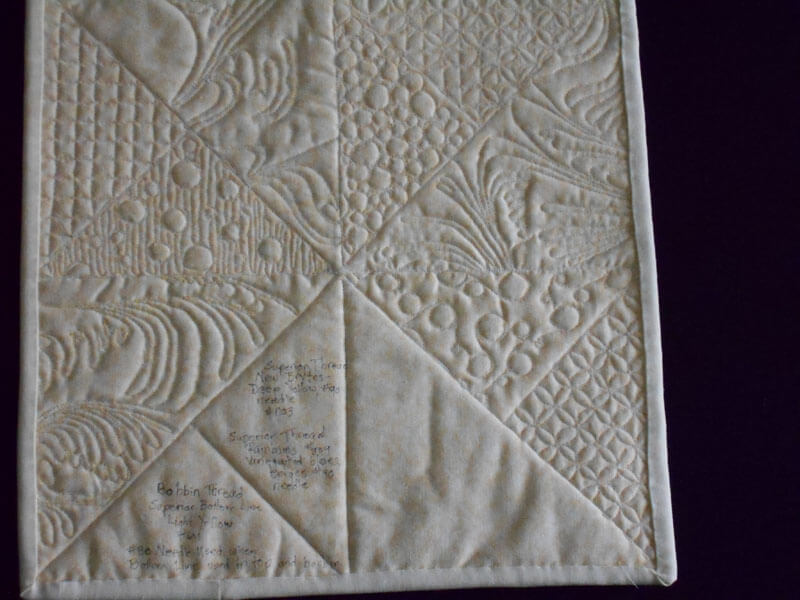
Back of traditional block
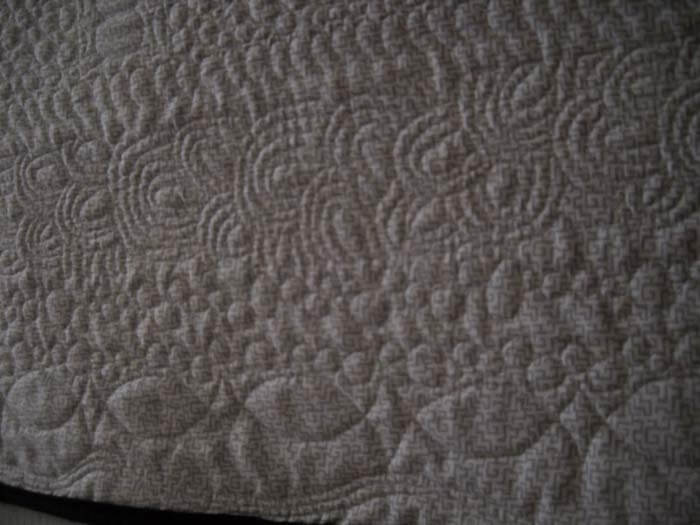
I quartered the block, and one section was left completely unquilted – because that is also an option. Here’s the front of the block:
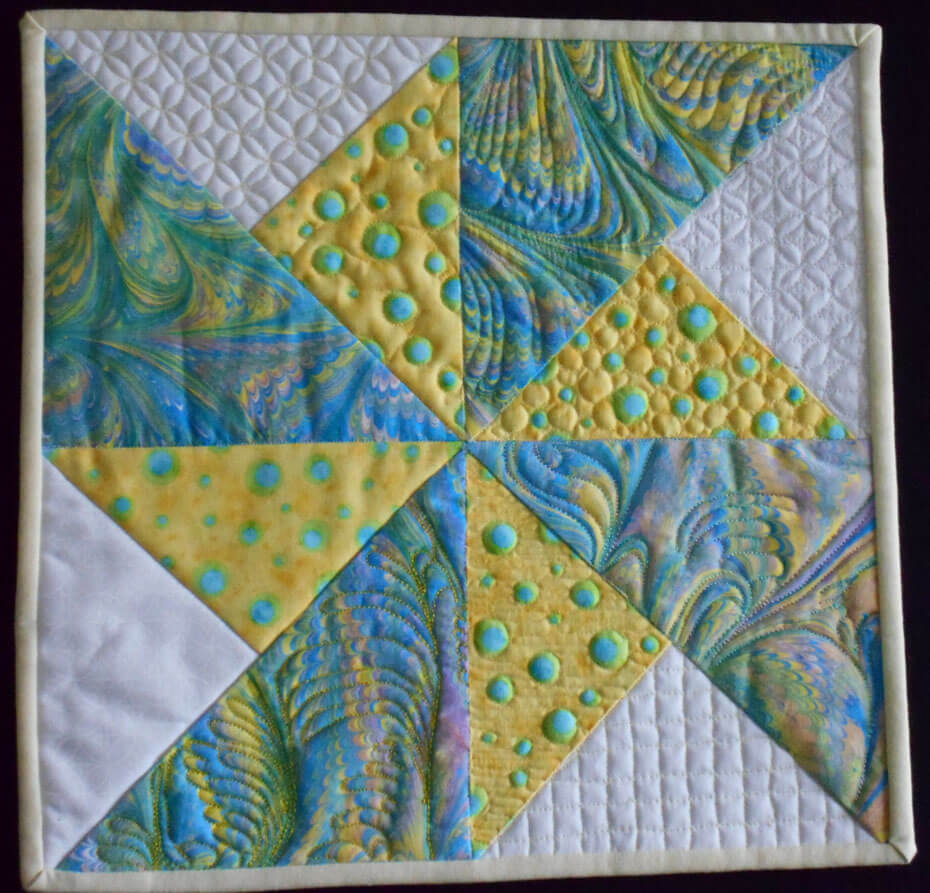
Marbled quilting sample block
Far left – unquilted. The yellow pieces have three different designs. I’m partial to the one with pebbles quilted throughout the piece. I used Bottom Line in the bottom, size 80 Superior needle, and Bottom line in the top.
Each marbled piece is done in a different free-form design. Lower center uses a Superior Thread Brytes, heavier, so I used a #90 Superior needle. Upper right used Bottom Line on the top and followed most of the curves in the pattern. Right marbled fabric used a variegated Superior Rainbows thread and only did a few of the wide curves. Different looks in all three. One of my favorite stitches is just following basic curves, and you can see that in this quilt:
Free motion quilting
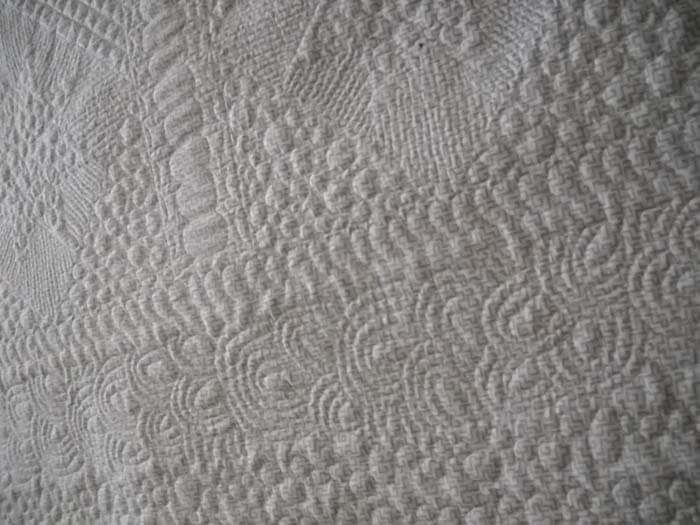
For the white – BIG lesson was don’t use a distinct variegated thread unless your fmq stitches are VERY even. Spent three hours taking it all out. The white was patterned with circles and small crosses. For the bottom right I used yellow Bottom Line in the top for a hint of color and gridded the triangle, using the fabric pattern as a guide. Upper left, also with white Bottom Line, I followed the circles in the white fabric pattern. Right triangle I followed both patterns, also white Bottom Line, and found it too busy.
After the New Year, I want to experiment with more like this. Let me know if you have done something like this to determine different quilting ideas.
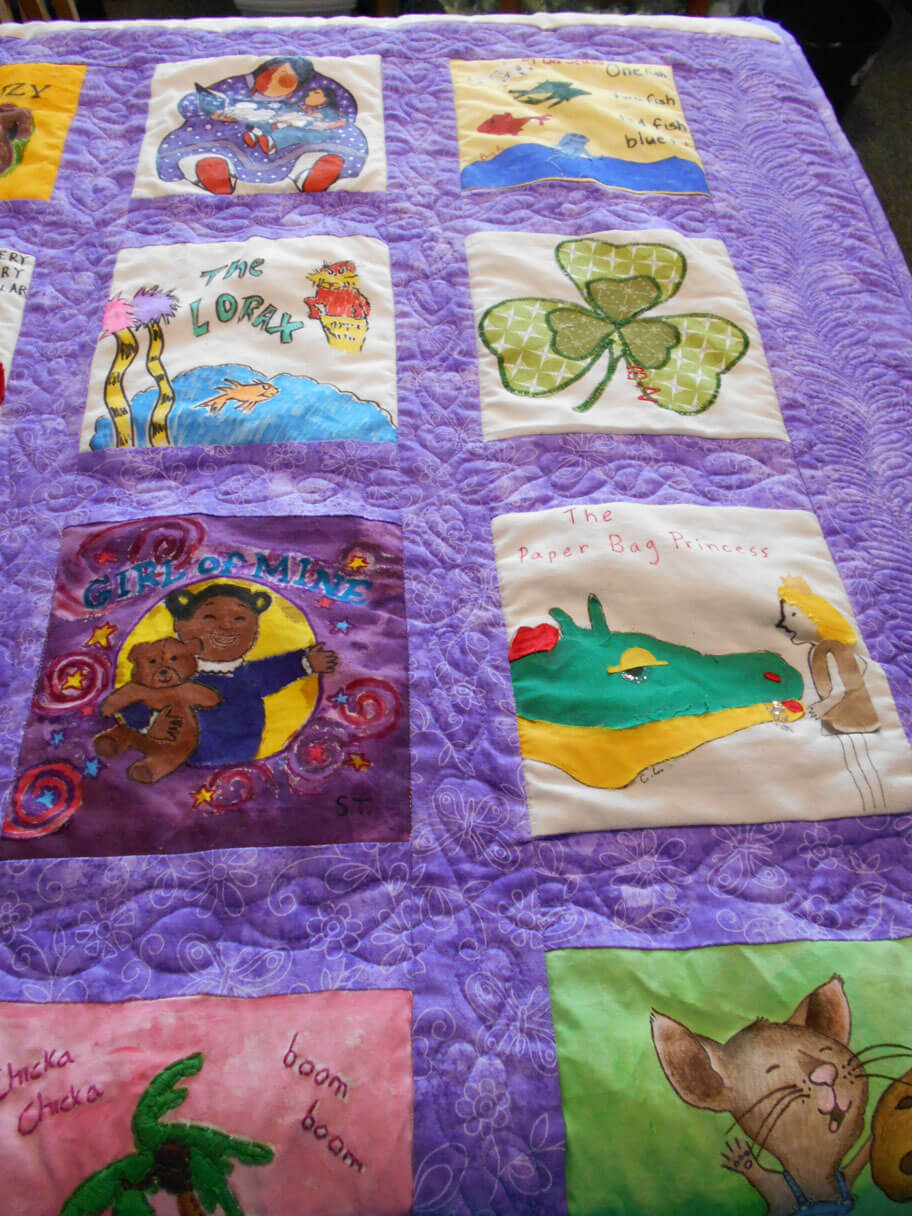
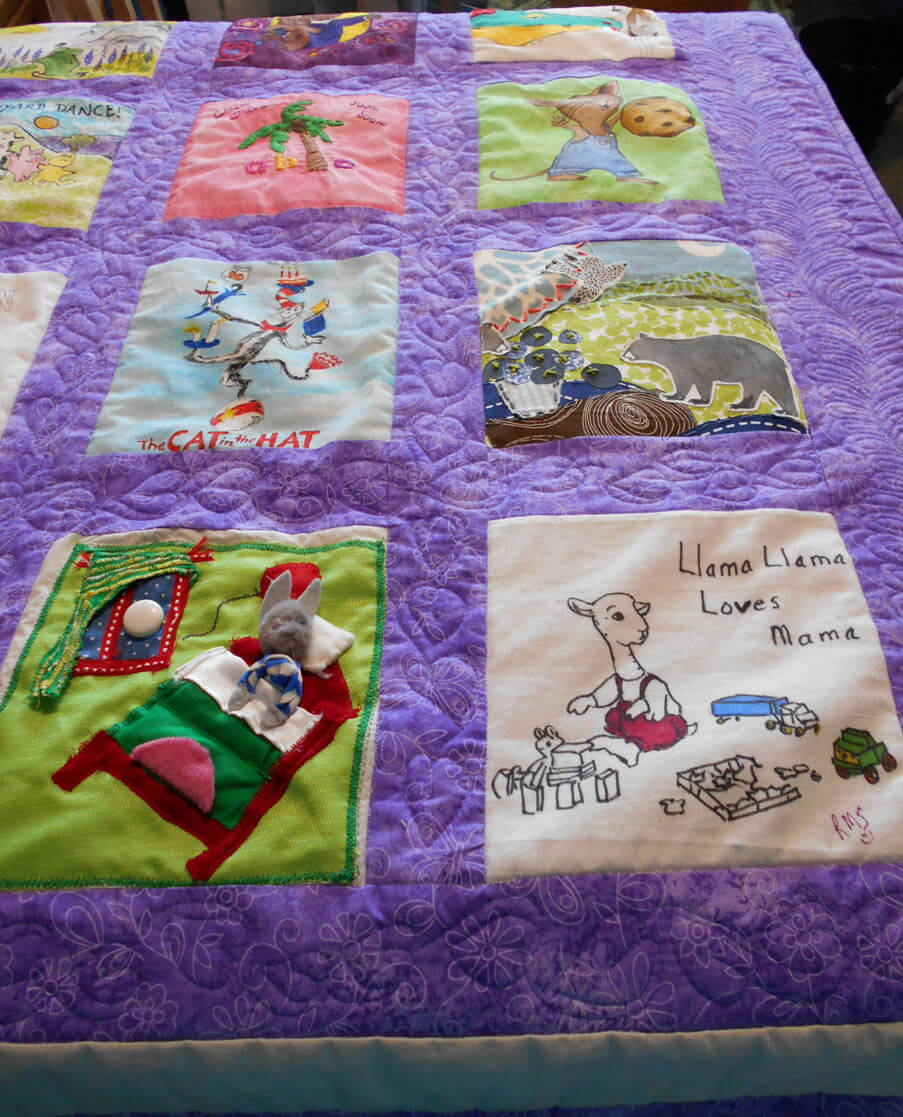
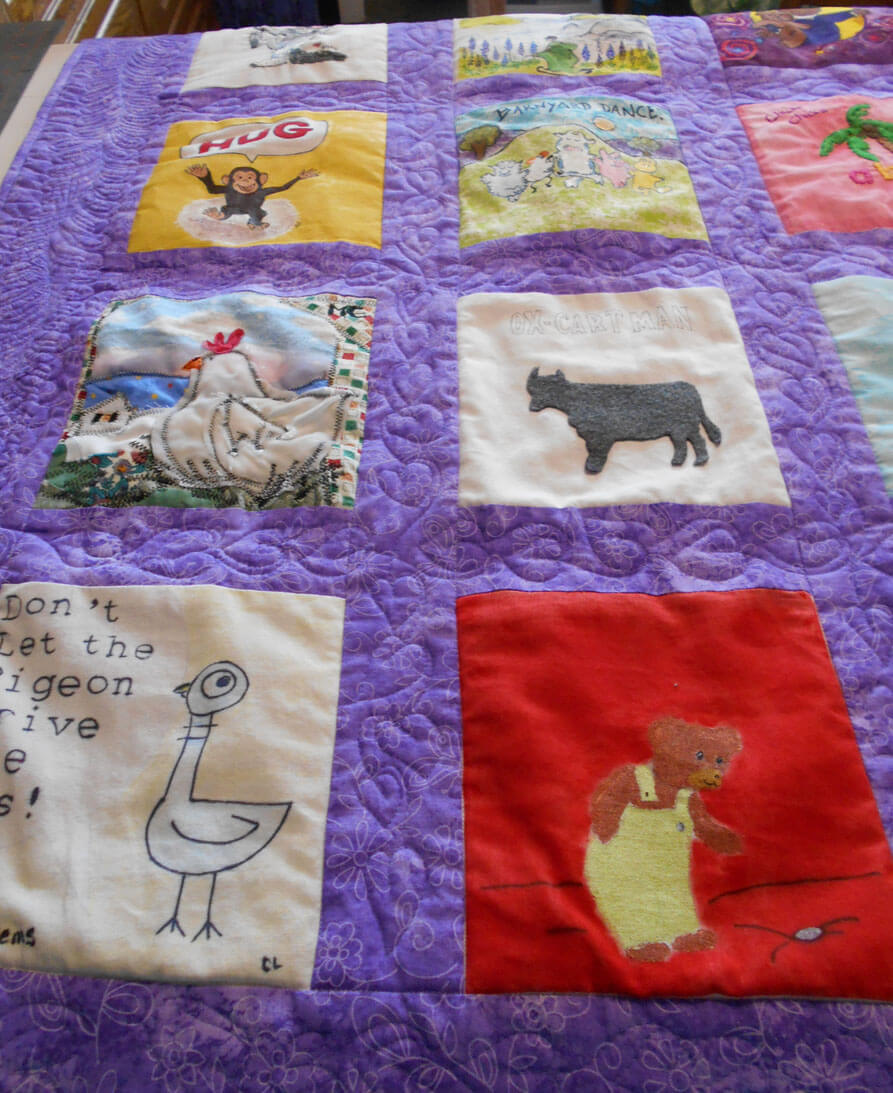
Baby Quilt Commission
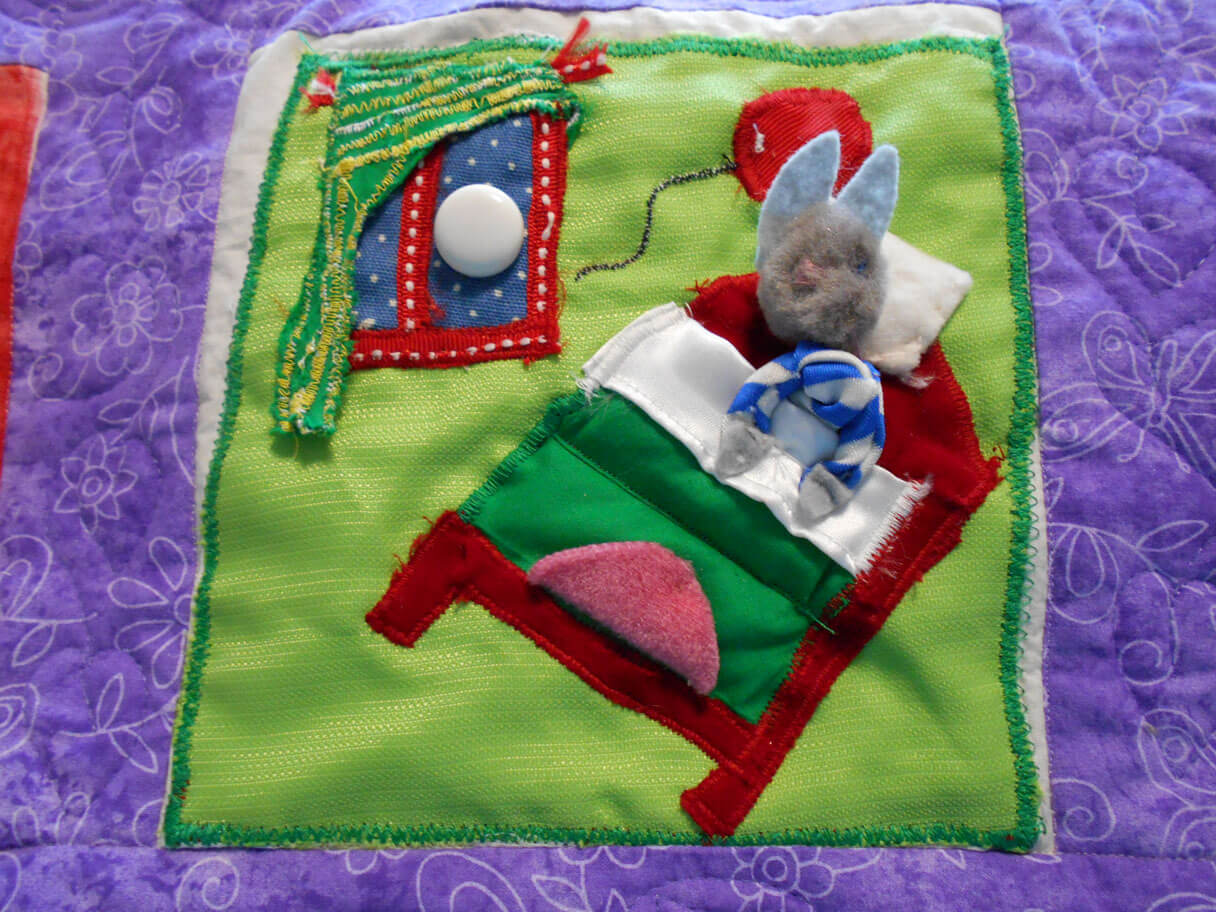
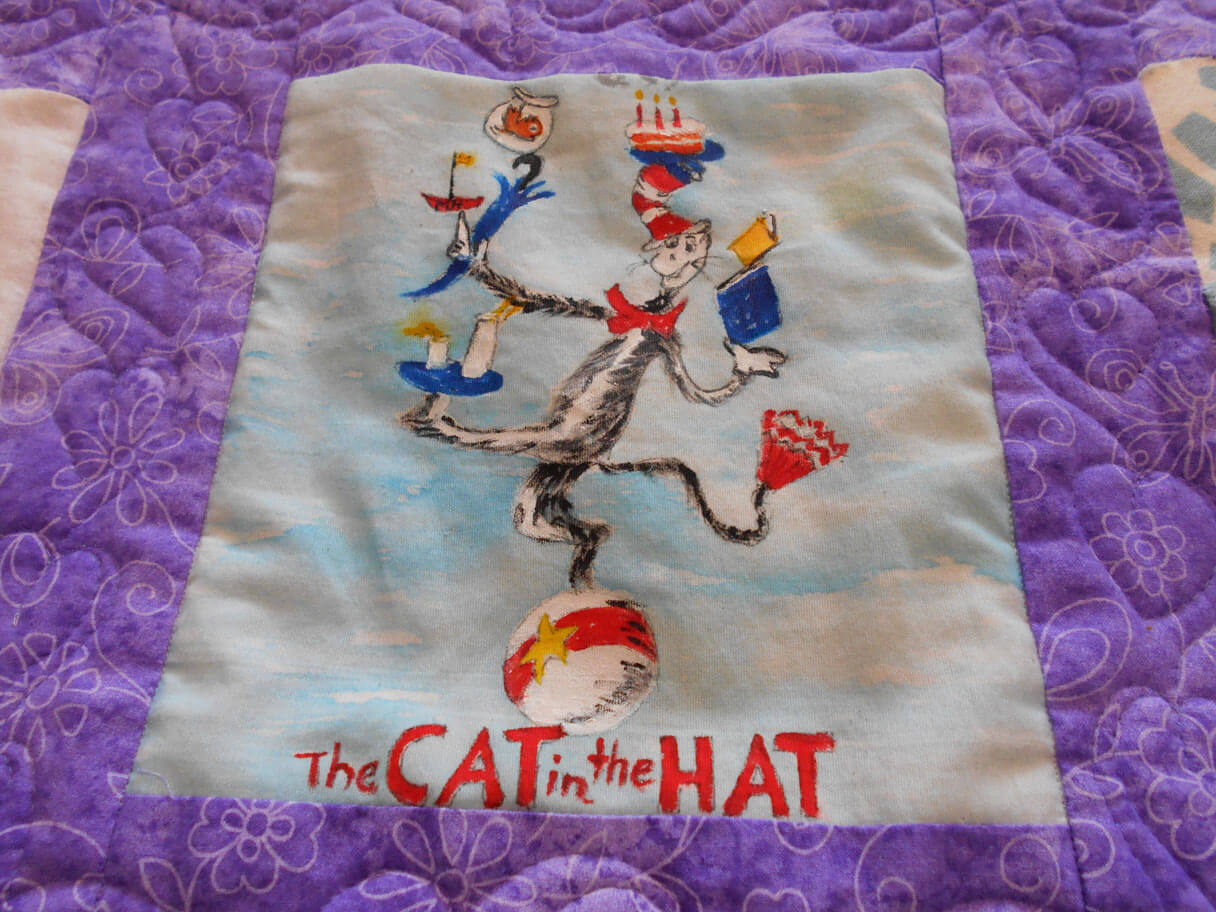
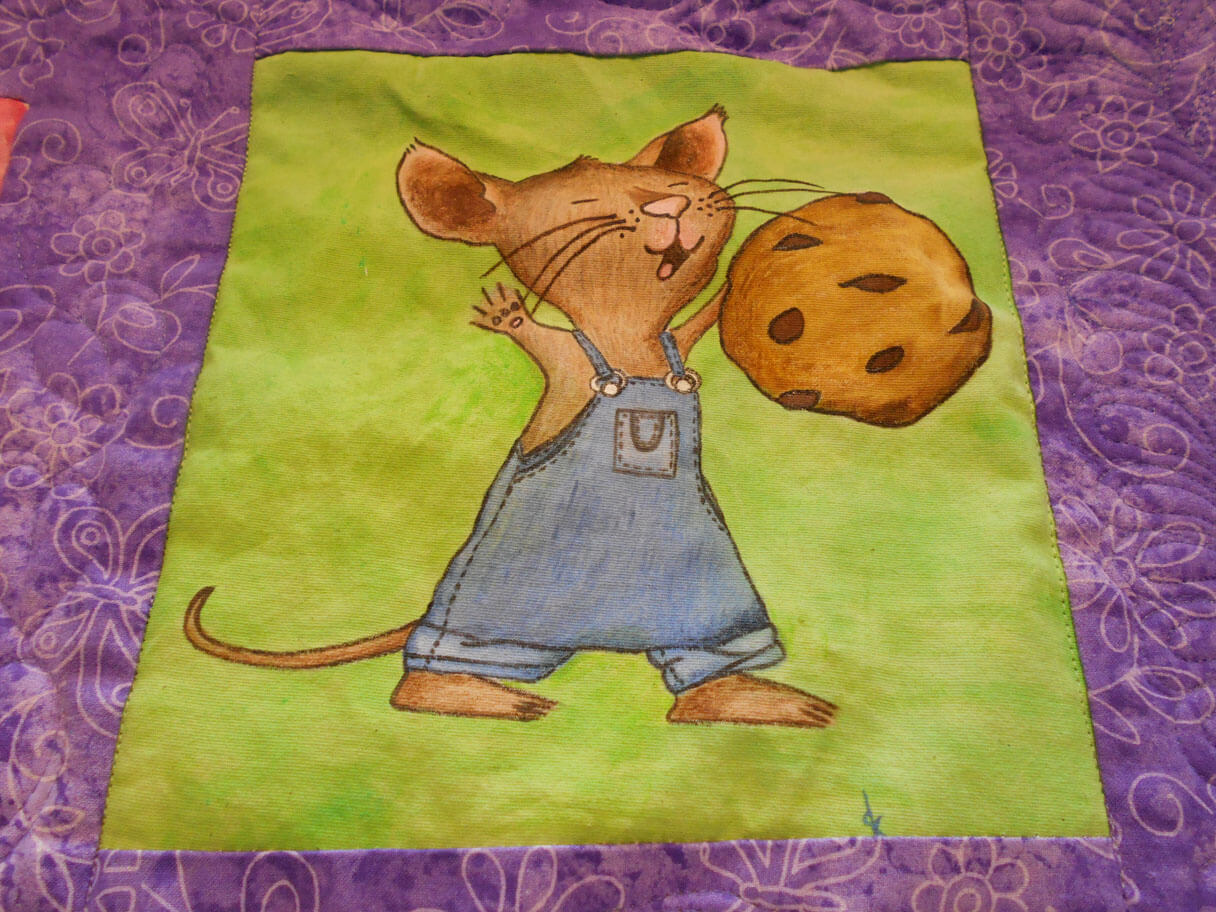
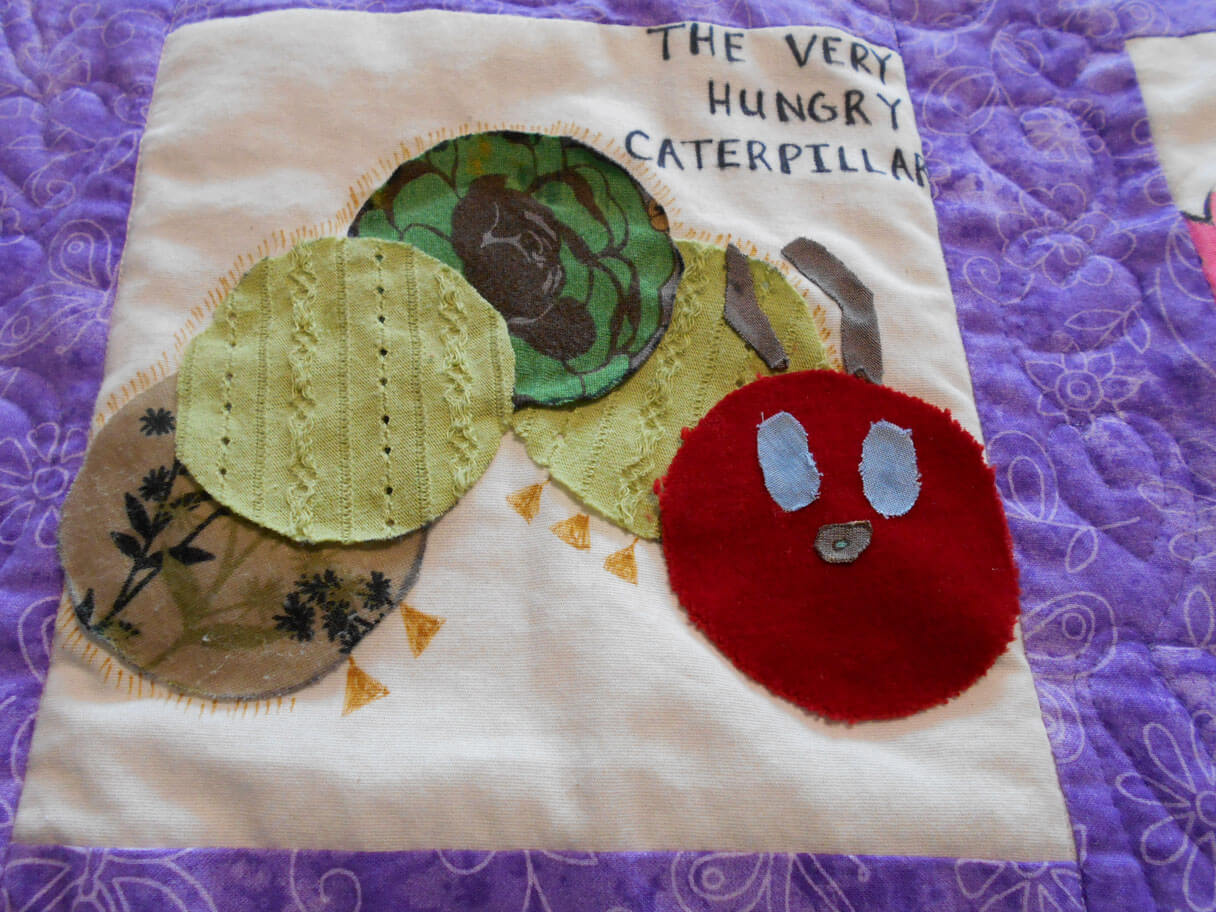
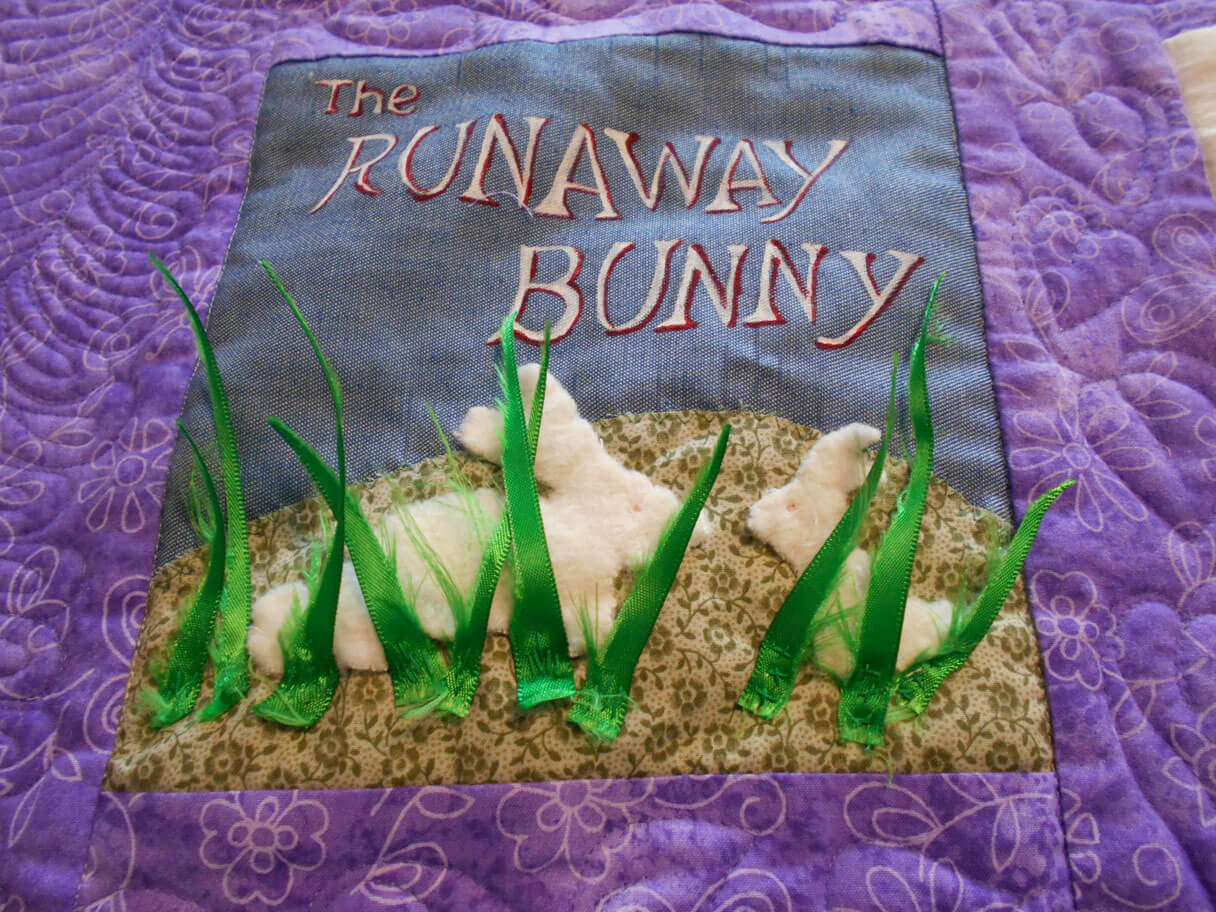
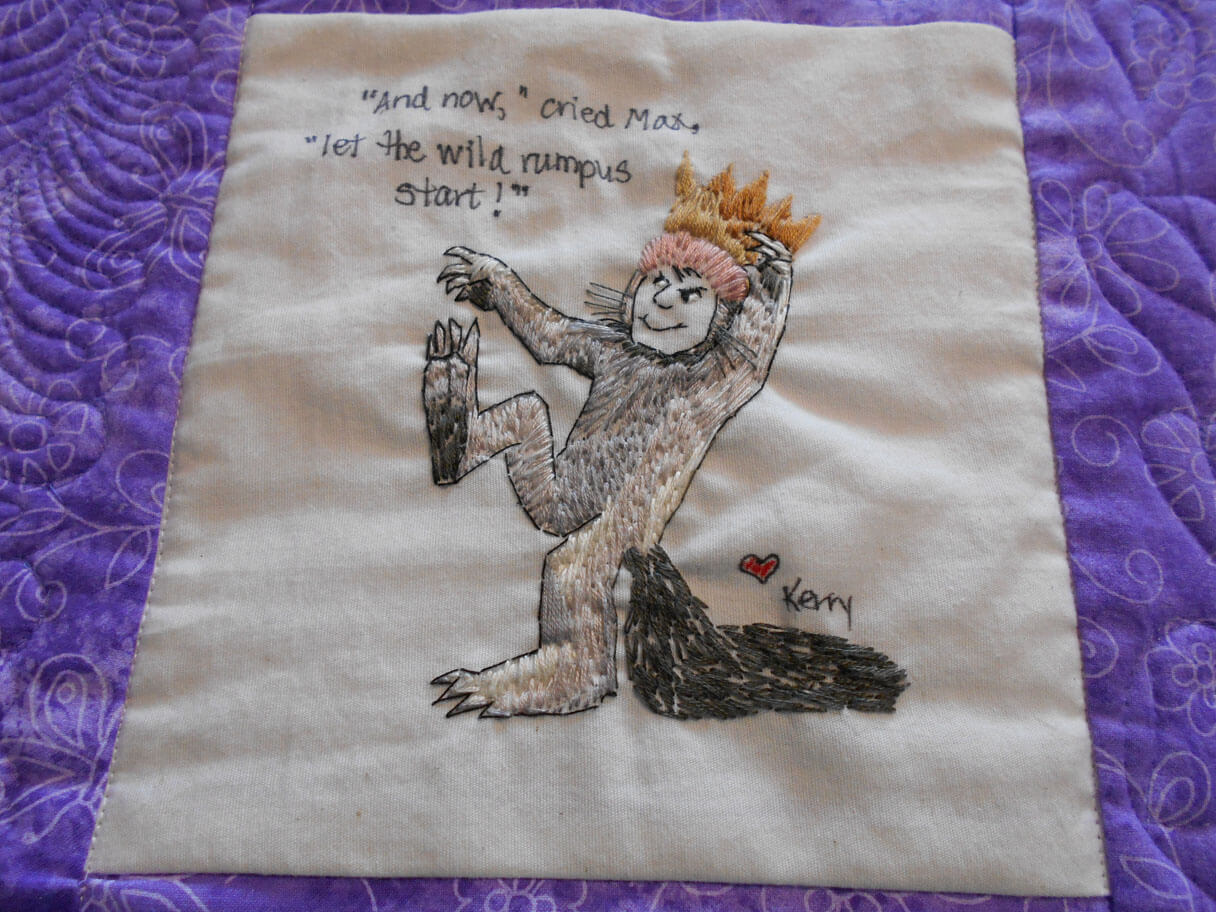
It is SO GOOD to be back at the sewing machine! In order to get the groove back, I have been working on this really adorable baby quilt that my friend always coordinates for pregnant teachers at her former middle school. In this one, people completed blocks to represent a piece of children’s literature, and then for the baby shower, the folks bring the actual books to start the child’s library. Great idea!!
Here’s some pics of the finished quilt……learned a lot, as I always seem to do. Next time I am doing squares, I will back them with a stabilizer. The last quilt I did like this I was able to quilt in each of the squares to get them to lay flatter. Next time….but look at the textures in these squares!


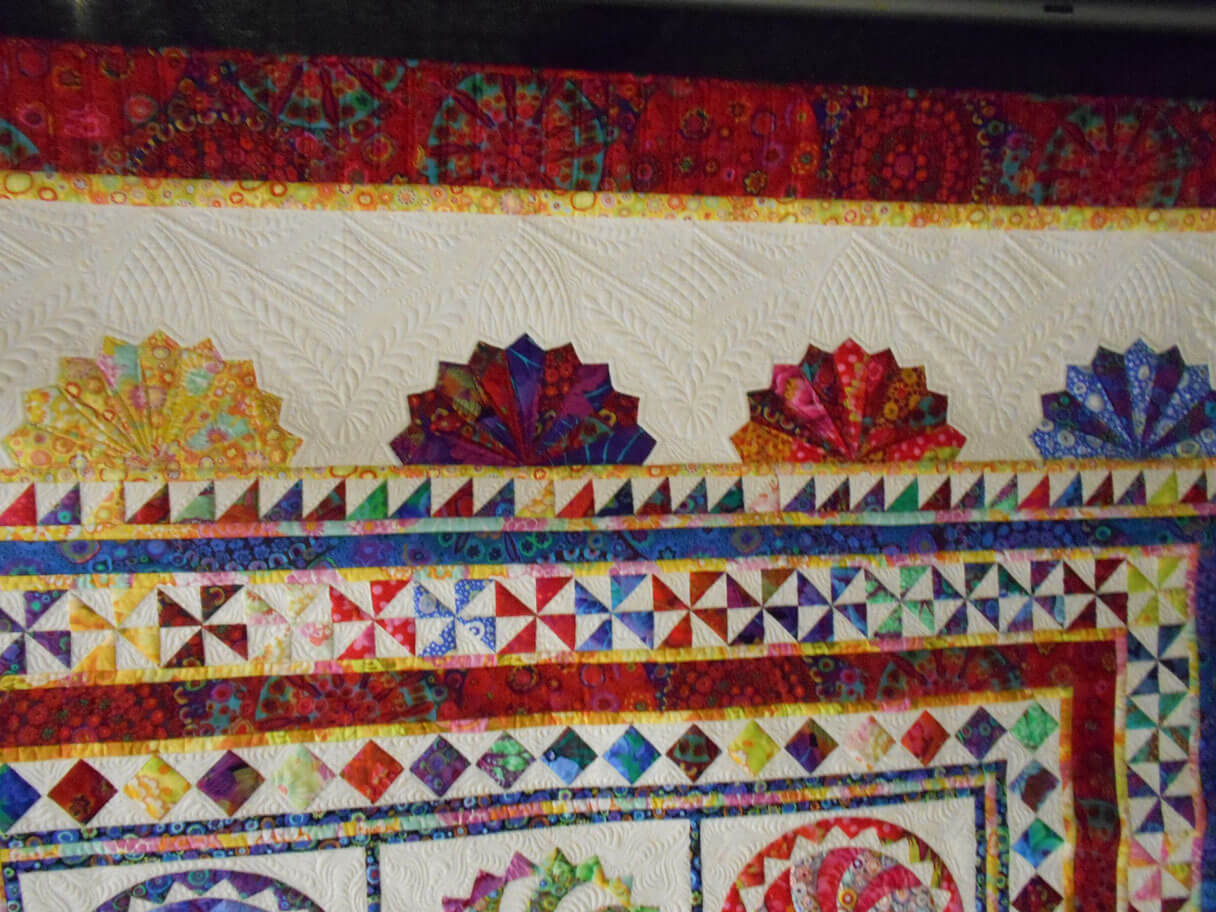
Vermont Quilt Show
Marilyn Young, Barton, VT
I It only took me 21 years to get to the Vermont Quilt Show. When I was set to go before leaving Vermont in 1994, it was way over the 90s, and the person who was going to drive couldn’t handle the humidity. So I had to pass, but I finally went in June….to find out me camera took virtually no decent – in focus – pictures. Time for a new one, this time two or three steps up from my point and shoot – which has gotten me great pictures over the eight years I’ve used it. So here’s a few good ones:
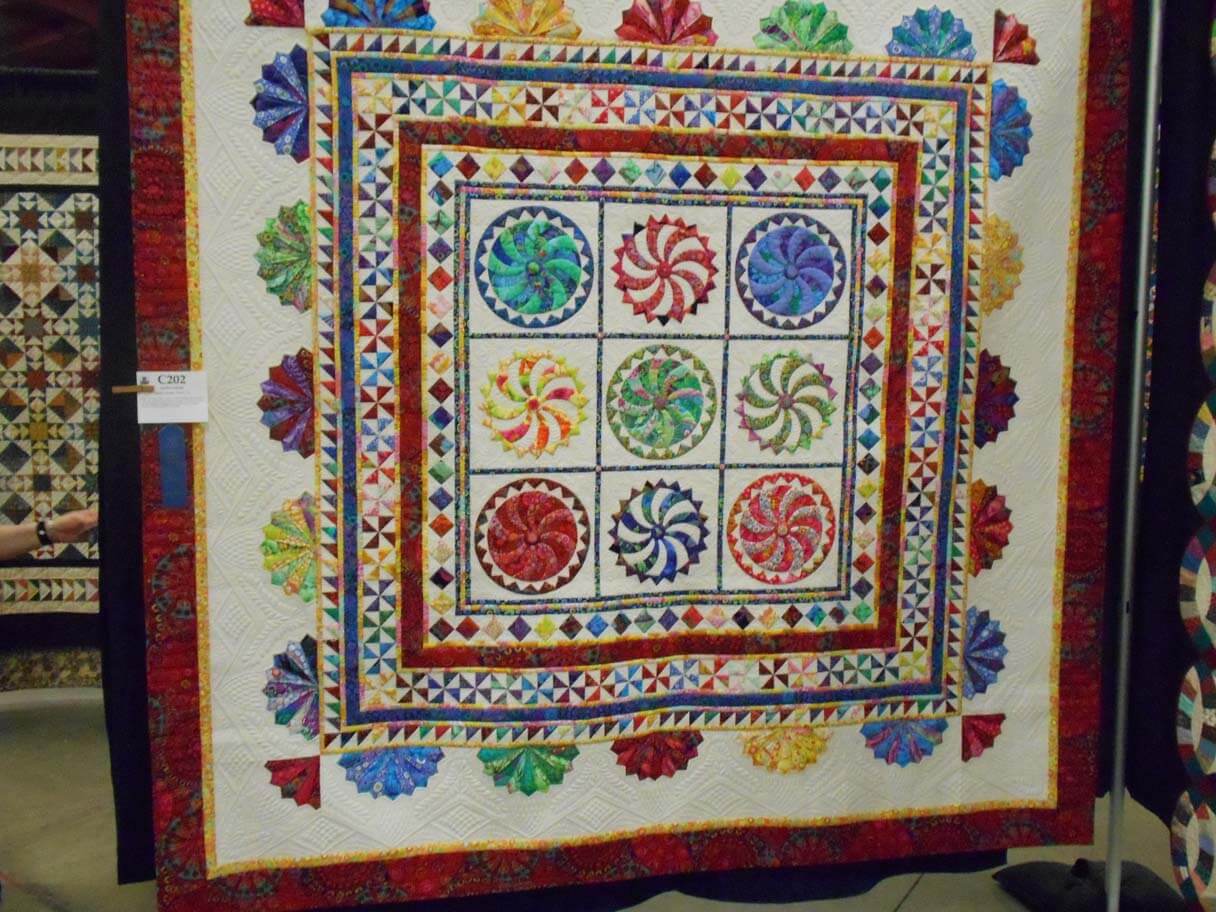
Marilyn Young
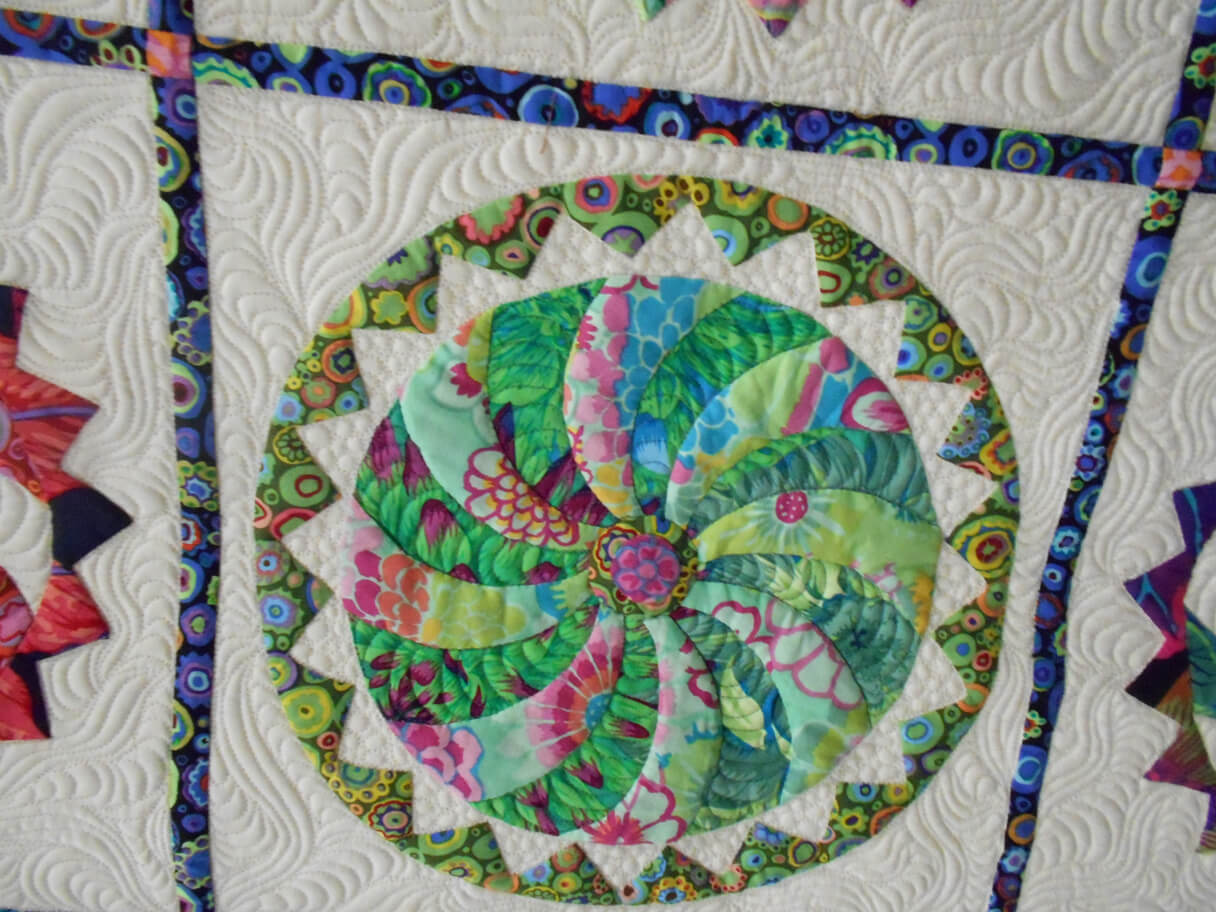
Marilyn Young
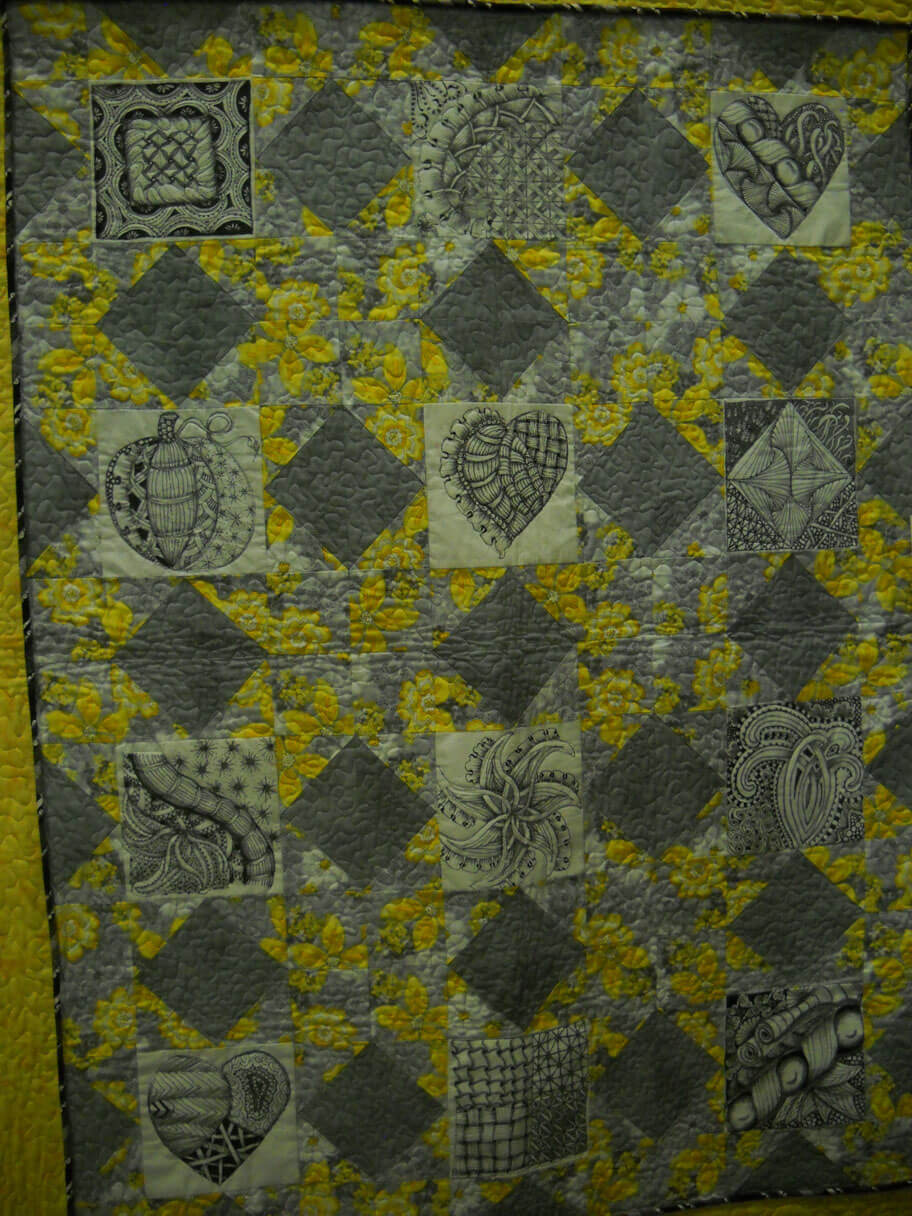
A number of zentangles made their appearance at the show:
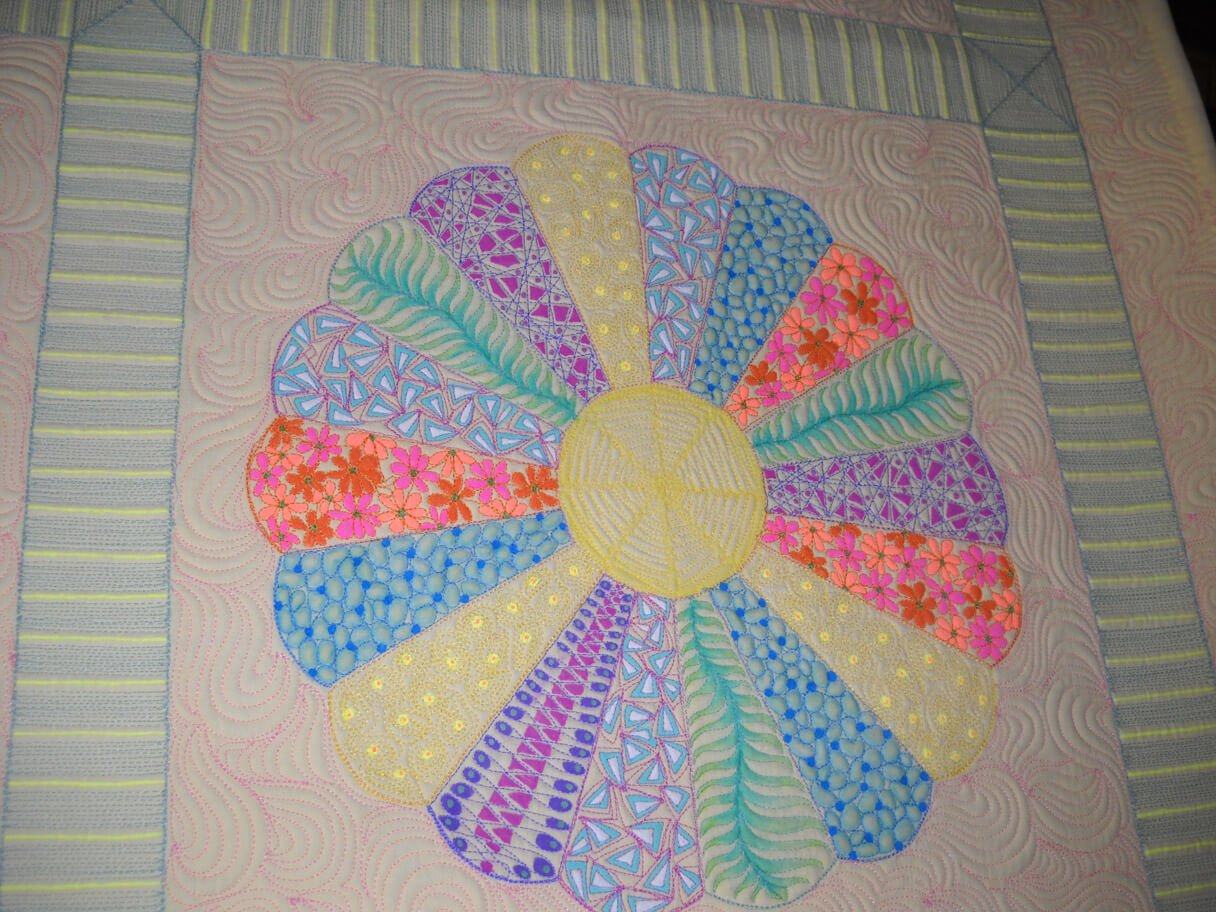
Dresden Plate Zentangles – and reversible!
Other side
Sorry – did not get the maker….
Loved the colors in this next one:
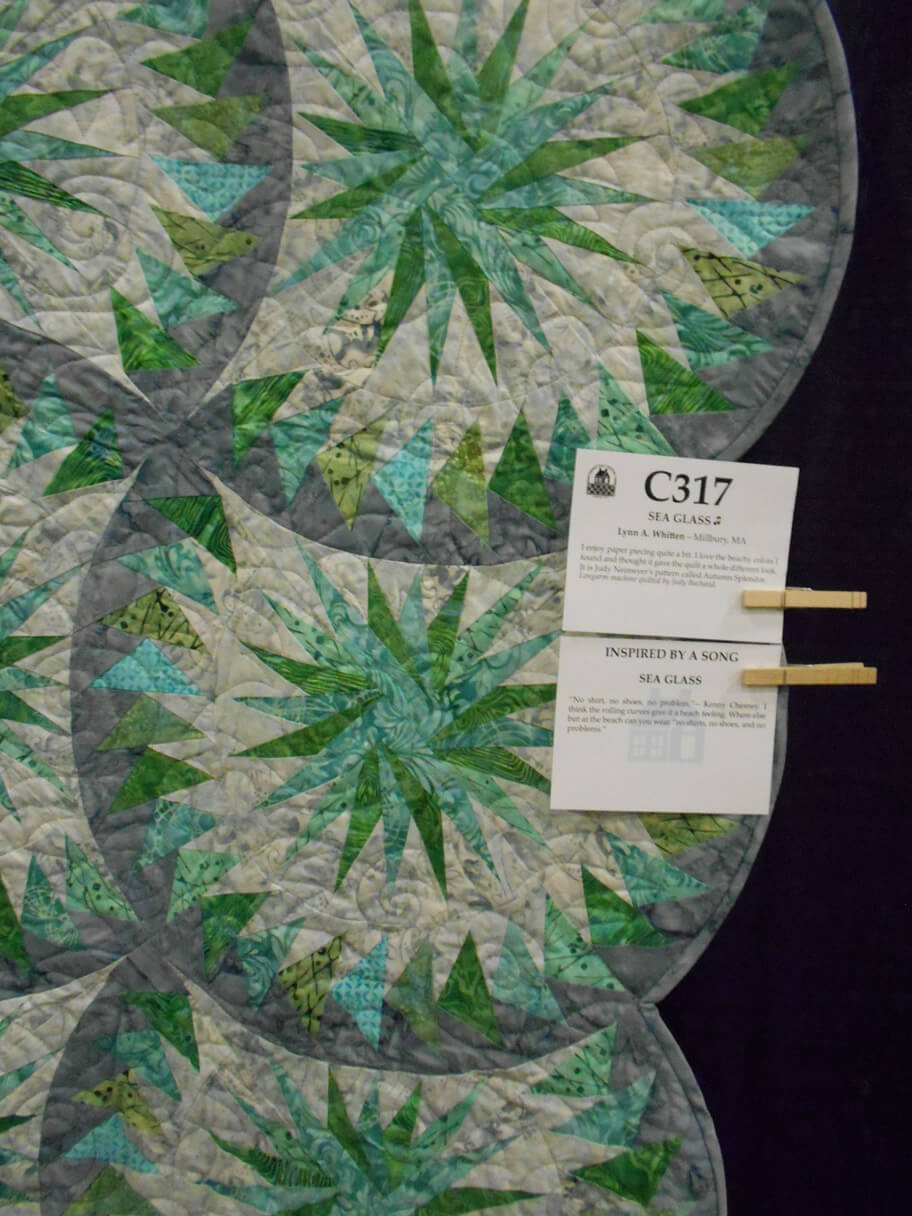
Sea Glass – Lynn Whitton
And finally…..I am back to my own work!
Thoroughly Modern Gracie-Mae
My last finished project before packing the studio for the big move to Vermont. I made a modern quilt – it didn’t start out that way. I was going to do a log cabin, but then I decided I just wanted to sew half-square triangles using the paper triangles. After about 150 triangles, I realized there was no way I wanted to sew three times as many more for the whole quilt. So I made the center panel. (Needless to say, I have lots left over for another project….)
All of the colors were chosen as to whether they would play nice with the blue fleece I’d bought in November for the backing – this color is my great-niece’s favorite – forgetting the fact that I’ve never used fleece for a backing…..
Then I started playing around with borders to the center design, trying to get it into lap-quilt size. I had plenty of triangles left, so did borders with just a few on each end – I’ve seen something like that in a lot of the modern quilts I’ve looked at. At this point things became pretty freeing – I knew I wanted lots of space for free-motion quilting, and Maria from Quilter’s Market helped me pick out another fabric – she has an amazing eye.
The worst part of the whole quilt was sewing together all those triangles, lumpy intersections, and trying to quilt over them. But I LOVED how it came out. I was having serious rippling problems because of the stretch of the fleece, and Maria suggested using 505 to spray and corral it into place for the rest of the quilting – wonderful, with only a few ripples and they are not really noticeable. I ran out of my Silk Kimono blue I was using, which I loved….and if I hadn’t had several rippit sessions, I might have had enough to finish the quilt. But I had to go to the Big Local Fabric Store and once again I realized HOW MUCH I LOVE Superior Threads – the stuff I bought kept shredding constantly. I used Magnifico in the bobbin and LOVED it.
So here are some shots of the free-motion on the front:
And finally, the completed lap quilt for my great-niece Gracie-Mae on turning 13. (Seven more lap quilts for the other great-nieces and nephews over the next 10 years as they turn 13…….)
Or if you prefer this orientation….
I can now understand the freedom of modern quilts. I have a lot more ideas on how to use the marbled fabrics in some new smaller wall hangings, but that will need to wait until I set up my new studio in Vermont – maybe by July!
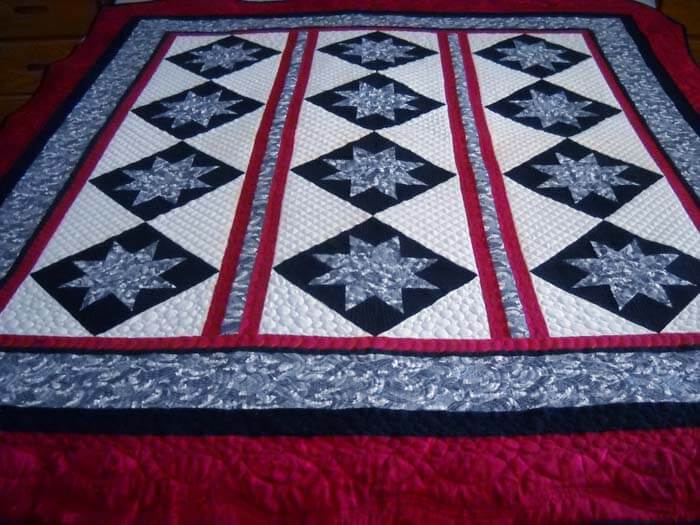
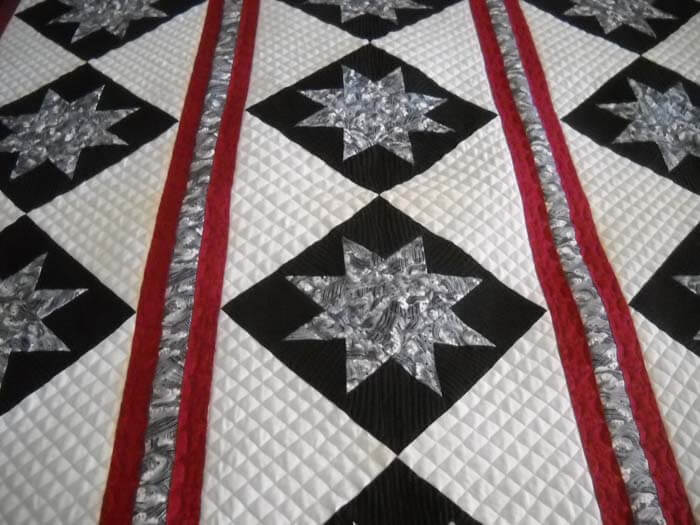
The Latest Finish…..Best to Date!
This is the “before.” Nice and flat, virtually no texture. I remember when I went to Road to California a couple of years, I noticed everything was machine-quilted within an inch of itself. Both hubby and I thought, just because you can doesn’t mean you should fill it up with machine quilting.
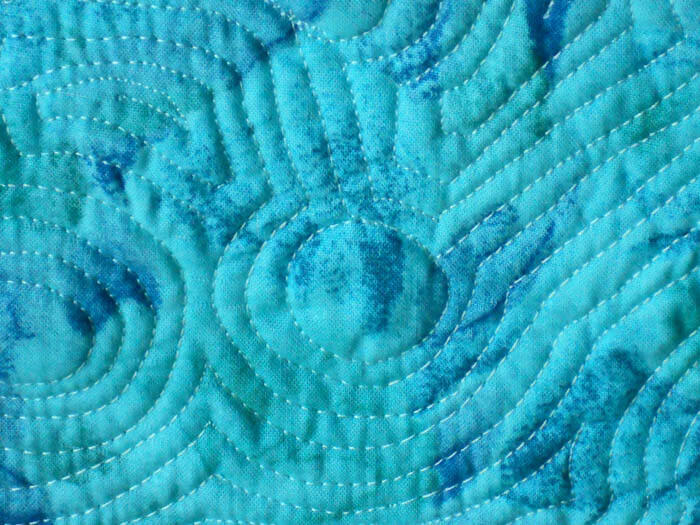
That was before I started with the 2012 free motion quilting challenge with SewCalGal and got hooked…..I’m talking seriously hooked. Now it’s not about the quilt top for me, it’s about the quilting. There are seven different quilted motifs in this quilt, and I LOVE IT! It is so much more interesting than if I had just done quilting in the ditch and stippling. Yes, at least 10 hours of fmq in the quilt, and a lot of bobbin thread, but did I say I LOVE IT?
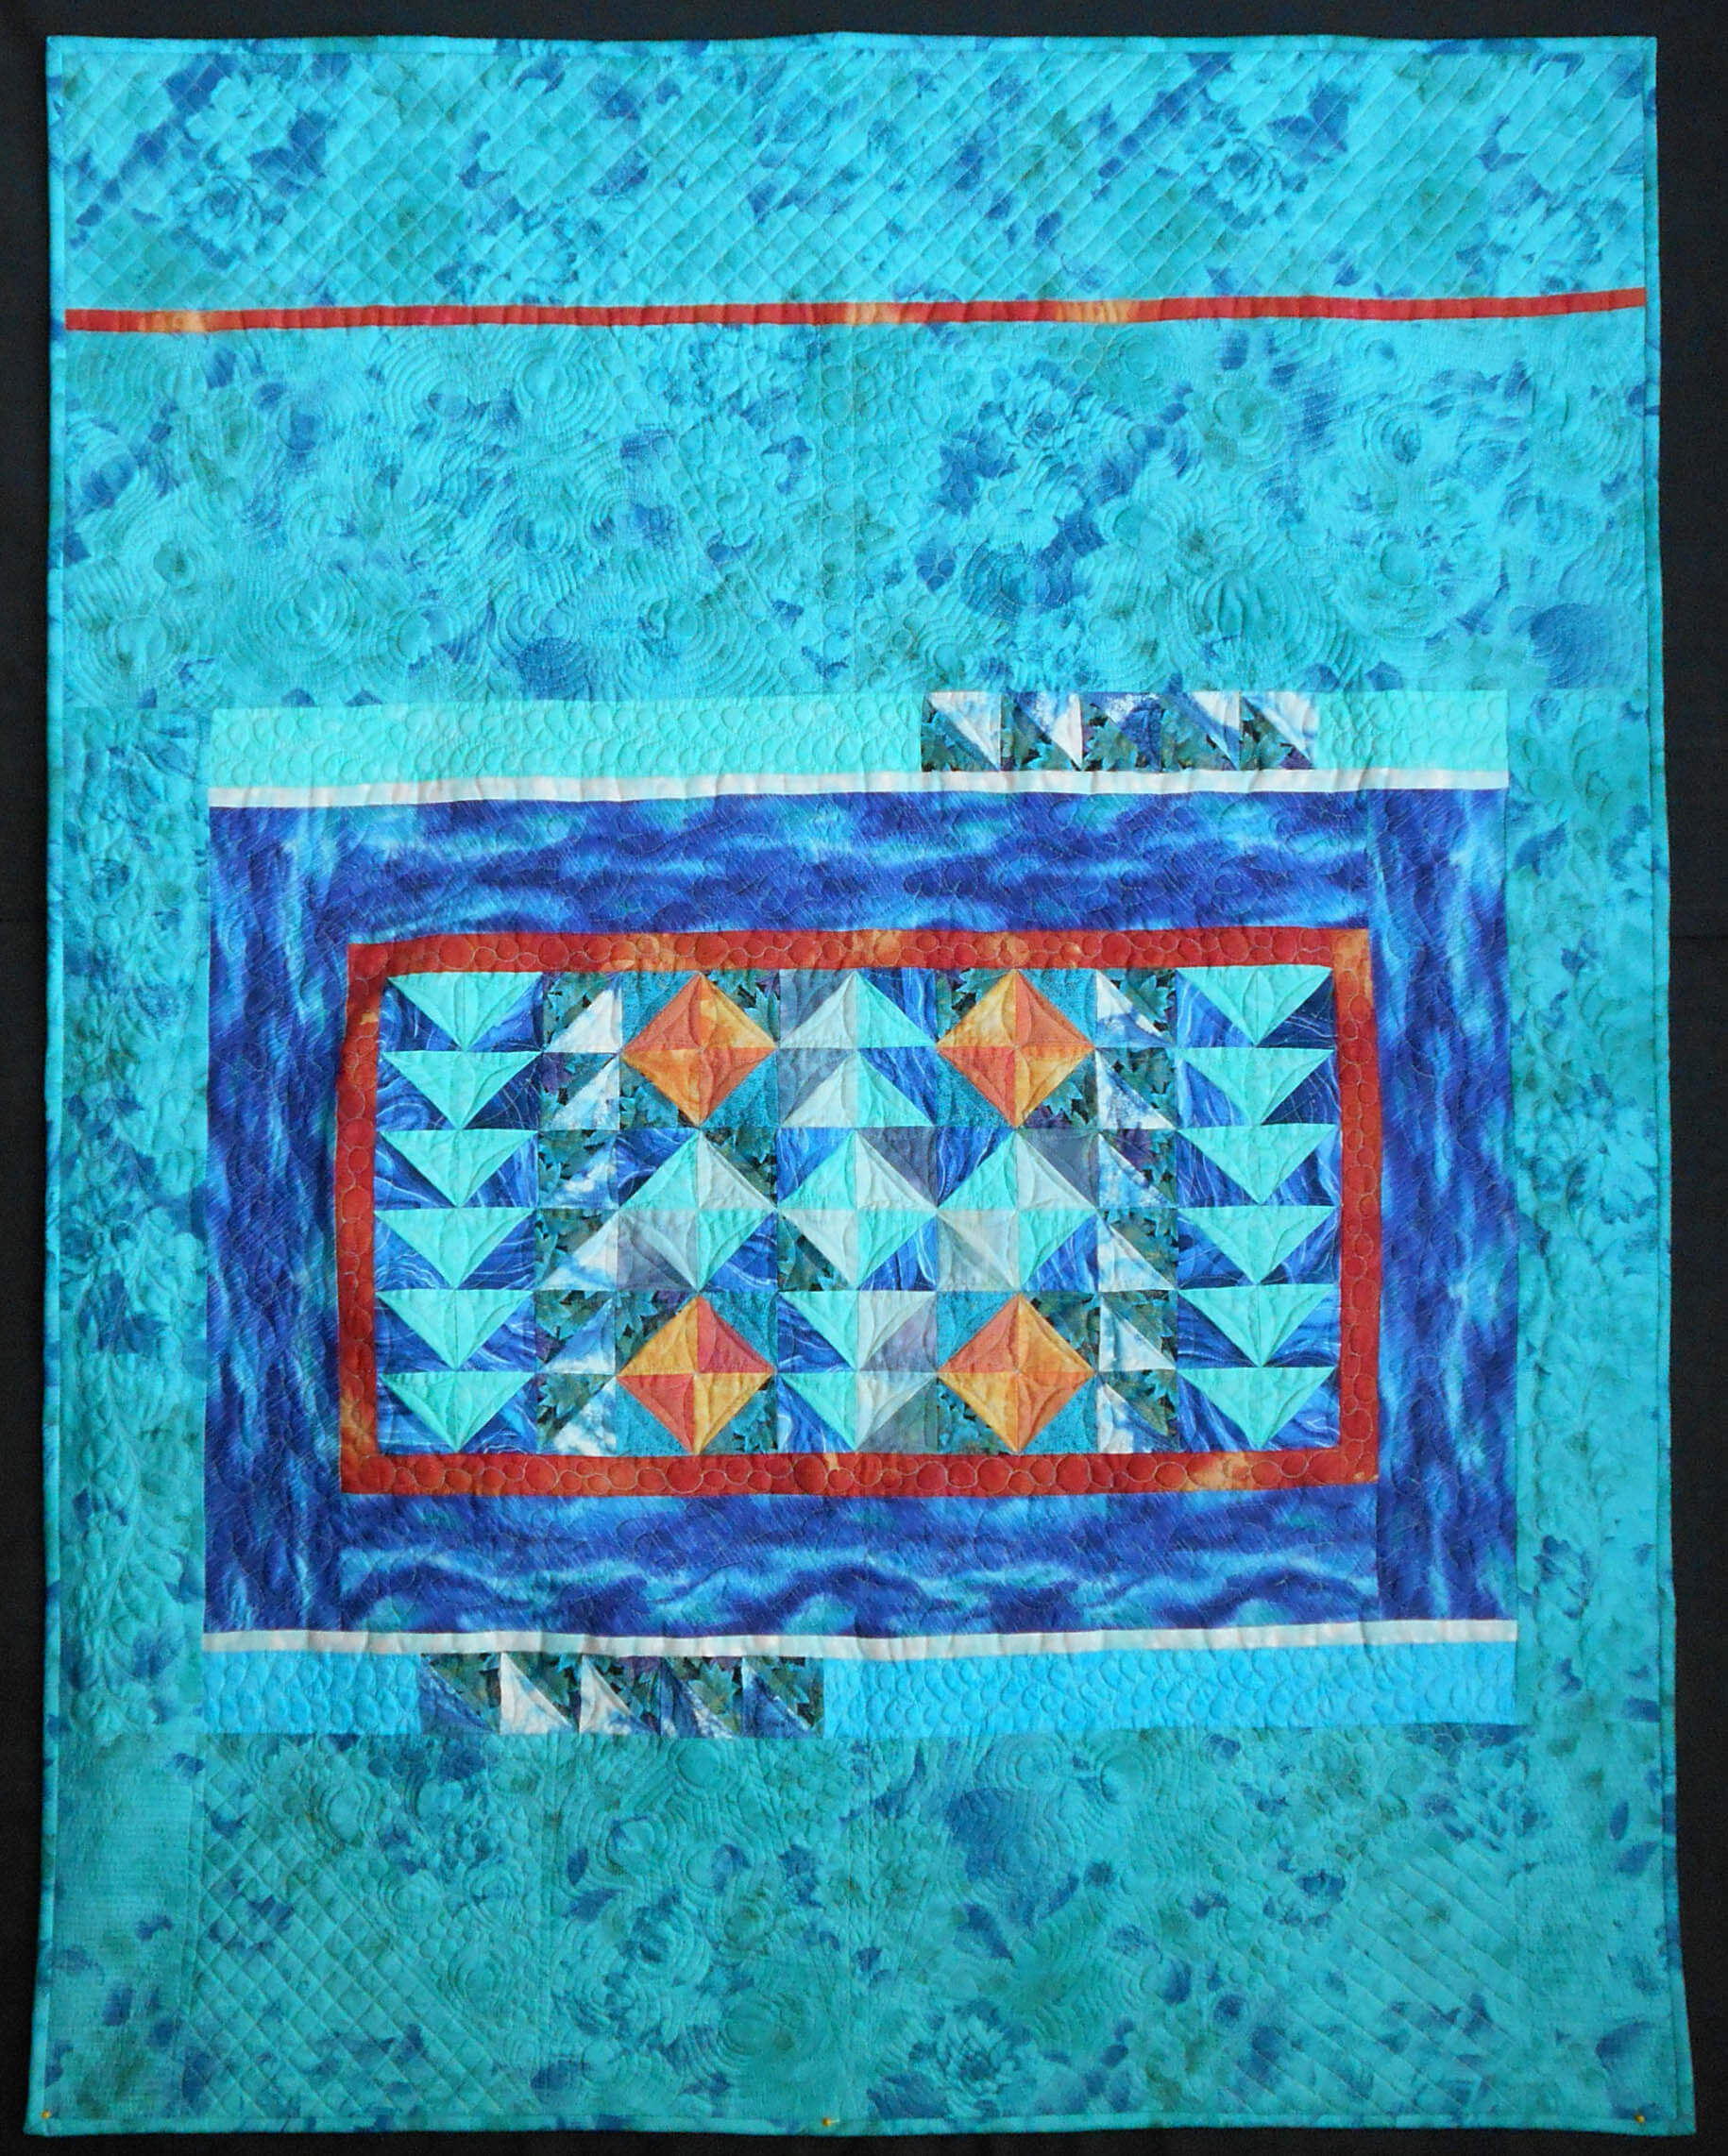
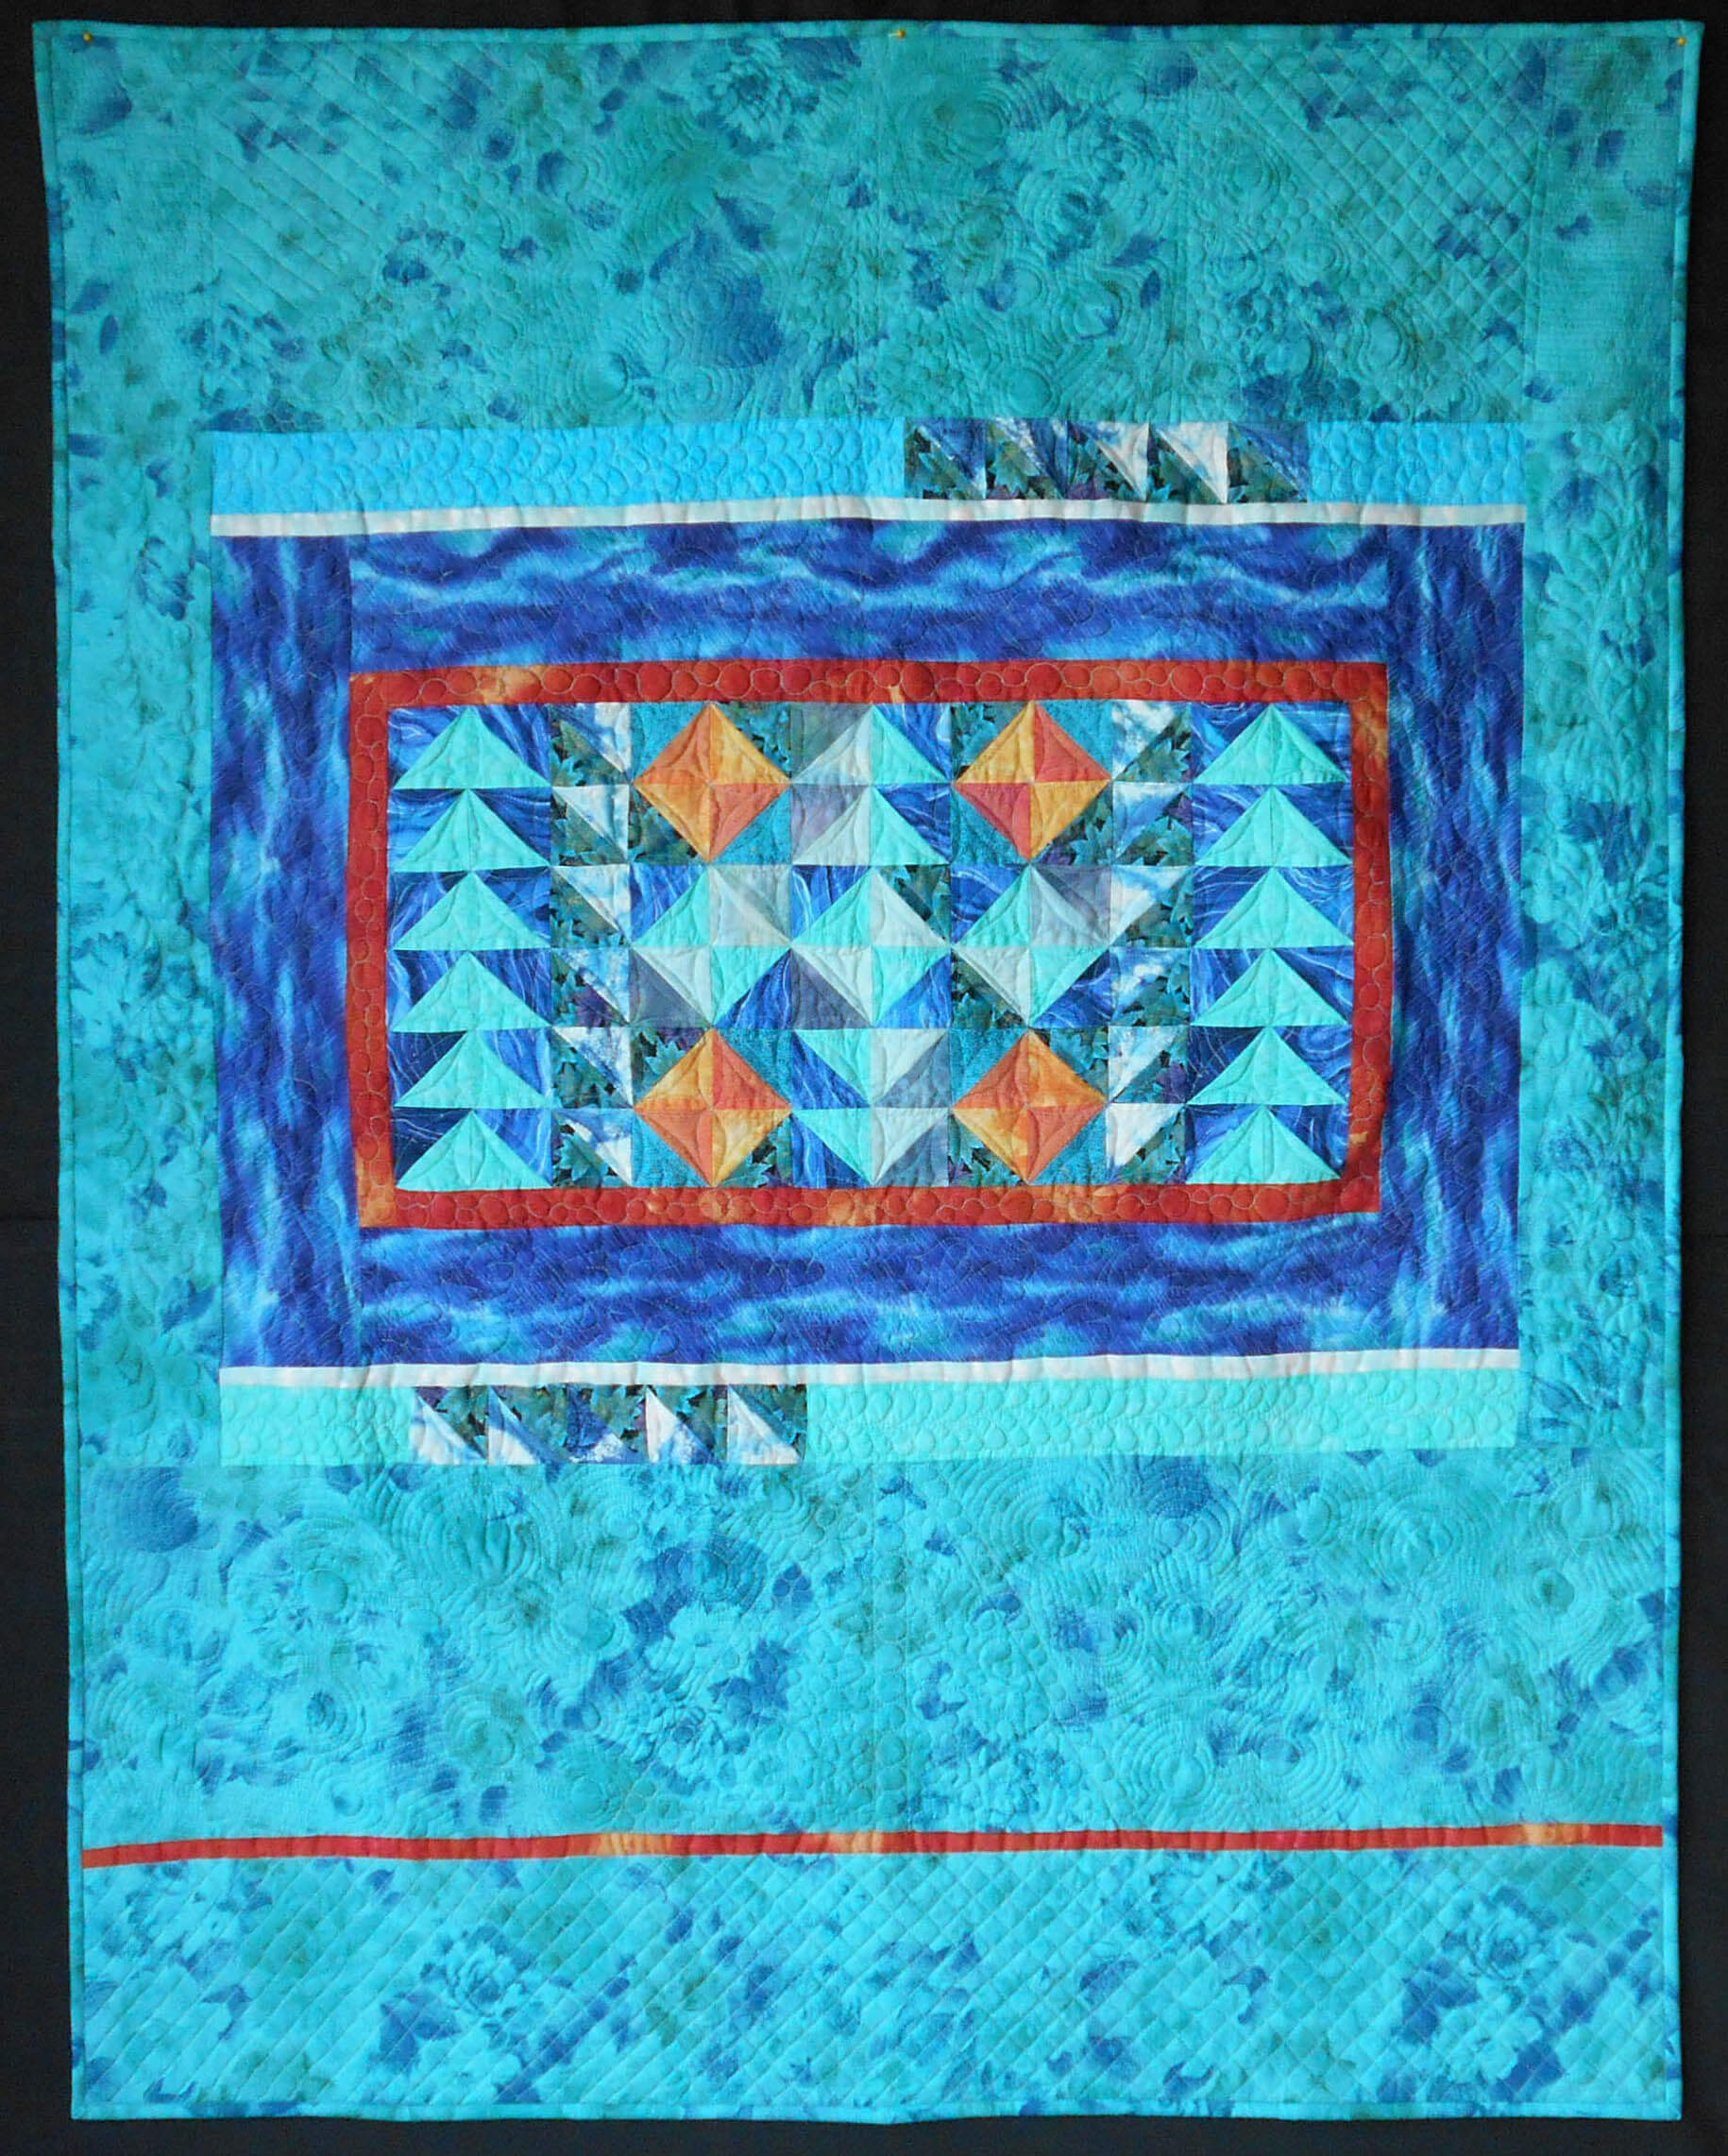
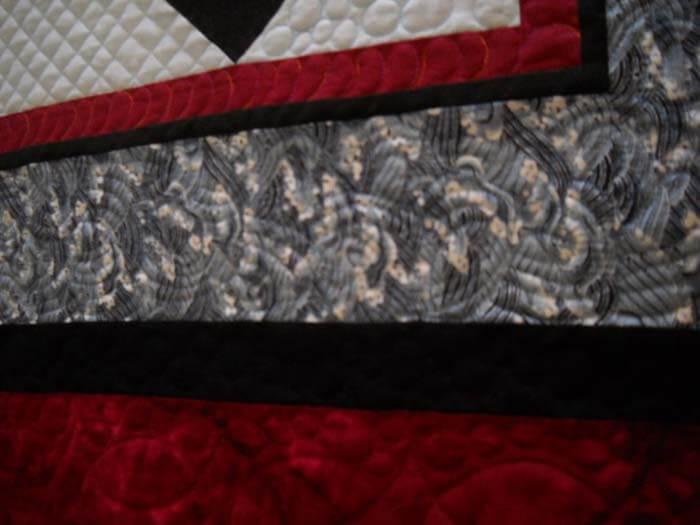
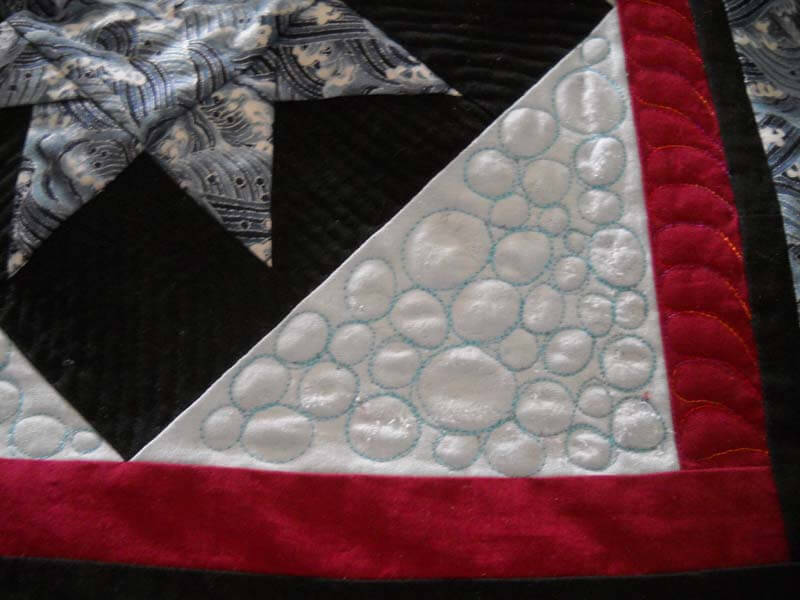
So here are some of the “after” pictures. For some reason the blue wave fabric looks to be black and white, and it isn’t. I used Superior Silk Kimono thread in the triangle backgrounds, the outside black border, and the final border. Magnifico by Superior for the bubbled in the corner triangles, Rainbows by Superior in the border of blue waves, and Bottom Line by Superior in the bobbin and in the black backgrounds of the stars. I guess you could say I really like Superior Threads….
I LOVE THIS! I used the color adjustments in Photoshop to try and bring back the blues – this is pretty true to the actual colors. The maroon strips in the center are done in a cathedral square pattern. I gridded all the light blue triangles for the texture – I was only going to do the center panel but I fell in love with the effect. The bottom light blue triangles are done with a MAgnifico blue thread in bubbles – I was aiming for a stars at night over the ocean effect.
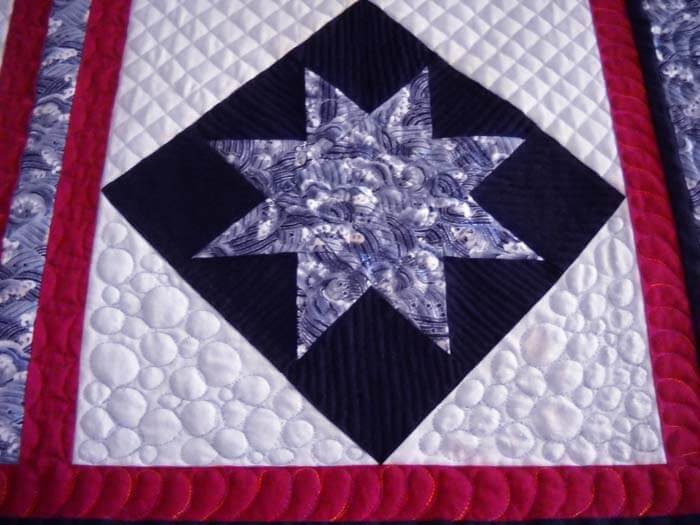
The ironic thing here in this picture is the bottom right corner is the one I picked out all the thread on – what I call the “war-zone” corner. The blue stars themselves have bubbles quilted into the with a Rainbows blue.
The wave fabric here has one of Leah Day’s fillers in it called Ocean Currents. I happened to be on her blog one day and said yup, that’s the one.
This quilt is for my yoga instructor, and so in one corner I did a free-motion “third eye” chakra symbol.
Now for the back….WHICH I LOVE LOVE LOVE – the texture is amazing!!
Note to self – time for some smaller quilts……….
Meditative Rippit……
See that bottom left light blue triangle? Eight hours later, I have learned a couple of new lessons. One, there is something to be said for trying out a motif on scrap fabric and batting. Two ripping out teeny tiny threads can actually be meditative…..
That said, those bottom triangles were going to have a different pattern along the top and bottom. I was thinking a type of lotus blossom (a variation for me on a feather) with smaller feathers inside each petal. Because at this point I wanted a little relief from all the blue. I thought it needed some more color…..I was wrong, at least with the color I chose. I should have stopped after the first petal, rather than completing the triangle…..a lot of my decisions look way better after they are finished. But I was still wrong….maybe if I had left it all in the shiny blue….but it was still wrong. So I knew I had to take it out.
Were the quilt for me, I would have just put it aside until I felt like dealing with it. But no, it’s for my yoga instructor, and I want to get it finished before we have to dismantle the studio for the move. So I started with the seam ripper….three hours Wednesday night, music in the background….the petals were easy in the Magnifico thread – just slid out. NOT SO the feathers…..teeny tiny……three hours Thursday, three hours Friday (yes, a lot of tiny stitches, many on top of each other), and today after 20 minutes I was finished, with two very sore fingers for my efforts.
The fabric looks kind of like a war zone – it’s 16 years old after all, and nothing like that left in my stash – or I could have ironed on a replacement triangle and then quilted that. But the bubble stitching will hold it together, as long as the cats done find a few loose threads of the fabric. And the whole bottom looks much much better. Now for the triangles along the top, and then into the borders……I have to remind myself to plan ahead and if I want to do something fancy, try it ahead of time……..even if rippit is fairly meditative…….
Surprisingly meditative
The Hum-Purr of My Machine….
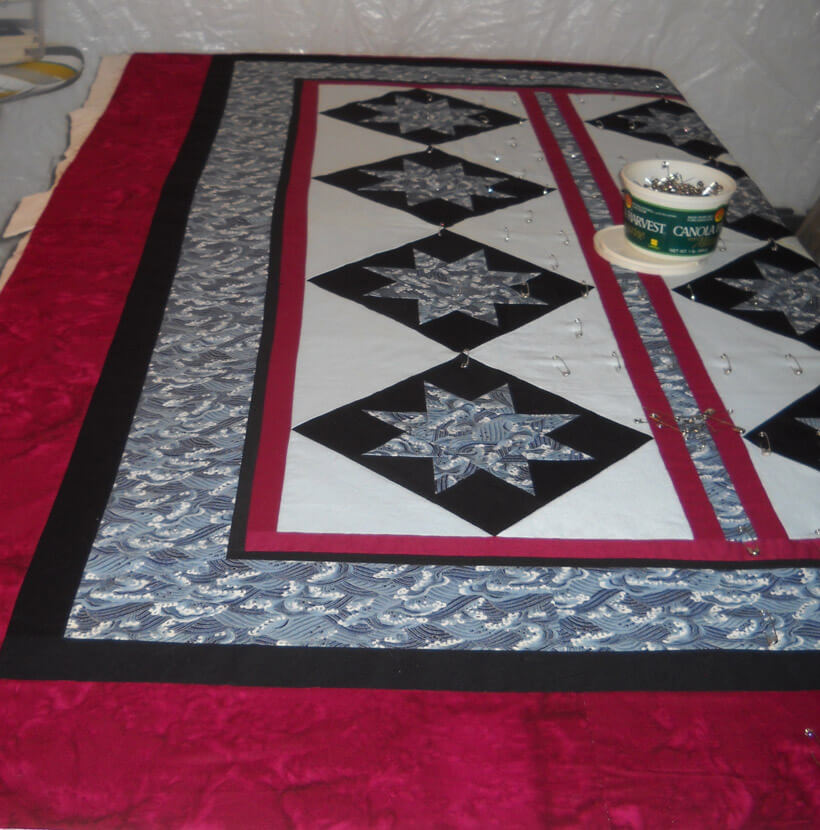
Thank you, Cindy Needham, for talking about the hum-purr your machine makes when you are in the groove! And I have been in the groove this past month – another quilt under the presser foot, this one a 16-year-old top that I am giving to my yoga instructor. I haven’t done anything with the top prior to this, because there was an area I really wanted to do feathers in, and I wasn’t willing to hand-quilt them. So now that I can do feathers in free-motion, sounds about right to finish this top…..except the area I was thinking really needed something else…..so I did a grid pattern, and I LOVE IT! It makes the traditional top look much more modern.
Below is the quilt being basted – my safety pins have gotten quite the workout in the last few months! The quilt top originally ended with the blue wave border, but it wasn’t long enough to cover a chilly body. So I added another black and wine border – lots of ideas for quilting those – and yes, I will have feathers somewhere on this quilt!
Before I started in on this, I continued with the BOM from our local quilt store, four months to catch up on, and I’m pleased with how they look. Based on progress I’ve made with the amount of sewing over the last couple of months, I would probably do some colors differently in the original blocks. Here’s the new ones:
Photography really isn’t doing them justice!
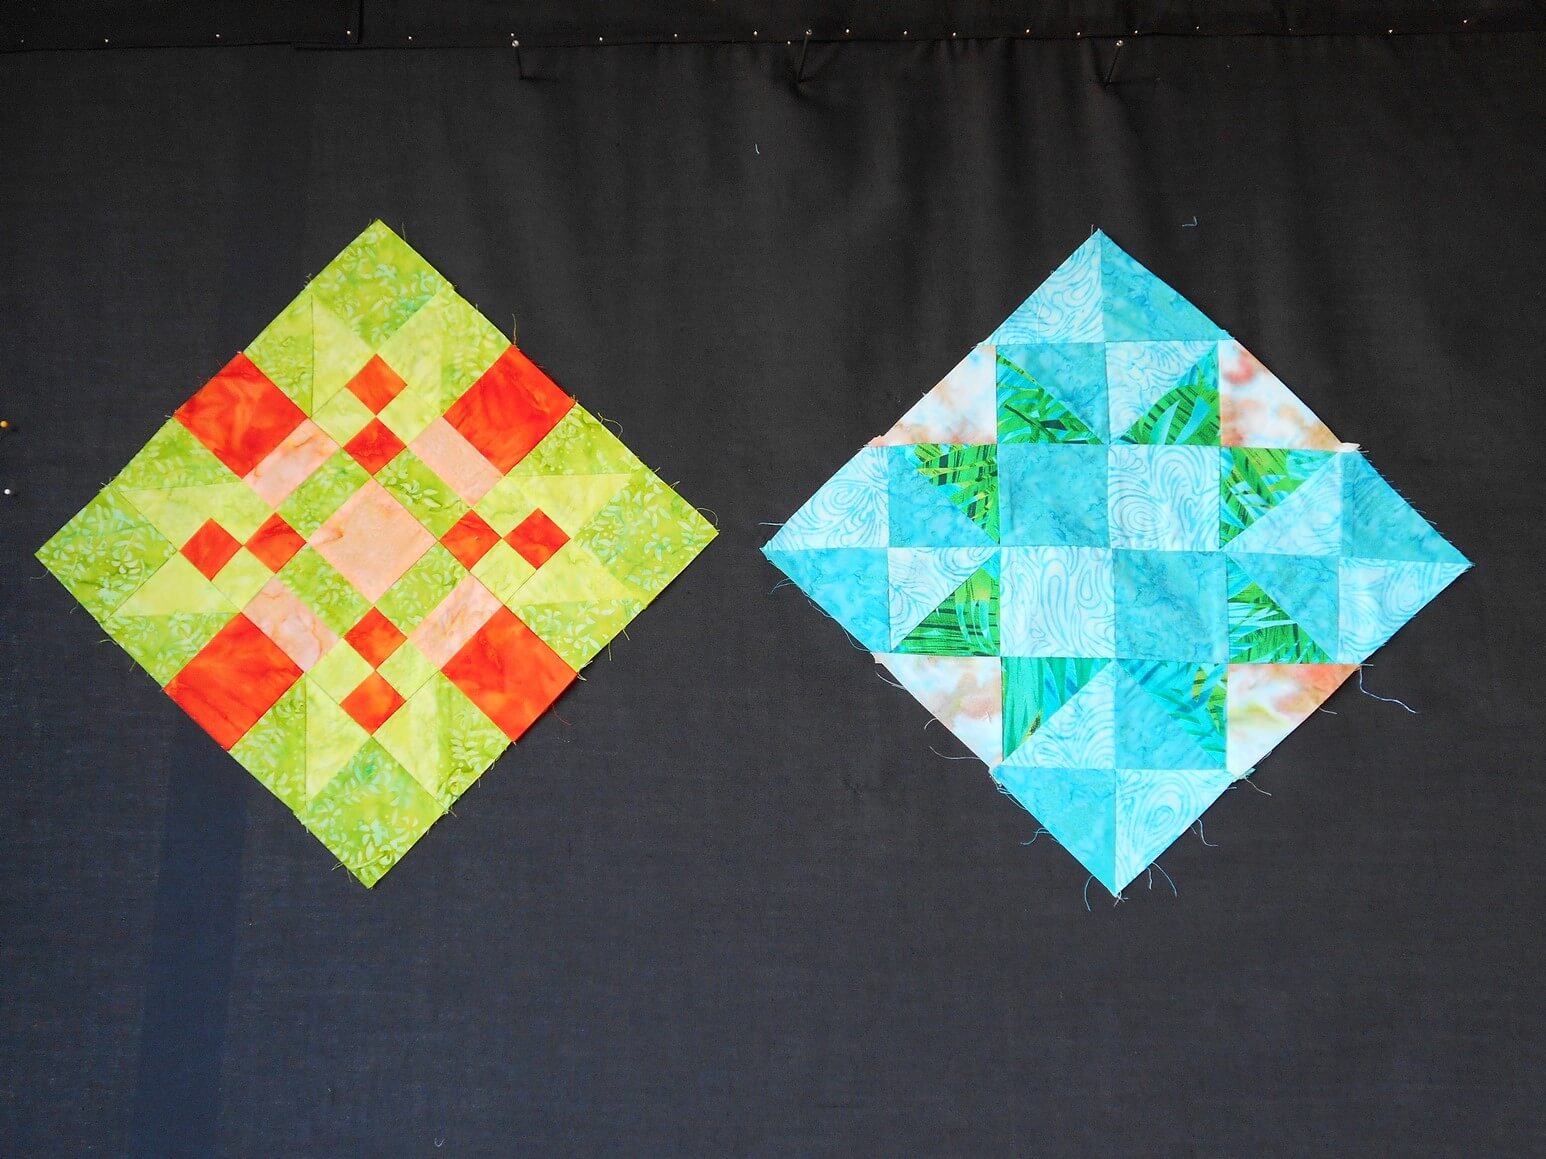 I love the green and orange one!
Up after this quilt is a lap quilt for my great-niece who turns 13 in August, and I would like to have it done for when we see them in May. I’ve made the commitment that all 8 of my great-nieces and great-nephews will get a lap quilt from me when they turn 13. This means lap quilts for the next 11 years…….