Posts Tagged ‘quilting’
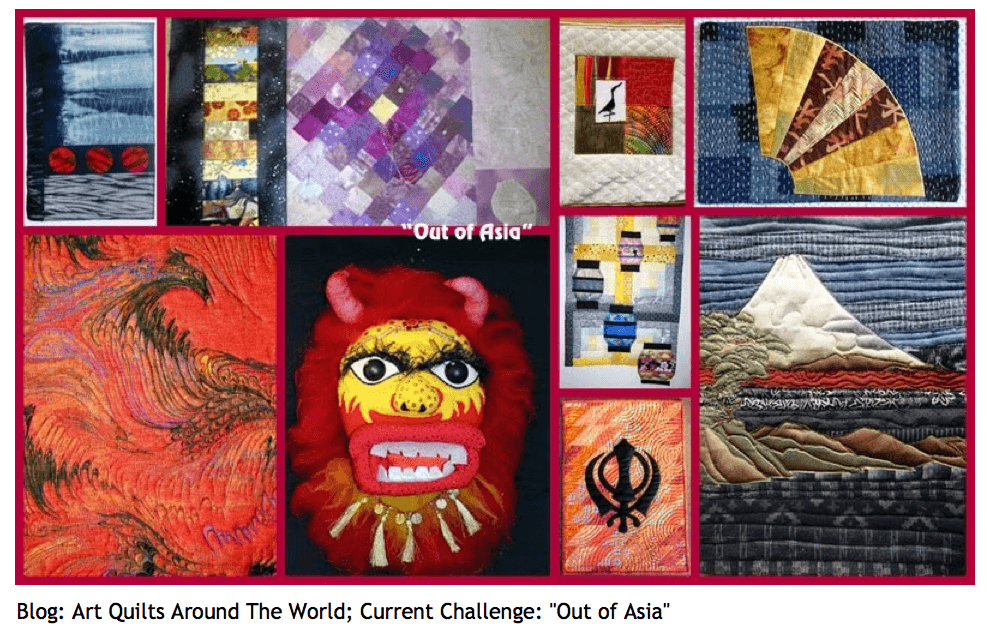
Out of Asia – Next Challenge from Art Quilts Around the World
![]()
I belong to the online group Art Quilts Around the World, and we have just posted our last challenge, Out of Asia. My piece came out really well, and we pick it up from the framer tomorrow. It just had to be stretched and matted, and if it comes out like we think, it will be spectacular. Here’s the story behind “Ode to Hokusai: DragonFlight.”
This was an interesting challenge. I knew the fabric I wanted to use almost immediately the topic was announced. This was a piece of cotton lame’ that we marbled about 10 years ago. It read Asian to me as soon as I rinsed it out, and it went into the “save” pile for some time in the future for when I could figure out what to do with it. I have done a couple of pieces of cotton lame’, one of which is on the website – green cotton lame’ called Rainforest. I wanted to do more, because of the properties of lame’, but is seems in the last ten years that formulas have changed, and there seem to be a lot more additives to the fabric. My last attempt at lame’ didn’t work well at all……
So this is the piece that sat on the design wall for six weeks.
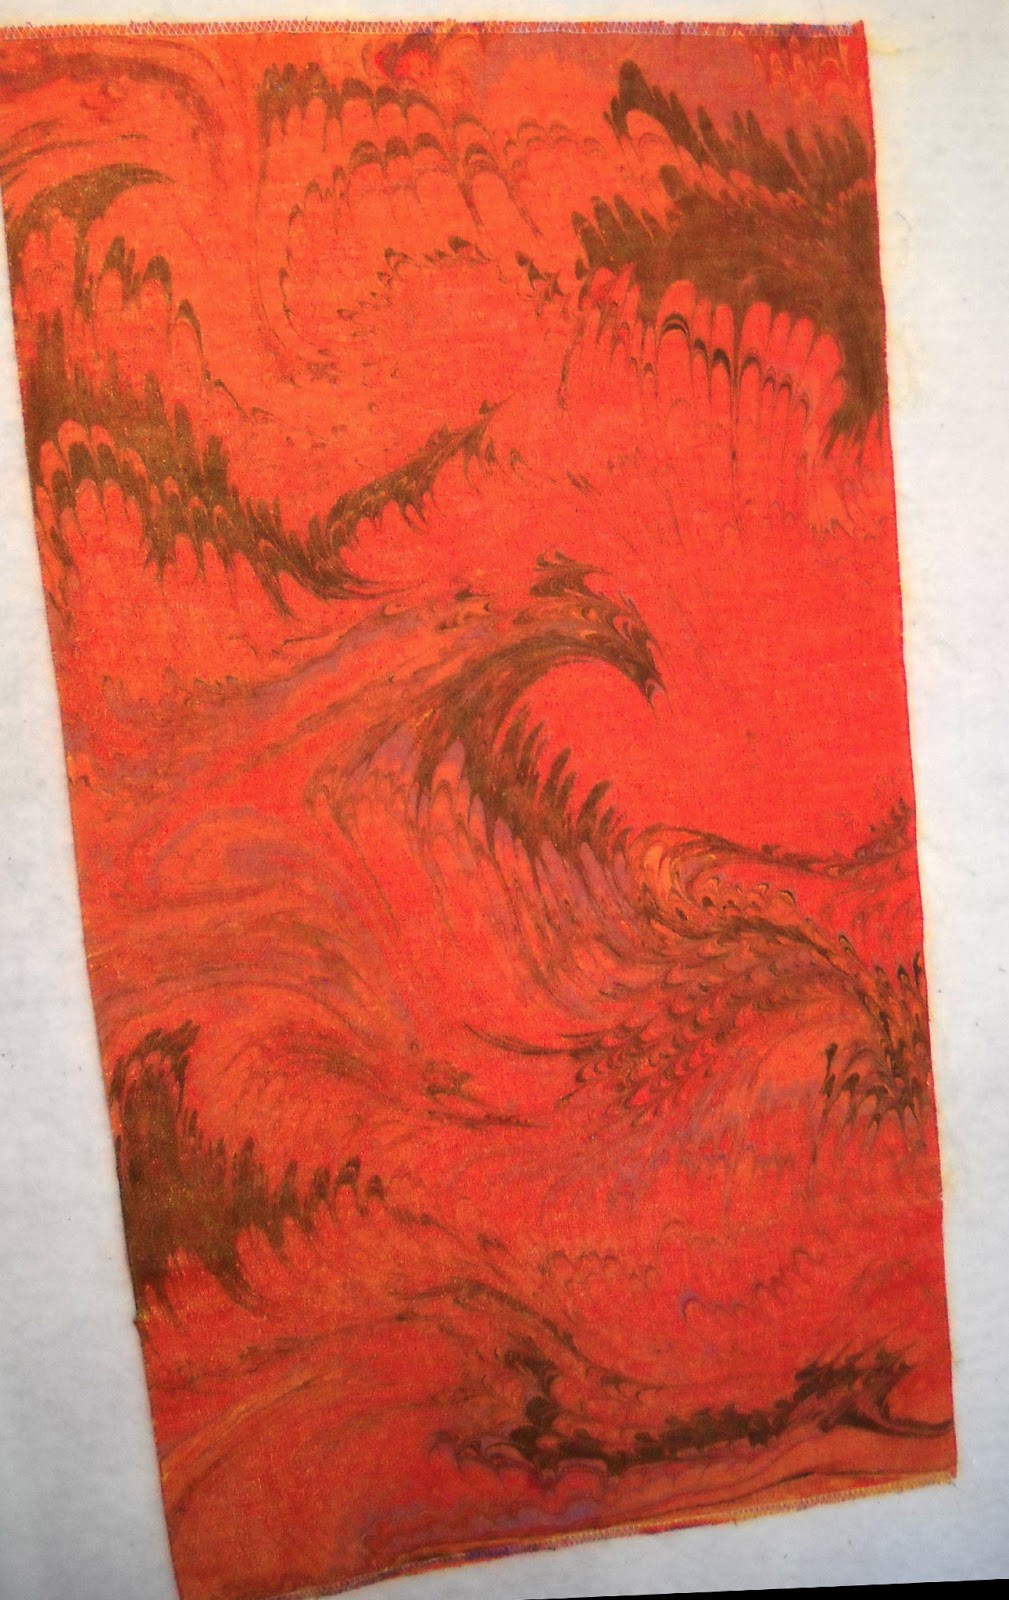
I knew I couldn’t cut it, even though it is slightly smaller on one side and larger on the other from our group sizes. I just couldn’t cut it………so I figured I would just quilt the lines to accent the wave, reminiscent of “The Great Wave” by Hokusai – one of those pieces of artwork I easily recognize every time I see it. It’s almost like I planned that wave, when the whole piece really was an experimentation with a different comb (literally, a small hair comb for teasing the hair).
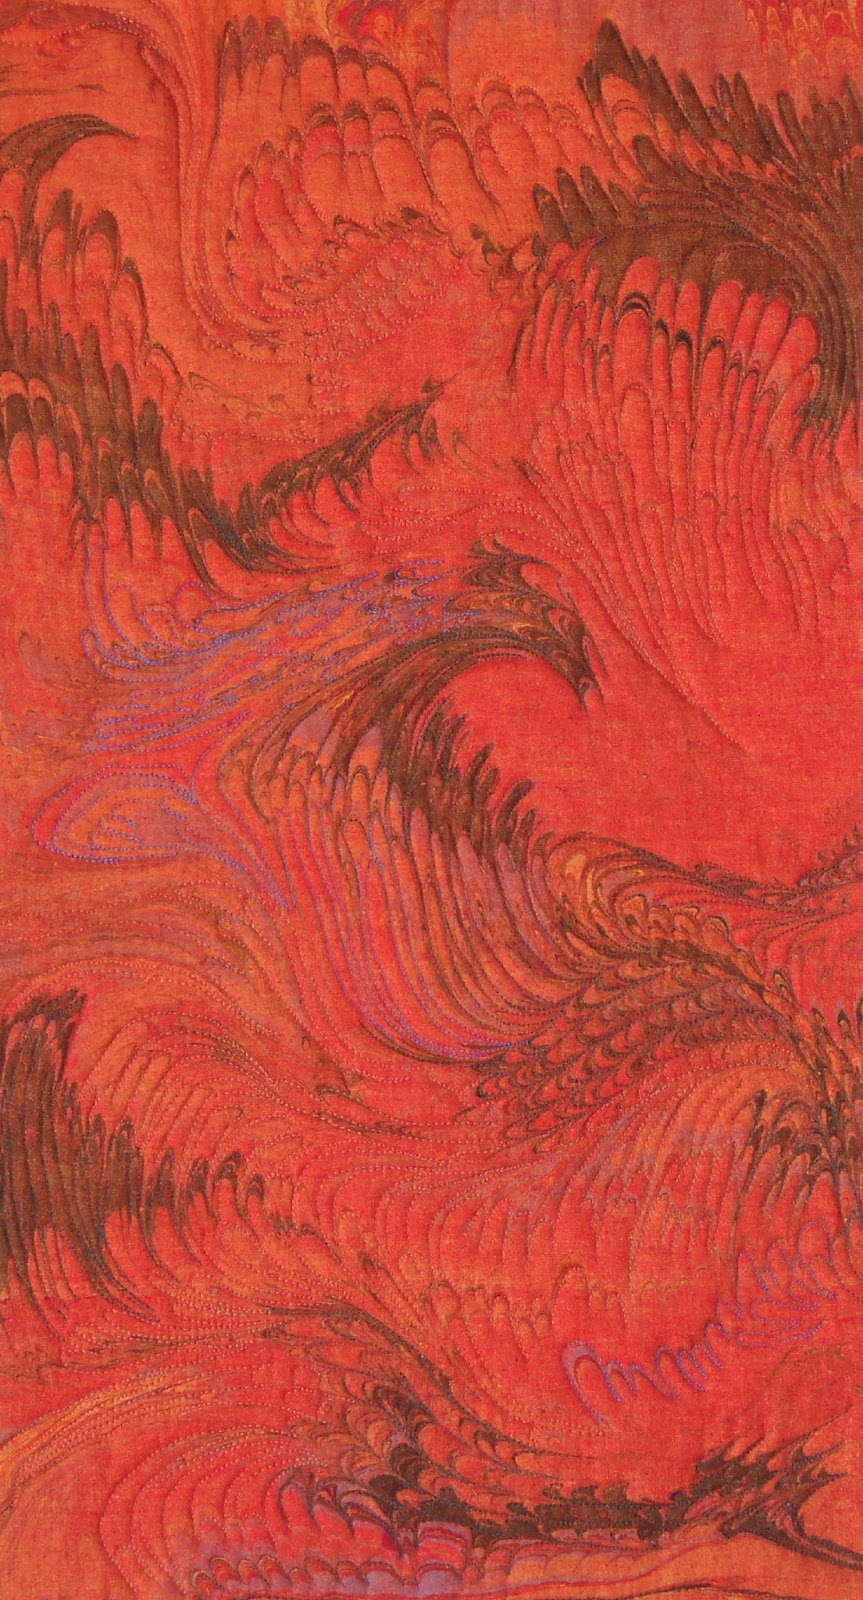
So I started on the center section, figuring I wold just accent the lines of that wave. Normally I would have pulled out black silk thread, since I really just wanted texture, but the dark green (Silk Kimono by Superior) kept calling my name. It is so subtle, but what it did was soften the black in the design – which I liked. Who knew? And with the light on it – it’s perfect.
I loved it when it was done – so much of a great wave, you could almost match it up with the master! So I kept looking at it and pondering where I would go from there……how much more would get quilted?
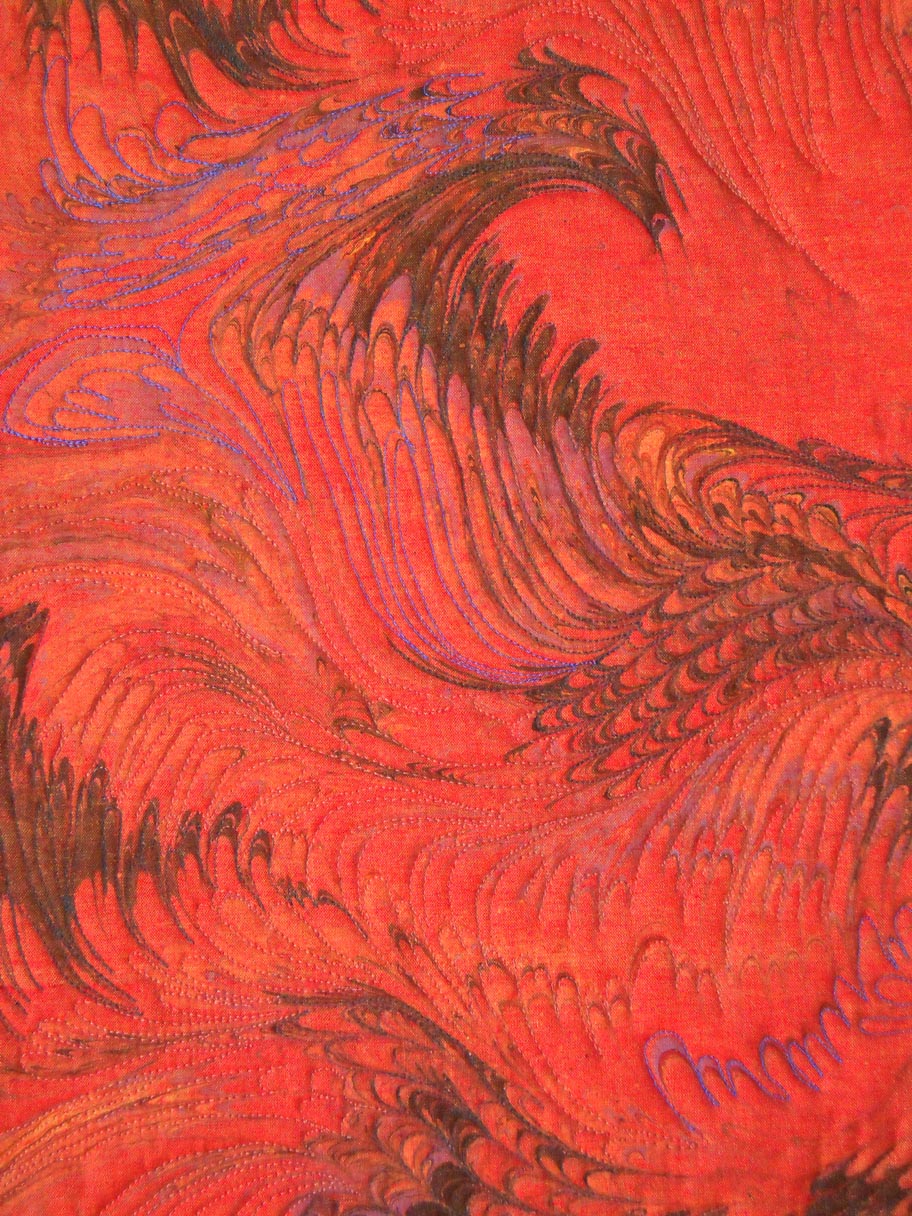
Serendipity struck, in the form of hubby the other marbling artist…who took one look and said, “I thought you were doing a wave? This is an amazing dragon. ” From then on the dragon was the overall image I saw every time I looked at the piece, so I just had to listen and figure out the next steps.
There is some very light blue within the colors, so I chose a blue silk Kimono thread to accent the blue, sort of like glistening dragon wings (too much Anne McCaffrey and Pern….). Then I wanted to do more quilting in the background to accent the idea of flight, so I went with a pale orange silk Kimono, just for wind and/or wave ripples. I ripped out a few lines because it just seemed like too much. Finally I just said “done,” because it seemed to have everything it needed. It is at Michaels right now getting stretched on foam core and a 2-inch black mat, as it said “I want to be framed.”
Above all, I listen…..
You can see other fabulous pieces here.
In Retrospect – Year 2 of Retirement

I’ve been retired now for two years. Last year on the one-year anniversary I took a look at what I accomplished for the year. I was afraid of looking back on retirement and not seeing anything to show for it. So I tracked everything this year. The last four months have been pretty fallow, as I struggled with some personal issues, but I feel like I am finally reclaiming myself. All in all, I had a pretty productive year.
SAQA quilt submitted to major show
SAQA auction quilt submission
continued blogging
Tried out Tophatter, gave it up after some really obnoxious feedback from an a-hole, who actually burned my quilt
Newsletters for 10 out of 12 months
Wrote a dozen blogs for Handmadeology
Remade hubby’s blue quilt
Participated in the free motion quilting challenge through the end of the year
Yoga instruction throughout the year, including pretty regular daily practice
Completed two more table runners for Momma Betty
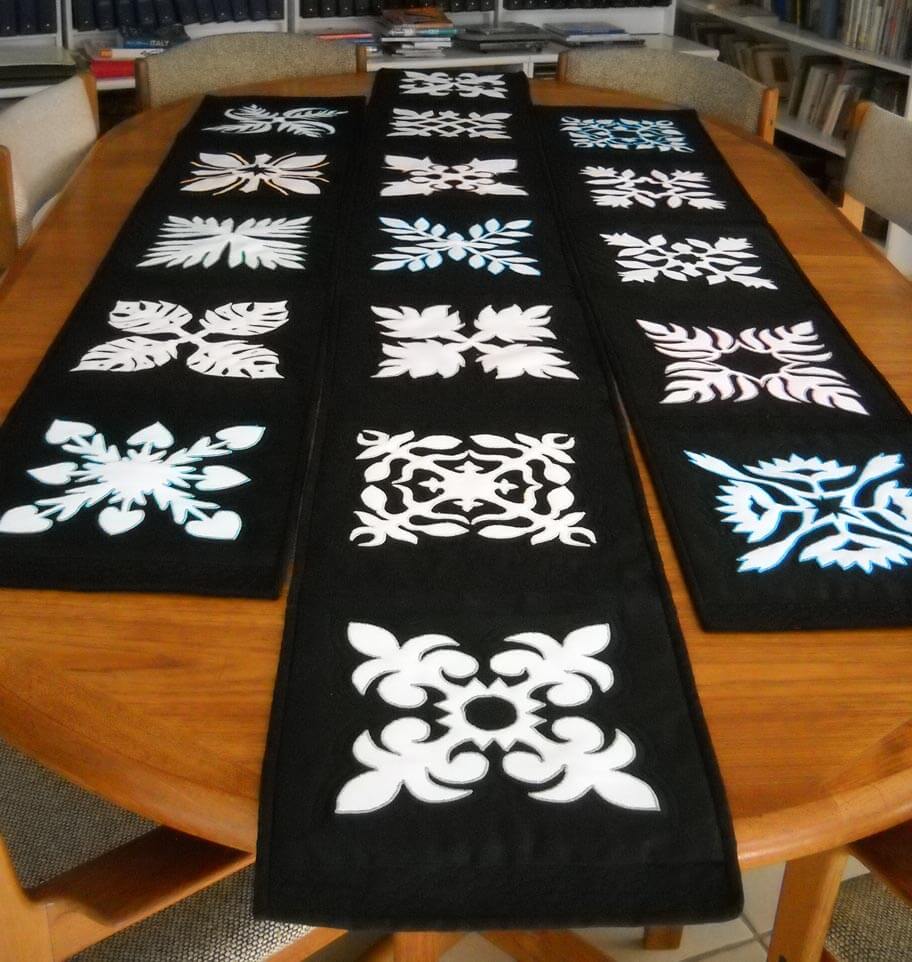
Completed Stepping Stones table runner
Completed “Clammin’,” a small art quilt up on Etsy
Completed pattern and two samples for the table runner pattern
Sold “DesertScapes”
Machine-quilted the Forest quilt
Machine-quilted two bed-stand table-toppers and one dresser scarf
Worked at stocking and marketing the Etsy store
Took a Quilt University class with Elizabeth Barton
Finished Spring Wall Hanging
Guest post on Craft Gossip
Finished makeover of small Christmas quilt
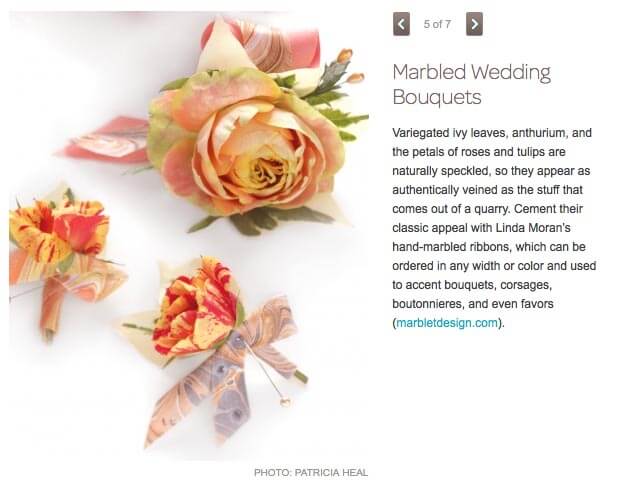
Pictures in Martha Stewart Weddings, Spring issue
Quilted Ali’s green picture
Participated in three challenges for Art Quilts Around the World
Took two Craftsy classes
Joined Galleribba online gallery
Potentialgallery representation starting fall 2013 in Tubac
Participated in StashFest again this year for the La Conner Quilt Museum
Submissions for three books, one accepted, the other as an ebook
Green and purple whole cloth quilts completed
Started commission of 7 quilted chakras, finished Root chakra
Completed two bed-stand table toppers and one long dresses scarf
Accepted into the juried Faculty/Staff art show for The Art Institute of Tucson
There are probably a couple more, but the mind has been kind of blank. It’s nice to have this list, so I know I accomplished a lot! Now I have to start the new one for year three.
52 Sparks – Week 6 – On Top of the World

I am behind, part of what’s making me so nuts lately. But I do so want to stay up with some of my projects for this year. So far I’m really not doing badly, and I know I need to give myself a break and stop being so hard on myself. So….Week 6: When You’re On Top of the World….
I feel giddy, I giggle, I smile, I talk a lot, and my mind goes crazy with ideas. I’ve often commented “It doesn’t take much to make me happy.” I don’t know if that’s a good thing or not! I’m thinking it’s a good thing – I like the feeling, and I want it to happen more often.
I often get this feeling when I complete a project. I just finished a commission as part of a house-warming, and about half-way through I started grinning from ear to ear. I LOVED the piece!! And then, yesterday, I bought a new sewing machine – with 90 decorative stitches…..I’m still grinning, and I can’t wait till Thursday when life is a little simpler to play with it and make my stitch sampler. I’m still giggling at the prospect.
Nature also makes me feel on top of the world, and not necessarily when I’m on a mountaintop. A favorite spot just south of the Seven Pools on Maui, the lakefront on Champlain, the Pali on Oahu, cactus in bloom during a wet spring in Saguaro National Park……get me outside and I can feel on top of the world.
So here’s my free motion quilting piece for my friend Ali. There are SO many things I love about this piece – the colors worked even better than I thought, and I love how the blues kind of shine. The tension on the back for the most part worked really well. I used Bottom Line in the bobbin, Silk Kimono for the ribbon, Art Studio for some of the blue background, and King Tut for the overall design. The thread colors were great. The ribbon around the center celtic piece was the new FMQ challenge for this first part of the year from SewCalGal, and brought to us by Libby Lehman. I love how the ribbon is created. I’m not happy with how mine turned out – it needed to be larger, and I discovered that I really didn’t need a pattern – next time I will freehand the ribbon and not make the stitching as dense. I was even thrilled with the blocking, squaring off, and binding. Overall – on top of the world……

close-up of the “ribbon” work


52 Sparks, Week 2 – Appreciation vs. Approval, Plus FMQ
![]()
This week of 52 Sparks had a really interesting question that I pondered a bit. The question: How do you appreciate yourself? I had to think long and hard about this one. I think I was confusing appreciation with approval, and it took me the longest time over the years to not worry about family approval. I needed to start appreciating me for me, and what I did and succeeded at because I was pleased, not someone else…..kinda rambling, but I hope it makes sense.
Appreciation: I go for walks to think about what I’m doing, I take time off to read – some times days at a time to just immerse myself in some books. Mostly, though, I appreciate myself by giving myself free rein to make art. And with retirement, I am taking more time to appreciate what I’m learning and creating. In fact, three new commissions over this week. It is just so delightful to quilt away for hours (with the occasional back break) and see the progress.
That said, here’s what happened with art this week. Last time I had the stencil traced on to the green fabric in preparation for my first whole quilt. Now all I need to do is square it off and bind it. I LOVE IT!!!! I NEVER thought I would be able to free motion a whole cloth. Yay me!
So here they are – better pics when the binding is finished.

All are Superior Threads, Bottom Line in bobbin, Silk Kimono in background, and Fantastic variegated in the design.


Works in Progress….or Works That are Finished….
![]()
Yes, I am finishing things, some of which I can’t show yet, but I do have an “oldie but goodie” from the far past, from at least 25 years ago…….this is an afghan I made of a teacher colleague for her first child. She sent me a picture a few weeks ago, and I can picture exactly where I was in Phoenix making this little bear. The bear has now been passed on to a grand-child, so it’s good to know Bear won’t be lonely. I didn’t have a picture of this, as it was WAY before I started documenting my work. So thanks, Ann, for sending him along to me!

Also completed and never photographed (and needs to go under “early quilts” on the website) is my purple quilt – a really original title. This quilt happened in several stages. First, I did the basic blocks as part of a different quilt I was trying to design. There were 9 blocks, 5 of one design and 4 of another. Probably five years after originally making the blocks, I sashed them and then added a very geometric print for a border. This was the first time I actually started mixing some prints with the marbled fabrics. I did some beading, but I probably need to go back and re-do because I certainly didn’t do the beading well. What I particularly like is the secondary design in the blocks, where the marbled fabric actually looks like it is swirling.

Another completed project – the dresser scarf for hubby, based on what I’m learning in the Craftsy class with Cindy Needham. I may decide to take the serged edging off and replace it with binding to eliminate the curl on the edges. But it has been a great practice piece. Now I need to finish mine…….


I love how the cathedral window quilting works with the hand-dyed fabric.
This next is a work in progress, a type of self-portrait, but my own distinct version of it. Think of “marbled end pages of a book.” More to come the end of January……

This is a snapshot of a quilt completed for a customer, where the quilter did this A.MA.ZING. quilting. I can only hope to aspire to this level of free motion quilting….from Green Fairy Quilting. You have to check out the blog and see all the close-ups……drooling…….

Work in Progress Wednesday – More FMQ
![]()
In order to cope with the depression that has settled, I set a goal of sewing for a couple of hours every single day. It is helping. I’m taking Cindy Needham’s Craftsy class and getting LOADS of ideas. Plus, the FMQ challenge has a great tutorial on borders. So I started experimenting with both. I’m using the dresser scarf (one of two) to practice on. This middle section doesn’t really coordinate with the first one (or the soon-to-be last one), but these are for practice.
I am maintaining the circle stencil motif in the center of each third of the piece. Then I started with some of Cindy’s “sunshine and shadows” in the center, and then a round border of some pebbles. Then I took some ideas for borders from Patsy Thompson’s tutorial. Even added a paisley corner from Leah Day. LOVE the back – I actually managed to get the tension to work. I used Bottom Line in both top and bobbin, as I was trying Cindy’s suggestion to use that to add texture. I used the freeform feathers from Leah Day that Cindy talked about to unite the two sections. Liking the freeform there! This center part is about four hours of quilting – incredibly therapeutic. There is definitely a whole cloth quilt in my future!
Here are the free motion feathers…could have done more in the blank spaces, but I was running out of steam……….

A look at the center, with the edge of the circle, first, second, and third borders.

More of the center section.

Love the paisley corners!

Some pics of the back – LOVE it!!


Using Marbled Fabrics in Quilts

When we started marbling, we were hooked from the very first piece. The problem was…what do we do with the fabric? Each piece was so gorgeous it was hard to cut into it. We knew we had to get over that mindset. Folks consistently asked, “What do you do with the fabric? I don’t know how to use it.” Confession time – I wasn’t quite sure either. I saw a book and thought marbled fabric would look cool. Now it was “put up or shut up.”
I was a beginning quilter with virtually no good color sense…that was hubby’s field. I figured black goes with everything, so my first quilt was an attic window pattern.

This was a nice way to show off smaller pieces of marbling, but I had to stretch further. It took a number of years before I stopped being afraid of any color except black. I started a Block of the Month, using blocks from Judy Martin. I became more daring…this time it was not black…..but other solids. I built the designs on the colors in the marbling. My January block had a definite “coolness,” so I looked for solids with some texture that would work. I started to expand design ideas and felt that traditional blocks could be the key to using these fabrics.

Now another confession…..when I first started doing quilting, I was pretty much “stitch in the ditch”….with metallic threads, no less. The quilt above is 12 years old, and I took it apart (oy) and used my newly acquired FMQ skills. I didn’t stitch the marbled blocks, as I wanted them to stand out.

The completed quilt – marbled fabrics within traditional blocks. You can read more about the actual quilting here.

I was hooked on finding some great traditional blocks that could spotlight marbling and go together harmoniousl. Summer……..I had some great neon orange cotton, a nice piece of Moda Marbles, but I needed additional fabrics so the quilt wasn’t overloaded with green. I stretched with the print fabrics I added to complement the marbled fabrics.

There’s lots of machine quilting throughout, but the marbling has been left on its own. (I also took this quilt apart…. kind of obsessive. But as quilters, we KNOW what we want. More about the quilting here).

At this point, I had a great piece of marbled fabric that said “I want to be fish.” I found a traditional block that could be used as fish. Thus the “fish quilt” was born (you can read about that quilting here). This time I quilted the marbled fabric by following the lines of the pattern and used stitches from my workhorse Bernina.
 The completed quilt –

I started getting very bold – it never occurred to me to just quilt the marbled fabric itself. This was a major breakthrough. Traditional is fine, and I still work with traditional patterns, but quilting the marbled pattern gives a completely different look to a quilt. This quilt, “Nature 1: Rock Garden,” became my first quilt accepted into a juried show, “Expressions in Textiles.” It is very zen-like, and the quilting emphasizes the rock garden and sand.

Go traditional or go contemporary. Don’t be afraid of the marbled fabrics. They can be the spark that makes your quilt.


Work in Progress Wednesday….The UFO’s

I have been working on a guest blog post on using marbled fabrics in quilts, and it occurred to me to look at some of the more traditional quilts I have done to inspire people. Well, turns out most of them are UFOs…….so here’s a look at what I still need to quilt – now that I have some really good free motion skills. I’m really inspired to start working on these….after the patterns are finished…..

Needs to be taken apart so I can determine why there is the fold there…..The fabrics worked so well!

Known as my origami quilt…..complete with pins…..

One of the first quilts I really started to expand my thinking….(forgive the thumb…).

Gotta think about how to quilt this one……going to definitely quilt the marbled blocks.
And…..here’s part of my October FMQ challenge – LOVE LOVE LOVE how this is turning out! I have a few more things I would like to do to this piece, so maybe it will be finished by next week Wednesday. It’s a combination of a lot of ideas.

I have some really cool ideas for using the trapunto technique on marbled fabric…going to be the next piece.
A UFO Finally Finished!
![]() About three years ago (I date time from where I remember living while making this piece) I started what I called my “forest quilt,” as a result of Stripper’s Club, at my local quilt shop. The quilt looked masculine, so I figured it would be good for hubby. I got the top done in about a month of working on it school nights…and then it sat, because I just didn’t know how to quilt it. Didn’t want to do stitch-in-the-ditch,” and I just couldn’t imagine stippling the whole thing.
About three years ago (I date time from where I remember living while making this piece) I started what I called my “forest quilt,” as a result of Stripper’s Club, at my local quilt shop. The quilt looked masculine, so I figured it would be good for hubby. I got the top done in about a month of working on it school nights…and then it sat, because I just didn’t know how to quilt it. Didn’t want to do stitch-in-the-ditch,” and I just couldn’t imagine stippling the whole thing.
This past January I started the Free Motion Quilting Challenge with SewCalGal. I have learned SO much! From the very first pattern of leaves, my skills have grown by leaps and bounds. When I made my list of unfinished projects, this was on it. When I finished the last table runner for my second mom, I decided to work on this, because now I had a bunch of ideas for what to do in a quilt with a lot of straight lines and ninety-degree angles.
Before I actually started the quilting, I read Karen McTavish’s book of McTavishing, which I got for my birthday. I really liked what she said about adding texture to the quilt by using threads that are thin and blend in with the background. So….Bottom Line by Superior Thread in the bottom, and a light and dark Bottom Line for the top. I decided on a rosette (a variation of a feather) for each of the centers, and partial rosettes for the partial blocks. Along the way of quilting this large quilt, I got very used to moving it through and around the machine. One of the best lessons in free motion came early on, with the advice to learn how to do your pattern sideways and upside down. The only place I had to wrestle and turn the quilt was with the straight lines in each block.
Frances Moore leaves, Angela Waters swirls, Diane Gaudynski feathers/rosettes, and about 15 hours later the quilting was done.
The back looks amazing, if I say so myself. And….my border is to die for! Love the feathers, done with a Rainbow thread also from Superior. The quilt overall was a lot of fun to do, as I had a lot of variety within the quilting designs. The safety pins worked for basting, and I think I only had two tucks in the whole backing. I used a thin batting, and I’m so glad, because the quilt is actually pretty heave. It’s hanging on the wall right now, because since it’s still 90-plus degrees, I’m still weeks away from needing it to stay warm.
Here it is. For no blocking, it hangs pretty straight.


You can see the texture from this angle. I was looking at it the morning after we photographed it in the dining room, and with the natural light coming from the right, I could see the quilting. Lesson learned for the photography in the future.

Close-up of one of the edges. You can see the partial rosette.

The border – all the way around – and it really didn’t take that long. I LOVE LOVE LOVE the border!! NEVER thought I would be able to do feathers!
 On the bed – another look at texture.

The back….

…and the back again…..
Learned so much! Thanks SewCalGal for this amazing year of challenges!
Top Ten Tuesday
![]()
Slowly getting caught up on blogs, as well as working on a class at Quilt University. If you are interested in online learning in quilting and other fiber art techniques, check out QU. This is my 5th class with them, and I have been very pleased with every single class. I mostly focus on the design classes, and right now I’m doing a class on design with Elizabeth Barton, whose work I really like. Pretty great stats, wouldn’t you say?

I discovered a new photography blog, Sun Gazing. Great list of resources. Actually this is more a New Age site, and a lot of Buddha images, but the photography is amazing.

Look at this amazing photo!

Once again from the 365 Project, some glorious photography.

Oh My God, It’s Full of Stars by Alexis Birkell
I’ve just discovered Alison Schwabe’s blog, and this post on making samples was very good. One other blog has talked about stitching things out ahead in samples, and I think I’m looking at a new piece of my process. Should at least keep me from pulling out several inches of thread……

Readers of this blog know I love TED talks, and on the TED blog today is a list of the top 20 TED talks. There are a bunch here I haven’t seen, so I have some fun stuff to watch this week!
![]()
Discovered a new quilting blog this morning, with examples of some of the motifs being used for the 2014 Olympics in Sochi, Russia. Inspired patchwork! The blog is With Heart and Hands by Michele Bilyeu.

Animals Talking All in Caps is exactly what it says. Folks send in a picture with animals in it, and our moderator does a caption. Some are hysterical – well, most of them are. And some are very poignant.

I’M SORRY I KICKED DARREN IN THE FACE FOR CHEATING ON YOU.
I’m sorry I yelled at you for doing it. I was just startled.
HOOF TO GOD, I THINK HE DESERVED IT. YOU’RE A PRINCESS.
I love you, Shelly.
I LOVE YOU TOO.
Not every parent appreciates the pursuing of a liberal arts education, especially if it involves the classics. From Letters of Note is this letter to Ted Turner from his father, questioning his stupid quest to study Greek.

I love Vi Hart. She’s a recreational mathematician, and she teaches you stuff about math that is fun, simply through doodling. Here’s her latest video….warning – you need to concentrate!
And we’ll end with an interesting tidbit of history: Who Stole Helen Keller? How has history rewritten her story?
“Helen Keller worked throughout her long life to achieve social justice; she was an integral part of many social movements in the 20th century. Yet today, she is remembered chiefly as a child who overcame the obstacles of being deaf and blind largely through the efforts of her teacher, Annie Sullivan. While she may be hailed as a “hero” in lesson plans for today’s children, the books recount only a fraction of what makes Helen Keller heroic.”
Have a great week – let me know what you find on line that’s interesting!
New Work and Progress….
![]() I have been participating in the Free Motion Challenge this year sponsored by SewCalGal, and it has done wonders for my quilting skills. Each month a different machine quilting instructor, and I now have a variety of patterns to use. Part of my goal for this second year of retirement is to complete some of the unfinished projects over the last few years. Now I feel like I have way more tools than just stippling. I am working on a quilt from Stripper’s Club of three years ago at my LQS (Quilter’s Market), and it is looking amazing. I anticipate being done by the end of the weekend, as the quilting really doesn’t take that long. I just need to take breaks every half hour or so since my neck and shoulders are tightening.
I have been participating in the Free Motion Challenge this year sponsored by SewCalGal, and it has done wonders for my quilting skills. Each month a different machine quilting instructor, and I now have a variety of patterns to use. Part of my goal for this second year of retirement is to complete some of the unfinished projects over the last few years. Now I feel like I have way more tools than just stippling. I am working on a quilt from Stripper’s Club of three years ago at my LQS (Quilter’s Market), and it is looking amazing. I anticipate being done by the end of the weekend, as the quilting really doesn’t take that long. I just need to take breaks every half hour or so since my neck and shoulders are tightening.
In spite of feeling pretty lethargic over the last two months, I finished a small green color study, the June and July free motion lessons, completed the samples and wrote the pattern (which is now being tested by my new pattern testers), started work on my forest quilt, and completed a small piece called Desertscapes.
Desertscapes started as seven separate pieces that I knew would go together, but I wasn’t sure just how that would work. I just started with some free motion to accent the idea of geodes, as well as desert landscape. I loved the use of microstippling to mimic sand.


Here’s the finished piece, which already has a home. It looks so much better – and straighter – on the wall! Loved the way the marbled ribbon brought everything together.

Sunday Stories – Misfiring Synapses

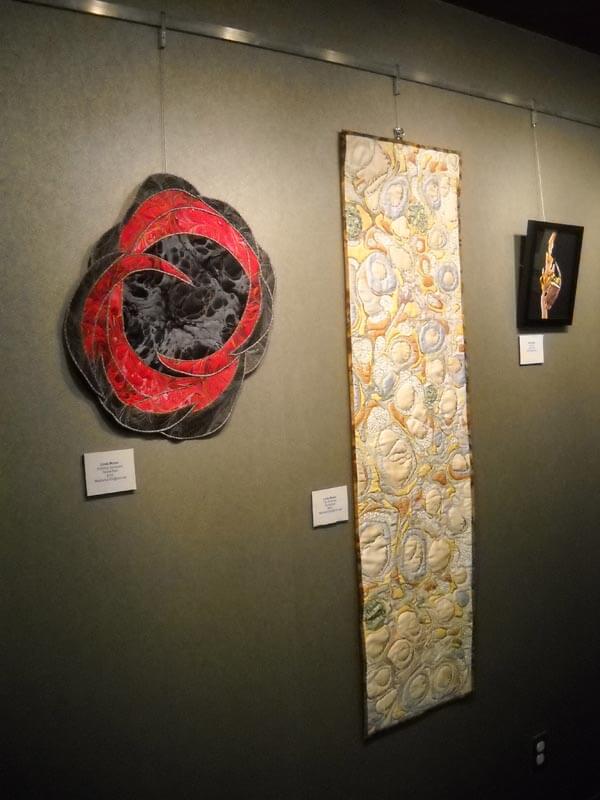
I’ve had a couple of people come by and see my “Misfiring Synapses,” a piece I did on depression. It’s getting mixed reactions. Some people don’t get it because it’s fiber and doesn’t look like their mental picture of fiber – which is a typical quilt. Some don’t get the imagery in the abstraction, and that’s okay. But most people who do get it love it – they say it’s exactly what they figure their mind is going through. Which is what I was aiming for in its creation. I think if you’ve suffered from some form of depression, especially situational, you get the idea that something is ultimately not right in your brain.
When the call for this show came up, I spent a lot of time trying to think 1) how I would interpret it, and 2) how I would do it in marbled fabric. We had done some black satin a while back for a different piece, and it was pretty organic in form. As I was going through fabric, I happened on the piece and thought it looked quite a bit like a nerve ending. Very dendritic. So I went with that piece, and I wish I’d taken a picture of the satin without anything done to it.
I wanted the effect of an irritation, like an itch that just wouldn’t go away. As I was checking through my threads, I saw a Rainbow thread from Superior that was a red/purple/black, and I thought it might work. When you look at the above photo, you can see that the red shows, and then it looks like there isn’t other thread. It looks like an irritated part of a nerve. Just what I wanted.
So I had the center of the piece, but I wasn’t sure how to develop the “looking inside” aspect – I wanted it to feel like you were looking deep into the brain and seeing just this one little piece of irritant. I had two different types of red fabrics, both satins, and both with some freeform designs, again very organic.

I did a lot of the same type of quilting, following the black, this time with a variegated series of reds. Lots of bubbling texture resulted. I did the same thing with the second piece of red. What I seemed to have were two different areas of the brain, both pretty irritated.
I also had some more great black satin, this time in more formal marbled patterns, and I figured this would work really well for the outer shell of the brain, all the “gray matter.” I continued with the curved pieces that overlapped each other, much like I would imagine the parts of the brain does. Each of the curved pieces had serged edges with the idea of the gray matter and all the wrinkles you see in the surface of the brain. There were a lot of issues in connected these pieces. I had to work from the design wall to the flat table, and then to the sewing machine, hoping I could get all the pieces of the puzzle together. My intriguing back of the piece started to look really messy, so before it travels at all, I will add another backing to it, to make it a lot neater.
 You can see a lot of the overlaps and edging in the above picture. What I particularly love about the piece is that it works both from a distance and close up. From a distance you see this really interesting organic shape, and the colors are somewhat disconcerting and upsetting. Close up it looks like it is undulating.
 I left it nice and big for you so you could examine all the various parts of this.
17 by 20 inches, available for sale.
Comments?
All Kinds of Good Stuff
 A great big welcome to all the folks coming here from SewCalGal’s tutorial and Fun Friday Giveaway! I enjoyed doing the tutorial on quilting marbled fabric, especially thanks to SewCalGal’s sponsoring the Free Motion challenge this year. Hopefully you’ll leave comments about what you might do with the marbled fabric. What I want to announce today is a new part of the website and blog, for those of use who use – or have used marbled fabrics – in your quilting and assorted sewing projects.
When we first started our website (back in 1997….and a few changes along the way as we learned a whole lot!), we had part of the site to show off people’s projects who used the fabric in their quilts. We’d like to start that again. If you check here, you will see some of the very early quilts I did that used marbled fabrics. When I first started using the fabrics, after we began to learn in 1992, I pretty much put everything with black. I was rather afraid of color at that point. One cyber friend who paid us a visit back in 2002 said, “Let me take a fat quarter and see what I can do with it,” and a week later she came back with a completely quilted piece of fabric. Oh my, it was gorgeous.
That’s what started me actually quilting the fabric. It took a while to get the speed and rhythm down for the free motion and the stippling, but it made such an impression on the appearance of the fabric. At the time we were just making fabric and selling it, not really paying attention to the actual quilting of it. Along the way, several artists bought some and began to incorporate it into their quilts. Kathy Nida used some in one of her first quilts that got accepted into a show, in 1999. To this day I love looking very carefully through her work to see remnants of fabrics she’s purchased from us.

A Study in Flesh by Kathy Nida
We’re on a mission to have people use marbling in their artwork. Send us a picture of how you use the fabric, whether you actually quilt the fabric or just use it in a more traditional manner. We’ll get you up with credit on both a blog page, as well as the web gallery.
Good lick with the giveaway – the fabrics are really quite pretty – and I want to see what you do. Plus….I’m doing a newsletter within the next week, so be sure to sign up to receive the monthly missive, and we always give away some fabric each month. Use the box on the upper right. Check out Ebay and Etsy as other sources for marbled fabrics, and you can always order direct from us.
Happy quilting!
Quilt Remake, Part 2

I finished the quilt remake in time to get the suitcase packed full of quilts to take to StashFest. Of course, it couldn’t be quite that easy to pack the suitcase….ended up packing it three times, as I went to photograph the quilts for a new book, and the first set wasn’t high enough resolution. So we set up again, and this time there was too much light. So third time was the charm….setting up the room again, and unpacking/repacking the suitcase. But the photos are on there way now….and my new little quilt looks great!
When I left off, I was working around the various quilting motifs. The larger triangles had a zentangle-like stippling, and the area around the stars was much smaller stippling. I will definitely need to practice that so the stitches are really consistent. But I really like how the rosettes worked out.
 I wanted to do feathers on the border and ran into tension problems…the background thread (Bottom Line) kept peeking through, and I finally decided I didn’t want o keep taking the feather out. So I changed the thread in the bottom to be the same as on the top – problem solved for the time being. The feathers go up half of each side. They’re pretty subtle, but I like them.
 You can also see the corner squares. I actually marked those lines for consistency. I must say it was the first time I marked anything, and I will probably do it again. I liked the effect, but I need to consider what I’m going to use for marking, so it’s easy to get out.

I absolutely love the back! Yeah, there are some tension problems, but I am making SO MUCH progress.
 I can certainly see the appeal of white whole cloth quilts. I feel the same about the backing quilting on my whole cloth marbled quilts.
And finally, hanging briefly on the wall before being packed:
 Tomorrow I will be so ready to leave, and no doubt all the loose ends will be done by noon, so I am going to start taking apart another older quilt in preparation for some brand new quilting!
Road 2 California – Part 2 – QUILTS!
![]() While I love the shopping opportunities at a large quilt show, I am there for the art. I was certainly not disappointed at road 2 California. Oh my goodness (and I said that a lot…), the quitls were wonderful. So much so I went back to walk through everything three times. So I have a LOT of pictures. We’ll start slowly.
While I love the shopping opportunities at a large quilt show, I am there for the art. I was certainly not disappointed at road 2 California. Oh my goodness (and I said that a lot…), the quitls were wonderful. So much so I went back to walk through everything three times. So I have a LOT of pictures. We’ll start slowly.
Sherry Reynolds created “America, Let It Shine,” and what a beauty it is. From her statement: Tribute to America and its foundations and values, with the hope that they will guide us to a brighter future. 5121 Swarovski crystals represent the words of the Constitution, Star Spangled Banner, Pledge of Allegiance, and age of America. The 13 colonies are represented by using 13 points on outer blue rays and red triangles. The 50 states are represented with the ring of 50 stars. Designed on graph paper, free motion quilted on a Bernina 1001.
Sherry was there Saturday with her original graph paper, and I loved her comment. “No one told me you couldn’t do all this quilting on a big quilt ona domestic machine.” Gives us all hope!
 (It’s really hard getting a good picture with a crowd around…). And here’s the back….also pretty amazing.
 Sherry won one of the major awards – just don’t remember which one…..
There were a group of “slice” quilts, where a picture is cut into so many pieces, and a different person quilts each piece, and then the whole is recreated. These were the Klamath Basin Vistas. I really enjoyed taking a look at all the exquisite details.


Another favorite (more winners later…) is this one from Diane Steffen called “Rare Catch.” I love the piecing in each of the lobsters, as well as the pieced boards, and the addition of a net.

Lisa Sipes won for her “BeDazzleder!” I loved the vibrant colors, and the trapunto and quilting was exquisite.

“Ring Toss for Spring” by Heidi Lund – vibrant blues.

Betty Busby gave us “Welcome to the Jungle.” There is so much hidden detail in here – couldn’t get the whole lizard in at the bottom…..

Amazing bromeliads by Barbara Beatty: “Ethereum Botanica: Bromeliads.” (Way more amazing in person than this pic….)

From Suzanne Marshall comes “Deruta,” which is a town in Italy known for its hand-painted ceramics.

From Bonnie Keller comes “Creme de la Creme,” an amazing whole cloth based on the work of William Morris. She used trapunto, embroidery, beading, and inks. The detail was amazing, and I’ve just included a detail shot.

And from Molly Hamilton-McNally and Cindy Seitz-Krug comes Best of Show: “Everlasting Bouquet.” The colors are spectacular.

More to come as I get them sized, labeled, and get to a few other things on my massive list…….