Archive for the ‘creativity’ Category
Sunday Stories: Gaia 3 – Autumn
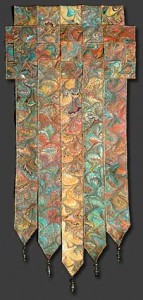
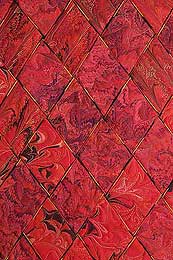
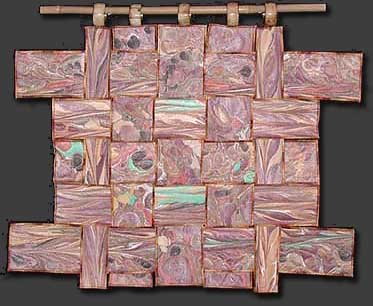
 I have lived in New England, specifically Vermont and New York, for a good amount of my life. My biggest regret living in the desert is not seeing Autumn each year. A number of years ago I had a chance to put some work in a small gallery in Jericho, Vermont – the town my husband’s family settled in the 1600s. The gallery is also the original home of Snowflake Bentley, the man who photographed snowflakes and proved no two snowflakes are alike. I wanted to do something that would honor autumn in New England.
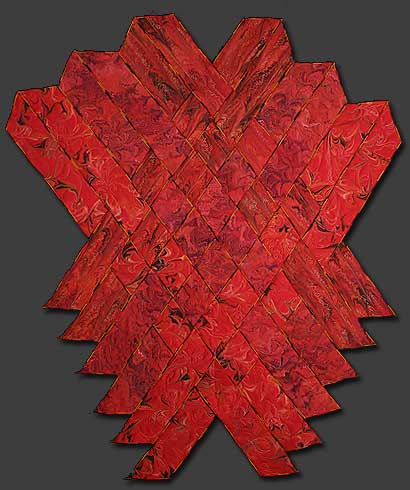
We marbled a piece of polysatin in autumn colors. Now there are some purists in quilting and marbling who insist 1) everything has to be cotton, and 2) you can’t marble polyester. Well, I’m a great one for breaking the rules…which is interesting, because I was such a linear, rule-follower growing up. But not where my art is concerned, evidently. We have discovered since we started marbling that polys take the marbling and paints extremely well, and almost all our art pieces are done on some type of polyester. The detail is exceptional, and the colors are consistently bright.
Once we had the great colors, then it was…hmmm, how to show this off? This would be my third piece in my Gaia series, and I knew I wanted to keep the weaving aspect. But I didn’t want a square or rectangle of strips. So I looked to weave just the top part and have the lengthwise strips hang down in points.
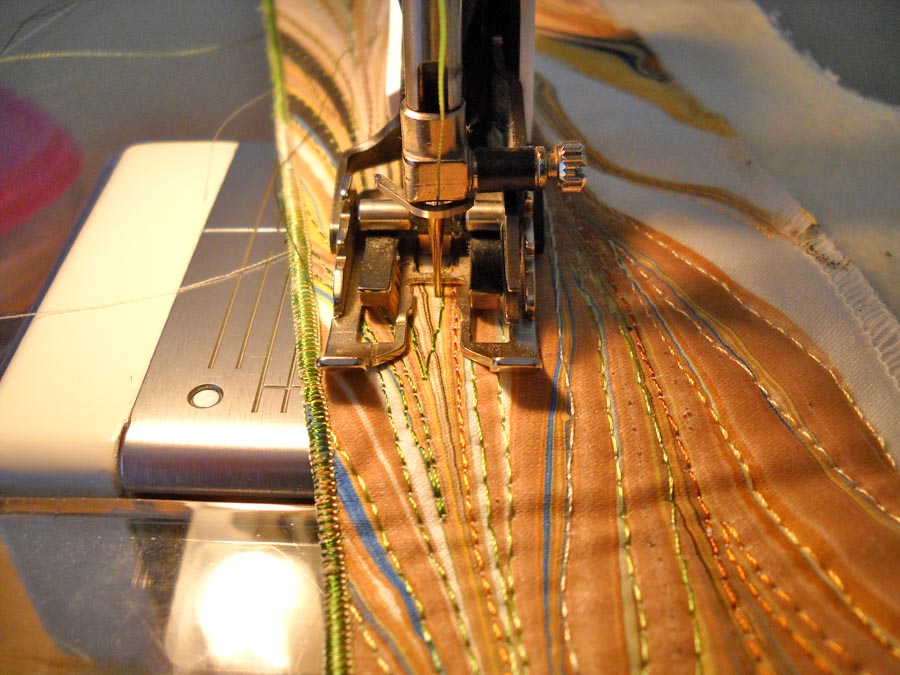
The draft looked like it would work, but the copper thread was not cooperating. This was before I really knew much about threads and machine tension and adjustments…so I did a lot of ripping out to try and get the stitched somewhat even. The other problem was the serging. Again, I wanted to use some decorative threads, but the machine wasn’t cooperating. And…I wanted to have points at the end of my strips, and I wasn’t sure how to manage that.
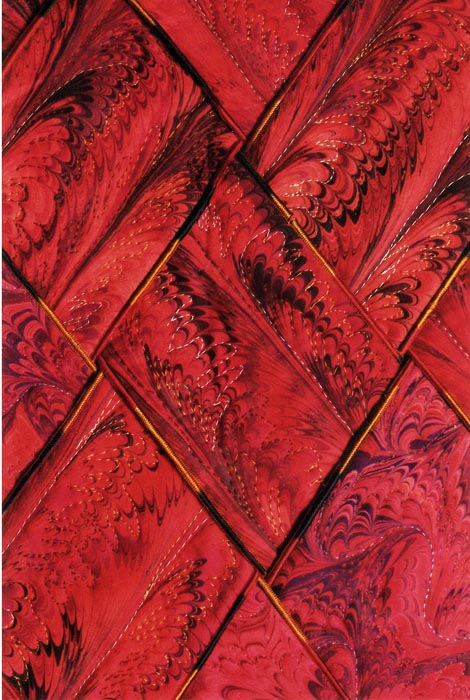
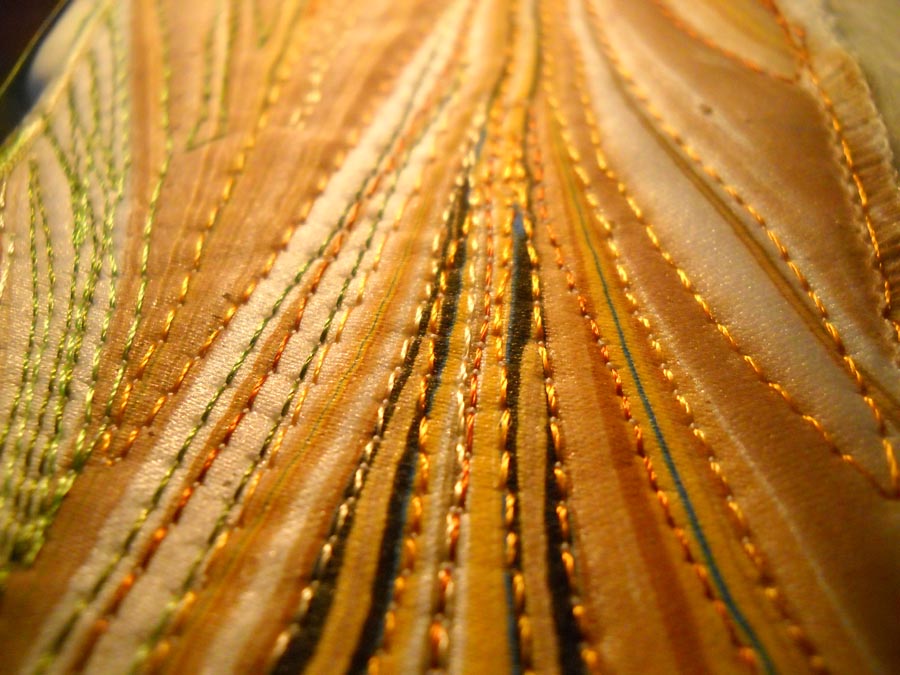
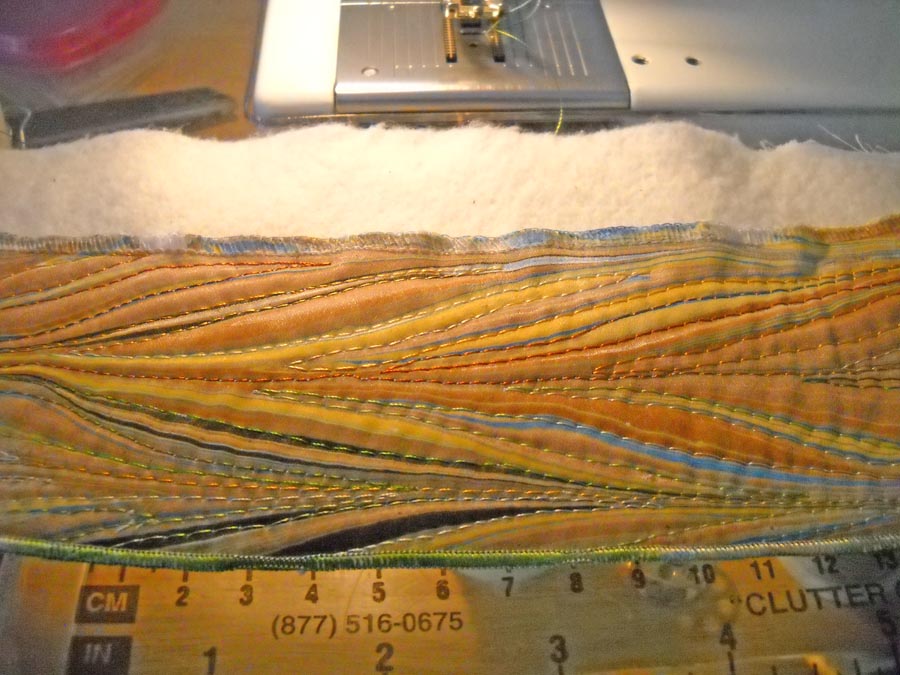
Now the visual effect was what I wanted. I cut the length-wise strips so the pattern would not be broken. This is a traditinal marbled pattern, the reverse of the peacock/bouquet design – which we call “bat wings,” because that’s what it reminds us of. The vertical strips are attached until about 6 inches from the bottom, because I wanted the effect of leaves/branches in the wind. This was actually the second piece I added beads to, and they worked out quite well.
The serging is rough. I have since learned all kinds of tricks to smooth out what I want for a decorative edge, and the piece I am working on now reflects all that I have learned. This is one where I wish I had better pictures – and more of them. If you visit the website, you can enlarge the pics there for a better view. The piece sold about a year later to a quilting buddy. I still miss it, as it is so New England autumn.
Be sure to become a subscriber! We have a drawing (good ole Random Generator) before each newsletter for a free Sampler 1 package. See the form to the right. Join the family!
The Power of Art Therapy
Intellectually I know that art can be good for the soul. Sometimes I need a brain/heart reconnect about the value of art on a daily basis. It’s been a royal blue funk since Tuesday, and I could just feel myself falling deeper and deeper, to the point of just bawling my eyes out today over all sorts of things that never used to bother me, but now seem hugely magnified.
Hubby had the serger out, getting some fabric prepared for marbling this week. I figured I’d keep him company, working on finishing up my leaves. This kind of sewing is almost mindless, which can be very good therapy. I started working on the leaves and two hours later seemed to be ready to wash away the stabilizer and see what I had. I checked a small piece and liked what I saw, so I put another two hours in on adding more thread. These leaves have close to eight hours of prep and sewing, but they are looking fine. I pulled out the bamboo pieces, added some additional stitches, and then started in on the stash, trying to find some background fabric.
When I originally conceived this bamboo piece, it would hang free-form – just strips. But my leaves, while good, aren’t stiff enough to support the top of the piece. So I needed a background. I was thinking a pieced background of diagonal strips, which would offset the verticals of the bamboo poles. Interesting how design decisions just kind of come about. I had been going back and forth about a possible background almost since I started this piece some five years ago. Background or not, pieced or whole cloth, vertical or diagonal…..I find it interesting that I have started to think through these decisions, and actually use the vocabulary of art – texture, form, function, and so on.
At which point I realized that if I want to have this piece done and photographed and entered by September 3, then I better get busy. Now I know when I need to I can work to deadline evenings after I get home from school, so that’s what I figured I was going to have to do.
And then I was fine. Well, not completely, there are no issues settled, but I feel like I can move on, which is more than where I was this morning. I will need to be very focused over the next 10 days, with planning a new class for school and sewing at night. But right now it feels good, and I need that.
Once again, art to the rescue.
PS – gotta tell ya, reading Annie Freeman’s Fabulous Traveling Funeral is not helping my depression. It’s a tremendous book, but not for the fragile right now…..
Photoshop Friday – Repeats!
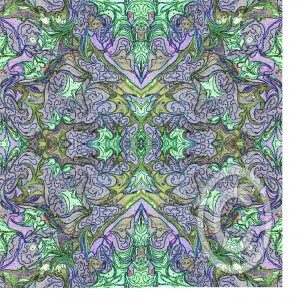
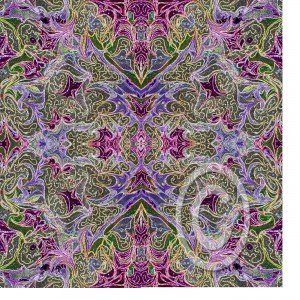
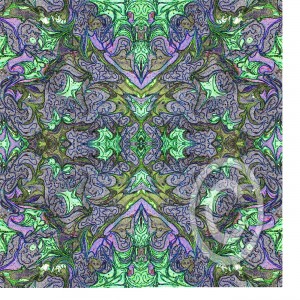
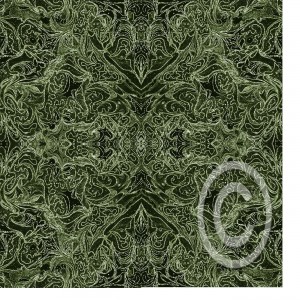
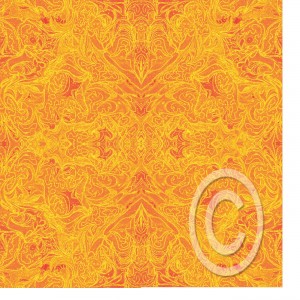
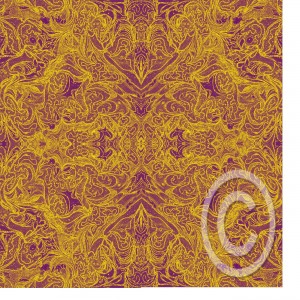
![]() That’s design repeats, not repeat columns…..I think I finally got this figured out. Readers of the blog know I’m interested in getting more mileage out of my marbled fabrics. I’ve been trying to see what would happen in Photoshop, and I end up with some great ideas. But for me to pursue licensing, I need to be able to create repeats…..so I think I’m on my way. Now, these are all copyright, so if you’re thinking about “borrowing,” don’t think any further….Nope.
That’s design repeats, not repeat columns…..I think I finally got this figured out. Readers of the blog know I’m interested in getting more mileage out of my marbled fabrics. I’ve been trying to see what would happen in Photoshop, and I end up with some great ideas. But for me to pursue licensing, I need to be able to create repeats…..so I think I’m on my way. Now, these are all copyright, so if you’re thinking about “borrowing,” don’t think any further….Nope.
I don’t know that I even have the original quilted piece of this fabric, but I have played around with it a lot. But here’s the deal…I’m posting these and then I want you to go to our Facebook fan page (link on the right) and tell me which one you like the best, and what you might do with it. Let’s see just how creative everyone is!
Here it is in its first incarnation…looks pretty springy to me. Version A:
Here’s Version B:
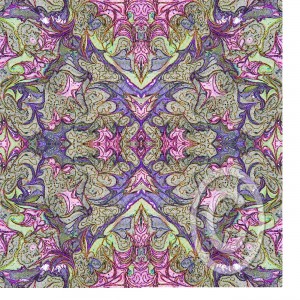 Version C: (Wouldn’t this look great with gold?
Version D:
Version E:
Version F:
Version G:
Can you tell I had a lot of fun? I have learned that if I get stuck on a project, to just put it away to “ferment,” and eventually I solve the problem. Now get over to Facebook and Vote!!!
Thursday Thoughts – Digital Marbling (TN)
Sometimes a piece of marbled fabric just begs to be used more than once – or find rebirth in a new form. That’s how our Digital Marbling (TN) was born. Playing around with the fabric and Photoshop leads to some very interesting effects. One thing I am hoping for with all this playing around is the development of some fabric lines, so I’m working on the idea of repeats right now.
Over the last decade or so there have been several runs of marbled fabric designs among some manufacturers. While the patterns are bold and colorful, I think there is a missing element in designing marbled fabric. A variety of colorways, bolds and subtles, and patterns that look like they would be easy to work with. I know when I started making fabric in 1993 it seemed like I was only comfortable putting the bold colors with blacks and whites. I want more flexibility, and to a certain extent I have found it.
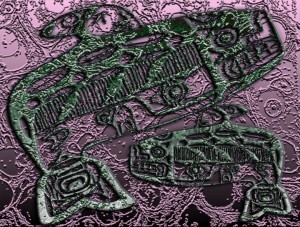
But as I work toward designing fabric, I’m using these new artistic creations as my learning. In our newsletter, I posted a pic of “Alaskan Whales,” a piece my digital partner Suzan and I had entered into a show at the Cordova Historical Museum in Cordova, Alaska. It was our first really successful digital collaboration, and I’m going to pull it apart for you.
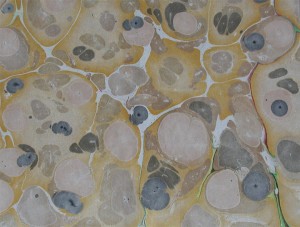
Here’s the original piece of fabric. I am amazed at just how blah that piece of fabric was, yet there was something appealing…if just means you have to do a lot of playing around to see what happens.
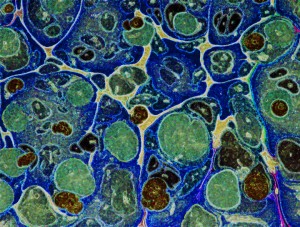
 This is the same fabric with a duplicate copy and some adjustments added.
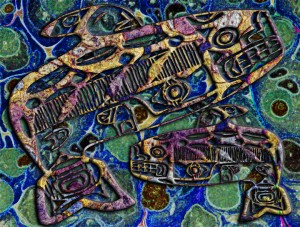
 Now it’s approaching the water effect we were looking for. Then we looked for a graphic to use. We liked the whales, just rotated them a bit. We also added some adjustments: bevel, outer glow, some transparency. It looks like there are extra colors added, but it’s a transparency with some curve adjustments that adds in the extra colors. There are a few more things done to this piece, but I have an old version of Photoshop, so it doesn’t show.
 Here’s another version, saved from the layers we chose not to use…never know when you will come across something unusual with stuff you didn’t throw out, but just left “invisible….”
Who’s manipulating fabric digitally? I’d love to hear from you!
Don’t forget to become a subscriber and be entered to win some marbled fabrics. Check the box at the top right.
Work-in-Progress Wednesday
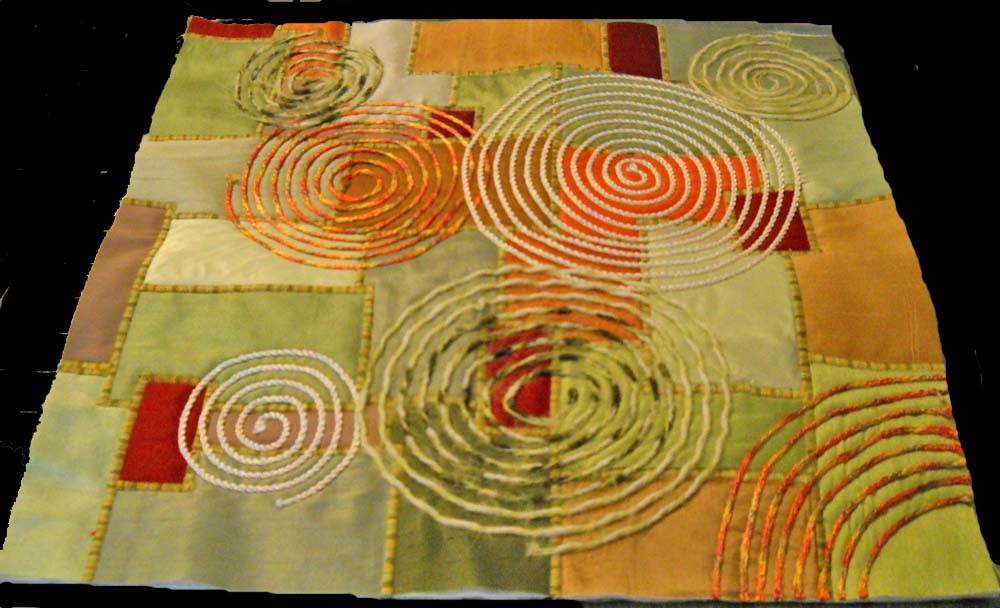
I managed to finish up the two small quilts based on the work of Carol Taylor and her “arc-i-texture” style. The DVD is from Interweave, and they have some scrumptious ones to choose from. I learned a few things, particularly about couching, and I finally got my satin stitch to work. I do want to try one with printed fabrics, but I really like the pay of light on the silk pieces.
Here’s the first finished one, in greens for Shelby, one of the twin girls I have know for a long time.
The edges were finished by adding a facing all the way around. I also showed you last week the beginnings of the quilt for Brianne, the other twin.
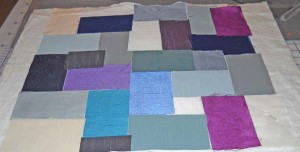 It’s pretty darn bland at this point, and I was worried about how it would finish. I next did my satin stitch to couch down the pieces of silk.
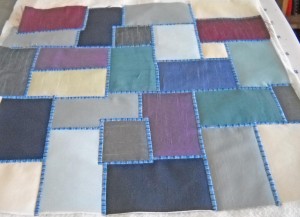 Definitely looking better. I do like the effect of the satin stitch, with a King Tut variegated from Superior Threads. From here I started the couching. I found some fuzzy blue yarns to try, one of which I liked, and one of which I ripped out.
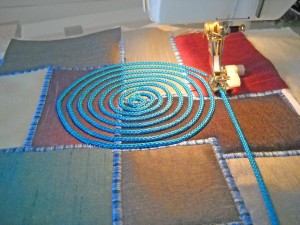 Once I got the hang of how to use the couching foot, I really liked adding the circles. I learned to trust the machine and the foot and not to pull.
Finally the finished product:
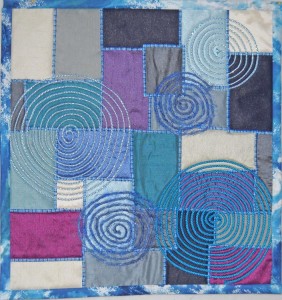 Still not totally pleased with it. It’s missing that certain spark, definitely in the picture. It looks better in person – you can’t see the rumpled silk. I used a regular binding on this one, because I felt the blues helped accent the main part of the design. But this is all part of The Process Pledge…writing about what I am doing and learning, and I did learn a lot. And I know the twins will love them.
This pic is a current shot of the bamboo leaves in progress. I started with those about three weeks ago, sandwiching the thread between sheets of Dissolve to create thread fabric. I started doing the free motion on the top, using a variety of different threads. Still have no idea how this is going to turn out. Hopefully I will have the completed piece next week – or at least the leaves, as I start back to school next Wednesday. We’ll have to see…
DON’T FORGET – sign up for our newsletter to get entered into a drawing for a Sampler 1 package of marbled fabrics! See the sign-up at the top of the page.
Sunday Stories – Gaia 2
I love this piece, absolutely my favorite so far of everything I’ve ever done. I really had no idea going in to this just what would emerge…everything was trial and error, but thankfully, very little error.
This piece started as a result of finishing a commission that was done on red unpolished satin. Six half-yard pieces were marbled, with my using a total of four of the finished pieces. My idea was to create a piece that would represent the volcanic origins of the earth and the goddess Pele. For the longest time this piece was known simply as “Pele.” I used a different marbling pattern on each of the half-yards, as I wanted interest within the piece.
Ever since my first teaching job on Maui, I have been fascinated with the stories of Pele, the Fire Goddess, and I was always on the lookout for the Lady in White when I drove home over the Pali at night. I didn’t realize it then, but Pele and fire have woven their ways through much of my work.
I really had no idea how these were going to weave together. I experimented and ended up with this weaving, starting with a tighter bottom and then “exploding,” much like magma does as it reaches the surface and becomes lava. The only problem with this shape came as I realized I had to figure out a way to anchor everything together. The strips are heavily hand-stitched together on the back – twice, as I discovered I had to make it much tighter to hold the weight of the piece.
A free-form pattern makes up the bottom four strips. The next four strips are the “wave” pattern, and the last four strips are what we call the ”fountain” pattern. A fourth pattern of a very small feather was ultimately not used in the weaving.
Each piece was sandwiched and serged with a variegated thread before any quilting was done. I liked the effect from the variegated thread, and I use that technique a lot now. But I have since changed how I put the individual strips together, with serging only one side or none at all, leaving another design element for later. The free-form strips were quilted using a variegated Sulky thread to accent the pattern. The four “wave” strips were quilted by following an initial curved line throughout each of the pieces and then coming back with a different metallic thread to accent the marbled pattern. The four “fountain” pieces were quilted in a distinctly different shade of thread to accent the eruption of lava.
Now, you have to understand I hadn’t done a whole lot of machine quilting to this point, beyond stitch-in-the-ditch. This was brand new territory for me! But ultimately I was hooked….I quilt most of my marbled fabrics now, and the patterns can be very zen-like to quilt. Here’s another close-up:
I truly love this piece, and I know I’ll never get another one just like it. It’s a little bold for any of our walls where we are living now, but one day, when I retire and the place is a little bigger, it will hang again!
For those of you who haven’t subscribed to our newsletter, we are doing a drawing again from all our subscribers for a FREE Sampler Package 1. You can visit our website to see this. Be sure to sign up – the form is at the top on the right.
And…tell me the story of one of your favorite pieces. I’ll include stories in a future “Sunday Stories” post.
Work-in-Progress Wednesday
 My thread arrived yesterday!! Lots of new greens, so I want to start in on the bamboo leaves tomorrow. Expect an update next Wednesday – and maybe even finished….
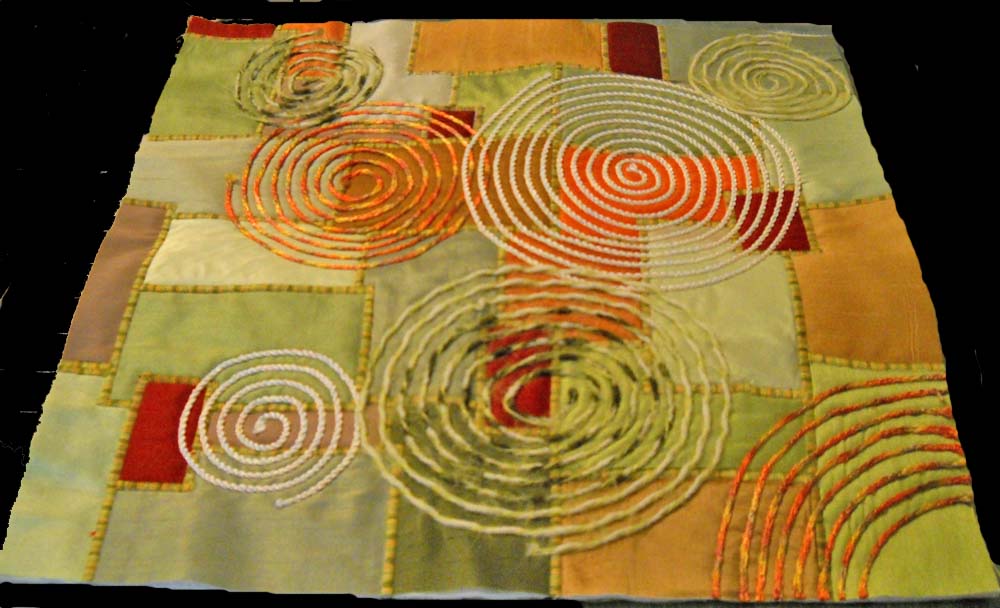
I wrote a while ago about using some dvd’s for professional instruction and how much I am enjoying this new manner of learning. One of the dvds was by Carol Taylor, about design. She called her method “arc-i-texture,” and by the time the video was done, I wanted to try it out. A long-time friend has twin girls whom we got reacquainted with in Vermont, so I am making them housewarming presents. Shelby likes greens, and Brianne likes blues. This started because Shelby gave me lots of small pieces of various silks to try and marble. For whatever reason (I think too much sizing) they didn’t marble well, so I decided to use them for this project.
While I finished Shelby’s, except for the facing, here’s Brianne’s to show you how I started out.
 All I did was arrange some rectangles into a fairly pleasing design. At this point, ho hum – doesn’t look like anything. The next step will be to anchor each of the pieces, which I will do using a satin stitch on each of the edges. That will provide another layer of interest. Once that is done, I will couch down a variety of threads for a third layer of interest. What I found with this project is that as I attacked each new layer, the piece not only became more and more complex, but also more interesting. Here’s Shelby’s, so you can see what the final piece will look like:
Way more interesting! While I have a couching foot, I haven’t used it before this, and I do like how it works. I learned to give the yarns some play and let the machine and the foot do the work. Next piece shouldn’t have the drawing up of the fabric from my pulling the yarns. I will say for the blue one I tried a whole bunch of stores trying to find some interesting yarns and trims.
Carol mentions in her video that she’s made something like 400-plus of these, and I can see getting addicted. I like the sheen and play of the silk, especially since the “nap” is going in different directions and takes the light differently, but I want to play with some lights, mediums, and darks from my stash for the next couple.
I want to know what videos and dvds you’ve watched for instruction and inspiration!
Top 10 Tuesday – Plus 5…A Busy Week on the Web!
It has been a busy week on the web for marketing. Two weeks ago in a post for Top Ten Tuesday, I had a number of comments about how helpful some of these marketing links are. I hope this is my way of giving back through my blog, with some of the best information I am finding as we artists navigate our way to building a viable business. I didn’t post last week, as these posts take a lot of time, as I want to have pictures from each site to enhance the appeal of this blog and make your reading experience more enjoyable. At the bottom I’ve given you a couple of links back to other Top Ten posts for your information.
* From Fine Art Views, the Triple Impact. Keith Bond describes this as Triple Impact or the 3-2-1 Impact.
3. The work catches your attention from afar and draws you in.
2. The work holds your attention from normal viewing distance.
1. The work delights and captivates you upon close inspection.
This resonated with me, as one of our early pieces (which we just don’t have a good pic of, so scroll down to the bottom) is The Wave – marbled on blue cotton. From a distance you see a huge rolling wave. The closer you get, the more you see of the texture of the breaking wave, until you are right on the piece, watching the wave break. This was our first piece where I realized it worked from close up and afar.
* Also from Fine Art Views, “Say the Right Thing.” Interesting look at comments from viewers of your art – what’s the intention behind what might seem like a stupid comment. If you’re serious about your art and not following this blog, you need to do so.
* Stock Xchng – the leading free stock photography site – free photos – since good blog posts are also very visual.
* Blu – you just need to go to this site – some very cool journal sketching – loads of ideas….someday I will actually do this!
* From the folks at Wishful Thinking comes “Why Artists and Creatives Have an Unfair Advantage at Internet Marketing.” This is not something we artists would think is working for us…very interesting article and worth the read.
* Six Facebook Applications to Sell Your Products – I am learning so much as I surf! I didn’t know you could set up a store on Facebook….
* Top 10 Features of a Winning E-Commerce Site – got your privacy statement? Got legal in the works? Lots of things to think about here.
* Three reasons You’re Not Charging What You’re Worth – from The Launch Coach – as artists we really undervalue ourselves…again, some very good points here.
* Art Licensing: Achieving Brand Recognition. Joan has a great blog if you are interested in licensing your artwork. But you need to know what your brand is before you start….
 *
Mike’s Life – 11 Things I Learned When I Became a Professional Blogger. So many of us blog and are thinking about going “professional.” So just what does that mean??
* From PluginID – 7 Luxuries You May Forget You Have….like running water. We all need to read this periodically.
 * Also from PluginID – How to Live on Your Terms – very interesting idea, and those of you who are journal artists are way ahead of the rest of us.
* Joanne Mattera ArtBlog – Co-op galleries and vanity galleries – a look at both, and artist beware.
* Maria Brophy – 10 Questions to Ask Before Hooking Up Your Art with a License. Distribution channels, top retail clients, product categories, distribution markets, and so much more.
And now, just for fun…. from The Best Article Every Day – go see the big version!
Let me know what interesting things you found on the web this week!
Another Top 10:
Work-in-Progress Wednesday
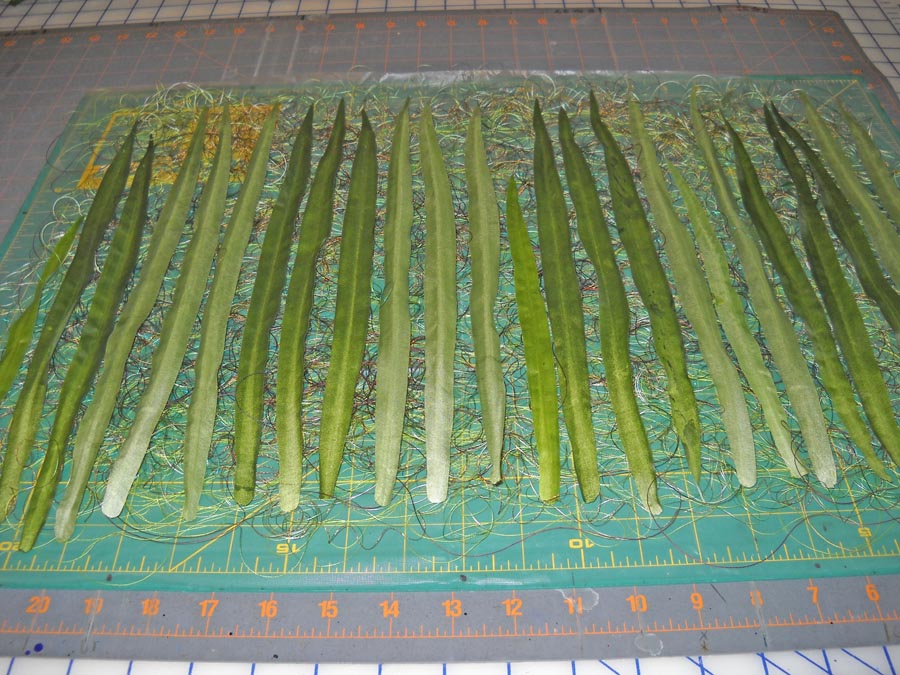
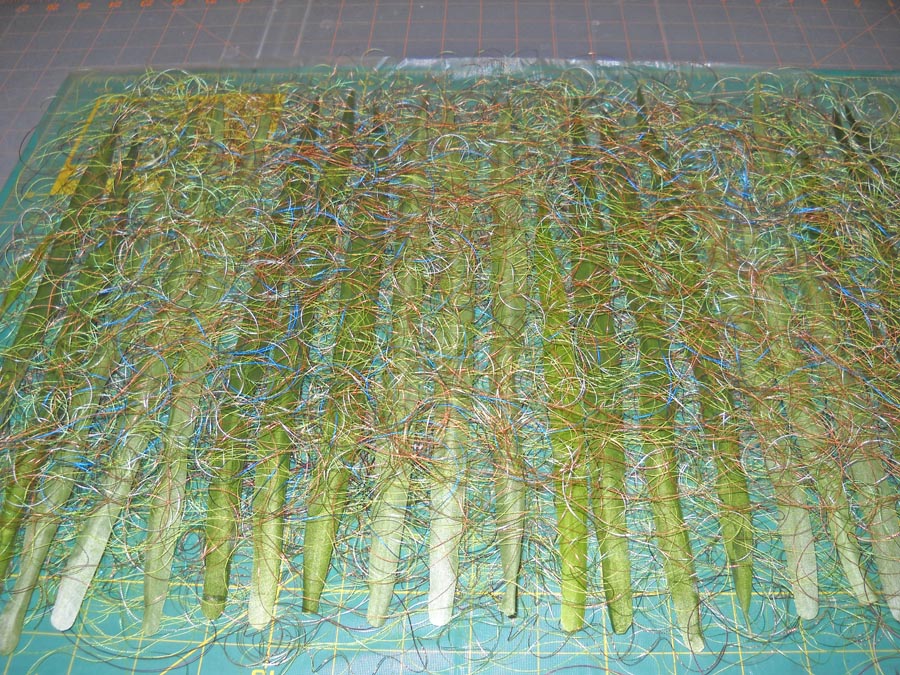
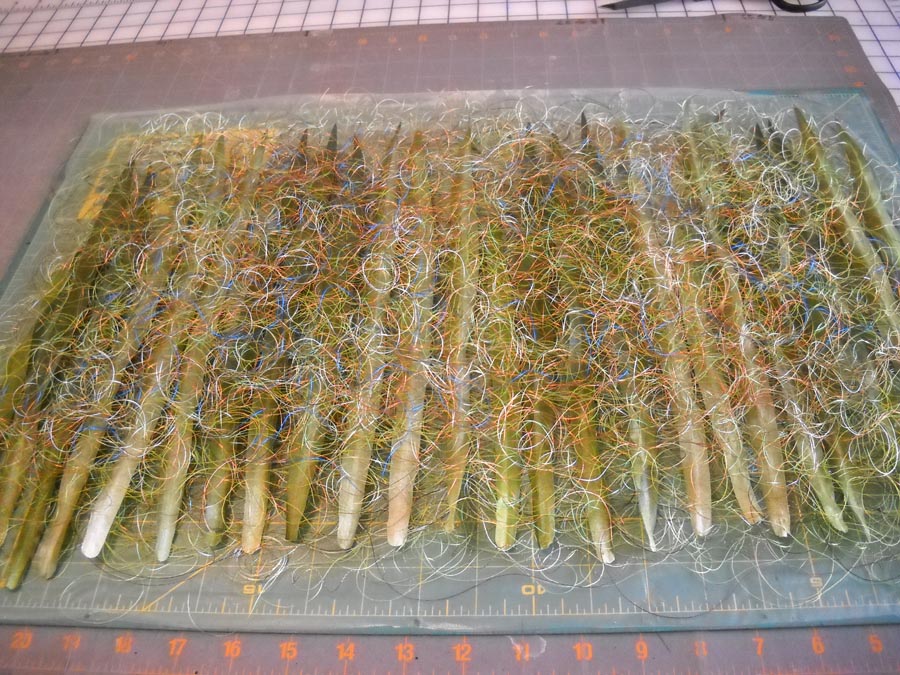
I have been thinking about the leaves for the bamboo piece. As I mentioned last Wednesday, I think the silk leaves would be too plain, and I didn’t like how they marbled, and I think thread leaves would be too fragile for such a sturdy plant. Then it occurred to me to do what I do in the classroom – it’s not an either/or, so why not combine the two.
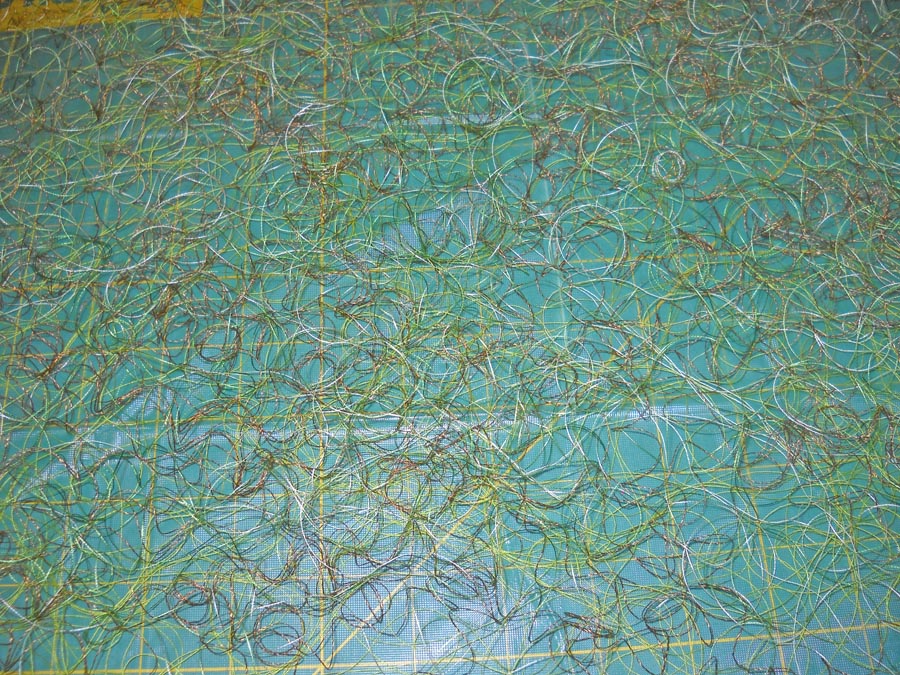
I started by cutting a piece of Dissolve from Superior Threads and taped it to an old cutting mat – that stuff is slippery. Then I started layering some of the old yucky threads I have.
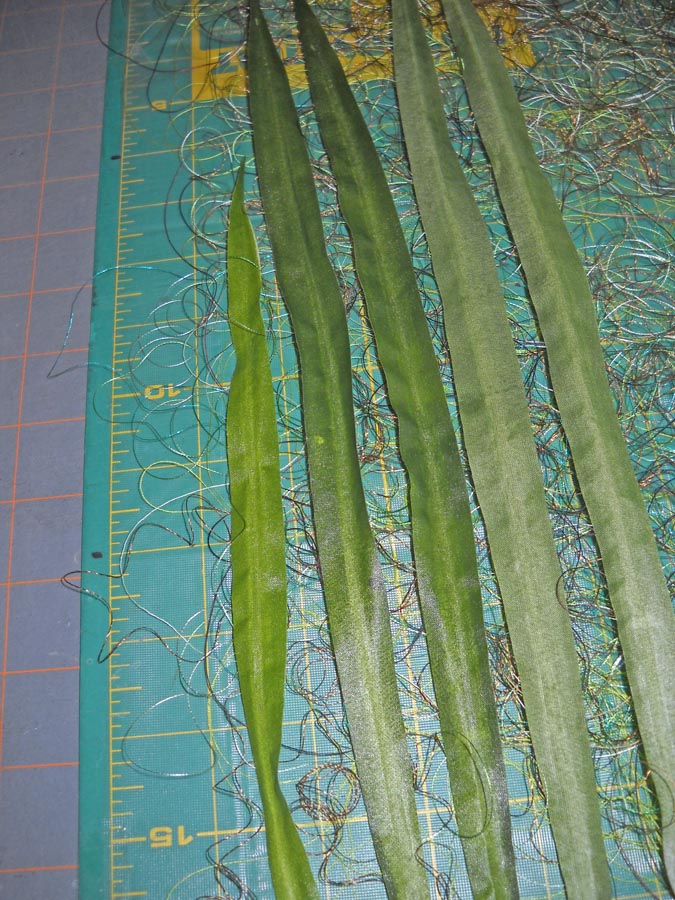
At this point it occurred to me that I could layer the silk leaves across this base of thread, after I pulled off the wire from the backing.
I turned some of them wrong side up, figuring I would be stitching on both sides of the sandwich, so I would get some additional effects front and back.
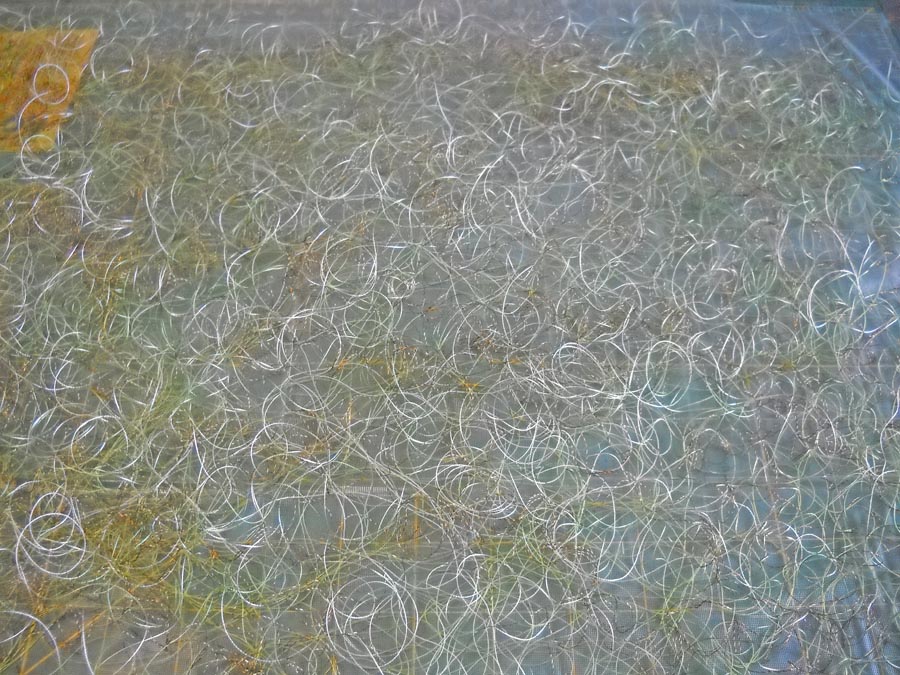
I am pleased to say it occurred to me earlier not to run the overhead fan in the studio while I was working on this….At this point I am ready to layer more thread on the top of this. Keep in mind I have no idea if this is going to work….
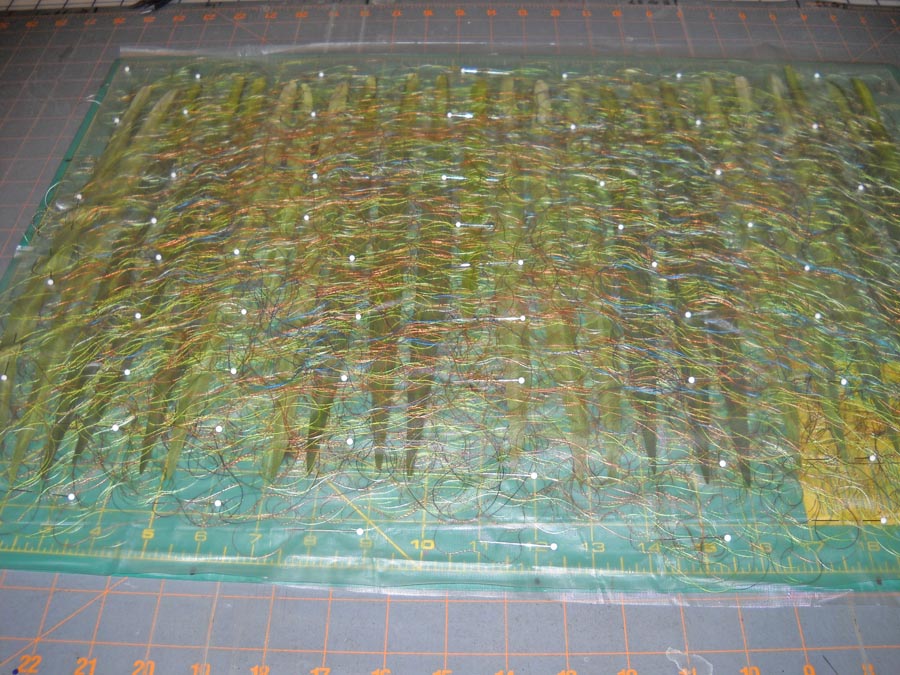
Now at this point I need to cut another piece of Dissolve to go over the top of this.
Now it is ready for stitching. I need to order some thread – Razzle Dazzle to use in the bobbin, and some green Lava for top and bottom. I figure I can order this week and while I’m waiting, I can finish up the bamboo strips. Once I cut everything apart, all the little slivers will become part of the base where the strips are mounted. I don’t know if I will need more leaves. I am counting on the leaves at the top to hide the hanging system. I do have plenty of silk leaves – I would need to get some more cheap thread if I need to do more thread work.
Any of you try anything like this? Suggestions? Ideas? Pitfalls? Inquiring minds and all that….
(Think Horschak) Oooh, Oooh, Oooh……I have some great tree agate I have been collecting from the gem shows….they would add some interest and weight to the bottom of the piece…I knew there was a reason I was collecting them……
Sunday Stories
I love reading blogs about the stories behind the art we create. It occurred to me I could document (primarily for myself) the process and story behind some of our pieces in our gallery on the website. There is a page on the site with some very early quilts, including an original design for a math program I participated in.
This is the PRIME quilt – the name of the program was Promoting Reform in Mathematics Education, and it was a total of 6 weeks over three summers at the University of Arizona. We gave this quilt to our professors at the end of the third summer, and it still resides in the math department.
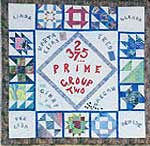 The center is the program itself, with the first few prime numbers. Each triangle attached to it is the name of one of the professors, with a little graphic representing each one; Fred, for example, had the calculator. The four corners are the teacher assistants we had, and each of the blocks is made with marbled fabric and a PRIME number of pieces. Let me tell you, the block with 37 pieces was a doozy to do.
We all signed the back of the quilt and presented it with the message that a puzzle was built into the quilt. Five 9 years later I filled in two of the professors as to what the puzzle was – the prime number of pieces. This was a fun quilt to design.
The quilt that started me on my present journey with marbled fabric is Gaia 1: Interdependence.
This is kind of a cross between a traditional stone pattern, some basic combing of paint, and some chevron pattern. When the fabric came out of the tray, I liked the interplay of the turquoise with the earthy colors. The turquoise reminded me of the gifts from the earth. I don’t know why I started to cut into strips – maybe just because I wanted to try weaving something. I really don’t remember.
I had five strips and nothing was working. Then I decided to just weave it back and forth and see what would happen. I liked where it was going and cut the strips in half so I would have more to work with. I used a thin batting (which I since use exclusively) and backed it with a fossil fern fabric. Then I started to quilt, just by following the lines of the fabric. I went for three hours without stopping because I was loving how it was working.
I didn’t want bindings. I thought it would detract from the message of interdependence of all the elements on earth. Then I hit on serging the edges. Now this was before I really understood what a serger can do. I still hadn’t figured out rolled edges. But I knew I wanted some type of variegated thread, so I just experimented.
Then came trying to hold it together. I used a LOT of pins and very carefully pulled the weaving off the design wall onto the quilting table upside-down and started to stitch all the strips together. Let me tell you, that took forever….
Well, the problems weren’t over. A basic sleeve wasn’t going to work for hanging, so I spent a few weeks trying to figure that out. I ended up buying a set of napkin rings with an earthy feel to them and looked for a piece of bamboo. The big problem was anchoring the napkin rings to the strips – with a lot of delicate sewing….but the piece has hung for five years in an office in Tucson with not a single problem.
I knew when this was finished I was on to something. The bamboo I am currently working on will be the fourth in the Gaia series of weavings. I do want to do more…the images I saw of rice paddies in southern China would make another interesting weaving…..
Our Own Art Educations
 Like so many of you, I am a regular reader of Robert Genn’s Twice Weekly Letter. This latest one looked at the traditional master-apprentice role in the arts, and I was particularly taken with some of the thoughts, especially since marbling has always followed this road. Apprentices worked with masters for years, learning and absorbing every trick and skills through watching – and later on by doing.
This made me think of how we get our own art educations, a topic near and dear for so many of us. I’m self-taught in virtually everything I have done artistically. I would hazard a guess that this is true for most of us baby boomer women. We were encouraged to go into paths that would support us or provide for families, with little thought as to what would make our hearts sing. As we’ve gotten older we have become more expressive.
Self taught. It seems to be fine in so many fields to say you are self-taught – tutored in life. But not in art. At least for me, I still feel intimidated when I see in a CV of someone in an art show all their schooling and formal coursework in the arts. My own art education early on consisted of a few art projects in elementary school and then a “class” as an elective in high school where we churned out particular projects. But nothing in creativity. Which ties in to a recent article in Newsweek on the dearth of creativity in modern classrooms and education.
I’m rambling, I know. But I’ve had to learn how to be creative, to break through the “OMG, what will it look like?” phase of making art. Would working with a master have helped this? I don’t know, but it probably wouldn’t have hurt any.
Who are our masters in the arts today? From whom do we study and learn? Enter the Internet, the cheap equalizer to getting an art education. The joke in our family always was that if my dad wanted to learn how to do something new, he would read a book. Well, I got that gene. I read everything I can get my hands on if it’s something I am really interested in. But that can get to be expensive, although still cheaper than a formal education or coursework.
The internet has opened up huge resources for us. I started on TV with Sewing with Nancy and Eleanor Burns and Kaye Woods. I picked up all kinds of hints – and reasons why something I was already doing (through guesswork) wasn’t working. Like many of us, I have taken workshops when I can afford it. Jennie Rayment and her muslin creations still stick in my mind – such possibilities for texture!
The first professional workshop on marbling was with Galen Berry (over a year ago) and it was wonderful – lots of questions answered, problems solved, and energy renewed. We started to zoom ahead in our skills.
Then I went to the School of Threadology with Superior Threads. Yes, I know I rave about their threads, but the professional education I received over the three days with Bob and Heather Purcell was priceless. My work has taken a dramatic turn for the better – and I don’t break thread anymore….
Now I’ve discovered Interweave and their dvds on quilting and other artistic endeavors. Better than a book because I can see things actually being done.
I watched a leaf tutorial by Heidi Lund and already picked up a bunch of hints to try something totally new for my bamboo piece. Carol Taylor’s video on her Arc-i-Texture techniques had me making a new quilt last night to try out the ideas…and I must say I’m loving it! And Susan Brubaker Knapp’s video on machine quilting corrected a whole bunch of errors I have puzzled over.
And of course we can’t forget YouTube. I have been devouring and studying very closely the wealth of marbling videos on line.
So my question to you is: What’s the best professional development you’ve ever attended – the one that has changed how you do your art? I want to know!
PS – all of these recommendations are unsolicited – they’re just stuff I have learned from and appreciate – nothing comes to me as a result of you checking these out! (OK, FCC – happy?)
Work-in-Progress Wednesday
I have to say, I have been busy. I originally was thinking nothing was going to happen art-wise in July because of so much work on the business. I was wrong…the last week has been incredibly productive. Last Wednesday I wrote about my lava piece just telling me it really wasn’t finished. Here’s last week:
And here it is now, since it told me it was “finished:”
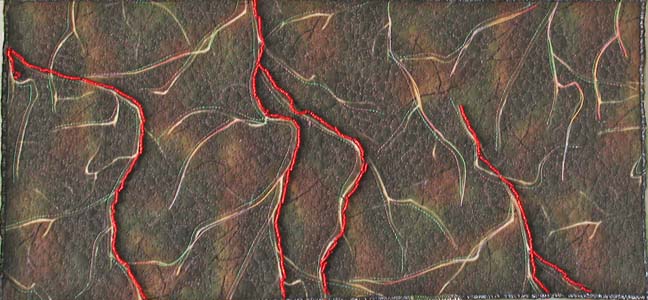
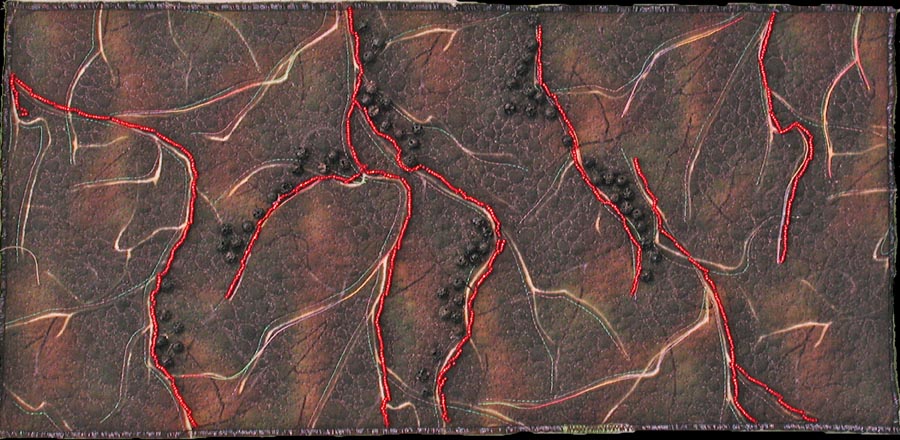
Turns out it needed actual lava – those little round pieces are actual chunks of lava I collected over a couple of visits to the Tucson Gem Show each February. I also added more lava flows, and nothing really interferes with the quote on the back. This is going to go up in the newly-developing Etsy store.
My “purse” didn’t make it as a purse…I loved the play of the fabrics together, but I couldn’t get handles to work the way I wanted them to…so now it’s a nice new basket for collecting fabric scraps.
If you were reading on Sunday, you saw the finished “Desert Heat” quilt, now on the wall in our bedroom.
Now I am working on my “bamboo” quilt, started about 5 years ago with a piece of marbled fabric in the chevron pattern. One of the things I like about this quilting is that it is very zen-like, in that you can just follow the lines of the patterns. You can see the original piece of fabric here. You’ll see what I mean about the lines of the pattern.
As I was quilting yesterday, it occurred to me to take pictures of the process, and then that led me to think about putting together a tutorial on quilting marbled fabric. There is an interesting story behind the quilting. Years ago I pretty much just put marbled fabrics with blacks, as I wasn’t sure at all about my color sense. I did slowly branch out, but it was Quilt artist Ellen Kohen who took a piece of fabric and quilted it. I knew there was more I could do with the fabric, but I wasn’t sure how to approach it. Once I saw what Ellen had done, I was hooked, but it took confidence to start the free motion needed to accent these patterns. Starting this Sunday, I’m going to introduce “Sunday Stories,” and I’ll take a look at the story behind each of the pieces in my gallery on the website.
For today, here’s a close-up look at one of the bamboo strips (which I am aiming to finish by mid-August, as I want to enter it into an art quilt show with my “Ocean’s Bounty.”) You can easily see all the “lines” in the pattern and how I have followed the lines with a variety of different colored threads. The problem you might run into (as I have) is when to stop with the lines – you can get easily sucked in to quilting everything.
You can see the serged edge in this piece – which is how I usually finish these weaving pieces. I’ve learned over the years not to serge until I am finished with the machine quilting.
This is with my walking foot, but I’m not totally happy with the control with this foot. Because there are slight curves to these lines, I use my regular foot and am quite happy with it. I think this is probably a personal preference. I tried the free motion foot on this, but I didn’t have the control and even stitches I wanted for this design.
I have four and a half “strands” of bamboo finished at this point. I can quilt for a couple of hours, listening to some John Denver and just kinda zone…as I mentioned earlier this week, I am amazed at just how much I get done when I think a project will take forever. Now what probably will take forever will be the leaves. I’ve tried marbling some silk leaves – not happy with them. I am thinking some thread leaves, but they may not seem “sturdy” enough for this hardy plant. I do know thread leaves would be a great use of all my lousy threads I have hanging around. I haven’t broken any threads with some 6 hours of quilting – have I told you how much I love my Superior Threads?
If you would be interested in a tutorial on quilting marbled fabric, please leave me a comment and let me know. If you’ve got pictures of some marbled fabric that you have quilted, I would LOVE to see it.
Top Ten Tuesday – Organizing and Living Life
This has been a great week for goodies on the web. Great eye candy and inspiration.
* I subscribe to Dumb Little Man, and every now and then they have something that really resonates. This week it was “How to Adopt an Attitude of Gratitude.” The article is based off this quote from Tecumseh: When you arise in the morning, give thanks for the morning light, for your life and strength. Give thanks for your food, and the joy of living. If you see no reason for giving thanks, the fault lies with yourself. ~Tecumseh You can read the article here. Great words to live by.
* Speaking of Native Americans, I picked up a great book at Bien Mur, the art gallery at the Sandia Pueblo in Albuquerque called “Native Wisdom for White Minds.” This is full of wisdom from indigenous people around the world, set up as a saying a day, so you have inspiration throughout the year. The book is available from Amazon – search on the left (disclaimer – I’m an affiliate, so if you order, I get a few pennies.).
From today, July 13 – “Nature is the storehouse of potential life of future generations and is sacred.” ~Audrey Shenendoah, Onandagan writer
* “What’s Trite, What’s Not” from Existential Neighborhood by Jane Dunnewold. Jane is an amazing fiber artist and I was licky enough last year to follow along on her daily photo inspirations. Is life trite? Here’s a provoking thought: “And there’s the paradox. The activities that keep me centered, authentic, and real could easily be dismissed as trite. It’s all phrasing and context. How much outside influence have you bought into lately?”
* Making Mondays – and Your Week – More Productive. Well, who doesn’t want to! There are seven questions to help guide you to more productivity – all of them worth thinking about.
* Self-Inflicted Time Management from Time Management Ninja (great name!). If you have issues with any of the following, read this post!
- Missed Deadlines
- Late Fees
- More Work Due to Undone Tasks
- Lateness
- Disorganization
* The Myth of Multi-tasking from Productivity 501. I thought it was just because I was getting older – I really thought I could multi-task well. Age has shown me I can’t… “It turns out that humans are amazingly horrible at multi-tasking. Many people feel like they are improving their focus by multitasking when they are really doing the opposite.”This is a good read.
|
|
|
|
|
|
Quilt is FINISHED!!!
It is so interesting to me that we can think in our minds that projects will take so much longer, and then we actually never get around to them, because we “don’t have the time.” That was the case with my Salmon Run entry and with Desert Heat. I kept thinking I was going to need more time than it actually took to complete the work the way I wanted it.
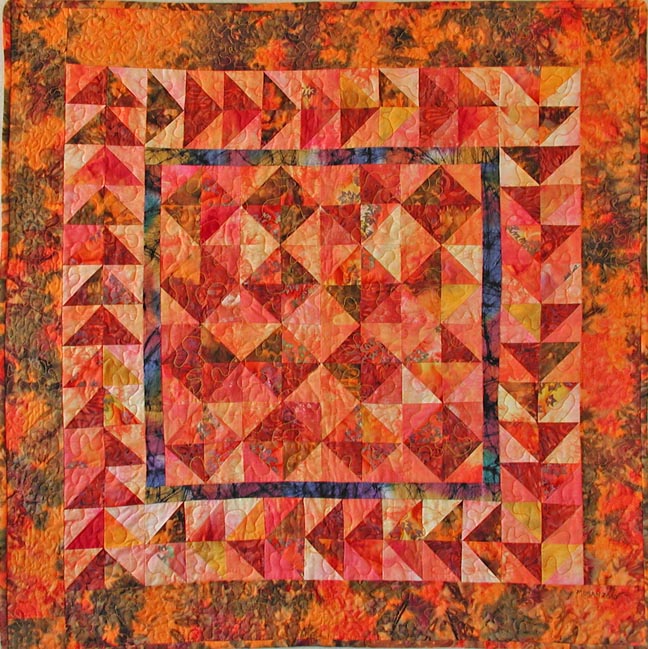
I made the commitment last night to finish Desert Heat – and I did! Binding and all, it’s now on our wall in our bedroom. What I particularly like about this quilt is a bunch of things:
* I used some of my first hand dyes, and you can’t really tell mine from the commercial ones.
* I experimented with a pattern and everything about it worked. I just started out sewing triangles because I wanted something mindless to do last summer.
* I learned that when sewing bunches of triangles like this, it is best to press the seams open for less bulk. That is probably the only thing I would do differently in remaking this quilt (I can see a “winter” quilt to change for the seasons…).
* I pulled colors based on how “hot” they seemed – turns out in the final analysis I did have a light, a medium, and a dark value without really thinking about it.
* The quilting worked perfectly – I only took out about 8 inches until I had the tension where I wanted it. I am getting much better with that – checking first before I sew a whole side….
* I love my new threads! I bought New Brytes in orange and yellow when I was at the School of Threadology with Superior Threads. I knew I wanted heat and bright – much like the desert in summer. I was given in my goodie bag a wonderful Rainbow of oranges, yellows, and greens that worked PERFECTLY in my border.
* Not once did I break any threads. I love the #90 titanium needles. And I LOVE Superior Threads!
* Perhaps the best thing abut quilting yesterday is that I think I am finally getting my quilting stitch length consistent. I have been going quite slowly with the machine quilting, so my stitches have been pretty large. I hesitated about going faster, as I can get clumps of thread if I move too slowly. Well, this time everything worked. I went faster and the stitches seemed to keep up with my movement of the quilt sandwich. So generally very pleased.
Here’s a close-up of the quilting. The center and first border have a very large stipple, as I wanted to try and get “the heat waves off the pavement” effect. It also helped to flatten all the triangle points. The quilting in the last border is a much tighter stipple, which seemed to make the quilt even “hotter.”
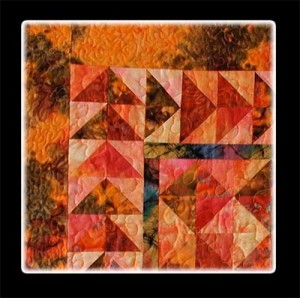 And now, the reveal (yup, too much HGTV….) –
So – anyone interested in a pattern? I am thinking of writing this up if there is interest.
I would love to hear thoughts about what you learn as you finish up quilts! We’re always learning – that’s what makes this so much fun.
Process, Process, Process
“I pledge to talk more about my processes, even when I can’t quite put them in the in words or be sure I’m being totally clear. I’m going to put my thinking and my gut feelings out there.” Check the Process box on the right side of the blog – this is a great idea – while I talk about process a lot, this should really help to keep me focused in the blog.
My Photoshop Fridays are always about process – how I came to what I’m doing with a particular picture. I haven’t talked that much about the process in my quilts, except occasionally on Work-in-Progress Wednesdays. I spent time today on a couple of projects, so I expect to be able to do some show and tell in the next few days. I am particularly happy with my Desert Heat quilt, done now except for the last 12 inches of free-motion quilting and the binding. I am very pleased with how this worked out. You can see its beginnings:
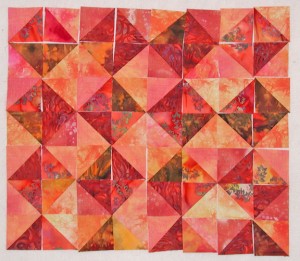 This is where I started last summer when I did my first hand-dyes. Then I started just pulling some stash fabrics to try and create a “hot” quilt to represent the desert. I am pleased to say it is certainly a hot quilt – the quilting lines remind you of the waves of heat off the cement and tarmac.
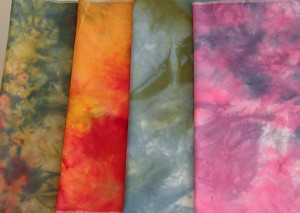 My first attempt at dyeing – in Desert Heat I used the orange-red fat quarter.
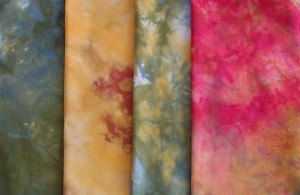 These are a little more pale than in actuality. I used the yellow and reddish one. In fact, I’m going to cut this short and go finish the machine quilting and cut the bias so I can show it tomorrow.
Then I have my lava quilt to finish – I gotta tell ya, sewing on little pieces of lava is tedious and tough! And then I want to get the straps on my purse, becasue after that it is back to the bamboo quilt – I want to enter that into a show whose deadline in September 3. I should have plenty of time…before schools tarts again….and marketing….Linda – go quilt!
