Archive for the ‘art’ Category
Thursday Thoughts – 7 Steps to Niche Marketing
It has been a very busy July for marketing and the business. I think those of us who are artists wonder at times about 1) the need to market, 2) continuing to make our own art, and 3) how we pull it all together. I sure don’t have all the answers, but I think at this point I have some insights on the process.
* You need a plan. You may not know what you’re going to do in the plan, but you need one. Sounds contradictory, I know, but you can make it work because part of your plan is to plan your plan. At this point my high school students would look at me and say “Huh?”
* You need to set aside time to read about marketing. What should you be doing? What tools should you be using? Set a deadline, so you don’t spend months at this stage, like I did until I finally started to do some of the things. When I ran my learning center and we had no money, I would do what I called “shoe leather marketing.” I was out talking to everyone I could about our learning center. Nowadays that “shoe leather” is social media, so spend time learning about that. You don’t need to be a net nerd for this step – there’s lots of available materials to read to get you started. Look at Social Media Examiner for a quick tour of Facebook and Twitter and what you need to do. Read Problogger about setting up and running a successful blog. Buy a book or two…or sit with a coffee in Borders or Barnes and Noble and browse the books.
* Set up Twitter and Facebook and start posting. Set up your blog and start posting. Read other blogs and start commenting. This becomes very important as you write more and create more of an active social media presence.
* Make your art. There is no point doing all this if you have nothing to offer the public. In our case, we have already established a few outlets: Ebay and website. Our website has a gallery with art work available for sale. Ebay has small pieces of fabric for buyers to create their own artwork.
* Decide who your customers are. This was a big issue for us, as a result of all the reading I did. I want to sell our larger artwork, but we have a great market in selling small pieces of marbled fabric for others to use in their creations. The more you read about selling on lie, the more you will see the suggestion to develop a product to “launch” and make money. I stumbled with this one. What would I do? Then came the proverbial 2 by 4 over the head – we already had customers. I needed to refine what we had already been doing. Consequently we continue to sell our fabric as well as put our artwork out in shows, galleries, and on line. It’s not an either-or. I am after art collectors who like fiber and mixed media, as well as quilters and crafters who like to do their own thing. Two worlds come together.
* Just do it. To quote Nike, nothing’s going to happen if you don’t do it. Just thinking about it will give you lots of ideas…and will make you go nuts in the “to-do list” department. (Ask me how I know this….) But there comes a point when you have to do it. Then…..
* You need a plan. Yup, all over again. I have discovered that I will need to have a very set plan for how to handle all of this once school starts again and my art/marketing time is limited. So over the next two weeks I will set up a calendar: 1) what gets posted each day, 2) when to write and schedule the blog posts, 3) how to schedule Twitter posts, 4) maintaining the Facebook Fan page, 5) writing a newsletter, and 6) making art.
I’ll keep ya posted! Any suggestions????
Monday Marketing – Art Display Systems
As promised, here is the third part of Moshe Mikanovsky’s articles on preparing for art fairs. This third part looks at display systems, complete with pictures. This is great stuff! i did the same thing at an art fair – I went around and snapped pictures (with permission) of the hanging systems I saw. This is one of those areas we just don’t pay enough attention to until it is actually time to display our work. I know that as I develop more of my marbled pieces, I am more conscious of how it should and will hang as I construct the piece. So enjoy!
Art Display Systems for Art Festivals
by Moshe Mikanovsky
This article is by Moshe Mikanovsky, Regular contributing writer for FineArtViews. You should submit an article and share your views as a guest author by clicking here.
Last time, in My First Art Fair Checklist – Follow Up, I promised that I would dedicate this post for the display system at the art festival (or art fair, whichever term you prefer). My display system was of the “Made in Home Depot” variety and couple of readers commented that I should really invest in proper, professional display system.
I do agree that professionalism is key and important in displaying yourself as an artist, the respect you give your creations, and the respect you want to get from everyone viewing, and more importantly, buying your art.
But, and here I want to list several reasons, there are quite legitimate reasons why you may want to go a different route, not the most conventional or “academically” professional:
· The budget factor. Not trying to raise the worn mantra that we are starving artists, therefore we can’t afford spending money on a professional system, some of us still have budget constraint. Whether it is your first experience doing an art festival and you want to try it out before you spend into it, or you honestly prefer to spend your budget on quality art materials and framing to create the best art you can possibly do, your budget might be squeezed and not much left for the display system – which is really, just the background for your artwork.
· Do it differently. We like to say that artists can break every rule and still make great art. So why not with how you display your art? I have seen several displays that were just different and unique and that made me want to look at them. But maybe that’s not the best thing since the idea is to focus on the art really…
· Practical means. Some DIY display systems are much easier to carry and transport and therefore could be ideal for artists who travel far, don’t have a car, live in the city and use the subway/taxi/bicycles, or all of the above. Imagine trying to carry around on top of your art also a big display system, professional as it might be.
· Everything works. I have seen it myself, and I am sure many of you can testify, that also without the professional display system, artists sell their art! There are many reasons why art is sold, or not sold, at art fairs and festivals. But not having “the right” display is only one piece of the puzzle.
OK, so with no further due, here are few of the display systems I have seen during my first art show. I was amazed with the varied options I saw with only 90 artists showing in the park! I am sure there are many more excellent ways and when I’ll find more, I will keep you updated. So here we go:
The Double Twines
Couple of simple twines tied to the tent’s frame at the top and to the artwork’s back wire at the bottom. This is the simple version of The Double Chain (see below).
Pros: Very inexpensive and simple.
Cons: Can only carry one painting, which should be fairly light. Paintings sway in the wind.

Julia McNeely www.juliamcneely.com
The Double Chain
Couple of metal chains hang from the top of the tent’s frame. The hanging of the chains can be by cable ties (as seen in the pictures) or by double length of the chain wrapped around the frame. The artwork is hung on S hooks suspended at any of the chain’s links.
Pros: Inexpensive and simple. Can hold more than one painting on long chains.
Cons: I have seen paintings sway in the winds.

|

|
The Clothes-Lines
Two clothes-lines or similar twine is stretched across the width of the tent’s wall. The artwork is hanged off the clothes-lines using clothespins. Suitable for non-framed art on paper.
Pros: Inexpensive and unique look.
Cons: Might look too DIY/crafty. Doesn’t fit for all type of artwork. In this case the artwork are prints on wrinkle-free “peel and stick” cloth, so they are well protected and suited for this hanging system.

|

|
The Leaning Boards 1
Two 1”x2”x8’ wood strips, attached at the top with metal hinge. The top is leaning on the tent’s frame and the bottom is open couple of feet wide. Throughout the entire length of the wood strips, angled grooves were made in order to hang the art from. The wood can be pre-primed with white paint, or you can paint or leave natural. For extra stability, the top is tied to the tent’s frame with some twine.
Pros: Inexpensive and simple look. Can fit several paintings.
Cons: Stability might be an issue, but it seems quite stable. Need some DIY know how to make the grooves properly.

|

|

|
John Visser, http://johnvisserart.com
The Leaning Boards 2
Wide boards, in this case old barn boards (over 100 years old!), leaning on the tent’s frame. To protect the frame, a foam material was used to wrap around the frame where the board is leaning against it, and the board is secured with some twine. For hanging the artwork, wooden pegs were installed in equal intervals.
Pros: Looks really nice! Old barn boards are not a must, although they make the difference, having a very unique look. More than one piece can be hanged on each board, and as extra touch, another board was made into a narrow table.
Cons: I won’t go out of the way to find or purchase these old boards, only if I happen to have them lying around. Stability might be an issue if someone kicks the bottom of the board. Quite bulky to carry and transport. Some DIY know how is required to install wooden pegs.

|

|

|
Jennifer Toliver, www.jennifertoliver.ca
The Leaning Boards 3
This one is made of metal railing that already comes with some holes in them. The railing was tied to the tent’s frame with bungee cords. S hooks are used on the holes to hang the artwork.
Pros: Inexpensive and easy to install. More than one painting can be hanged on each railing.
Cons: The look is quite cold and industrial.

|

|
Nicky Hindmarsh, nickyhindmarsh@hotmail.com
The Fencing 1
A metal fencing stretched across the width of the tent’s wall, attached at the side with some cable ties. In order to make the fence more stable and not buckle in, a long and narrow strip of hard plastic was inserted throughout a section of the fence. S hooks are used to hang the artwork.
Pros: Metal fence is durable and can carry multiple art.
Cons: Also a cold look and a bit industrial.

Scott Brewster
The Fencing 2
Similar to Fencing 1, but using a plastic fencing. I have seen someone using the orange color fencing in the past and it looked terrible. So if you opt to use this option, try black or white.
Pros: simple and inexpensive.
Cons: Wear and tear might be high. Looks like a construction area.

The Framed Fence
In this more elaborate usage of the fencing, they were stretched over wooden frames, stapled all around with a staple gun. The frames are attached to the tent’s frame, and to each other, with cable ties. In this example the frames are quite tall – taller than the lower portion of the tent’s roof structure. The frame panels had to be separated with a gap in the middle to fit in.
Note the special feature of this setup – the noodles. In each wall mid-section, a twisted noodle in inverted U shape is attached to the fence with cable ties. The purpose of the noodles is to stretch the tent’s roof outward, so that any rain falling on the tent will immediately spill over and not remain on the roof. I believe this can be achieved with other systems as well.
Pros: Can hang many paintings in many configurations. Not too expensive to setup.
Cons: Seems bulky to carry and transport. Require DIY know-how.

Steven Crainford, www.stevencrainford.com
The Fencing Rollup
I personally loved this system! In this display the 3’x15’ plastic fencing roll was cut to 5’ lengths. Each length of 3’x5’ was attached to a 1”x2”x3’ wooden strip on each side using washers and screws. Couple of eyelet screws were attached to one of these wooden strips. These were used to hang the fence from the tent’s frame, using a couple of large size S hooks. Similarly it can be hanged with cable ties or bungee cords. The nice thing about this system is that each fence is rolled up nicely around the wooden strip for carry and transport.
Pros: Light and easy to carry. Inexpensive and fairly simple to assemble. Can hold several paintings, depends on the size.
Cons: Need to make quite a few of these to cover all three walls, which might defer the size advantage. If it is not required (as in the picture), then it’s less bulky.

Jon Muldoon, www.jonmuldoon.ca
The Concrete Wire Mesh
Concrete enforcement wire mesh size 4’x8’, hanged from the tent’s frame with twine. The artwork is hanged using S hooks.
Pros: Inexpensive and light weight. Can hold many paintings, depends on the size.
Cons: the wire mesh rusts very easily, so it must be treated somehow beforehand, either painted over with rust resistance paint, or some anti-rusting spray. Edges can poke and scratch you. Not heavy but still bulky to carry and transport.

Moshe Mikanovsky, www.mikanovsky.com
The Gallery-in-the-Park
A gallery hanging system is attached to a 1”x4” board of similar length. Eyelets screws are attached to the top of the board, which is suspended from the tent’s frame using cable ties.
Pros: Small and simple.
Cons: Depends on the gallery hanging system, only one row of paintings can be hanged. Might be more expensive than the average DYI system, but needed to be compared with other professional systems.

The Coat Hanger
This DIY coat hanger style system is constructed of a 1”x1”x8’ wood strip attached to a small board for a base. The base is held with a small weight and the top of the strip is attached to the tent’s frame with wire. Hooks are attached to the front in intervals.
Pros: Simple and inexpensive.
Cons: Does not look very stable or fit for big and heavy paintings.

|

|
Sheetal Sehgal, www.sheetalsehgal.com
The Stained Glass Window
This system is quite unique. It is constructed of a wooden frame, and metal construction built together especially for this purpose. It’s easier to have a look at the picture and see what I mean. The final look is of a stained-glass window without the glass. The artwork is suspended off the metal-work with S hooks.
Pros: Special look that gave the booth a unique design.
Cons: Need to be very handy to create. Heavy for carry and transport.

Liz Menard, liz.menard@utoronto.ca
As you can see, there are so many creative ways to hang your art in a tent! I didn’t even mention The Easels Field and The Professional Grids. I am sure there are many more ways out there. True, being professional is very important and everyone should strive to present their art in the most professional way possible but if you are on a tight budget, want to try what an art fair is all about, or just want to be a bit different, why not try one of these displays? And if you have more ideas, please share them with us; we would love to hear from you.
Cheers
Moshe
PS Thank you to all the artists who allowed my wife and I to take pictures of their displays and use them in this post.
———————————————-
This article appears courtesy of FineArtViews by Canvoo,
a free email newsletter about art, marketing, inspiration and fine living for artists,
collectors and galleries (and anyone else who loves art).
This article originally appeared at:
http://fineartviews.com/blog/20870/art-display-systems-for-art-festivals
For a complimentary subscription, visit: http://www.fineartviews.com
———————————————–
Our Own Art Educations
 Like so many of you, I am a regular reader of Robert Genn’s Twice Weekly Letter. This latest one looked at the traditional master-apprentice role in the arts, and I was particularly taken with some of the thoughts, especially since marbling has always followed this road. Apprentices worked with masters for years, learning and absorbing every trick and skills through watching – and later on by doing.
This made me think of how we get our own art educations, a topic near and dear for so many of us. I’m self-taught in virtually everything I have done artistically. I would hazard a guess that this is true for most of us baby boomer women. We were encouraged to go into paths that would support us or provide for families, with little thought as to what would make our hearts sing. As we’ve gotten older we have become more expressive.
Self taught. It seems to be fine in so many fields to say you are self-taught – tutored in life. But not in art. At least for me, I still feel intimidated when I see in a CV of someone in an art show all their schooling and formal coursework in the arts. My own art education early on consisted of a few art projects in elementary school and then a “class” as an elective in high school where we churned out particular projects. But nothing in creativity. Which ties in to a recent article in Newsweek on the dearth of creativity in modern classrooms and education.
I’m rambling, I know. But I’ve had to learn how to be creative, to break through the “OMG, what will it look like?” phase of making art. Would working with a master have helped this? I don’t know, but it probably wouldn’t have hurt any.
Who are our masters in the arts today? From whom do we study and learn? Enter the Internet, the cheap equalizer to getting an art education. The joke in our family always was that if my dad wanted to learn how to do something new, he would read a book. Well, I got that gene. I read everything I can get my hands on if it’s something I am really interested in. But that can get to be expensive, although still cheaper than a formal education or coursework.
The internet has opened up huge resources for us. I started on TV with Sewing with Nancy and Eleanor Burns and Kaye Woods. I picked up all kinds of hints – and reasons why something I was already doing (through guesswork) wasn’t working. Like many of us, I have taken workshops when I can afford it. Jennie Rayment and her muslin creations still stick in my mind – such possibilities for texture!
The first professional workshop on marbling was with Galen Berry (over a year ago) and it was wonderful – lots of questions answered, problems solved, and energy renewed. We started to zoom ahead in our skills.
Then I went to the School of Threadology with Superior Threads. Yes, I know I rave about their threads, but the professional education I received over the three days with Bob and Heather Purcell was priceless. My work has taken a dramatic turn for the better – and I don’t break thread anymore….
Now I’ve discovered Interweave and their dvds on quilting and other artistic endeavors. Better than a book because I can see things actually being done.
I watched a leaf tutorial by Heidi Lund and already picked up a bunch of hints to try something totally new for my bamboo piece. Carol Taylor’s video on her Arc-i-Texture techniques had me making a new quilt last night to try out the ideas…and I must say I’m loving it! And Susan Brubaker Knapp’s video on machine quilting corrected a whole bunch of errors I have puzzled over.
And of course we can’t forget YouTube. I have been devouring and studying very closely the wealth of marbling videos on line.
So my question to you is: What’s the best professional development you’ve ever attended – the one that has changed how you do your art? I want to know!
PS – all of these recommendations are unsolicited – they’re just stuff I have learned from and appreciate – nothing comes to me as a result of you checking these out! (OK, FCC – happy?)
Work-in-Progress Wednesday
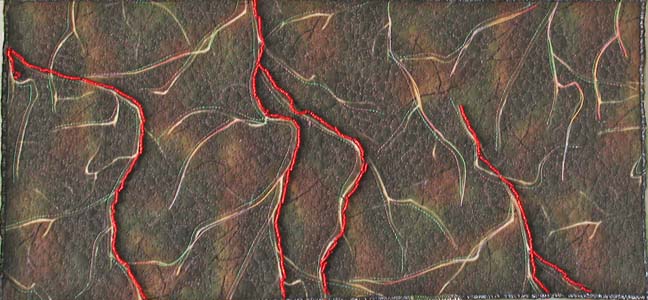
I have to say, I have been busy. I originally was thinking nothing was going to happen art-wise in July because of so much work on the business. I was wrong…the last week has been incredibly productive. Last Wednesday I wrote about my lava piece just telling me it really wasn’t finished. Here’s last week:
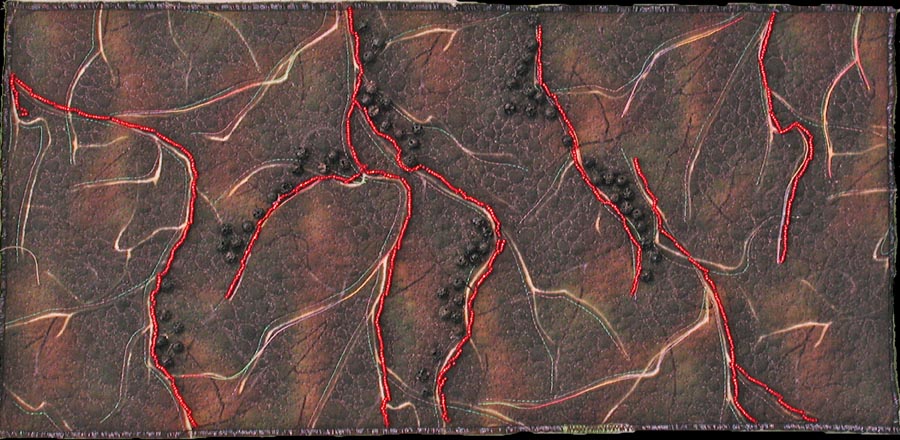
And here it is now, since it told me it was “finished:”
Turns out it needed actual lava – those little round pieces are actual chunks of lava I collected over a couple of visits to the Tucson Gem Show each February. I also added more lava flows, and nothing really interferes with the quote on the back. This is going to go up in the newly-developing Etsy store.
My “purse” didn’t make it as a purse…I loved the play of the fabrics together, but I couldn’t get handles to work the way I wanted them to…so now it’s a nice new basket for collecting fabric scraps.
If you were reading on Sunday, you saw the finished “Desert Heat” quilt, now on the wall in our bedroom.
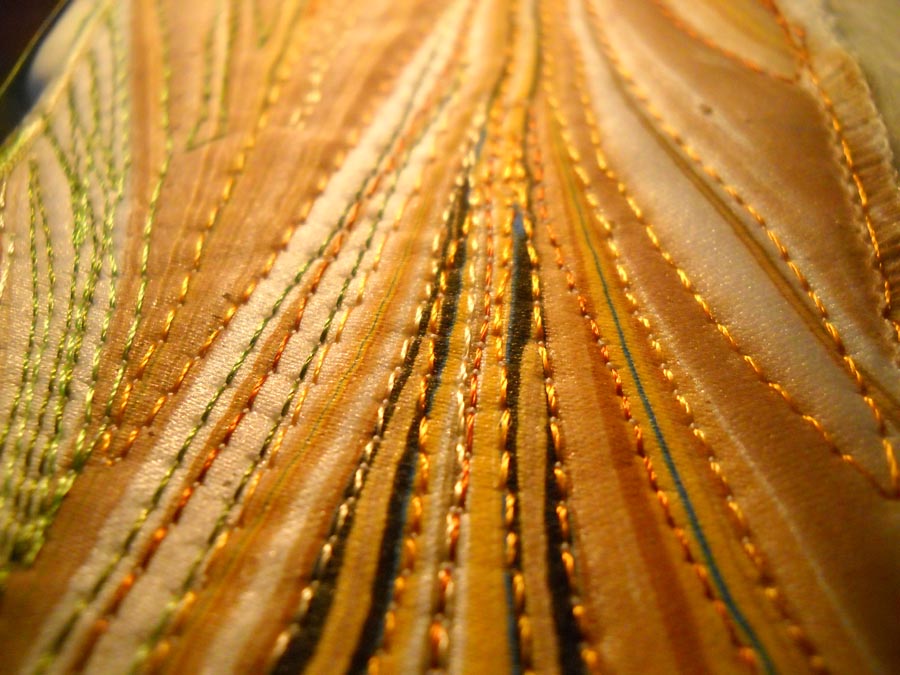
Now I am working on my “bamboo” quilt, started about 5 years ago with a piece of marbled fabric in the chevron pattern. One of the things I like about this quilting is that it is very zen-like, in that you can just follow the lines of the patterns. You can see the original piece of fabric here. You’ll see what I mean about the lines of the pattern.
As I was quilting yesterday, it occurred to me to take pictures of the process, and then that led me to think about putting together a tutorial on quilting marbled fabric. There is an interesting story behind the quilting. Years ago I pretty much just put marbled fabrics with blacks, as I wasn’t sure at all about my color sense. I did slowly branch out, but it was Quilt artist Ellen Kohen who took a piece of fabric and quilted it. I knew there was more I could do with the fabric, but I wasn’t sure how to approach it. Once I saw what Ellen had done, I was hooked, but it took confidence to start the free motion needed to accent these patterns. Starting this Sunday, I’m going to introduce “Sunday Stories,” and I’ll take a look at the story behind each of the pieces in my gallery on the website.
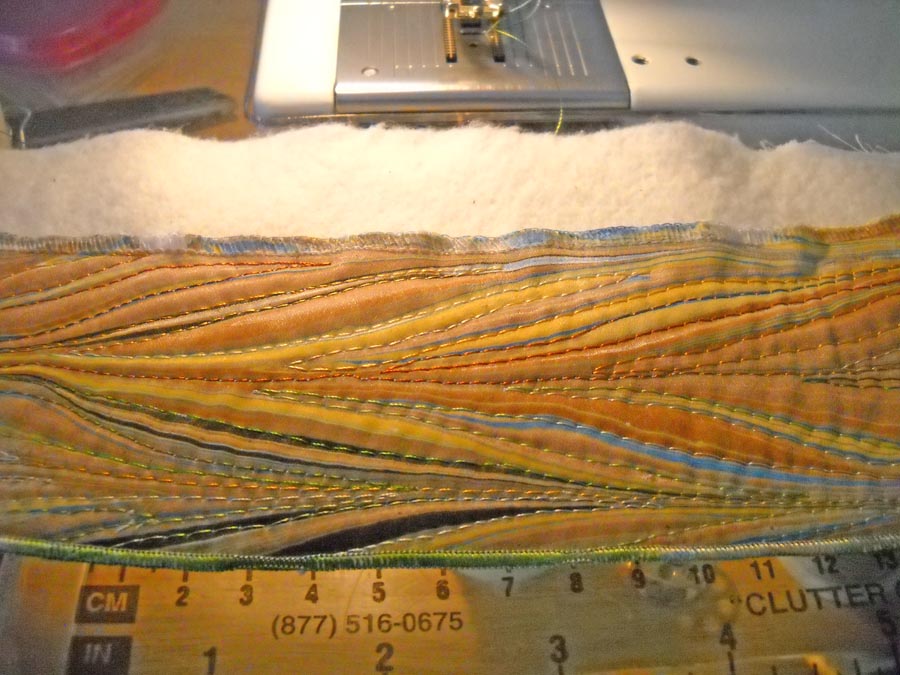
For today, here’s a close-up look at one of the bamboo strips (which I am aiming to finish by mid-August, as I want to enter it into an art quilt show with my “Ocean’s Bounty.”) You can easily see all the “lines” in the pattern and how I have followed the lines with a variety of different colored threads. The problem you might run into (as I have) is when to stop with the lines – you can get easily sucked in to quilting everything.
You can see the serged edge in this piece – which is how I usually finish these weaving pieces. I’ve learned over the years not to serge until I am finished with the machine quilting.
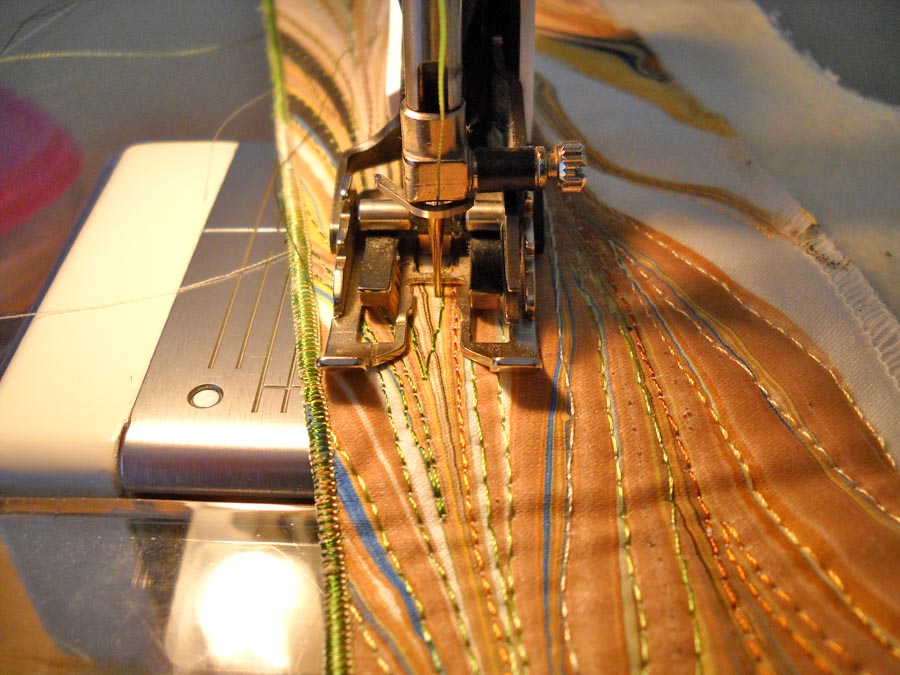
This is with my walking foot, but I’m not totally happy with the control with this foot. Because there are slight curves to these lines, I use my regular foot and am quite happy with it. I think this is probably a personal preference. I tried the free motion foot on this, but I didn’t have the control and even stitches I wanted for this design.
I have four and a half “strands” of bamboo finished at this point. I can quilt for a couple of hours, listening to some John Denver and just kinda zone…as I mentioned earlier this week, I am amazed at just how much I get done when I think a project will take forever. Now what probably will take forever will be the leaves. I’ve tried marbling some silk leaves – not happy with them. I am thinking some thread leaves, but they may not seem “sturdy” enough for this hardy plant. I do know thread leaves would be a great use of all my lousy threads I have hanging around. I haven’t broken any threads with some 6 hours of quilting – have I told you how much I love my Superior Threads?
If you would be interested in a tutorial on quilting marbled fabric, please leave me a comment and let me know. If you’ve got pictures of some marbled fabric that you have quilted, I would LOVE to see it.
Top Ten Tuesday – Organizing and Living Life
This has been a great week for goodies on the web. Great eye candy and inspiration.
* I subscribe to Dumb Little Man, and every now and then they have something that really resonates. This week it was “How to Adopt an Attitude of Gratitude.” The article is based off this quote from Tecumseh: When you arise in the morning, give thanks for the morning light, for your life and strength. Give thanks for your food, and the joy of living. If you see no reason for giving thanks, the fault lies with yourself. ~Tecumseh You can read the article here. Great words to live by.
* Speaking of Native Americans, I picked up a great book at Bien Mur, the art gallery at the Sandia Pueblo in Albuquerque called “Native Wisdom for White Minds.” This is full of wisdom from indigenous people around the world, set up as a saying a day, so you have inspiration throughout the year. The book is available from Amazon – search on the left (disclaimer – I’m an affiliate, so if you order, I get a few pennies.).
From today, July 13 – “Nature is the storehouse of potential life of future generations and is sacred.” ~Audrey Shenendoah, Onandagan writer
* “What’s Trite, What’s Not” from Existential Neighborhood by Jane Dunnewold. Jane is an amazing fiber artist and I was licky enough last year to follow along on her daily photo inspirations. Is life trite? Here’s a provoking thought: “And there’s the paradox. The activities that keep me centered, authentic, and real could easily be dismissed as trite. It’s all phrasing and context. How much outside influence have you bought into lately?”
* Making Mondays – and Your Week – More Productive. Well, who doesn’t want to! There are seven questions to help guide you to more productivity – all of them worth thinking about.
* Self-Inflicted Time Management from Time Management Ninja (great name!). If you have issues with any of the following, read this post!
- Missed Deadlines
- Late Fees
- More Work Due to Undone Tasks
- Lateness
- Disorganization
* The Myth of Multi-tasking from Productivity 501. I thought it was just because I was getting older – I really thought I could multi-task well. Age has shown me I can’t… “It turns out that humans are amazingly horrible at multi-tasking. Many people feel like they are improving their focus by multitasking when they are really doing the opposite.”This is a good read.
|
|
|
|
|
|
Thoughts for a Thursday – Marble-T Design
While on vacation, hubby and I had plenty of time to talk about our marbling business and how we wanted to proceed. Readers of this blog know we went through some very difficult times as we had problems with marbling: nothing worked – water, paints, fabric finishes – nothing. Prior to this time we had an active business, with a mailing list of about 300 people, and a list of products that sold each month fairly well. Once the art problems hit, at the same time I changed jobs, and time became a real premium.
Fast forward to now, and I am spending lots of time reading and researching how to build our business. About two weeks ago, on the road in Tennessee, I had one of those “2 by 4 on the head” moments, when I realized that everything the internet marketers tell us we have to do to build an online business we had been doing years ago. So I have been spending time updating, revising, incorporating social media (which wasn’t around when we went online in 1998…). I have learned a HUGE amount, I have loads more to do, and most importantly, I am having fun, as well as meeting lots of new and interesting people. I am glad that I am on summer vacation right now, and I don’t need to take classes or teach any remediation, because building this business is taking a lot of time.
So what does an art business need? We have a website that has gone through several versions since 1998 when the learning curve was EXTREMELY steep. It has again been updated by our amazing web designer Suzan at Saltwater Systems to reflect new fiber work, some of our digital work, and some new products to be released within the next two weeks. It is now easier to sign on to follow our work through our newsletter.
We did a lot of work off the website way before blogs, but blogging makes it a lot easier to update and refine offerings. Plus, I like being able to write about and reflect on new work, especially as our digital marbling (TN) increases. Now on our blog, Marbled Musings, you can follow updates to the blog, as well as sign up for our newsletter.
Social media has mushroomed. I’ve been on Facebook for about two years, and I have loved getting back in touch with former colleagues and students, as well as meeting and reconnecting with other artists. I am learning about Fan Pages and am just beginning to experiment with one. If you are interested, sign on to follow Marble-T Design on Facebook. Pretty soon we will have a button you can just click.
Now Twitter….this is really interesting. My students make fun of me for being on Twitter, but I tell them I am way ahead of them in this piece of technology, especially when it comes to business. I am not always logging on with information about what I am doing, but I do enjoy the resources that are posted. Following the NY Times arts columns has led to some great artists. If you’re in to Twitter, you can follow me @ArtsyLindaMoran. (And there wil soon be a button….)
Have I made any art lately? No, and that is by far the downside to building a business and doing the necessary marketing. I worked on a few pieces before I left for vacation, and there is time next week built in for working on art. My goal is to have the business running smoothly within the next four weeks, and then I will carve out the art time throughout the school year – a tough task as any artist knows who has to share creativity time with the job that pays the bills.
I am very interested in what all of you do. Comment about how you’re building your business, what you have found that works, and anything in particular you know HAS to be done. Love to read your comments.
AND….giveaway this weekend with Blog Post 400 – I promise you it’ll be a good one!
PS – a popular post about Martha Stewart and her “marbling” – this ran a year ago as we were just coming out of our hard times marbling, and I was incensed at how she tried to put her spin on this ancient art!
Student Artwork – Slope Art
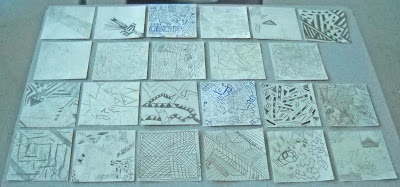
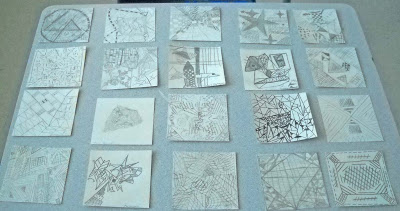
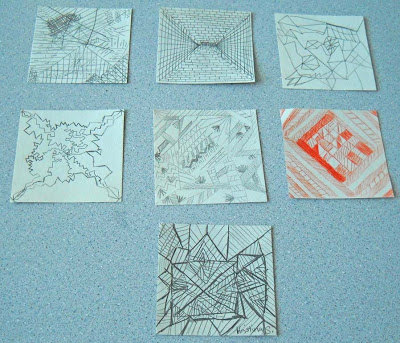
This first day back to school I wanted to ease the kids easily back into working with slope, so we viewed some videos about practical uses of slope – roof lines, ski slopes, and the like. Then I introduced them to zentangles and talked about doodling using ONLY straight lines. Most of the kids got right into drawing and got lost in the drawings pretty quickly. A few were like I used to be, worried about what the final product would look like. Overall some nice art was created. We will move from this into an actual art project with straight lines, with the equations for each of the lines used. But that’s for next week….
In the meantime, here’s their work (taken with my new digital camera that I can carry around in my purse):
Thursday Thoughts – The New School Year
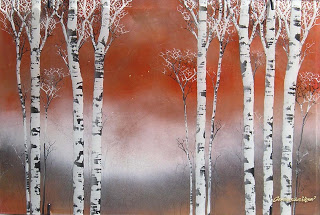
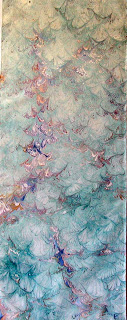 Another really cool piece from the past – a lot of these art pieces that went up on Ebay were left over from commissions. This piece always reminds me of a misty morning. I probably should try something else with it, so I will work on this one tomorrow, with Photoshop.
School started yesterday – just the teachers in for meetings. I spent today getting ready for ninth grade orientation tomorrow. And once I again I face the same conflict every year at this time – how can I maintain the momentum from all the summer art work? Yesterday I was so tired, I had no energy to sew after dinner. Now, rationally I know that’s to be expected the first week or so back, because I have to get re-energized with the school year and get the body attuned to the new schedule. But still, every year the momentum just fades……
I do enjoy blogging, and I want to maintain at least 5 entries a week. Blogging really helps me process what’s going on in my life, as well as the original purpose – to keep a record of my creativity. I had a blast at our arts meeting on Monday – we all seemed to mesh really well as a group of diverse artists – lots of dialogue about how we do what we do, and what we would like from the group – keeping us motivated. There’s momentum, again.
I am hoping the monthly meetings will help me work on projects for each time we get together. September has the gem show and a chance to look for new goodies, with some of the group. I want to work on the bamboo piece and look for more “dirt-ish” stone to embellish the base.
It all comes down to getting over the end-of-the-day slump and get busy during the evenings. I am surprised – and pleased – that so far I am not overwhelmed by preparation. I have so many things prepared from last year, that now I can actually work at presenting material in a much more interactive manner – which is a goal for this year.
So I guess it’s just a matter of time……
Saturday Special!
 I was hoping, when I started a regular pattern of blog writings, that I could do some marketing on Saturdays – hence the “Saturday Special.” This has not been my most successful day because I can’t keep up with changing images, especially since Cafe Press isn’t as “intuitive” as I would like it. I did set up a friend’s store – The Edge of the Sea of Cortez – and you will see some really cool sea creatures, many of whom are endangered. Betty Hupp is the co-author of “The Edge of the Sea of Cortez,” a book about the sea creatures you will find tide-walking. Check out the store for an indication of some of her products, with more to come.
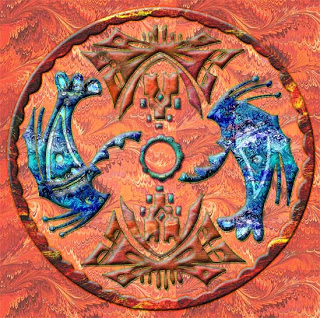
I really like this image, created a few months ago, and part of the “Indigenous Images” series I am working on. I put this on a t-shirt for this week – limited time only! I also have this image on a small ornament – looks really cool.
Digital Marbling (TN) is unique – I take a piece of marbled fabric – or two – and manipulate it to other intriguing images. Loads of fun to do. I am learning a lot about photo manipulation – what an amazing field. Were I younger, I think graphic design would have been my career field.

About a year ago I created a great background, and my digital partner Suzan used a shot she had taken of the Grand Canyon – makes for a very dramatic image. You can find this on notecards this week. The image is also available on a small magnet.
Also over a year ago I started my “Fossil” series, again from a traditional marbled stone pattern on fabric. The background has loads of possibilities! It’s available as a small poster this week and as a small mug.
Have fun exploring! If you are interested in Betty’s book on the Sea of Cortez, here’s the Amazon link.
Photoshop Friday – NOT……
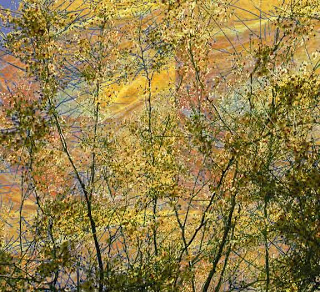
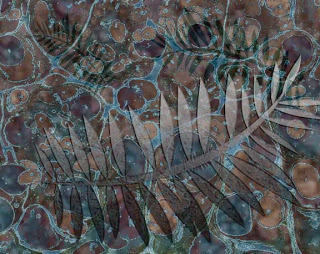
I worked with Photoshop for a while this afternoon, and NOTHING clicked – no tutorials, no playing with filters, nothing. The photo at the left is one from a while ago – I was working with blending modes, and added a background of marbled fabric for an interestng sunset effect. Rather than push it and get more frustrated, I put the work away (saved, of course – ya never know…), and started getting caught up with some favorites on Twitter. What an amazing source of great articles and ideas!!
Katydid Designs is offering an e-course starting September 7: Multiple Streams of Income. I’ve taken a couple of Photoshop classes on line and had a great time. I took a blogging class on line (31 Days through Problogger)) and learned a huge amount – so much so, that I have spent the summer really working on some marketing ideas, getting a support groups together, and of course creating some new art (marbling tomorrow and doing more paper – yay!).
My art is my stress-reliever, since I am still teaching full time, but this year, with Arizona ranking 50th in the nation for support of education, everything about the job, paycheck, hours, and class sizes is up in the air. After being able to spend the summer creating art, I am really concerned with the lack of time come next week Wednesday. I still have a number of years before I can retire and work at my art all the time. So I am looking for other opportunities, and I learn really well on line!
If you answer “yes” to any of the following, you might want to consider checking out this course.
* Are you struggling to make a living doing what you love?
* Do you feel like you are working all the time and getting nowhere?
* Do you feel overwhelmed and confused about all the ways artists and crafters can make money?
* Are you always jumping from one idea to the next without following through on anything?
Laura Bray, an artist with an M.B.A., will teach you how to create income by doing what you love. Specifically designed for the creative personality, this online course will teach you how to develop a successful business and how to have fun while you do it.
*
Learn that creating multiple streams of income is the fastest way to reach your financial goals while making a living a doing what you love.
That has been my goal all along, but I just can’t seem to get it together. I am interested in hearing from those of you who are having good luck with this.
* Learn how to leverage your artwork and projects to make money for you over and over.
I have an idea about this, and that’s how I got into digital marbling (TN), as a way of getting more mileage out of a great piece of fabric.
* Learn how to create passive income. You can be independently employed, go on vacation, and still make money!
I am so intrigued by this idea….
* Find out the many ways an artist or crafter can make money from their art. You probably haven’t even thought of some of them!
I know eBay has been okay for us – would love to increase weekly sales. Etsy seems stagnant… what else is there?
* Learn from experts in creative income areas such as; online selling, art licensing, children’s book illustration and craft shows.
I want ideas!
* Create a personal business plan, outlining your income choices and the steps you need to take to make your plan a reality.
There’s got to be more to what I am attempting – and not having any successes!
So think about it…and keep making your art!
Work-in-Progress Wednesday – NUMBER 300!!
Yup, post 300! Over two years on the blog, as a record, first of all, of my Photoshop classes, and now as the creative journey. It’s really interesting looking back at some of the early work! I’ll have to track down a couple of links….At 500 posts I think I’ll do a BIG giveaway!
So I finally got to “unzip” pics of the finished quilt – well, almost – still have a top and bottom binding to put on. But I presented it and we took lots of photos of it on the bed. So here goes…
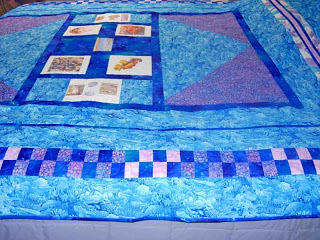
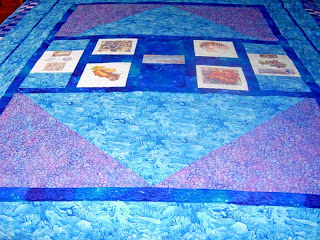
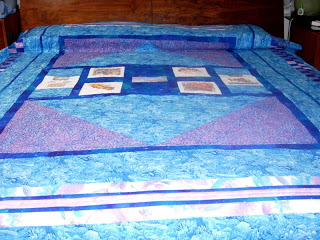
Needless to say, I am please and somewhat proud. I designed it from scratch, did massive amounts of free-motion quilting, and got it together so it looks really good on the bed! Now on to some new sewing adventures….
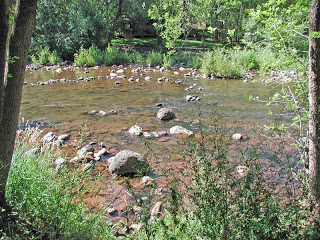
Also in progress – pics of the Sedona trip. Here’s a couple of Oak Creek – notice that wonderful tree and bark – and yes, the rocks really are that red!
Visual Delights!! (continued)
There were so many amazing visual sights in Sedona! The Lou deSerio Gallery has amazing Southwest art, including photography workshops – and a 15-year-old son who has been doing photography (award-winning) since he was three. He trained with Ansel Adams, and his black and white are spectacular. These images are from his site.
There were some amazing “leather” sculptures in one of the galleries. The artist is Pat Fetters, and I wasn’t able to find any info on her on line. She molds the leather to glass or plexiglas vases – the texture and colors were fabulous. You had to see these to really appreciate how wonderful they were.
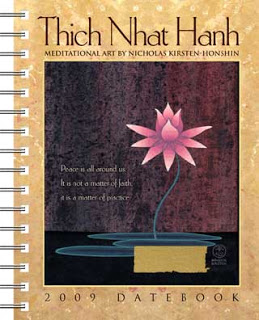
Then there was the Golden Lotus Gallery – oh, my…..Nick Honshin is the artist – in what he calls Asian Fusion. His paintings are a combination of Asian influence – you could meditate to his paintings and never want to return. As his website states: “His art is inspired and flows from the sacred meditational space of the transcendental archetypal symbols of Christianity, Zen, and Tibetan Buddhism as well as the shamanistic practices of the world’s perennial philosophies. This fusion of the traditional with the modern highlights the natural harmony of the beliefs, symbols, & practices of East & West. The work reflects the transformation of Perennial Philosophies and symbols into Modern Mythic images of the transcendent moment.”
You simply HAVE to visit his site.
Those of you familiar with sumi-e – a Japanese water-art of brush strokes – will love the work he has done – snakes done in ONE brush stroke. Absolutely amazing!!! Unfortunately, the links aren’t working – but check out his site.
Loads of eye candy – Enjoy!!
Visual Delights!!!
Sedona is truly one of the magical places on earth. We spent three days there, and we explored a lot of areas we hadn’t seen before, including walking along Oak Creek. One of our friends, Steve DeVol, is president of Keep Sedona Beautiful, and he put together the following slide show which demonstrates this amazing beauty.

This is just a sample of the beauty – watch the slide show for MUCH more!
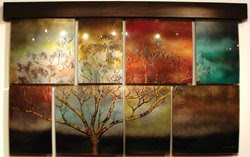
One of the things we love to do is prowl galleries, looking for spectacular art. Well, we certainly were not disappointed! Christoper Owen Nelson – WOW! Etched and painted plexiglass. We were stunned with his work – we just stared and stared – and had heart palpitations!
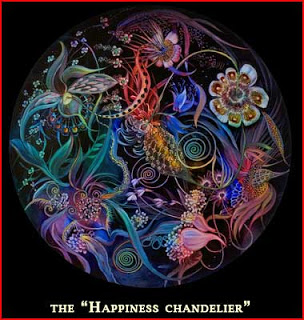
Not content with his work, we headed to another gallery – Visions at the Hyatt Shops. So many beautiful things!! Ulla Darni makes some incredible glass chandeliers – called the newest Tiffany.
Some amazing kaleidoscopes outside the gallery – the “table” moves – and the table is full of plants – a truly unique inside pattern!
Here’s glass, paintings, ceramics.
Another artist we loved – Eyvind Earle. Seurat meets Japanese lacquer – really gorgeous, you need to see them up close.
More tomorrow – just too many beautiful things to see!
Images:
http://www.fastdynamitecms.com/cmsimages/sedona_arizona_cathedral_rock.jpg
http://www.southwestart.com/sept08/21_Under_31/solitude_christopher_owen_Nelson.jpg
http://www.happinessdocumentary.com/images/ulla-Image-.jpg
Art – It Feels So Good!

The kids and I were definitely on the same page today. They didn’t want to work, I didn’t want to work, they had lives outside of school, I have a life outside of school….so we talked about not giving up when we still have work to learn. I took them through everything they had accomplished in algebra 1:
*making a table, a graph, and an equation for a linear function;
*making a table, a graph, and an equation for an exponential function;
*making a table, a graph, and an equation for an absolute value function; and
*making a table and a graph for a quadratic function.
THe only thing we really have left to do is solve quadratic equations through factoring and the quadratic formula. I think they were pretty impressed with themselves, and we had a great class. No more whining – we were in this together!
But – I still wanted to get home and work some more on the gecko from yesterday. I still felt there were a lot of ideas to try in Photoshop. So you can go back an entry and see the original image – and then look at this new one -lots of embossing, and I learned how to change the shadows from a default black to a color within the marbled pattern. I continue to be amazed at the amount of texture the marbled fabric gives the design.This one looks like a piece of copper. Another “wow,” and I foresee a series with the gecko, and maybe a few other common images of the Southwest.
Don’t forget our CONTEST!
Creating – Part 2

So after some errands, and a short time outside relaxing and reading (which I haven’t done in months), I went back to Photoshop, and things flowed wonderfully. This image is from the Cochiti tribe of the Southwest. Once I realized I hadn’t put pieces on individual layers, I was able to do a lot more with manipulation. Also, every background that you will see is marbled fabric. A few of the fabrics have been lightened, or hues changed, through Photoshop.
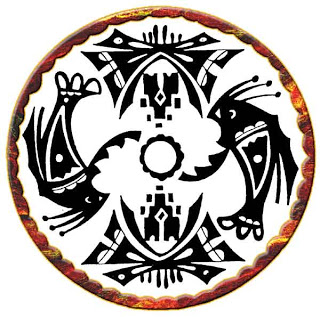
This first shows the border. I played around with embossing and a small stroke to give the border some good dimension. The stroke is done in a color sampled from the marbled fabric. It always amazes me what Photoshop can do.

This second looks at two of the main images, done with a free-form marbled pattern. Lots of embossing, shadows, some stroking, There’s a wonderful “look” to these – very earthy.
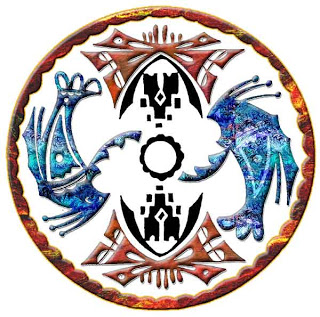
I went with a watery marbled pattern for these two, as well as some of the same layer options as above. The pattern has been lightened for the shadowing inside the figures.
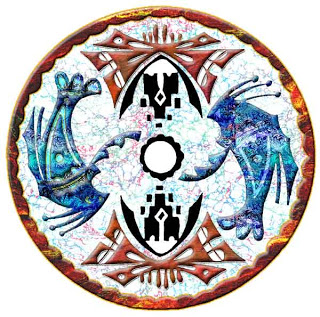
I knew when I started I wanted some marbled pattern for the center, if not the whole background. This is the Italian Vein marbled pattern lightened so it doesn’t overwhelm the foreground. Once it was there, it looked perfect.
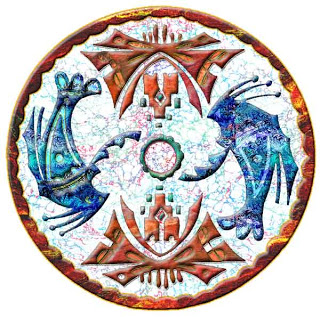
I finished off all the other little “openings,” for lack of a better term. I lightened some pieces, trying to get as much depth and texture to the whole piece. Then – I played around with the overall background. I wasn’t adverse to the white, but I wanted to see what else would work. Black was too dramatic – it seemed like the eye just wen to the black before the design. I chose a large orange pattern I had scanned, then lightened it a little, so the border would still be prominent.
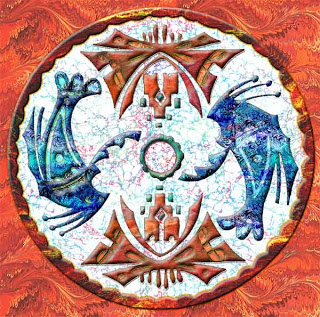
To say I’m pleased is an understatement. This meets my “wow” criteria. I tried a few other tricks in Photoshop – ready for some new ones. And – these pics don’t even begin to do justice to this piece!!

