Author Archive
Our Own Art Educations
 Like so many of you, I am a regular reader of Robert Genn’s Twice Weekly Letter. This latest one looked at the traditional master-apprentice role in the arts, and I was particularly taken with some of the thoughts, especially since marbling has always followed this road. Apprentices worked with masters for years, learning and absorbing every trick and skills through watching – and later on by doing.
This made me think of how we get our own art educations, a topic near and dear for so many of us. I’m self-taught in virtually everything I have done artistically. I would hazard a guess that this is true for most of us baby boomer women. We were encouraged to go into paths that would support us or provide for families, with little thought as to what would make our hearts sing. As we’ve gotten older we have become more expressive.
Self taught. It seems to be fine in so many fields to say you are self-taught – tutored in life. But not in art. At least for me, I still feel intimidated when I see in a CV of someone in an art show all their schooling and formal coursework in the arts. My own art education early on consisted of a few art projects in elementary school and then a “class” as an elective in high school where we churned out particular projects. But nothing in creativity. Which ties in to a recent article in Newsweek on the dearth of creativity in modern classrooms and education.
I’m rambling, I know. But I’ve had to learn how to be creative, to break through the “OMG, what will it look like?” phase of making art. Would working with a master have helped this? I don’t know, but it probably wouldn’t have hurt any.
Who are our masters in the arts today? From whom do we study and learn? Enter the Internet, the cheap equalizer to getting an art education. The joke in our family always was that if my dad wanted to learn how to do something new, he would read a book. Well, I got that gene. I read everything I can get my hands on if it’s something I am really interested in. But that can get to be expensive, although still cheaper than a formal education or coursework.
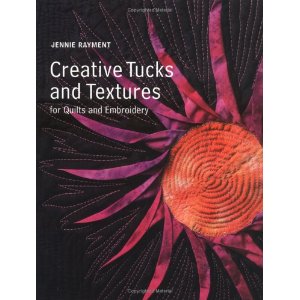
The internet has opened up huge resources for us. I started on TV with Sewing with Nancy and Eleanor Burns and Kaye Woods. I picked up all kinds of hints – and reasons why something I was already doing (through guesswork) wasn’t working. Like many of us, I have taken workshops when I can afford it. Jennie Rayment and her muslin creations still stick in my mind – such possibilities for texture!
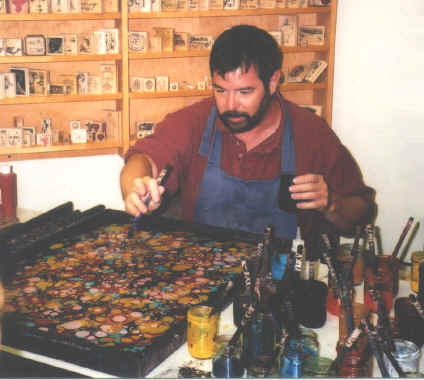
The first professional workshop on marbling was with Galen Berry (over a year ago) and it was wonderful – lots of questions answered, problems solved, and energy renewed. We started to zoom ahead in our skills.
Then I went to the School of Threadology with Superior Threads. Yes, I know I rave about their threads, but the professional education I received over the three days with Bob and Heather Purcell was priceless. My work has taken a dramatic turn for the better – and I don’t break thread anymore….
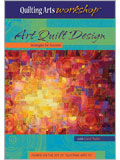
Now I’ve discovered Interweave and their dvds on quilting and other artistic endeavors. Better than a book because I can see things actually being done.
I watched a leaf tutorial by Heidi Lund and already picked up a bunch of hints to try something totally new for my bamboo piece. Carol Taylor’s video on her Arc-i-Texture techniques had me making a new quilt last night to try out the ideas…and I must say I’m loving it! And Susan Brubaker Knapp’s video on machine quilting corrected a whole bunch of errors I have puzzled over.
And of course we can’t forget YouTube. I have been devouring and studying very closely the wealth of marbling videos on line.
So my question to you is: What’s the best professional development you’ve ever attended – the one that has changed how you do your art? I want to know!
PS – all of these recommendations are unsolicited – they’re just stuff I have learned from and appreciate – nothing comes to me as a result of you checking these out! (OK, FCC – happy?)
Work-in-Progress Wednesday
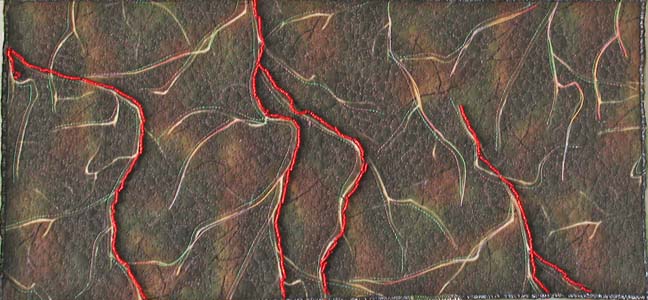
I have to say, I have been busy. I originally was thinking nothing was going to happen art-wise in July because of so much work on the business. I was wrong…the last week has been incredibly productive. Last Wednesday I wrote about my lava piece just telling me it really wasn’t finished. Here’s last week:
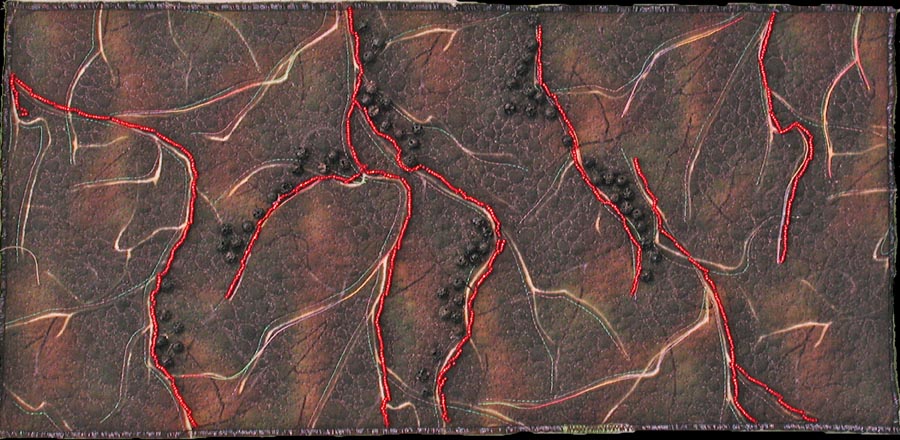
And here it is now, since it told me it was “finished:”
Turns out it needed actual lava – those little round pieces are actual chunks of lava I collected over a couple of visits to the Tucson Gem Show each February. I also added more lava flows, and nothing really interferes with the quote on the back. This is going to go up in the newly-developing Etsy store.
My “purse” didn’t make it as a purse…I loved the play of the fabrics together, but I couldn’t get handles to work the way I wanted them to…so now it’s a nice new basket for collecting fabric scraps.
If you were reading on Sunday, you saw the finished “Desert Heat” quilt, now on the wall in our bedroom.
Now I am working on my “bamboo” quilt, started about 5 years ago with a piece of marbled fabric in the chevron pattern. One of the things I like about this quilting is that it is very zen-like, in that you can just follow the lines of the patterns. You can see the original piece of fabric here. You’ll see what I mean about the lines of the pattern.
As I was quilting yesterday, it occurred to me to take pictures of the process, and then that led me to think about putting together a tutorial on quilting marbled fabric. There is an interesting story behind the quilting. Years ago I pretty much just put marbled fabrics with blacks, as I wasn’t sure at all about my color sense. I did slowly branch out, but it was Quilt artist Ellen Kohen who took a piece of fabric and quilted it. I knew there was more I could do with the fabric, but I wasn’t sure how to approach it. Once I saw what Ellen had done, I was hooked, but it took confidence to start the free motion needed to accent these patterns. Starting this Sunday, I’m going to introduce “Sunday Stories,” and I’ll take a look at the story behind each of the pieces in my gallery on the website.
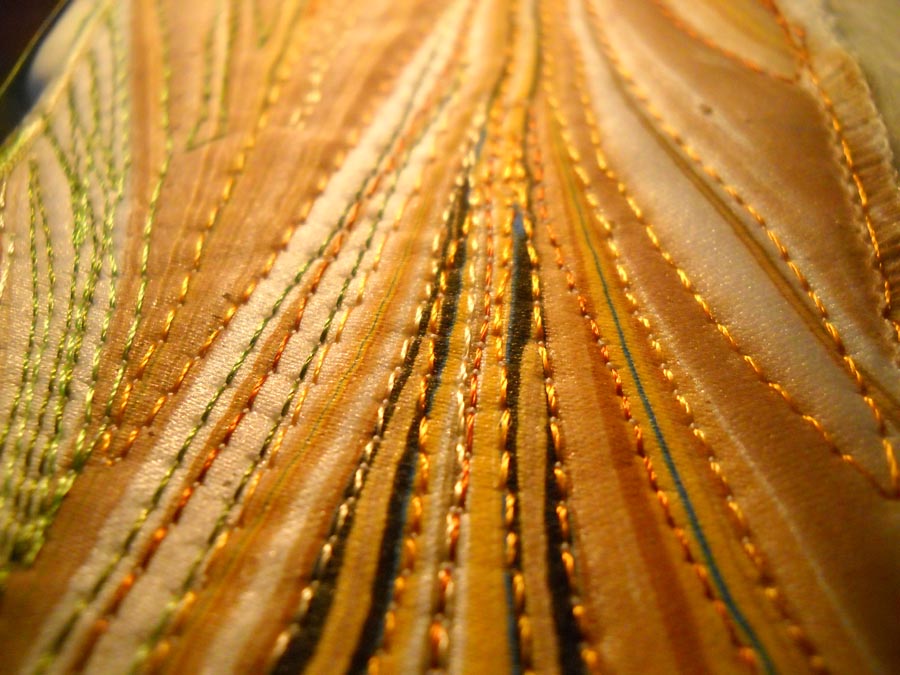
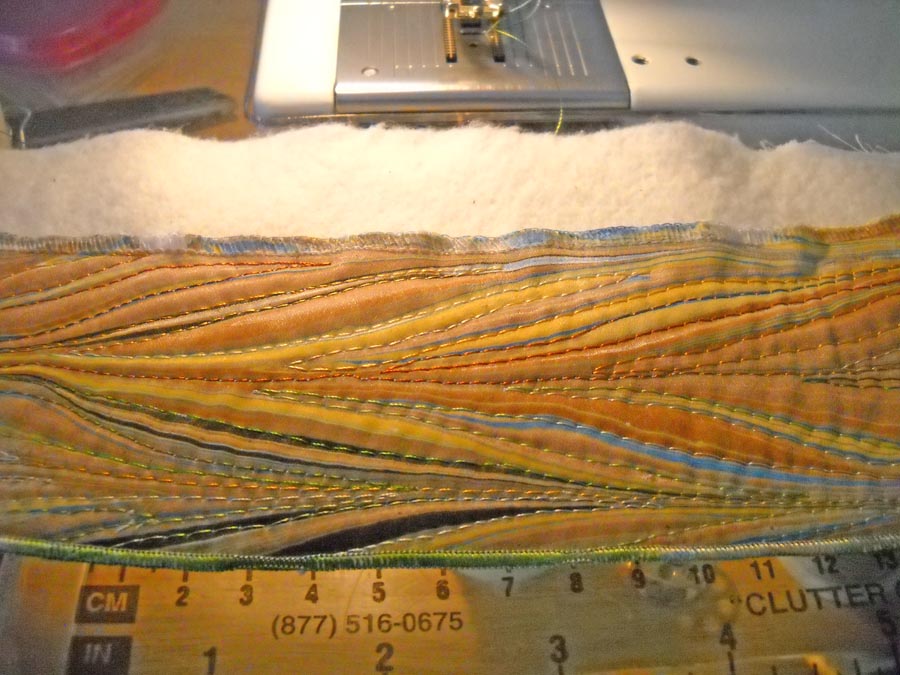
For today, here’s a close-up look at one of the bamboo strips (which I am aiming to finish by mid-August, as I want to enter it into an art quilt show with my “Ocean’s Bounty.”) You can easily see all the “lines” in the pattern and how I have followed the lines with a variety of different colored threads. The problem you might run into (as I have) is when to stop with the lines – you can get easily sucked in to quilting everything.
You can see the serged edge in this piece – which is how I usually finish these weaving pieces. I’ve learned over the years not to serge until I am finished with the machine quilting.
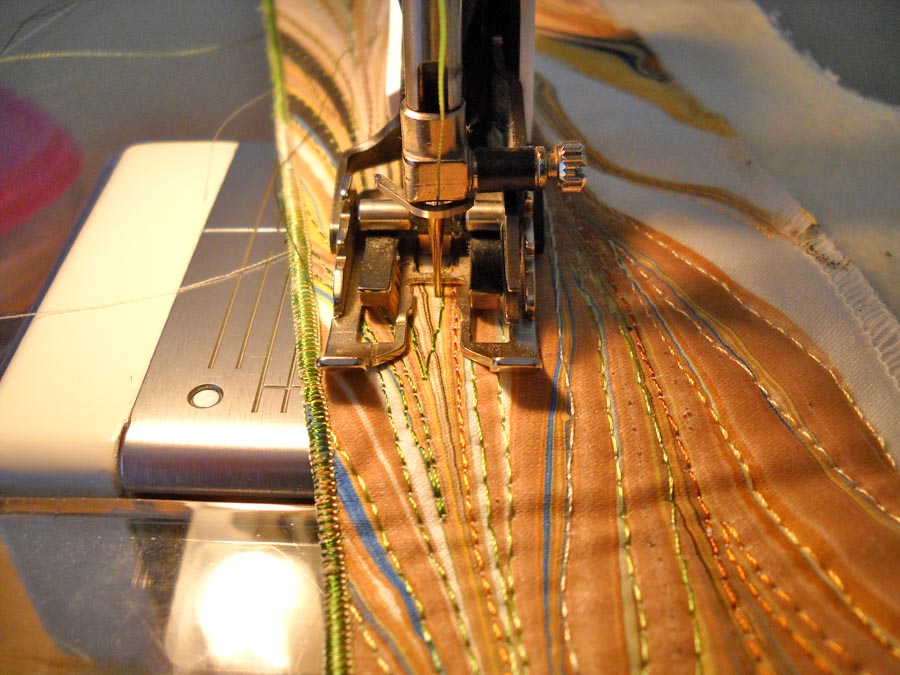
This is with my walking foot, but I’m not totally happy with the control with this foot. Because there are slight curves to these lines, I use my regular foot and am quite happy with it. I think this is probably a personal preference. I tried the free motion foot on this, but I didn’t have the control and even stitches I wanted for this design.
I have four and a half “strands” of bamboo finished at this point. I can quilt for a couple of hours, listening to some John Denver and just kinda zone…as I mentioned earlier this week, I am amazed at just how much I get done when I think a project will take forever. Now what probably will take forever will be the leaves. I’ve tried marbling some silk leaves – not happy with them. I am thinking some thread leaves, but they may not seem “sturdy” enough for this hardy plant. I do know thread leaves would be a great use of all my lousy threads I have hanging around. I haven’t broken any threads with some 6 hours of quilting – have I told you how much I love my Superior Threads?
If you would be interested in a tutorial on quilting marbled fabric, please leave me a comment and let me know. If you’ve got pictures of some marbled fabric that you have quilted, I would LOVE to see it.
Top Ten Tuesday – Organizing and Living Life
This has been a great week for goodies on the web. Great eye candy and inspiration.
* I subscribe to Dumb Little Man, and every now and then they have something that really resonates. This week it was “How to Adopt an Attitude of Gratitude.” The article is based off this quote from Tecumseh: When you arise in the morning, give thanks for the morning light, for your life and strength. Give thanks for your food, and the joy of living. If you see no reason for giving thanks, the fault lies with yourself. ~Tecumseh You can read the article here. Great words to live by.
* Speaking of Native Americans, I picked up a great book at Bien Mur, the art gallery at the Sandia Pueblo in Albuquerque called “Native Wisdom for White Minds.” This is full of wisdom from indigenous people around the world, set up as a saying a day, so you have inspiration throughout the year. The book is available from Amazon – search on the left (disclaimer – I’m an affiliate, so if you order, I get a few pennies.).
From today, July 13 – “Nature is the storehouse of potential life of future generations and is sacred.” ~Audrey Shenendoah, Onandagan writer
* “What’s Trite, What’s Not” from Existential Neighborhood by Jane Dunnewold. Jane is an amazing fiber artist and I was licky enough last year to follow along on her daily photo inspirations. Is life trite? Here’s a provoking thought: “And there’s the paradox. The activities that keep me centered, authentic, and real could easily be dismissed as trite. It’s all phrasing and context. How much outside influence have you bought into lately?”
* Making Mondays – and Your Week – More Productive. Well, who doesn’t want to! There are seven questions to help guide you to more productivity – all of them worth thinking about.
* Self-Inflicted Time Management from Time Management Ninja (great name!). If you have issues with any of the following, read this post!
- Missed Deadlines
- Late Fees
- More Work Due to Undone Tasks
- Lateness
- Disorganization
* The Myth of Multi-tasking from Productivity 501. I thought it was just because I was getting older – I really thought I could multi-task well. Age has shown me I can’t… “It turns out that humans are amazingly horrible at multi-tasking. Many people feel like they are improving their focus by multitasking when they are really doing the opposite.”This is a good read.
|
|
|
|
|
|
Monday Marketing – Art Fair Checklist
Two weeks ago I reprinted a post by Moshe Mikanovsky on preparing for an Art Fair. It’s a great post with lots of things to think about if you are new to doing art fairs. Here’s his Follow-Up Checklist. There is great information here based on his personal experiences. Next Monday you’ll read about the hanging systems he is using and is thinking about using. Enjoy!
My First Art Fair Checklist – Follow Up
by Moshe Mikanovsky
This article is by Moshe Mikanovsky, Regular contributing writer for FineArtViews. You should submit an article and share your views as a guest author by clicking here.
Wow! The time I had preparing and doing my first art fair was just amazing!
After writing “My First Art Fair Checklist”, I received many comments with some great tips, encouragements and well wishes. And it was well received. I felt that many of you were there with me, if not in presence, then in mind and spirit. I also had several visitors to my booth who commented on the previous blog post. That was awesome!
Ok, so now let’s get to business. Many of you were waiting patiently for my report about the show and how it went, so with no further due, here it is, my Lessons Learned:
Artwork
- I believe that my artwork spoke for itself. I received many excellent comments, so that was good.
- I didn’t sell anything though. Yes, I am not afraid to admit it, the same as I would not be afraid to tell you how successful I was selling million of dollars worth of paintings… I wish. Trying to understand though why I didn’t sell, I came up with a few ideas:
- My niche art didn’t fit most of the buyers. My art is based on religious subject matter or inspiration from my upbringing in Israel. Although I have paintings of trees and of the Zodiac, the other paintings might be a turn off for some.
- My unique style (which I did receive many comments on it) is still needs to be “understood”. Presenting for the first time, it takes time to build followers who not only like but also buy my art.
- Work on paper. I was told that people buy more art on canvas rather than on paper. All my art is watercolor on paper. I did have 4 small paintings in watercolors mounted on panel and covered with resin, which many people really liked, so I am thinking of creating more of these in the future.
- The show itself. Although the organization of the show was outstanding, I heard comments from other artists that were disappointed with their sales. One even told me that the show attracts many dog-walkers and baby-strollers and not the real art-buyers. But, I did see people buying art. So it might be only personal observation.
- Not enough marketing on my part. As much as I tried to market the show to everyone I know, only a few of my existing contacts showed up. I relied too much on the exposure of the new crowds that had never seen me before.
- Attraction of my tent. Although I really liked the end result of my tent, which you can see in some of the pictures I took, I did get some feedback from my mentor that my tent was “too clean” and not strong enough in a way of attracting people in. Maybe it’s true, I still have to think about it a bit more…
- People like to “find hidden treasures”. I saw how everyone loved sifting through boxes of matted artwork. The art that they didn’t see on the walls but had to go through in the box was hidden from them and attracted them. I will definitely try to have some in the future.
Tent
My tent worked out really nice! We did have prediction for rain, so I sealed the seams of my roof several days beforehand. I was very anxious about it, because I didn’t know if I did it right or not, but in the end, it was great. We only had rain at night between the two days of the show and water did not leak through, so I was very happy. One of my neighbors though had water leaking into her tent and she realized that the tent was not water resistant.
Putting up the tent and taking it apart was not too bad, although in hot and humid weather it was quite steamy inside. I kind of envied the artists who came to a ready tent that they rented. On the other hand, I saved few hundred dollars by borrowing mine and putting it up myself.
Although the organizers asked everyone to bring a white tent, several artists opted for other colors. Either they had the tents already or borrowed them. I still think white is the way to go.
Very important – before going home, always make sure that not only your tent is secure with weights in all 4 corners, but also all your neighbors on ALL sides are secure. And if they are not, insist that they don’t leave before they make sure it’s secure. Otherwise you might come the next day and see that your tent is standing nicely but the tent next door just moved a bit and maybe even collapsed on yours… So do yourself a favor, don’t be shy, befriend your neighbors, and insist that they do their job to make everything safe.
Display system
Hmmm, well, what can I say? As this was my most challenging item before the show, it was also most challenging during the show… Let me tell you why. The wire mesh I used was easy to install and looked quite nice. The problems started with the overnight rains and humidity in the air. The iron mesh rusted very quickly. At the morning of the second day I had to wipe all three meshes and the rust stains on the wall of my friend’s tent will never come off (we tried CLR but it didn’t work… maybe washing it somehow?)
I still got poked and scratched by the pointed edges of the wires.
The S Hooks had a mind of their own and it was sometimes a challenge to straighten the artwork. Drove me a bit crazy all the time, especially when it was windy and each painting was a bit tilted.
I saw many other excellent ways to hang the art. My next article will be dedicated for the other great display systems. It’s a topic that needs its own post.
Marketing
I handed out many business cards and postcards, so I am happy about that. I am sure I will have some returning clients for my paintings and/or my Giclee and licensed products (mainly the Ketubahs).
Many people looked through my portfolio, so I was happy to have it.
My little “marketing surprise” was the shirts my wife and I wore during the show. That goes to one of the discussions in the last article’s comments, regarding what to wear (professionally vs. fitting the crowds). I opted to do it like in trade shows – wear a white shirt with my logo and name, and my website on the back and sleeve. I also had a 3rd shirt on the table, which I put out for a drawing for all the people who signed my guestbook for my newsletter.
And speaking about a logo – the image of the Leo from my Zodiac painting was everywhere – my business cards, my tent’s sign, my shirt, the cover of my portfolio, and online it’s on my blog , newsletter and my avatar as well.
Other supplies
In addition to the list I published last time, I got some new items: 4 weights to secure the tent, work or garden gloves, first aid kit with band-aids and Polysporin, business cards’ and fliers’ holder, pouch for money and other valuables, bungee cords, camera, paint-pen to fix scratches on frames, measuring tape…
I want to thank everyone for their support. As a way of appreciation, I put together a checklist form, “My Art Fair Packing List”. Feel free to download it and use it for all your future events. And be nice, play it forward, and share with others.
Cheers
Moshe
———————————————-
This article appears courtesy of FineArtViews by Canvoo,
a free email newsletter about art, marketing, inspiration and fine living for artists,
collectors and galleries (and anyone else who loves art).
This article originally appeared at:
http://fineartviews.com/blog/20487/my-first-art-fair-checklist-follow-up
For a complimentary subscription, visit: http://www.fineartviews.com
———————————————–
Quilt is FINISHED!!!
It is so interesting to me that we can think in our minds that projects will take so much longer, and then we actually never get around to them, because we “don’t have the time.” That was the case with my Salmon Run entry and with Desert Heat. I kept thinking I was going to need more time than it actually took to complete the work the way I wanted it.
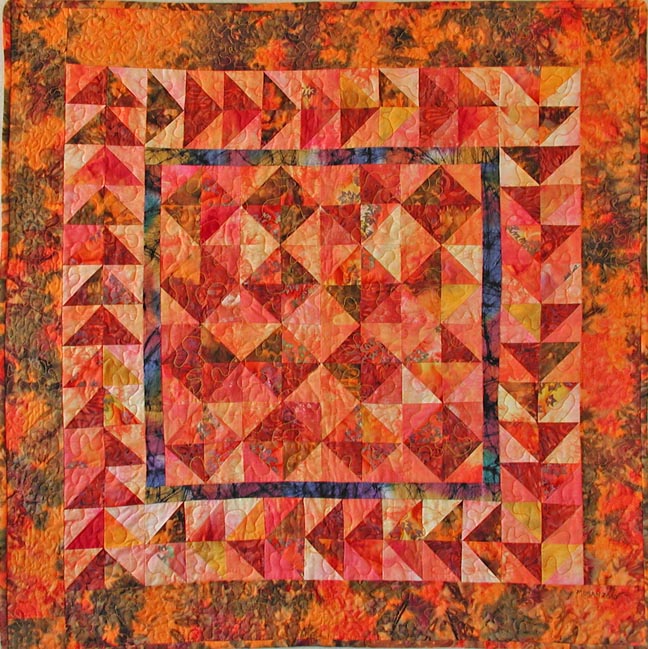
I made the commitment last night to finish Desert Heat – and I did! Binding and all, it’s now on our wall in our bedroom. What I particularly like about this quilt is a bunch of things:
* I used some of my first hand dyes, and you can’t really tell mine from the commercial ones.
* I experimented with a pattern and everything about it worked. I just started out sewing triangles because I wanted something mindless to do last summer.
* I learned that when sewing bunches of triangles like this, it is best to press the seams open for less bulk. That is probably the only thing I would do differently in remaking this quilt (I can see a “winter” quilt to change for the seasons…).
* I pulled colors based on how “hot” they seemed – turns out in the final analysis I did have a light, a medium, and a dark value without really thinking about it.
* The quilting worked perfectly – I only took out about 8 inches until I had the tension where I wanted it. I am getting much better with that – checking first before I sew a whole side….
* I love my new threads! I bought New Brytes in orange and yellow when I was at the School of Threadology with Superior Threads. I knew I wanted heat and bright – much like the desert in summer. I was given in my goodie bag a wonderful Rainbow of oranges, yellows, and greens that worked PERFECTLY in my border.
* Not once did I break any threads. I love the #90 titanium needles. And I LOVE Superior Threads!
* Perhaps the best thing abut quilting yesterday is that I think I am finally getting my quilting stitch length consistent. I have been going quite slowly with the machine quilting, so my stitches have been pretty large. I hesitated about going faster, as I can get clumps of thread if I move too slowly. Well, this time everything worked. I went faster and the stitches seemed to keep up with my movement of the quilt sandwich. So generally very pleased.
Here’s a close-up of the quilting. The center and first border have a very large stipple, as I wanted to try and get “the heat waves off the pavement” effect. It also helped to flatten all the triangle points. The quilting in the last border is a much tighter stipple, which seemed to make the quilt even “hotter.”
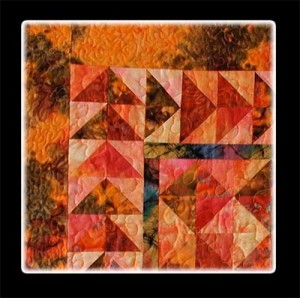 And now, the reveal (yup, too much HGTV….) –
So – anyone interested in a pattern? I am thinking of writing this up if there is interest.
I would love to hear thoughts about what you learn as you finish up quilts! We’re always learning – that’s what makes this so much fun.
Process, Process, Process
“I pledge to talk more about my processes, even when I can’t quite put them in the in words or be sure I’m being totally clear. I’m going to put my thinking and my gut feelings out there.” Check the Process box on the right side of the blog – this is a great idea – while I talk about process a lot, this should really help to keep me focused in the blog.
My Photoshop Fridays are always about process – how I came to what I’m doing with a particular picture. I haven’t talked that much about the process in my quilts, except occasionally on Work-in-Progress Wednesdays. I spent time today on a couple of projects, so I expect to be able to do some show and tell in the next few days. I am particularly happy with my Desert Heat quilt, done now except for the last 12 inches of free-motion quilting and the binding. I am very pleased with how this worked out. You can see its beginnings:
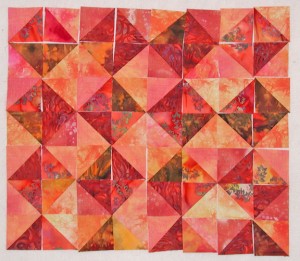 This is where I started last summer when I did my first hand-dyes. Then I started just pulling some stash fabrics to try and create a “hot” quilt to represent the desert. I am pleased to say it is certainly a hot quilt – the quilting lines remind you of the waves of heat off the cement and tarmac.
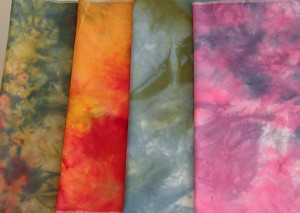 My first attempt at dyeing – in Desert Heat I used the orange-red fat quarter.
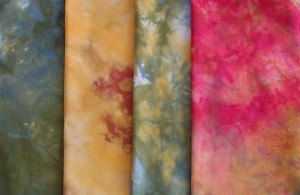 These are a little more pale than in actuality. I used the yellow and reddish one. In fact, I’m going to cut this short and go finish the machine quilting and cut the bias so I can show it tomorrow.
Then I have my lava quilt to finish – I gotta tell ya, sewing on little pieces of lava is tedious and tough! And then I want to get the straps on my purse, becasue after that it is back to the bamboo quilt – I want to enter that into a show whose deadline in September 3. I should have plenty of time…before schools tarts again….and marketing….Linda – go quilt!
Photoshop Friday
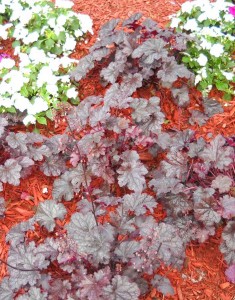 This is the original of a photo I snapped on vacation while at the Boston water front. Since it’s been 16 years since I saw east coast flowers (and trees and water…) I was snapping pictures of everything. I loved the purples in these flowers, and it is my desktop wallpaper now.
But – I knew when I took the picture that I would be playing with it in Photoshop. I haven’t done much playing around just for me, as I have been working on a licensing presentation and the issue of repeats, so my work has been focused in that direction. But it’s Friday night and I want to have a bit of fun. As I usually do, I applied a bunch of adjustments and filters just to see what would happen.
One of the tricks I have learned is to make a selection of various parts of a picture and jump it to a new layer. I get a very rough edge, raw kind of look that I really like. Here’s where I went next:
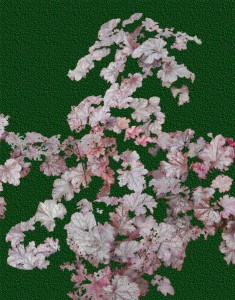 I cropped the photo, tried to look at a heavier bottom, and changed the background with a couple of filters. You should be able to click to see this larger. The darker green (after trying about 8 other colors) has three filters to it, including the sponge.
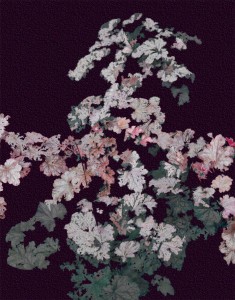 I was playing with hue and saturation for each of the sections of the plants. I’m thinking this looks pretty ethereal, which is how I like a lot of my plants (especially cactus…).
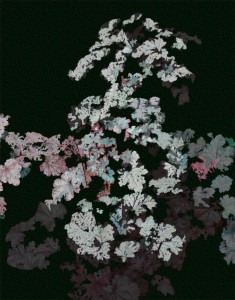 This is continuing to play with the hue on other levels. I like the additional green in this and the fact that there is a more distinct background and foreground.
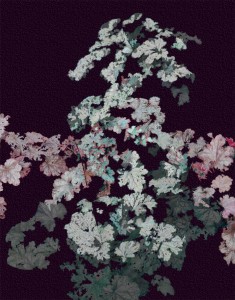 Another variation, but i think I like the one before this better, although this is not bad.
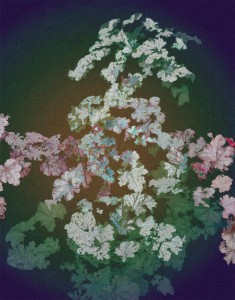 This is with a radial gradient, which givs it a very different feel – emphasizes the pink and to me gives it a distinct Asian feel.
There’s something to be said for each manipulated shot. Which one speaks to you? Which one would you like to see as a piece of stationery or a print? And…ideas for a title?
DON’T FORGET – You have till July 13 to sign up for our newsletter (link at the right) and be entered for our drawing of marbled goodies:
* A remnant package of 100% pima cotton, hand-marbled with assorted colors and patterns – 6 pieces.
* Three postcards for mixed media collage of digital marbling (TN).
* A few pieces of marbled papers, again for collage.
* A 10% Off coupon for anything on our website.
* A Polynomial Quilt Pattern, which would make a great present for the math teacher in your life, if not for you!
* 14 small pieces (about 2 x 5 inches) of some heavy-weight colored (not marbled) silk, again for collage or some crazy quilting or piecing – it’s all for your imagination!
* A set of digital marbled notecards (four cards, with envelopes)
SO SIGN UP!!!!
Thursday Thoughts – Giving Back Through Blogging
I discovered – probably way later than most people who use Google Reader – that I could much easier keep track of the blogs I follow and the new entries. There are some times when I can be really slow…like realizing just what they mean by scrolling through the RSS entries and updating immediately. That said, there was a really interesting post today from Problogger, whom I have been reading for over a year, and I am finally putting a lot of his suggestions to work. You can find the full post here, but the title was very thought-provoking: How Do You Give Something Back With Your Blogging?
Now if you’ve been following lately, you know that I am spending a lot of my summer vacation working on building my art business and all that entails. Blogging is a way of driving people to your business. But for me blogging has turned into a way for me to reflect, in that I never really cared for journaling. But I don’t want my blog to be soley a business tool. I like to think I give something back….
I’ve met some wonderful people in over 400 posts on this blog. As I started to correspond by comments, I was able to answer some questions about marbling, commiserate with school issues, help out with math problems, send sympathies, and send out goodies. My high school sweater from Sterling High School in New Jersey is nearly 50 years old, and it went to a new home at El Milagro Studio last year to become part of a felting project…and something about the colors of the Toronto Maple Leafs……It has a new home and new life – a repurposing, as they say on HGTV.
For someone who has always been quite the introvert, blogging has given me a wider window into the world, and I love being able to chat around the world. I have gotten so much more – amazing writing, wonderful art in its stages, other intriguing art fields, food for my love of history. Do I give back enough? Probably not, but I do appreciate each and every interaction with readers, and I promise to be much better responding to you.
So – how do you give back through your blogging? Leave me a comment.
Check out this post for our give-away – you have till July 13 to become a subscriber and get a chance to win a lot of marbled goodies.
Work-in-Progress Wednesday
I think one of the biggest challenges we face as artists and business people is making sure our art doesn’t suffer, that we continue to create. My summers away from school usually lead to one big new piece being finished, and this year it will probably be my bamboo piece. But right now I am finishing up some small pieces to go in my soon-to-come Etsy shop.
This is my lava piece, which is not from marbled fabric, but was part of a group challenge a couple of years ago.
Originally I didn’t do any background quilting beyond the whitish streaks, but the more I looked at it over the years, the more it felt like it wanted additional quilting. So I free-motioned the whole background, so it would look like rougher solid lava. Then I thought it was done….but now I want to add more lava, and as I was looking through my beads and stones, I realized I have some actual lava pieces I bought at the gem show. I will add that around the piece to represent more of the rougher hardened lava.
This piece originally came about because of a quote I had read concerning the volcanoes of Hawaii: “Seeing lava that has traveled from the center of the earth to the ground at your feet is something that speaks to the soul.It is the most basic of things. The creation of earth unfolding before your eyes. Each person has their (sic) own reason for wanting to see this awesome power of nature. For some, it is the scientific aspect that fascinates and confirms. For others, it is simply creation unfolding before their very eyes.” This from Gloria Hopkins in her article “Photographing Hawaii’s Lava Fields.”
If you have stood on the rim of a volcano, walked a hardened lava field like some of the beaches on Maui, or watched the lava creep across the road on the Big Island, then you know what a spectacular sight you are witnessing.
On another matter, check our yesterday’s blog for details on our Give-Away of marbled goodies. You need to use the Subscribe button to the right here to add your email address for our monthly newsletter. You have till July 13 to do this before we use the random generator to choose a winner! And – there is a big coupon coming in this first newsletter, so sign up now.
GIVEAWAY!!!!
GiveawayGiveawayGiveawayGiveawayGiveawayGiveawayGiveawayGiveaway! I’ve done 400 Blog posts – who knew I could keep going this long! I hated journaling as a kid, but with the advent of the computer, my writing took off. Now I love keeping track of and processing life.
When I started, the blog was solely a place to record my Photoshop work, as I was taking an online class and needed a place to dump my work. I started January 20, 2007, and I was so pleased with my ability to even set up a blog to begin with. And…if you’re interested, you can see the very first thing I actually created with Photoshop here. I periodically go back and look at the earlier posts to remind myself (when nothing seems to be working in Photoshop) that I really have come a LONG way.
These are some of my more favorite posts:
Absolutely Fabulous Glorious Day
My Wonderful Seventh Grade Art Class
Over the years I have met some wonderful folks through blogging and the accompanying social media, for which I am very grateful. Staying in touch with other creative souls is such joy. So to say thank you, hubby and I have put together an assortment of goodies, most related to marbling, but the occasional nod to the math geek in me.
Now to be eligible for the giveaway – you need to subscribe to our new newsletter. I am exploring a brand new format to our monthly newsletter (which has been “yearly” for the last three years), complete with pics and video about marbling. Subscribe and I promise you won’t be disappointed (and if you are, you can unsubscribe…). Just fill in your email on the box to the right of this entry. You have till July 13 to subscribe, and then I will use the Random Generator to choose a subscriber. Feel free to let others know about the giveaway.
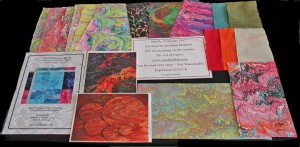
Now let me explain what you could receive (and the pic is just a sample – not everything is photographed):
* A remnant package of 100% pima cotton, hand-marbled with assorted colors and patterns – 6 pieces.
* Three postcards for mixed media collage of digital marbling (TN).
* A few pieces of marbled papers, again for collage.
* A 10% Off coupon for anything on our website.
* A Polynomial Quilt Pattern, which would make a great present for the math teacher in your life, if not for you!
* 14 small pieces (about 2 x 5 inches) of some heavy-weight colored (not marbled) silk, again for collage or some crazy quilting or piecing – it’s all for your imagination!
* A set of digital marbled notecards (four cards, with envelopes)
So – it’s up to you now – the count-down to July 13 begins….sign up and spread the word!
Creativity – When Does It Strike?
Sometimes creativity hides in the closet, buried beneath all those boxes of supplies and half-completed projects. Sometimes you are so focused on other business-related things that creativity is lost from view. I’ve spent so much time over the last two weeks working on business-related tasks that I haven’t made anything, art or not. So this weekend I took a break from the computer.
Friday was my birthday, and our local quilt store gives you a discount that is half your age. So I bought a new book for inspiration, and of course a bunch of fabric. I saved the equivalent of another book, but couldn’t quite convince hubby of the benefits of my buying yet another one….
I had been in the store on Wednesday, and when I realized I would be entitled to a birthday discount, I put the plastic away and waited. In those two days I decided exactly what I would do with that set of 16 fat eighths all in blacks – I needed a new purse, and I already had the clothesline, so I could wrap my way to a new bag…which is what I did on Saturday and Sunday while watching television.
Wrapping clothesline is very satisfying, as you watch the pile of rope build up. Sunday morning I headed to the sewing machine to start framing the bag. I used a beginning measurement from the pattern book and I was on my way. I don’t want anything fancy, just something different from the same-ole same-ole black purse I carry. At this point I have the bag almost to the height I want it, and now I am thinking abut finishing it off, what to use for handles, and how to make the shoulder strap. And it feels good to be at the sewing machine again.
This was an important lesson. Since I make art, and that’s what makes my heart zing, I need to make sure I don’t let all the “other stuff” get in the way. Yes, I am trying to build my business this summer, by getting updated web work and marketing plans done before school starts again, but I can’t let a lot of time go by – I have to at least take some time each day – even if it’s only wrapping clothesline in front of the TV – to make sure I feed that part of my soul. Plus – I wanna carry the new bag….
TOMORROW – POST 400! GIVEAWAY!!!!
Thoughts for a Thursday – Marble-T Design
While on vacation, hubby and I had plenty of time to talk about our marbling business and how we wanted to proceed. Readers of this blog know we went through some very difficult times as we had problems with marbling: nothing worked – water, paints, fabric finishes – nothing. Prior to this time we had an active business, with a mailing list of about 300 people, and a list of products that sold each month fairly well. Once the art problems hit, at the same time I changed jobs, and time became a real premium.
Fast forward to now, and I am spending lots of time reading and researching how to build our business. About two weeks ago, on the road in Tennessee, I had one of those “2 by 4 on the head” moments, when I realized that everything the internet marketers tell us we have to do to build an online business we had been doing years ago. So I have been spending time updating, revising, incorporating social media (which wasn’t around when we went online in 1998…). I have learned a HUGE amount, I have loads more to do, and most importantly, I am having fun, as well as meeting lots of new and interesting people. I am glad that I am on summer vacation right now, and I don’t need to take classes or teach any remediation, because building this business is taking a lot of time.
So what does an art business need? We have a website that has gone through several versions since 1998 when the learning curve was EXTREMELY steep. It has again been updated by our amazing web designer Suzan at Saltwater Systems to reflect new fiber work, some of our digital work, and some new products to be released within the next two weeks. It is now easier to sign on to follow our work through our newsletter.
We did a lot of work off the website way before blogs, but blogging makes it a lot easier to update and refine offerings. Plus, I like being able to write about and reflect on new work, especially as our digital marbling (TN) increases. Now on our blog, Marbled Musings, you can follow updates to the blog, as well as sign up for our newsletter.
Social media has mushroomed. I’ve been on Facebook for about two years, and I have loved getting back in touch with former colleagues and students, as well as meeting and reconnecting with other artists. I am learning about Fan Pages and am just beginning to experiment with one. If you are interested, sign on to follow Marble-T Design on Facebook. Pretty soon we will have a button you can just click.
Now Twitter….this is really interesting. My students make fun of me for being on Twitter, but I tell them I am way ahead of them in this piece of technology, especially when it comes to business. I am not always logging on with information about what I am doing, but I do enjoy the resources that are posted. Following the NY Times arts columns has led to some great artists. If you’re in to Twitter, you can follow me @ArtsyLindaMoran. (And there wil soon be a button….)
Have I made any art lately? No, and that is by far the downside to building a business and doing the necessary marketing. I worked on a few pieces before I left for vacation, and there is time next week built in for working on art. My goal is to have the business running smoothly within the next four weeks, and then I will carve out the art time throughout the school year – a tough task as any artist knows who has to share creativity time with the job that pays the bills.
I am very interested in what all of you do. Comment about how you’re building your business, what you have found that works, and anything in particular you know HAS to be done. Love to read your comments.
AND….giveaway this weekend with Blog Post 400 – I promise you it’ll be a good one!
PS – a popular post about Martha Stewart and her “marbling” – this ran a year ago as we were just coming out of our hard times marbling, and I was incensed at how she tried to put her spin on this ancient art!
Top Ten Tuesday – What’s New on the Web in Marketing
This has been a really productive week for marketing – mostly all the lose ends that we need to do to move our businesses forward. I haven’t had a lot of time for art-making this week, as my goal for the end of June and July is to do everything on the “list” to have the business ready to go for this coming holiday season, before teaching starts again in August. Lots and lots of thinking has led to this point, and now I actually have the time to do these things! That said, here’s some cool stuff I have stumbled on this week on the web as it relates to moving our art along.
* The World of Apple – “Invincible Apple: Ten Lessons from the Coolest Company Anywhere.” I have been an Apple user since 1989, and I’m on my 4th Apple (I make them go a looonnngggg way). This is a look at how Jobs and crew – mostly Jobs – makes the Apple brand so powerful.
* Tara Reed is an expert in art licensing. This is a listing of her ezine articles for those of you interested in looking into licensing. She has loads of information to help you navigate a HUGE field. Here’s her website for more information.
* Lateral Action – creativity plus productivity equals success. Here’s a recent post on things you Do and DON’T need to sell your art.
* All Art Licensing – again, great info if you want to look at licensing your designs. J’net Smith made Dilbert a phenomenon.
* Blurb – a great way to make a portfolio of your work, plus loads of ways to get marketing materials based on your own designs.
* Problogger 52 Blog Tips to Kick-Start Your Blog – good all year round, if you’re having problems getting your blog off the ground.
*Art Calendar A must for any artist – see what’s new in shows and opportunities.
* Social Media Examiner – Your Guide to Social Media – sign up to get the Twitter tutorial, which is extremely helpful.
* 100 Best Places to Appreciate Art Online Galleries, Porffolios, artist sites – look at what’s new in the art world.
Number 10??? What have you discovered this week on line that could help your marketing? Let me know!
Monday Marketing – An Art Fair Checklist
This is a guest post from Moshe Mikanovsky, who has written a couple of posts for FineArtViews about preparing for an art fair. It has loads of great information in it, so enjoy! And then, check out Fine Art Views – great information.
My First Art Fair Checklist
by Moshe Mikanovsky
This article is by Moshe Mikanovsky, Regular contributing writer for FineArtViews. You should submit an article and share your views as a guest author by clicking here.
I am doing my first art fair in a few days. Yes, I have done a lot of online marketing efforts in the past, but I felt that it was comfortable enough to hide behind a computer in the virtual world, but now it was time to get out of my comfort zone, and expose my art, and myself, to the real world. So, in the past six months I tried to exhibit in as many art shows as I could; some I got in and some not. And for this summer and the season of outdoor art fairs, I was accepted to one of the shows.
But now that I am actually in, it dawned on me that I know close to nothing about the preparations for such an undertaking. I have walked many shows and saw what other artists are doing, but from looking-at to actually doing it, there is a big difference.
So the first place I looked for information was, of course, the Internet. My searches, surprisingly enough, didn’t bring me the amount of information and blog posts that I was expecting. I am not sure why, as there are many artists who participate in hundreds of such event on a yearly basis. I did find couple of good posts, and some suggestions, mainly on art forums. I also went to an orientation meeting at the Artists’ Network, the organization that runs the show, and had a chance to learn and get many excellent tips.
Here is a quick summary of what I learned. I hope it will help other artists who are planning to do it for the first time. I am also looking to hear from the more savvy art-fair artists about their experiences. Given the fact that I am writing it before the show, I am probably missing a few things. I will write another post after the show, and see how it will differ from this one…
Artwork
*After debating how much work I should have, I opted to bring between 20-30 paintings, in different sizes. This way I hope to have enough to hang on the walls of my tent (see below), with some extra if (and when) I sell some of the work. My paintings are not very large, so I have enough room for 5-10 on each wall. Different sizes will have different price tags, catering to varied buyers’ budgets.
*One of the best pieces of advice I gotten is to keep all the art work similar. This way, the visitors will “understand” me as an artist and things will make sense to them. This made the decision on which paintings to bring easier – I picked the style I am mostly known for, and for which I am recognized, and everything that doesn’t fit this style, I am leaving behind. As much as I want to sell some of my other work, I think it will hurt my display rather than help it.
*In the same logic, I framed all my artwork in the same frame profile and color. No mix and match, just one simple black frame. Looks very sleek!
*I wanted to sell also Giclee prints, but after checking with the show organizers, I realized I can only show original paintings. I was a bit disappointed about that, but I have a plan! I will market my prints, especially those that the original artwork is on display. More details below in the Marketing section…
Tent
*The tent had to be white and 10’ x 10’. The color is very important. I have seen in the past, darker tents and the experience in them is terrible. First, they feel like a cave and on hot days it’s even worse. Moreover, the color of the tent changes the color of the art! And no one wants that, right?
*Being on a tight budget, I opted to borrow a tent from an artist friend rather than buying or renting one. If I didn’t have budget restrictions, I would probably rent one, just because it’s my first show. So I prefer to see first if I like it or not, and after that, if I decide to go to many others, to invest in a good tent.
*It was important for me to practice putting up the tent. I have about couple of hours to set everything up on the morning of the first day of the show, so I need to make sure I know what I am doing. So I asked my friend to show me how to put it together, and then I did it again at home, in my back yard.
*The last thing is preparing for rain. I hope and pray for beautiful weather on the show’s weekend, but we have to be ready for every eventuality. All tents are NOT waterproof. Their fabric is usually resistant to water, but the seams can leak. To prepare them, I have to use a seam sealer (purchased at a local Canadian Tires in the camping department). Now, I am waiting for the last minute with this… Not sure if it’s smart or not, but my plan is to seal the seams (on my friend’s tent) once I know the weather forecast.
Display system
*Here, I had the hardest time to find a way to present my artwork nicely and still on a low budget. In the end, I found on one of the forums a suggestion to use concrete enforcement wire mesh. These are sold at the hardware store (like Home Depot). I got 3 of them, each is 4’x8’. I will hang each on a wall frame using white twine. At first I thought to spray paint them white, so they will blend more with the white tent, but eventually I decided to just keep them in their original dark-gray metal color. The only thing I did was to cut their extra wire on all ends, about 2 inches on each wire. These just stick out and I’m afraid they will poke someone’s eye…
*To hang the paintings on the mesh wire, I will use S hooks. When I built the tent in my backyard, I mounted one of the meshes, and tried everything, and it works!
Marketing
*There are a few things I printed for the show: Business cards (with my logo image, all contact info and websites), postcards, and a sign for the tent with my logo.
* I prepared few clear acrylic free standing frames, bought at the dollar store, with some images of my prints, licensed products, commissioned work, etc.
*I made a portfolio with my CV, artist’s statement, printed articles from local press, list of printed work, images of all my licensed artwork and prints, and all other art related services I offer. I also included a blog post that details my inspiration for the style of artwork I am into. This is a full package that anyone interested can browse, and get more details about me. I could have done it also with a laptop and have my website and blog on, but no access to power supply, and a short battery time on my laptop, will make that a problem.
*I have another marketing idea I am playing with, but I am keeping it a surprise for now. If I end up using it, I will tell you all about it!
*I also got a nice guest book, can’t forget that! Good advice is to put titles on each page, directing people for the information I want them to fill – their name, email address, and comments.
Other supplies
Wow, there is so much under “other supplies”… My packing list is quite long. A few of the things I have in it are:
*Comfort – hat, sun glasses, sun block, hands sanitizer, headache medicine (hopefully I won’t need that!), water, snacks, change of clothes, high chair (don’t use a low one, better to be high to keep eye contact with potential buyers), Kleenex.
*Paperwork – sales permit, receipts pad, credit card processing paperwork (luckily, as a member of the Artists’ Network, I can use their service for Credit Card processing), some cash money, calculator, price list and price tags, pens, notebook.
*And some more: table and table cloth, trolley, bubble wrap to wrap sold paintings, duct tape, masking tape, scotch tape, scissors, cutting knife, safety pins, garbage bags, Windex and paper towels.
Did I miss anything? Probably. Quite a lot of things to arrange!
So wish me luck! And share with me your tips from your experience. And if you are in Toronto, I would love to see you at the Riverdale Art Walk.
Cheers
Moshe
———————————————-
This article appears courtesy of FineArtViews by Canvoo,
a free email newsletter about art, marketing, inspiration and fine living for artists,
collectors and galleries (and anyone else who loves art).
This article originally appeared at:
http://fineartviews.com/blog/20107/my-first-art-fair-checklist
For a complimentary subscription, visit: http://www.fineartviews.com
———————————————–
The Joys of Traveling – Vermont
Everyone should have the opportunity to travel across country at least once. This is my second round trip – coming out in 1989 and then again this summer. I’ve traveled one-way twice before, but doing the round trip on different routes is special. This time was very interesting, after 16 years in the desert with very little water and green trees. We realized just how much we are New Englanders and small town folk. We really missed the small town America of New England – small main streets that are still viable, great architecture, loads of fields and lawns and grass and forests.
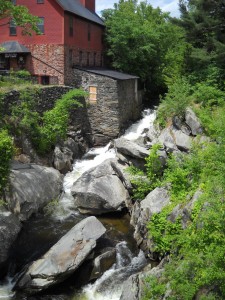
Jericho, Vermont is hometown to hubby’s family ancestors. The Brown family settled the area, thinking they were in the Stowe area – wrong side of the mountain. There’s the Browns River, Browns River Middle School, Browns Trace (a road), and so on. The mill on the left houses the genealogy of the family, as well as the repository of the work of William Bentley, otherwise know to the world as Snowflake Bentley. The Jericho Historical Society maintains the mill, the craft shop, and the small museum. They have been publishing reprints of Bentley’s snowflakes, which are absolutely beautiful. There are only two mills left on the Browns River, and this is designated a historical landmark.
This is a common photo, as you can see from Waterfalls of the Northeast. I do plan to print this out larger and get it framed as a reminder for me of this gorgeous area.
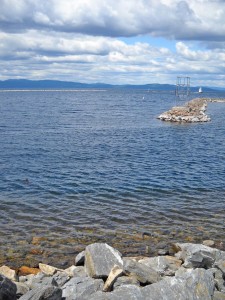
It was wonderful to see Lake Champlain again, even in the rain – which we don’t get that often in the desert. This is one of those pics when my telephoto actually worked really well – I didn’t expect to get the actual rocks under water.
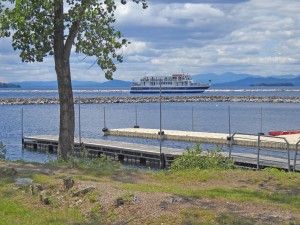
Ferry service doesn’t seem to be running to Plattsburgh from Burlington, although it could be most of the service has moved to southern Vermont, since the bridge was destroyed. Now it’s mostly party boats.
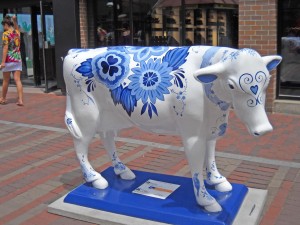
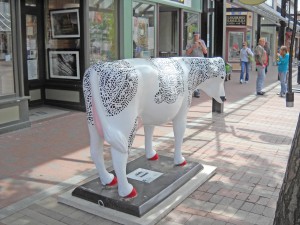
We used to joke a few decades ago that Vermont had more cows than people. Not true anymore, but Vermonters do love their cows! Instead of the Painted Ponies out here in the desert, we have Painted Cows.
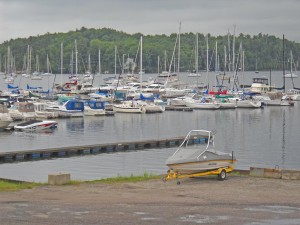
It was gray and rainy when we started around Mallet’s Bay, in honor of hubby’s folks. Every time we take a Sunday ride, we call it “going around the bay,” even though there is no major water here for some 150 miles. But my in-laws would always do this, as would we, when we lived in Vermont. It’s prettier with sun, but it is still glorious to see all that water, remember sailing on the lake, ferry rides in the Islands (especially during the winter), and the many camps on the shores.
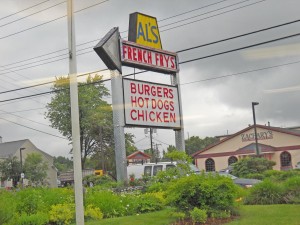
The hot dog guy had left the bay area, so no Michigan’s, but- Al’s French Fries is still going strong…but not nearly as greasy adn good as we remembered, so I think Al’s has gone healthy…..
Lots more to come for a great trip east and back!
