Archive for the ‘quilting’ Category
Our Own Art Educations
 Like so many of you, I am a regular reader of Robert Genn’s Twice Weekly Letter. This latest one looked at the traditional master-apprentice role in the arts, and I was particularly taken with some of the thoughts, especially since marbling has always followed this road. Apprentices worked with masters for years, learning and absorbing every trick and skills through watching – and later on by doing.
This made me think of how we get our own art educations, a topic near and dear for so many of us. I’m self-taught in virtually everything I have done artistically. I would hazard a guess that this is true for most of us baby boomer women. We were encouraged to go into paths that would support us or provide for families, with little thought as to what would make our hearts sing. As we’ve gotten older we have become more expressive.
Self taught. It seems to be fine in so many fields to say you are self-taught – tutored in life. But not in art. At least for me, I still feel intimidated when I see in a CV of someone in an art show all their schooling and formal coursework in the arts. My own art education early on consisted of a few art projects in elementary school and then a “class” as an elective in high school where we churned out particular projects. But nothing in creativity. Which ties in to a recent article in Newsweek on the dearth of creativity in modern classrooms and education.
I’m rambling, I know. But I’ve had to learn how to be creative, to break through the “OMG, what will it look like?” phase of making art. Would working with a master have helped this? I don’t know, but it probably wouldn’t have hurt any.
Who are our masters in the arts today? From whom do we study and learn? Enter the Internet, the cheap equalizer to getting an art education. The joke in our family always was that if my dad wanted to learn how to do something new, he would read a book. Well, I got that gene. I read everything I can get my hands on if it’s something I am really interested in. But that can get to be expensive, although still cheaper than a formal education or coursework.
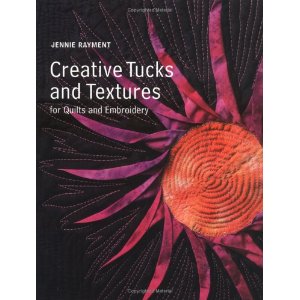
The internet has opened up huge resources for us. I started on TV with Sewing with Nancy and Eleanor Burns and Kaye Woods. I picked up all kinds of hints – and reasons why something I was already doing (through guesswork) wasn’t working. Like many of us, I have taken workshops when I can afford it. Jennie Rayment and her muslin creations still stick in my mind – such possibilities for texture!
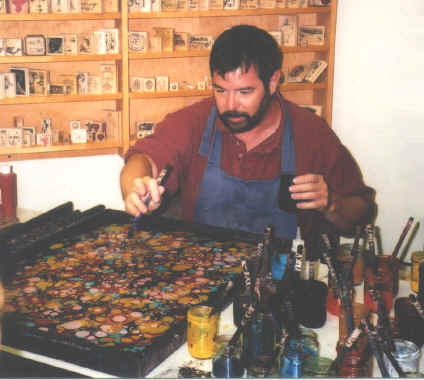
The first professional workshop on marbling was with Galen Berry (over a year ago) and it was wonderful – lots of questions answered, problems solved, and energy renewed. We started to zoom ahead in our skills.
Then I went to the School of Threadology with Superior Threads. Yes, I know I rave about their threads, but the professional education I received over the three days with Bob and Heather Purcell was priceless. My work has taken a dramatic turn for the better – and I don’t break thread anymore….
Now I’ve discovered Interweave and their dvds on quilting and other artistic endeavors. Better than a book because I can see things actually being done.
I watched a leaf tutorial by Heidi Lund and already picked up a bunch of hints to try something totally new for my bamboo piece. Carol Taylor’s video on her Arc-i-Texture techniques had me making a new quilt last night to try out the ideas…and I must say I’m loving it! And Susan Brubaker Knapp’s video on machine quilting corrected a whole bunch of errors I have puzzled over.
And of course we can’t forget YouTube. I have been devouring and studying very closely the wealth of marbling videos on line.
So my question to you is: What’s the best professional development you’ve ever attended – the one that has changed how you do your art? I want to know!
PS – all of these recommendations are unsolicited – they’re just stuff I have learned from and appreciate – nothing comes to me as a result of you checking these out! (OK, FCC – happy?)
Work-in-Progress Wednesday
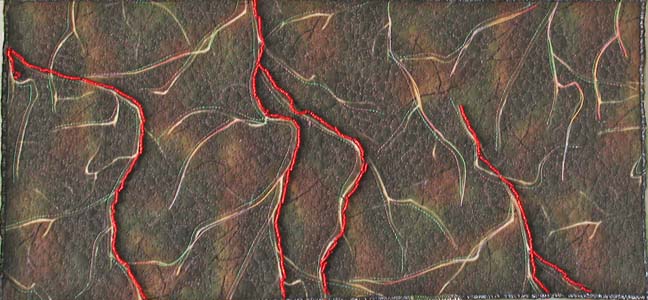
I have to say, I have been busy. I originally was thinking nothing was going to happen art-wise in July because of so much work on the business. I was wrong…the last week has been incredibly productive. Last Wednesday I wrote about my lava piece just telling me it really wasn’t finished. Here’s last week:
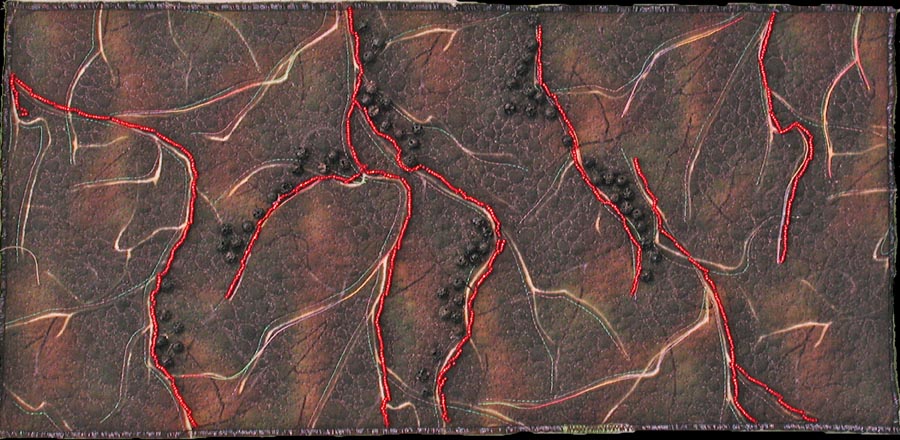
And here it is now, since it told me it was “finished:”
Turns out it needed actual lava – those little round pieces are actual chunks of lava I collected over a couple of visits to the Tucson Gem Show each February. I also added more lava flows, and nothing really interferes with the quote on the back. This is going to go up in the newly-developing Etsy store.
My “purse” didn’t make it as a purse…I loved the play of the fabrics together, but I couldn’t get handles to work the way I wanted them to…so now it’s a nice new basket for collecting fabric scraps.
If you were reading on Sunday, you saw the finished “Desert Heat” quilt, now on the wall in our bedroom.
Now I am working on my “bamboo” quilt, started about 5 years ago with a piece of marbled fabric in the chevron pattern. One of the things I like about this quilting is that it is very zen-like, in that you can just follow the lines of the patterns. You can see the original piece of fabric here. You’ll see what I mean about the lines of the pattern.
As I was quilting yesterday, it occurred to me to take pictures of the process, and then that led me to think about putting together a tutorial on quilting marbled fabric. There is an interesting story behind the quilting. Years ago I pretty much just put marbled fabrics with blacks, as I wasn’t sure at all about my color sense. I did slowly branch out, but it was Quilt artist Ellen Kohen who took a piece of fabric and quilted it. I knew there was more I could do with the fabric, but I wasn’t sure how to approach it. Once I saw what Ellen had done, I was hooked, but it took confidence to start the free motion needed to accent these patterns. Starting this Sunday, I’m going to introduce “Sunday Stories,” and I’ll take a look at the story behind each of the pieces in my gallery on the website.
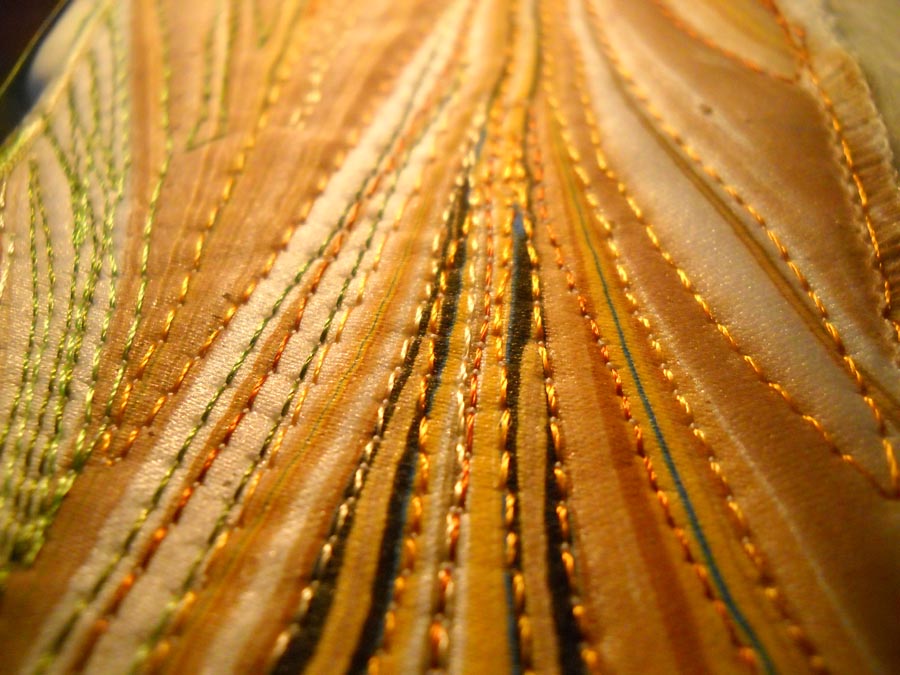
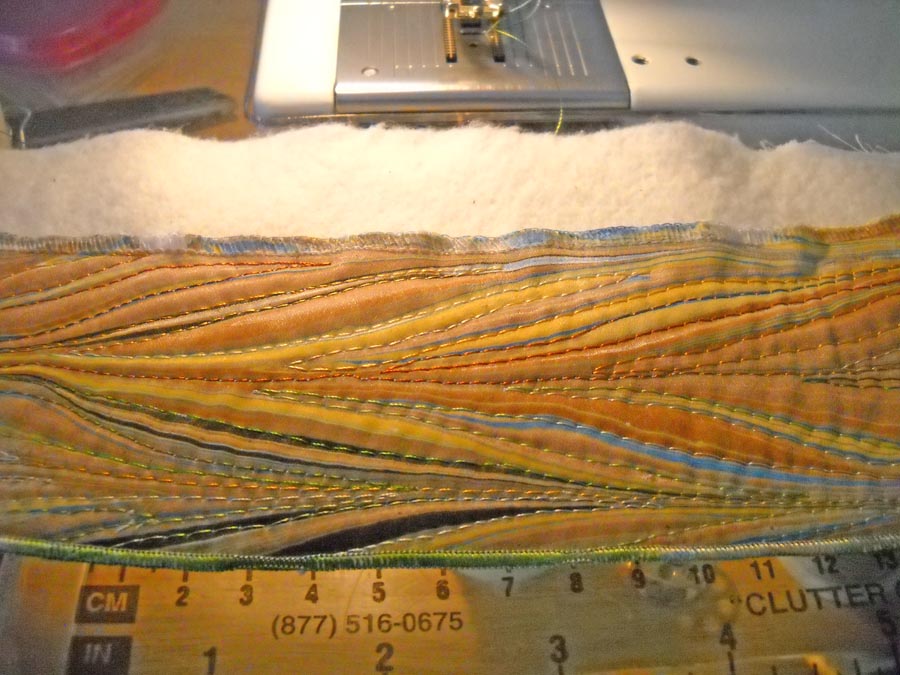
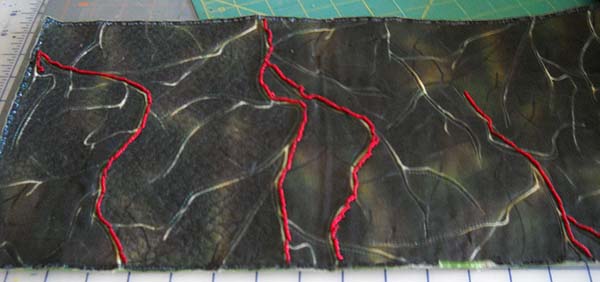
For today, here’s a close-up look at one of the bamboo strips (which I am aiming to finish by mid-August, as I want to enter it into an art quilt show with my “Ocean’s Bounty.”) You can easily see all the “lines” in the pattern and how I have followed the lines with a variety of different colored threads. The problem you might run into (as I have) is when to stop with the lines – you can get easily sucked in to quilting everything.
You can see the serged edge in this piece – which is how I usually finish these weaving pieces. I’ve learned over the years not to serge until I am finished with the machine quilting.
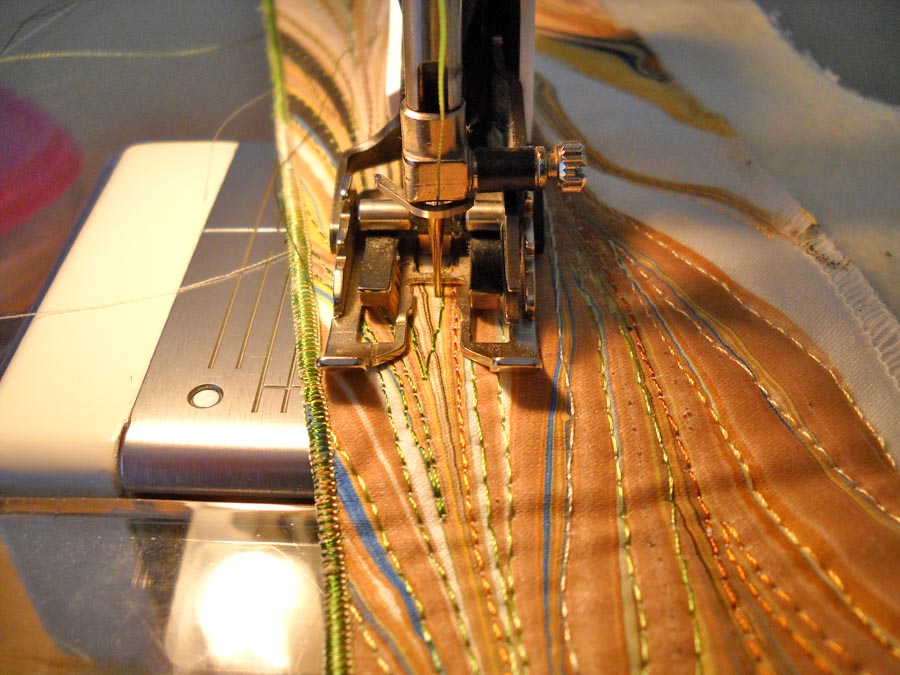
This is with my walking foot, but I’m not totally happy with the control with this foot. Because there are slight curves to these lines, I use my regular foot and am quite happy with it. I think this is probably a personal preference. I tried the free motion foot on this, but I didn’t have the control and even stitches I wanted for this design.
I have four and a half “strands” of bamboo finished at this point. I can quilt for a couple of hours, listening to some John Denver and just kinda zone…as I mentioned earlier this week, I am amazed at just how much I get done when I think a project will take forever. Now what probably will take forever will be the leaves. I’ve tried marbling some silk leaves – not happy with them. I am thinking some thread leaves, but they may not seem “sturdy” enough for this hardy plant. I do know thread leaves would be a great use of all my lousy threads I have hanging around. I haven’t broken any threads with some 6 hours of quilting – have I told you how much I love my Superior Threads?
If you would be interested in a tutorial on quilting marbled fabric, please leave me a comment and let me know. If you’ve got pictures of some marbled fabric that you have quilted, I would LOVE to see it.
Quilt is FINISHED!!!
It is so interesting to me that we can think in our minds that projects will take so much longer, and then we actually never get around to them, because we “don’t have the time.” That was the case with my Salmon Run entry and with Desert Heat. I kept thinking I was going to need more time than it actually took to complete the work the way I wanted it.
I made the commitment last night to finish Desert Heat – and I did! Binding and all, it’s now on our wall in our bedroom. What I particularly like about this quilt is a bunch of things:
* I used some of my first hand dyes, and you can’t really tell mine from the commercial ones.
* I experimented with a pattern and everything about it worked. I just started out sewing triangles because I wanted something mindless to do last summer.
* I learned that when sewing bunches of triangles like this, it is best to press the seams open for less bulk. That is probably the only thing I would do differently in remaking this quilt (I can see a “winter” quilt to change for the seasons…).
* I pulled colors based on how “hot” they seemed – turns out in the final analysis I did have a light, a medium, and a dark value without really thinking about it.
* The quilting worked perfectly – I only took out about 8 inches until I had the tension where I wanted it. I am getting much better with that – checking first before I sew a whole side….
* I love my new threads! I bought New Brytes in orange and yellow when I was at the School of Threadology with Superior Threads. I knew I wanted heat and bright – much like the desert in summer. I was given in my goodie bag a wonderful Rainbow of oranges, yellows, and greens that worked PERFECTLY in my border.
* Not once did I break any threads. I love the #90 titanium needles. And I LOVE Superior Threads!
* Perhaps the best thing abut quilting yesterday is that I think I am finally getting my quilting stitch length consistent. I have been going quite slowly with the machine quilting, so my stitches have been pretty large. I hesitated about going faster, as I can get clumps of thread if I move too slowly. Well, this time everything worked. I went faster and the stitches seemed to keep up with my movement of the quilt sandwich. So generally very pleased.
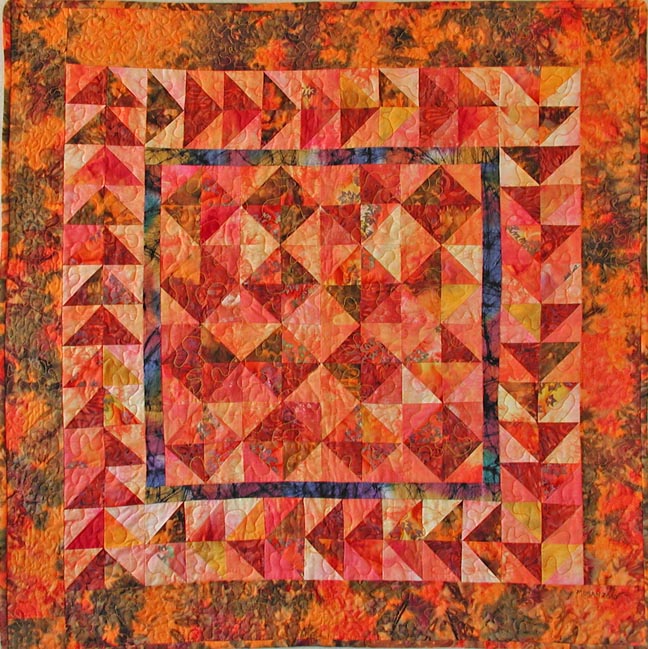
Here’s a close-up of the quilting. The center and first border have a very large stipple, as I wanted to try and get “the heat waves off the pavement” effect. It also helped to flatten all the triangle points. The quilting in the last border is a much tighter stipple, which seemed to make the quilt even “hotter.”
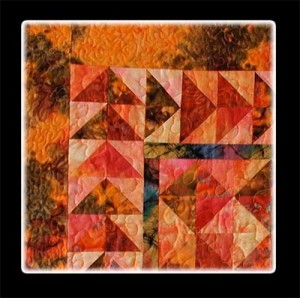 And now, the reveal (yup, too much HGTV….) –
So – anyone interested in a pattern? I am thinking of writing this up if there is interest.
I would love to hear thoughts about what you learn as you finish up quilts! We’re always learning – that’s what makes this so much fun.
Process, Process, Process
“I pledge to talk more about my processes, even when I can’t quite put them in the in words or be sure I’m being totally clear. I’m going to put my thinking and my gut feelings out there.” Check the Process box on the right side of the blog – this is a great idea – while I talk about process a lot, this should really help to keep me focused in the blog.
My Photoshop Fridays are always about process – how I came to what I’m doing with a particular picture. I haven’t talked that much about the process in my quilts, except occasionally on Work-in-Progress Wednesdays. I spent time today on a couple of projects, so I expect to be able to do some show and tell in the next few days. I am particularly happy with my Desert Heat quilt, done now except for the last 12 inches of free-motion quilting and the binding. I am very pleased with how this worked out. You can see its beginnings:
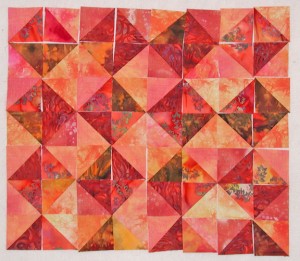 This is where I started last summer when I did my first hand-dyes. Then I started just pulling some stash fabrics to try and create a “hot” quilt to represent the desert. I am pleased to say it is certainly a hot quilt – the quilting lines remind you of the waves of heat off the cement and tarmac.
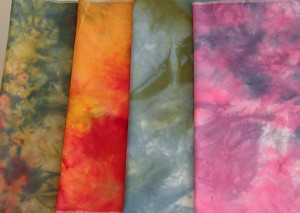 My first attempt at dyeing – in Desert Heat I used the orange-red fat quarter.
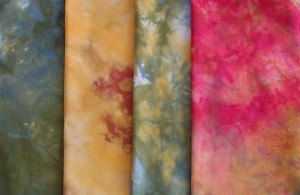 These are a little more pale than in actuality. I used the yellow and reddish one. In fact, I’m going to cut this short and go finish the machine quilting and cut the bias so I can show it tomorrow.
Then I have my lava quilt to finish – I gotta tell ya, sewing on little pieces of lava is tedious and tough! And then I want to get the straps on my purse, becasue after that it is back to the bamboo quilt – I want to enter that into a show whose deadline in September 3. I should have plenty of time…before schools tarts again….and marketing….Linda – go quilt!
Works-in-Progress
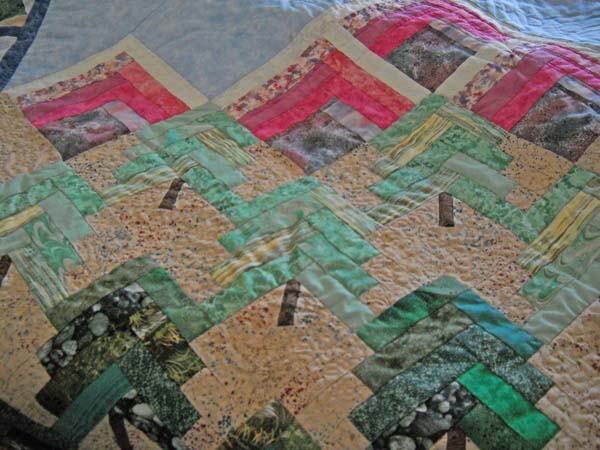
I pulled out an old quilt to work on – not that I don’t have plenty of new projects going. This is my “deer quilt,” so called because of the pieced deer at the bottom of the quilt. I found this pattern about 12 years ago when I was learning a lot about piecing. It looked like it would be fun to do – and was, until I got to the deer, which was quite the challenge. The pattern was, I believe, from Pam Bono Designs, in an old book called Rotary Cutter Quilts. I looked on her site and the book seems to be out of print. I got the top pieced in about a month, sandwiched with what I know now to be REALLY cheap batting, and I started quilting it…with invisible nylon thread.
Needless to say, I have learned my lesson with invisible thread – use the poly thread from Superior Threads. I could see the brittleness and yellowing, so I have spent several hours pulling out a lot of old quilting. I had done a lot of free motion quilting in the background, which is literally ground. I loved the fabric choice, and it still looks great 12 years later. This is just a portion of the mountains, and two layers of trees.
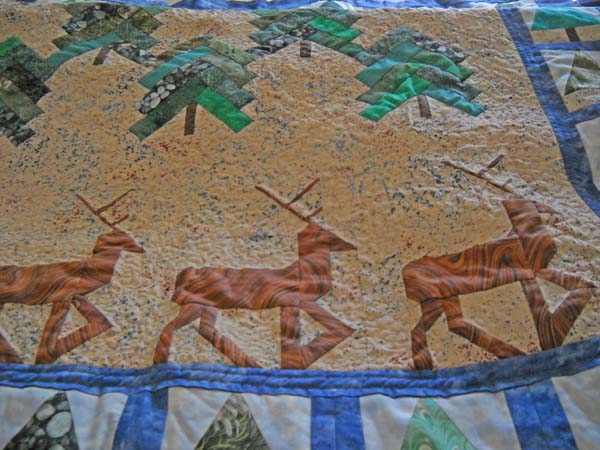
One thing I am noticing is that I am MUCH better at machine quilting, even though I think I have a long way to go. This quilt shows me where I started, and just how I have improved. Here’s the deer:
They are done in a commercial marbled fabric because I loved the texture of the fabric. I am thinking of doing some thread painting on the deer to accent the design. We’ll see….I know I’ll add a little bit of cotton for the tails when I am done….
This second piece was in response to a group of us a couple of years ago (like 5) trying to do a group art piece. I had this in mind for a lava piece, and it was so-so. I serged some edging of black fabric, with the idea of tacking it into place to represent hardened lava. Didn’t really work. Here’s the piece without it:
The left side of this is my new approach – using So Fine black from Superior Threads – another new thread I haven’t tried – and I love it! No broken needles, and just some gentle tension adjustments. This looks more like lava than the earlier version. Here’s another shot:
Color is truer in the top one. I’ll be curious to see when I finally consider it “done,” only five years later….
Quilting Breakthrough….
 I’ve been away from the sewing machine for a couple of weeks, and I was experiencing withdrawal…I am almost finished basting my Desert Heat quilt, but I had been thinking about my Sunrise piece, since I want to finish it for Show and Tell at our January meeting. I started work on it tonight as I got home from school early (7 teaching semesters left till retirement!!). Getting home early today was like a half-day off.
The piece to the left is similar in color and pattern to my Sunrise piece, but the piece of marbled fabric I am using has more subtle blues to it. I started out free motion quilting the waves to accent the clouds, and suddenly I found myself following the curves of the marbled patterns – rather successfully, I might add. Quilting marbled patterns can be interesting – stone is fun and easy, and freeform just is zen-like. But the more complex patterns call for lots of curves and steep turns. I just kept at it – which I really shouldn’t because too often I end up having tension problems that I never check till I’m done. This time – everything seemed perfect. I pulled it out of the machine to look at and realized it was a breakthrough – I have found a way to quilt some of these curves while “staying on the lines” and accenting the curvature of the pattern.
That’s the breakthrough – more fabric is getting pulled out for possibilities in quilting. In the meantime, I think the name is getting changed – to Salmon Sunrise, and I think it will become my entry for the Cordova show this spring. I think it’s going to look subtle scaley – if that’s even a state of being…..
Speaking of zen-like, I have my grades done, as well as my lesson plans for the frst week back – almost unheard of for me. I want to look at linear relationships a little differently, pulling in careers where being able to figure slope is important. Then it occurred to me, since these are straight lines, that we should look at some zentangles, and then have the kids do their own – straight lines only. I did a couple with just straight lines and incorporated them into my power point – here they are:
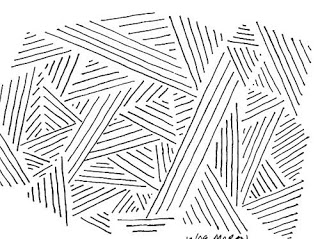
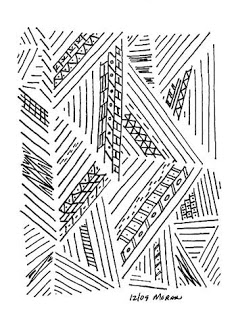
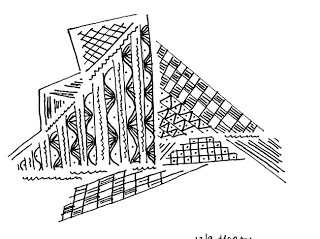
So I started cheating on the last one – just a couple of curves…..
Art Every Day – Quilting!!
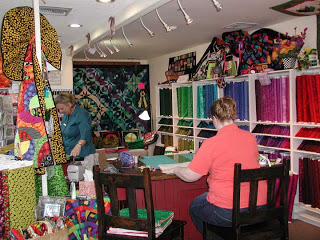
My most favorite quilt store in the country is the one right down the road from me:
Quilter’s Market. The folks are great, very friendly, and love anything to do with quilts. They also are masters at marketing. They are going on four years of Stripper’s Club, with a different quilt each month (except Decembers) using 2 and a half strips. I’m working on the one from September, and I just started a new class with them today – Stepping Stones from a Judy Niemeyer pattern. When you walk into the store, you are surrounded by color and incredible quilts. I walked in to see this new one today, and I immediately signed up for the class. I have wanted to do quilts like this for a long time but never had the nerve to start it completely on my own, even though most of my skills (including marbling) are self-taught.
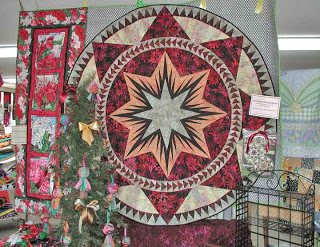
Even though I design my own quilts with our marbled fabrics, I still like taking classes. I go with my friend Michelle, and today I met another teacher friend I hadn’t seen in 9 years or so. I do enjoy the energy and company, plus I like learning new techniques. I can see eventually designing a pattern to use some of the “sea” marbled fabrics I have.
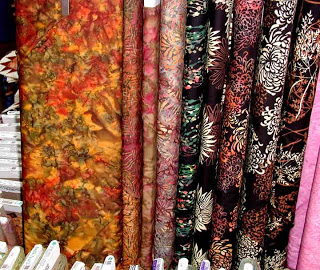
Batiks galore – even though one of the “chains” said batiks are seasonal. I could spend a small fortune on adding batiks to my stash. And everywhere you go in the store are samples – a very generous class schedule, with literally something for everyone!
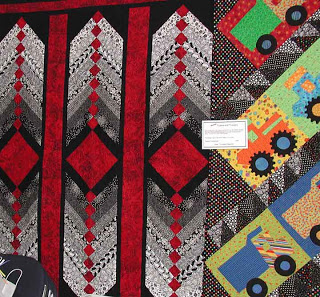
I am working on a class called Stepping Stones, a pattern by Judy Niemeyer. I browsed her website a little bit ago, as I want to buy some additional foundation papers for this quilt; I want to make a full queen for our bed, and I know if I leave it to myself to quilt, it ain’t gettin’ done…I’m planning to send it out for quilting.
We spent today’s session sorting and determining color combinations. Since I have a bunch of unfinished quilts at this point, I really didn’t want to spend more money on three sets of Bali Pops, so I decided to make the “stones” exclusively out of my stash. I discovered my color eye was kind of failing me, and I was regrouping fabrics to make them better work together. At this point I don’t know if the quilt will be a subtle as I am wanting. Only sewing will tell….
I’m not sure I can get 36 blocks done for next Saturday……
Work-in-Progress Wednesday – NUMBER 300!!
Yup, post 300! Over two years on the blog, as a record, first of all, of my Photoshop classes, and now as the creative journey. It’s really interesting looking back at some of the early work! I’ll have to track down a couple of links….At 500 posts I think I’ll do a BIG giveaway!
So I finally got to “unzip” pics of the finished quilt – well, almost – still have a top and bottom binding to put on. But I presented it and we took lots of photos of it on the bed. So here goes…
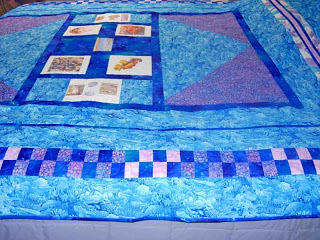
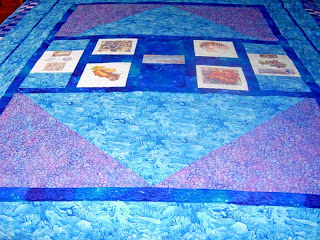
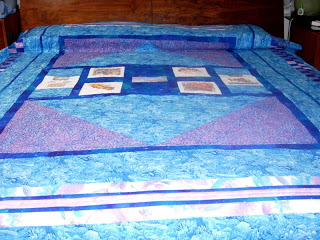
Needless to say, I am please and somewhat proud. I designed it from scratch, did massive amounts of free-motion quilting, and got it together so it looks really good on the bed! Now on to some new sewing adventures….
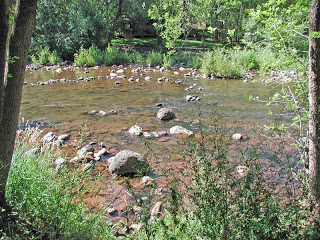
Also in progress – pics of the Sedona trip. Here’s a couple of Oak Creek – notice that wonderful tree and bark – and yes, the rocks really are that red!
Work-In-Progress Wednesday

I am finally seeing the end of this quilt! You can go here to see the early photos and an explanation of the design. I got the first side border on, with help from hubby to hold all the bulk.
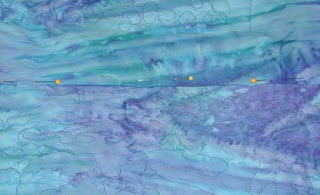
I hate hand-sewing, even though I enjoy hand-quilting. For each of the sections of this quilt, once they were machine-quilted, I sewed on the piece, and then hand-stitched the “hem” on the other side. This is the part that is taking forever! You can see what I mean here.
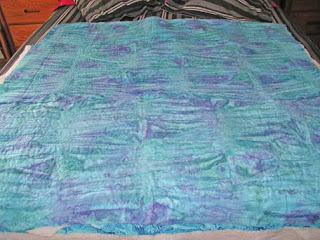
This is a shot of the back. There is a huge amount of quilting in each of these sections. From this, the two side panels will be added, and the quilt will be done. Then I’ll have a pic of the front.
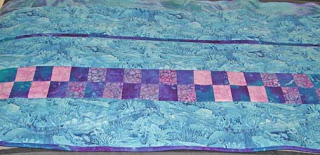
The borders have been easier to do. They can be adjusted, depending on the bed size. I broke up the main fabric, with the checkerboard strip, and it ties together the major colors in the quilt. I am doing the binding as I go, for two reasons. One – there’s a lot of quilt, and doing it in sections is easier. Two, I am machine stitching the binding on completely – I can’t handle that many yards of hand-stitching!
Stay tuned for final pics!
Top Ten Tuesday – Getting Here

I’ve been giving some thought to how I’ve gotten to this point in my art, especially since my art is taking some different paths. How did I come to getting fiber and digital art work into juried shows?
* I did a lot of cartooning and pen and ink drawings in my early teens. As long as I could “copy” something – have a pic in front of me, I could do pretty well. My high school art class didn’t do a lot for me, although I do have two pieces left from those early days.
* I started sewing my own clothes in college, thanks to a sorority sister with a sewing machine. I learned a huge amount, and thanks to invisible zippers, got over that fear left from home ec as a ninth grader. I did a huge amount of sewing during my years teaching in Hawaii – way cheaper than buying muu-muus.
* I bought a sewing machine (my second) when I returned to Vermont to teach, having donated my first purchase to the drama department at the high school. I signed up to take classes from Stretch and Sew, and that’s where I got into designing with their patterns. At that point I was sewing almost everything, including a 1970’s leisure suit for my husband….
* Embroidery was the next stage, and I finished a number of pieces, mastering some of the stitches. But I didn’t have the amazing skills of my mother-in-law Erma, who would look at a picture of a Hopi kachina and recreate it in embroidery. I needed a pattern!
* I was also doing a lot of crochet, learning how to read patterns, new stitches, and choosing good yarns. I could never get into knitting – always seemed too complex, and I didn’t have the patience. Crochet went much faster.
* From here it went into needlepoint and cross stitch. I finished a lot of framed pieces as well as pillows. But a fire wiped out all of it, and I couldn’t bear to do cross stitch again.
* I took up tole painting and realized it wasn’t for me. But I did learn how to recognize really good tole – it wasn’t mine!
* From here I took a beginning class in hand-quilting. I had made three quilts with the Eleanor Burns Log Cabin in a Day earlier, but I wasn’t happy with my fabric choices. I figured I would start with the basics.
* While in Vermont, I saw a book on marbling and wanted to try it for some quilts. Hubby really got into it, and we’ve been working on that since.
* While learning to marble, I also had dinner with the high school art teacher who had gotten back from Africa and put her photos into some great posters. I wanted to do that with marbled quilt patterns. It only took me 15 years….
Now I’m getting better at Photoshop, our marbling is improving, and I continue to learn from others about color and design. Just lots of fun on the journey!
How did your journey start?
PS – had lunch with my friend Yvonna – wait until you see her pottery and mosaics – OMG, unlike anything I have seen!
History of Marbling, Part 2

The article has long been submitted – but here’s the rest of it!
Turning fabric into art was a long time coming. Dean and Linda worked initially to perfect their marbling skills on fabric, experimenting with tools to create patterns, as well as refining the pretreating process. Like the Middle Ages guilds that would keep marbling techniques secret, it was very difficult to get accurate information about tools, combs, and patterns. They learned the basic patterns of nonpareil, bouquet, stone, and chevron and experimented with free-flowing patterns and swirls. They started selling to crafters, quilters, and sewers interested in wearable art.
Marketing was originally limited to local groups, but after hearing the price to set up a website of their own, Linda undertook the steep learning curve of html in order to get their product out to the world. After 10-plus years on line, they worked with a web designer who also was a quilter and digital artist. Linda discovered the need for a more professional online portfolio that emphasized the artistic end of marbling, as opposed to the more commercial one of just selling fabric.
Linda stumbled into “fabric as art” at a meeting of a local critique group. She felt there was more that could be done with a piece of marbling. She and Dean loved creating new fabric, but they wanted a way to enjoy the truly great pieces. One new friend bought some fat quarters and came back to brunch the following week with a quilted and embellished wall-hanging – exactly what had been in the back of Linda’s mind but unable to exactly see. She started cutting and quilting strips and weaving them into unusual forms, leading to their first trunk show at Textures Gallery in Scottsdale, Arizona.
EBay provided an unexpected outlet of getting fabric out into the hands of fabric artists over the last three years. Blogging became a way of recording progress on art pieces, as well as musing about the artistic process. The realization that they wanted to do more than just create fabric to sell to others was no longer what they wanted to do. Dean joked that no fabric was safe from marbling – they would try to marble just about anything to see what would happen. Forget lace, velvet, nylon in favor of linen, velveteen, organza, brocades – and, yes, polyesters.
Now Dean and Linda have a dedicated studio space where potential half-yard pieces hang on the design wall, waiting for discussions about the stories they will tell. One of the most wonderful moments in learning marbling was realizing that a piece of fabric could tell an amazing story through simple lines and spaces of paint and color. One series is called Gaia, and the weavings focus on the abstract beauty of the planet, told through color, line, and shape, accented with quilting and embellishment. Another series explores the power of the mandala, the circle of life. Yet a third takes on the small beauties of everyday nature: the simple rock garden, the quiet pond, the rough water. Then there are other pieces that just have to be: a detailed rock, a comfort quilt for a friend, a stream for a geologist, a tide pool for an environmentalist. Using environmentally safe products and processes, it was a natural leap to develop series based on nature.
This art form has become a major part of their lives. It’s not only a chance to share their creativity with each other, but the two are able to bring different styles to the marbling. Dean is more studied in the dropping of paint, working very methodically. Linda likes the randomness of the paint globs and the unexpectedness of new designs. They love the study of a good piece of fabric to decide just what the finished story will be. They spend weekends when they are not marbling scouring galleries to breathe in art and look for interesting subjects and techniques that could carry over into the marbling process.
They experienced a two-year period where nothing about the marbling process worked. Fabrics from overseas were treated differently and it was harder to remove chemicals. Paint formulas changed, and certain colors were no longer bright and distinct. The local water wasn’t conducive to the marbling process. The worse part was feeling like they would never be able to marble large pieces of fabric again. They would take out special pieces and moon over them, wishing they could create again. One by one they eliminated problems and were finally able to marble once more.
There was no question that this was what they were meant to do together. Facing the two years without their marbling sessions was very difficult. For Dean especially, coming to marbling after years in wholesale/retail, this art form brought out hidden skills. For Linda, this was recognition that she could be an artist in a medium of her own, without criticism from others.
Sharing their art pieces with others still brings a thrill, especially when visitors watch the marbling process. The oohs and ahs as the patterns develop are like notes of joy from others as they see new beauty. One gallery owner, in jurying some pieces, said the work was amazing, gorgeous, and too high-end for her gallery. Feedback is important, and the list of accepted jury shows continues to grow. But for Dean and Linda Moran, and Marble-T Design, it will always be about the creative process.
Glacier 2

There is something very satisfying about quilting marbled fabric, especially this pattern. This is a traditional chevron pattern, and it is the basis for many more complex patterns. I love the lines to this pattern, and they are very easily quilted – almost a zen-like feel with the sewing machine. Use the walking foot and then just quilt.
I’ve been doing a lot of quilting with the stone, freeform, and chevron patterns, although the Pele piece on our website is much more complex. Quilting the nonpariel and wave patterns really take some thinking and some very slow free motion to get the stitching accurate. I need to set some more pieces with those patterns.
As I was quilting last night (to John Denver’s greatest hits – good quilting music), I was thinking about the decisions in this piece. I used the light gray about every three inches to hold the fabric in place. The stitches pretty much disappeared. I used the darker gray to accent the black in the piece. Then I started with the variegated rayon, and those stitches really popped. I may decide to actually stretch this piece and frame it when done, so that there aren’t any ripples in the fabric.
Once again I found myself judging the piece based on some beginnng quilting lines. Nothing fantastic yet, but I have just begun. So I need to put the critic to bed and out of my mind.
