Posts Tagged ‘textiles’
The Art Making Begins…..

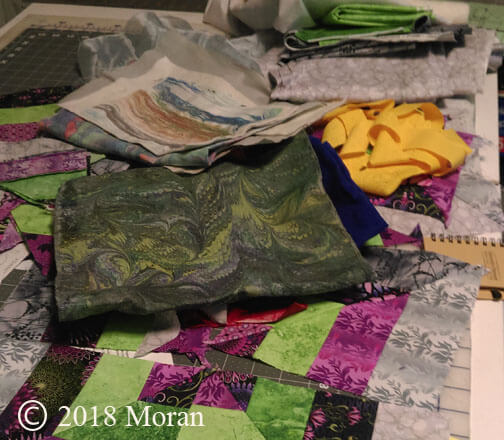
I finally decided yesterday I had to make a major list/inventory of all the “wannabees” or “in progress” art pieces. What follows is what was available in one drawer and the top of the storage table. The left has four amazing pieces of Kona cotton for a volcano series, plus the dotted brown piece is another half-yard unpolished satin for another river rock piece. Below is the current purple piece, plus some black poly-linen for art pieces and below that is a piece of silk done att he bottom of the marbling tray – it’s now a very large digital piece, but this one still exists for me to do something with it….
Now for the list once I had evverythingout and listed:
Mardi Gras lap quilt, silk FQ Botabical, small strata, orange cotton strip, cotton left-over pieces, black-purple poly-linen, greenish denim, clam shell black, blue ultrasuede, purple silk, green silk, 3 black linens, black chevron, brown silk, volcano (4), 3 FQ left-overs, 8 x 10 leftover, circular left-over, yellow linen, large black poly-silk wave pattern, purple-yellow silk, applique pillow top, Guilin (in progress), Wetlands 2 (in progress), wouthwestern pot hanging (in progress), iceberg hanging (in progress).
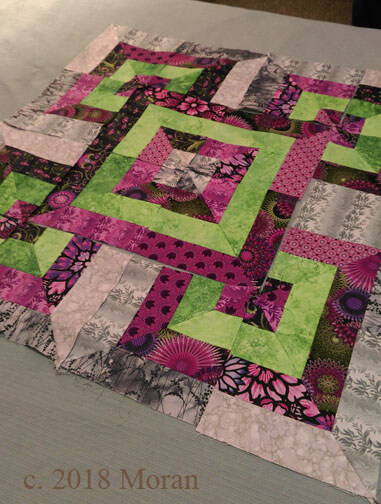
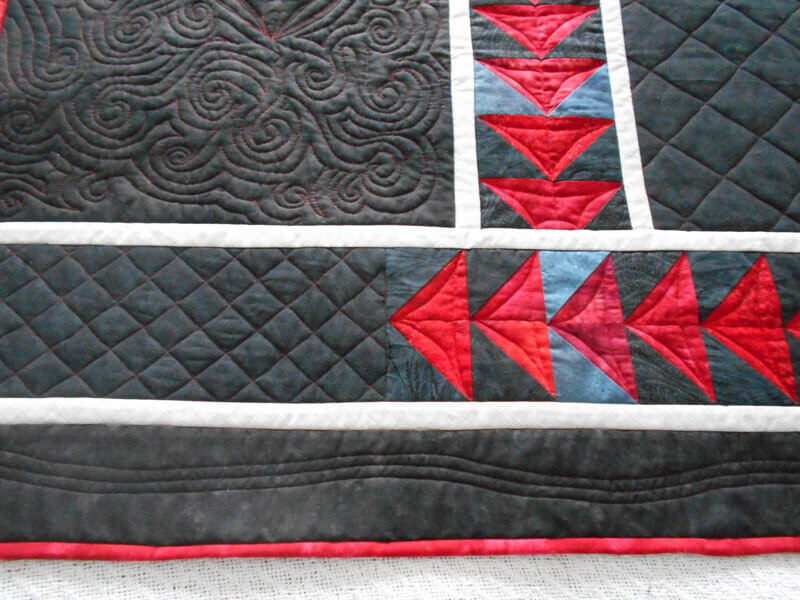
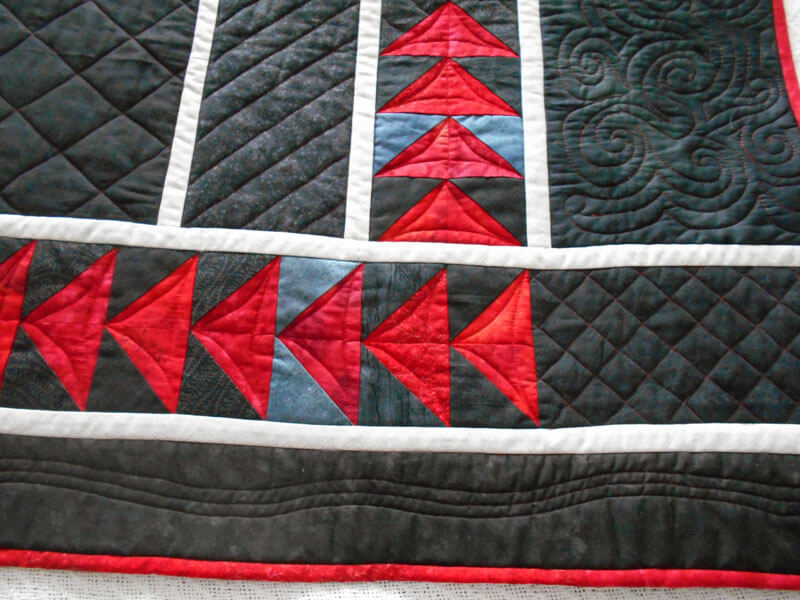
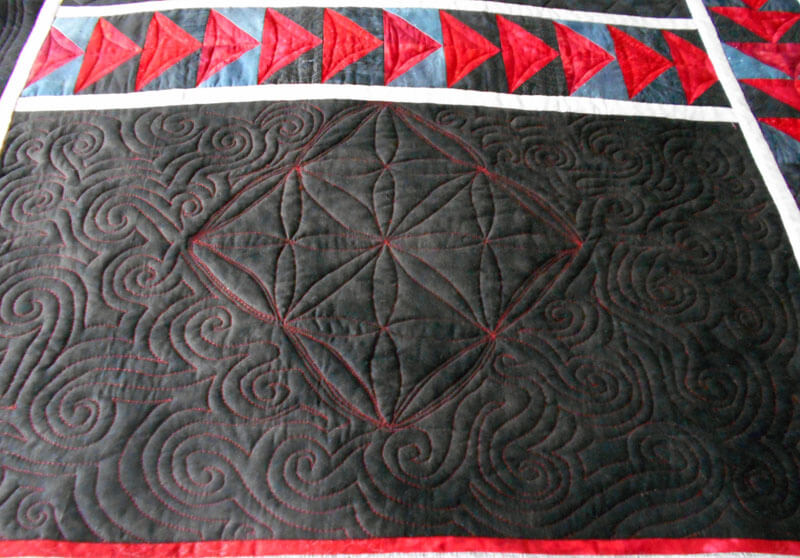
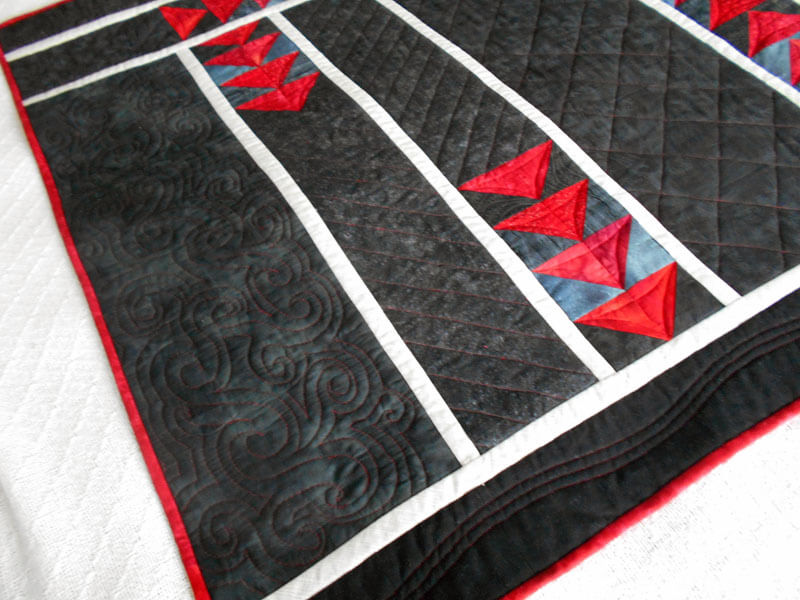
Then it was thinking about “balance” in the various shows coming up, so I decided the place to begin is with another large wall-hanging – Mardi Gras. In progress pictures…this is of the first step, arranging strips light and dark – from four sets of purple strips I bought two years ago at Keepsake Quilting, just for this.
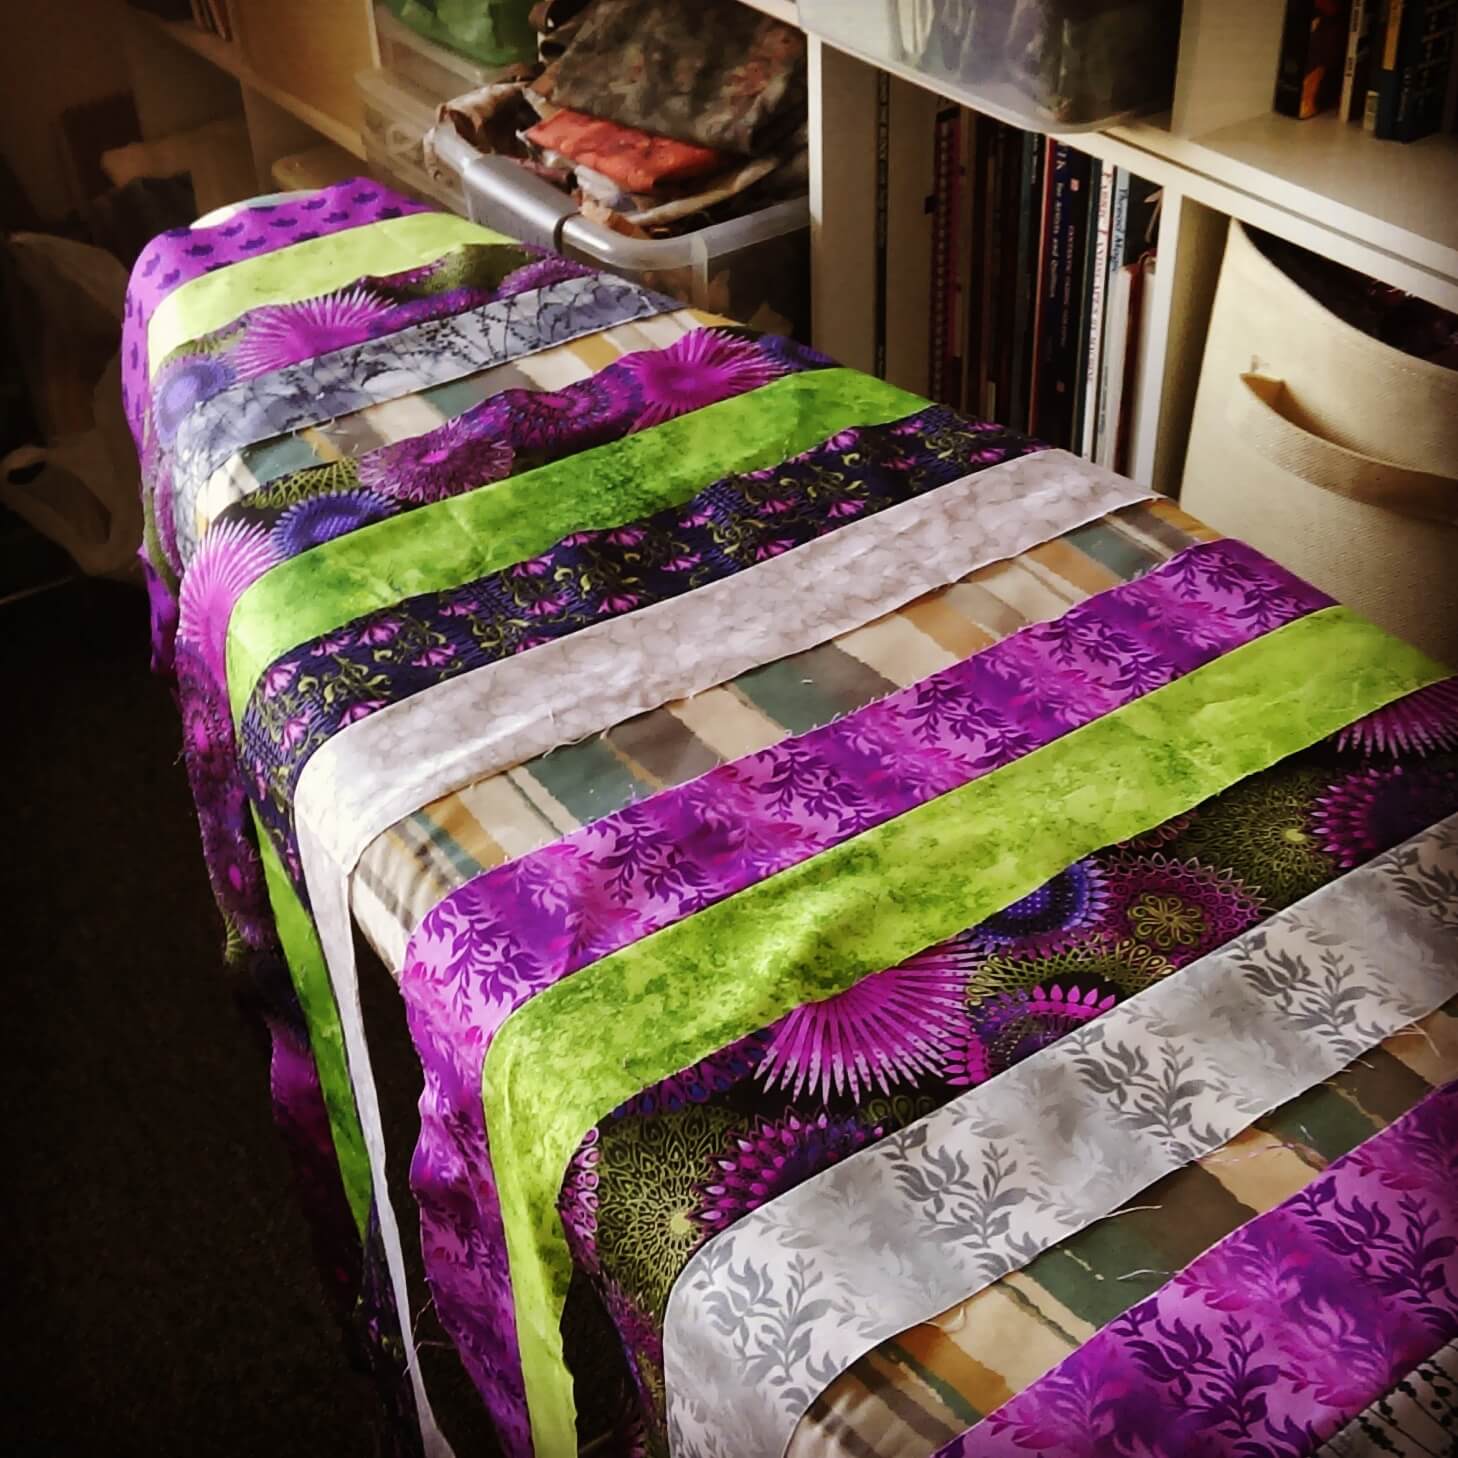
I had 25 blocks with dark on the outside, and 25 blocks with light on the outside.
This is the center block with the purple dark as the border – I felt it emphasized the purple and decreased the brightness of the grays.
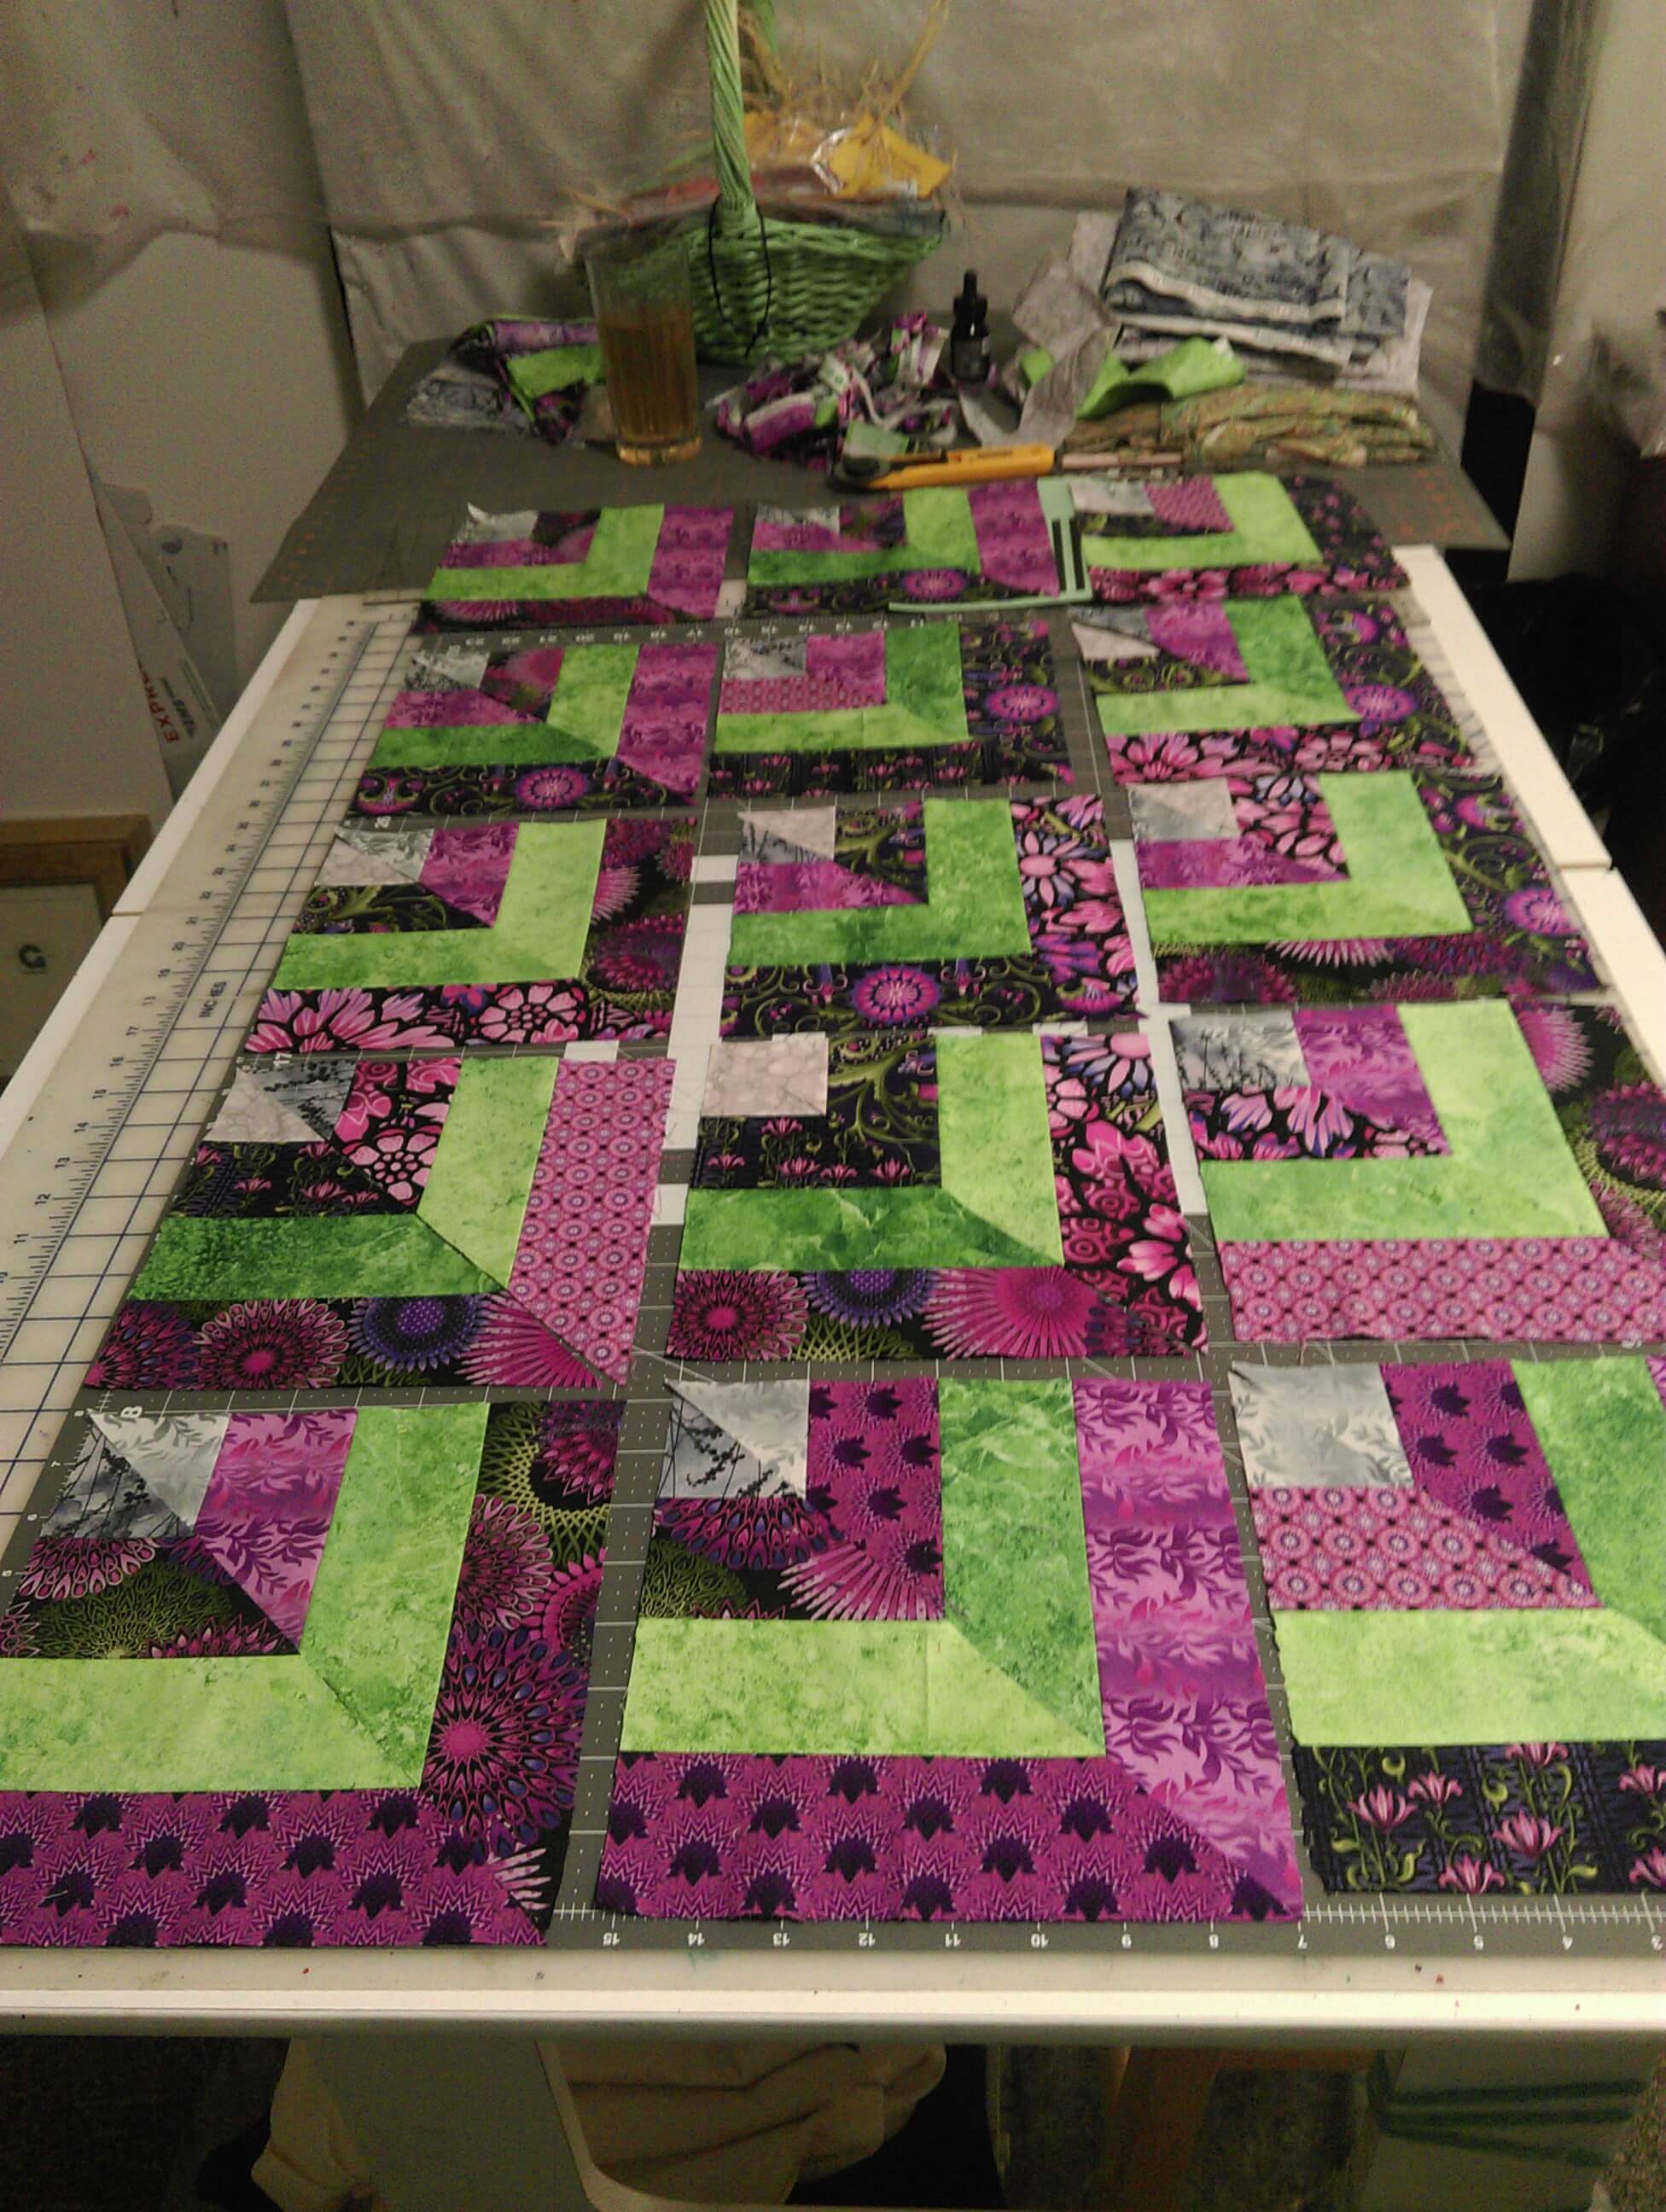
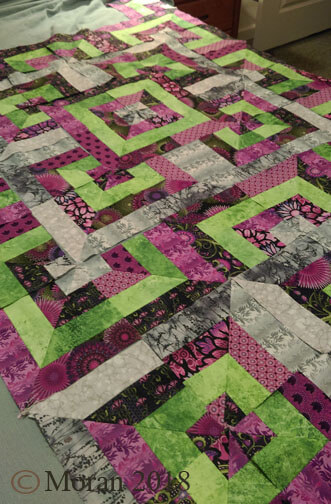
Almost the whole layout completed – blocks and rows are numbered and ready for the bext step of sewing them into a finished top, then deciding borders – I already have a quilting design in mind – lots of concentris overlapping circles to offset all the straight lines, and in gold thread for Mardi Gras.
Lots to do betweennow and end of March!
PS – there are four items on the “need to do” list by fall – not for shows….
“Experimenting with Textiles”
I am currently (like right now) watching a video from the fellows who bring you textileartist.org. I’ve subscribed for several years, and they are introducing a series of videos on finding your voice with your textiles. So far, 11 minutes into the video, I can see the various paths I have taken and why I had problems with them.
First, early on in working with stitching on marbled fabrics, I felt intimidated by mo own machine quilting skills, and I felt like I needed to do a huge amount of practice on smaller pieces before I came to the bigger works I wanted to do. A cyber friend kindly said to me – do the work you want and the skills will follow….and so they did. I started weaving strips of marbled fabric after I machine-quilted them, and I didn’t look back.
Second, I’ve always experimented with lots of techniques – marbling happened to be the latest one (embroidery, knitting, crocheting, painting), but the marbling hooked and and hubby. Now I have a body of work that utilizes marbled fabric and new means of quilting and embellishing. I picked up bead work only in the sense it could add to the overall design.
Lots of ups and downs in learning and trying to determine a niche for ourselves, as well as work within limitations of what we could afford. I finally decided that what other marblers do is fine – so is our work in its own unique way. I didn’t want to marble paper – I wanted fabric – first limitation, and we made it work. We perfected our style on white fabric – very unforgiving – a second limitation.

How can I push the boundaries of the basics? Hubby and I laugh about what I have him end of trying to marble – “pushing” to do ribbon, silk flowers, canvas…all because I don’t want to waste paint in the marbling tray. Lots of additional projects opened up, mostly with embellishing what we were already creating. Any new techniques were pursued in how they could expand our marbled fiber art.
Making marbled art is expensive – a pound of carrageenan is about $50.00 now. So because of our extremely limited financial capabilities we had to work within a very tight budget – and we succeeded. Looking at a display of our work several months ago, both of us marveled at what we were able to create with so little resources.
Embracing what we can do on our limited budget led me to learn how to manipulate my 1008 Bernina workhorse sewing machine to do what I wanted it to do. Yes, I miss “needle down” and variable speed….but my skill with this basic machine has led me to teach very successful machine quilting classes to folks who think they can’t machine quilt unless they have a long-arm or other fancy sit-down machine.
In terms of skill level, I am completely self-taught, with only one marbling class from a master (Galen Berry). Everything else has been trial and error….no color theory of design, so I started with putting everything with black fabric. Hubby has the color sense, and I slowly came around to improving mine. Now I can put marbled fabrics with a range of other colors and designs. I attended a workshop with Tony Conner, water colorist extraordinaire, who talked us through a painting he created. It was like a design class with a master, listening to him talk through his decisions. I kept referring to pieces I was working on to see that I was naturally doing some of the design elements. I was trusting my “eye” and myself.
You owe it to yourself to watch the first of these videos – maybe you are new to the idea of limitations. We had natural limitations through finances imposed on us, and it led to who we are as artists now. Check out our web page to see our range of work. Find textileartist.org on Facebook and get your free video.
PS – no more pima cotton fabric, special order didn’t work because it was too light, so we “over-marbled”…and it’s good to go…..making due with a limitation……
Busy Busy Busy…….Two of Seven…..
So it’s a crazy time in the studio right now – 7 projects, five of which are big ones. Two deadlines coming up this next Monday for photography…see, Kathy Nida – I’m calling the photographer ahead of time to get myself to the deadline!
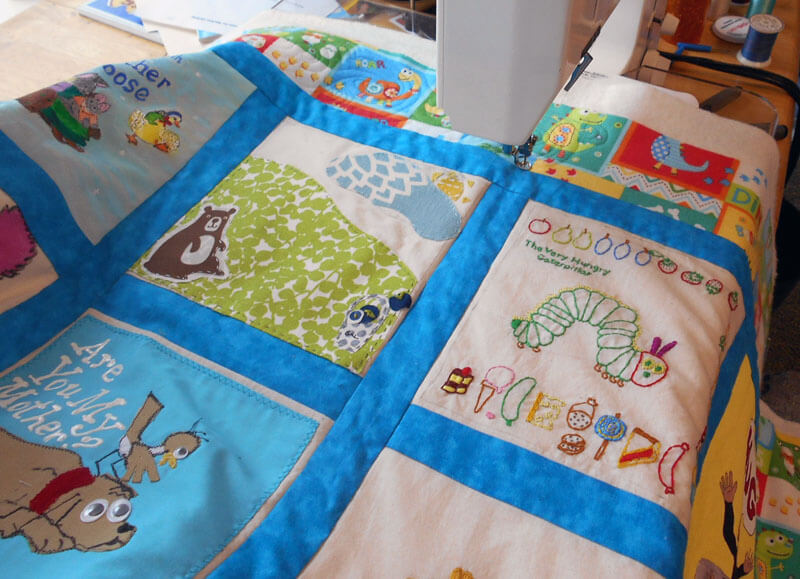
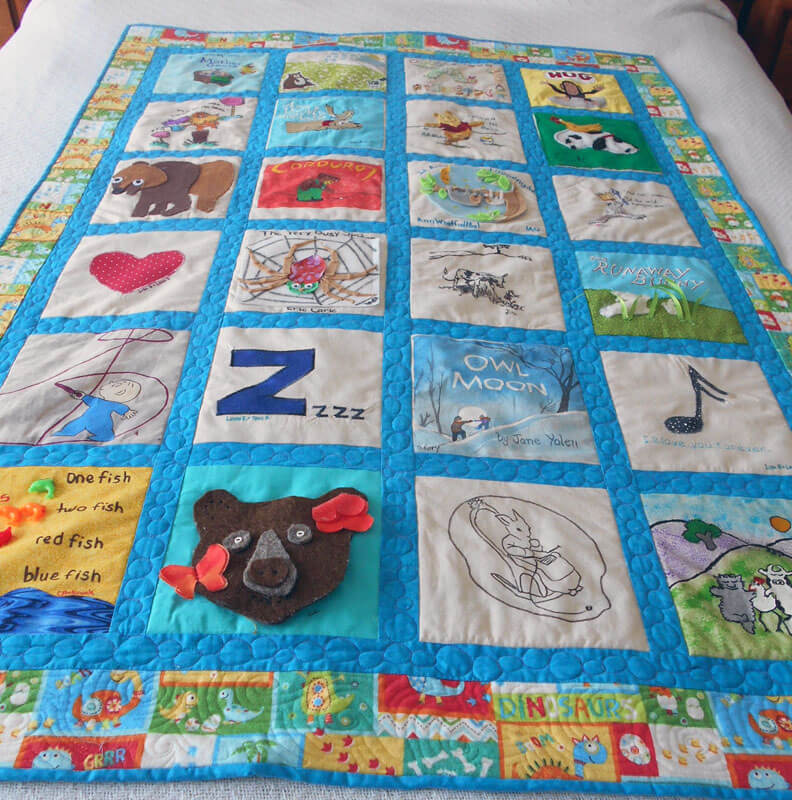
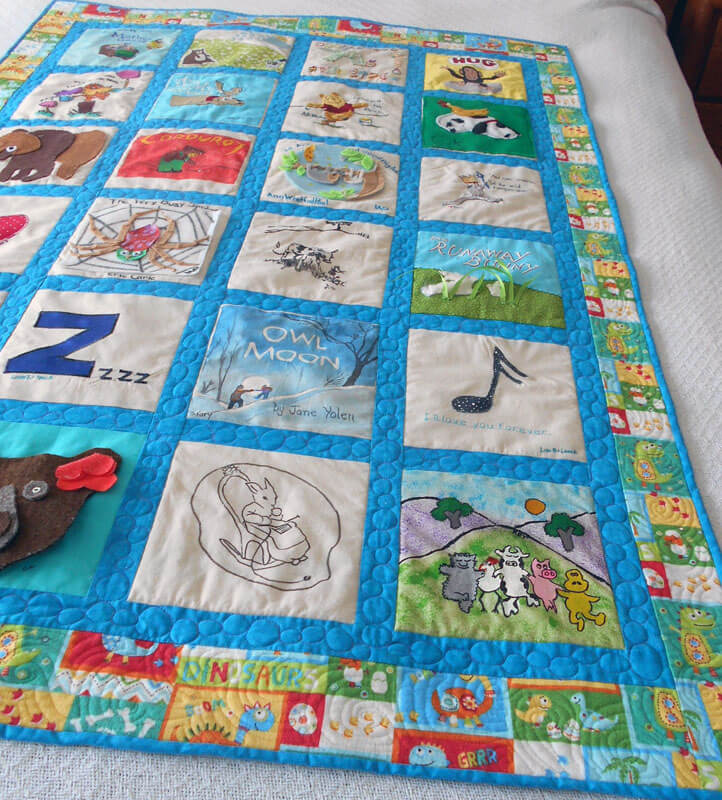
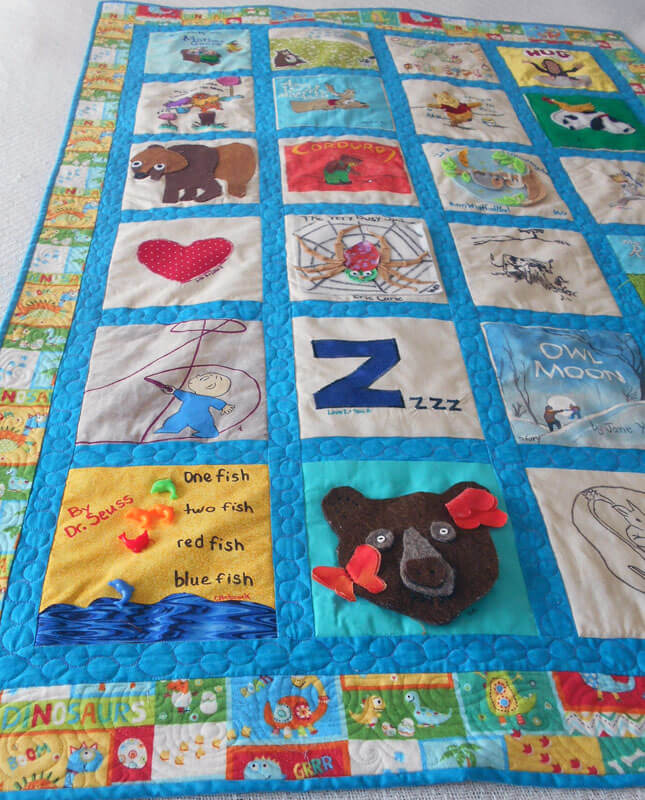
Here are the first two of the seven….I’ve been quilting baby quilts for a friend who works at the middle school we both did, me back in the mid-seventies. You can see the last baby quilt (before all the deadlines hit) here. I enjoy doing them, we usually get a free lunch together, and it gives me a chance to practice my free-motion skills – kind of like practicing free throws before you need them for the big game. You can see the children’s literature theme – the books usually stay the same, and the colors change to the new mom’s preference. ALL pictures copyright 2017, Linda A. Moran. PS – thank you, Superior Threads!
 ALL pictures copyright 2017, Linda A. Moran.
 ALL pictures copyright 2017, Linda A. Moran.
Now for the next project – I decided to make quilts for my great-nieces and great-nephews when they turned 13. You can see Gracie Mae’s quilt from two years ago here. Now it’s Gavin’s turn, and I did another “modern” quilt with the colors he wanted. Again, a great chance to practice design and free motion quilting. In looking at the one two years ago, I can see the improvement in my skills. In two years I owe two new birthday quilts.
 Love the backing – perfect for an adolescent boy!
 ALL pictures copyright 2017, Linda A. Moran.
 ALL pictures copyright 2017, Linda A. Moran.
 ALL pictures copyright 2017, Linda A. Moran.
 ALL pictures copyright 2017, Linda A. Moran.
 ALL pictures copyright 2017, Linda A. Moran.
I really wanna learn to use rulers like Judy Madsen…..
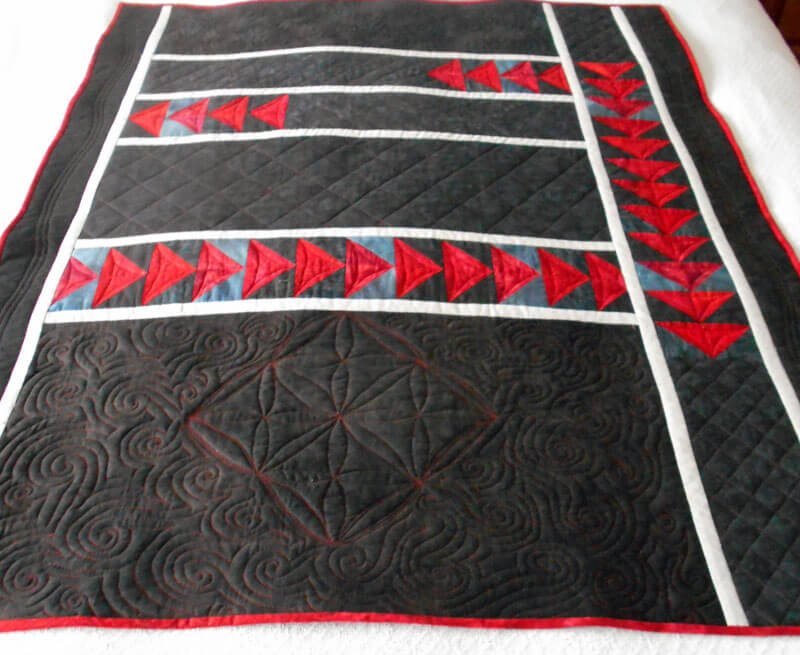
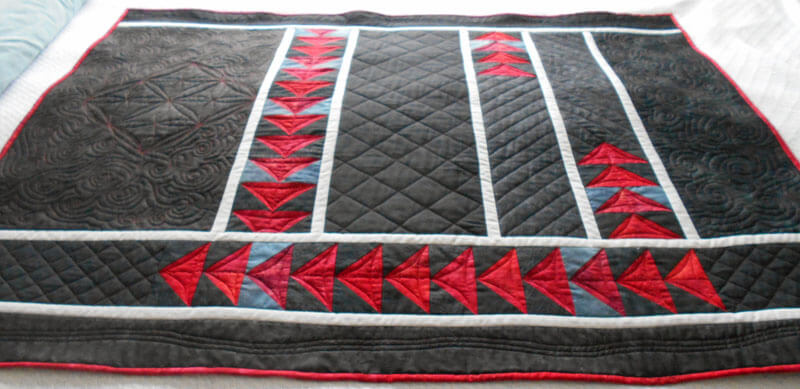
On to “Eruption” and the “Threads of Resistance” quilts…….
Deconstructing and Redesigning
Photograph by Stephen DeVol, Sedona, AZ
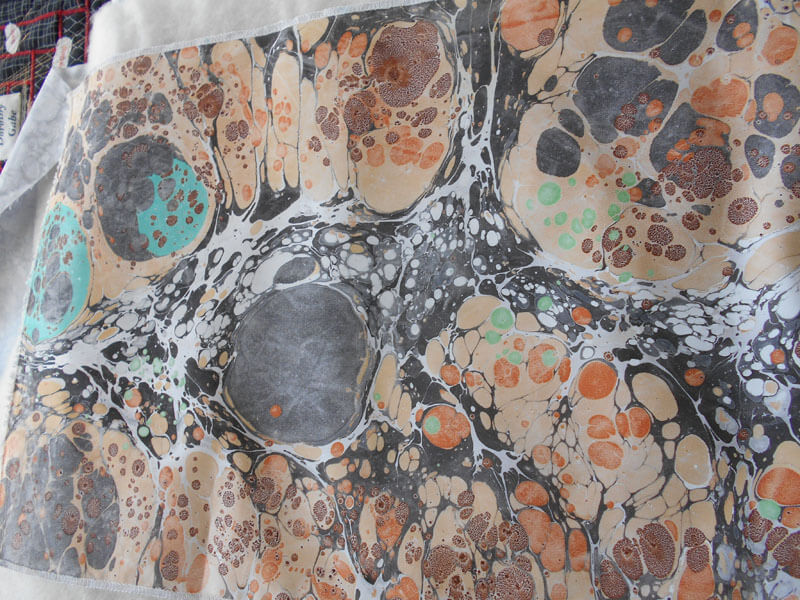
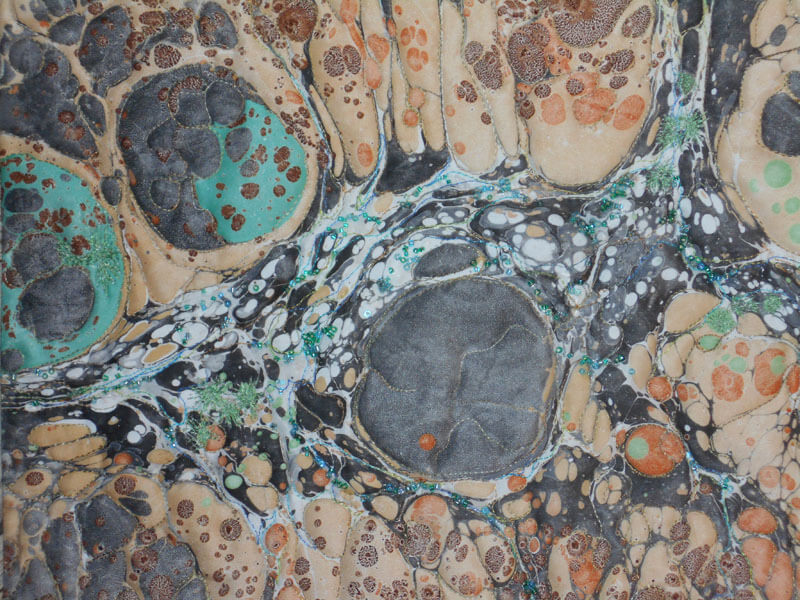
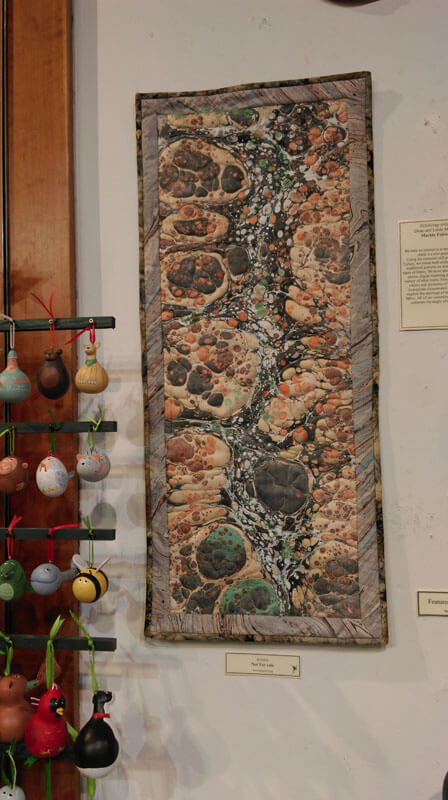
For over 13 years this piece has been known privately as “Ode to the Fire Goddess Pele” as a result of my time in Hawaii. It’s official title is Gaia 2: Beginnings. Our biggest problem has been that it was meant to hang on it’s own, but we were unable to figure out a simple – and not intrusive – hanging system. So for the last year, since we have been showing our work in Vermont, we’ve talked about mounting the piece – somehow. Here’s the story of the creation of the original piece.
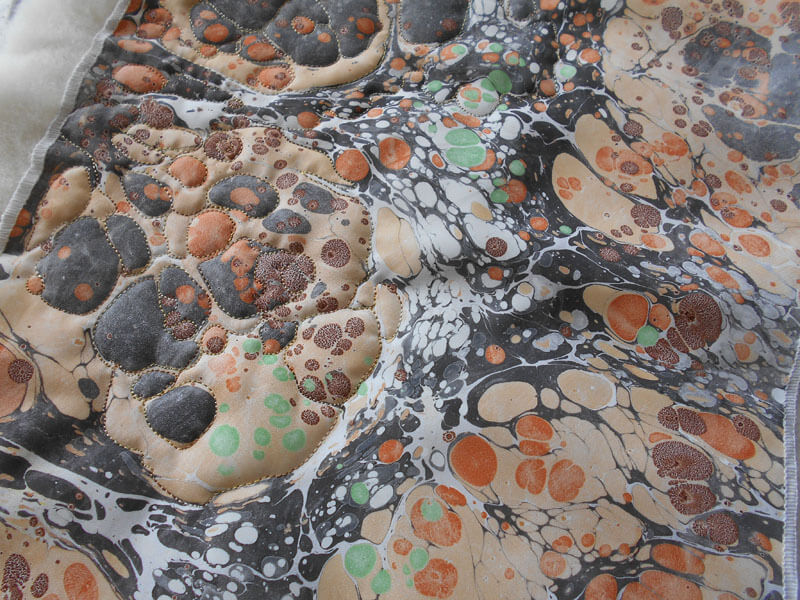
That led to me deciding to completely redo the piece – ev.er.y.thing. It took two weeks of night time by the television to get all the machine quilting pulled out. In the 13 years since this was finished my machine quilting skills are SO much better. I will say that my original tension was so bad that in many places all I had to do was pull a thread and I had many many inches come right out.
My new plan is to requilt it, change the edging, mount it on a large piece of black fabric, quilt the black fabric, and then add a sleeve. I need to have all this accomplished by May, as I plan to enter it into the “Abstraction” show in Saranac Lake this summer.
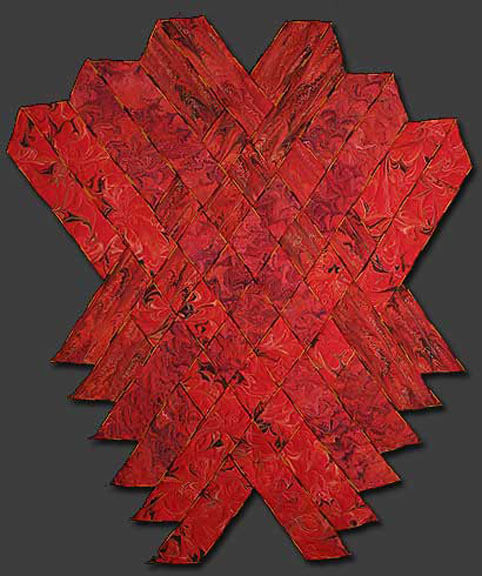
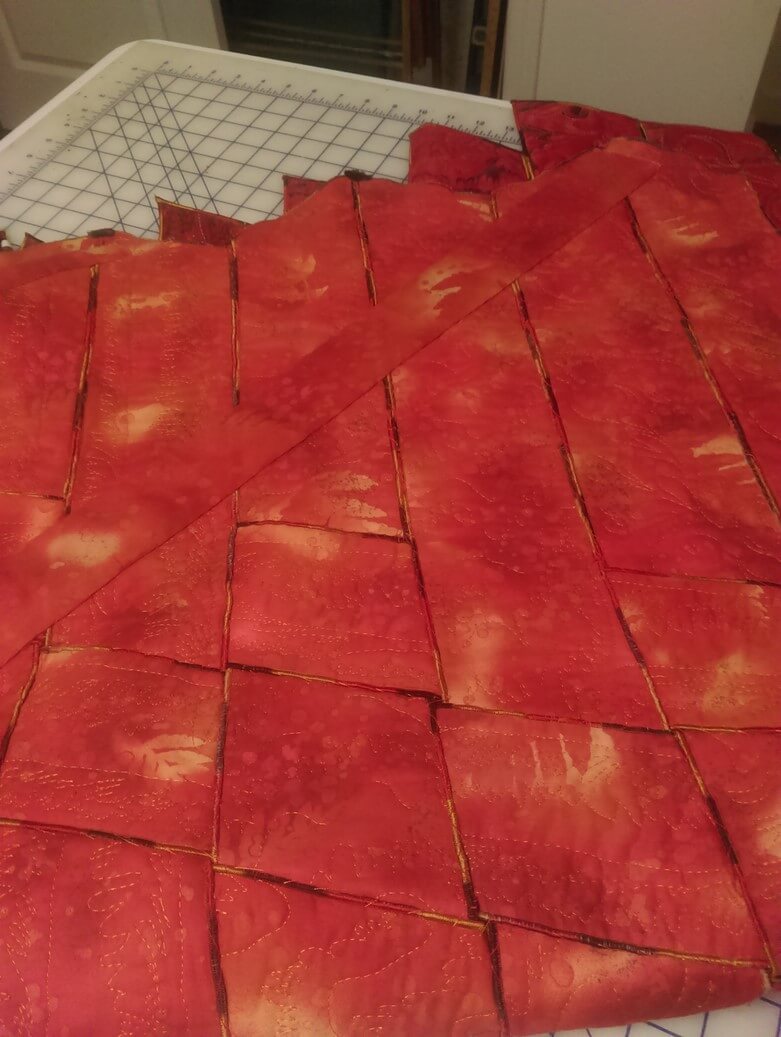
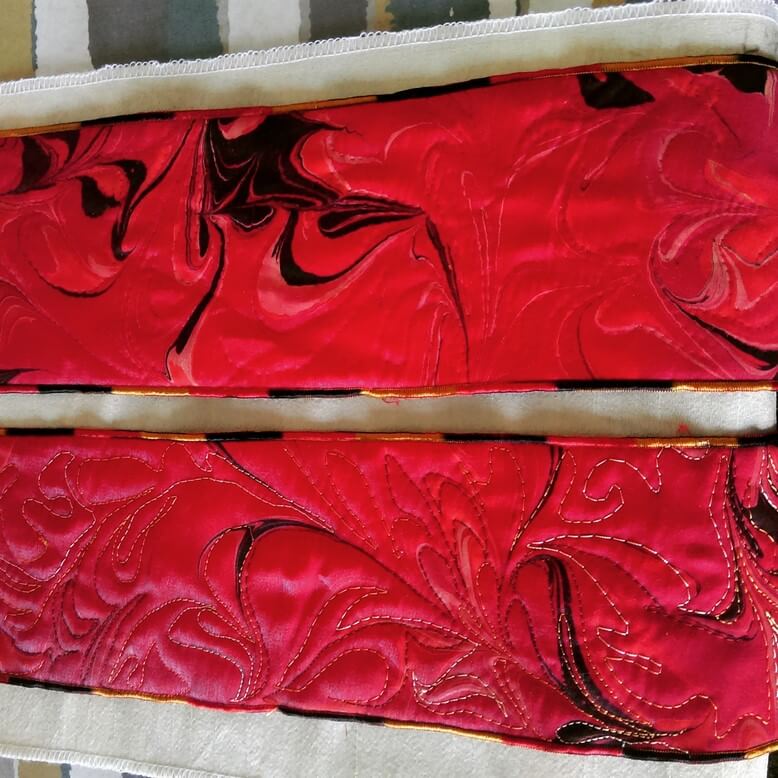
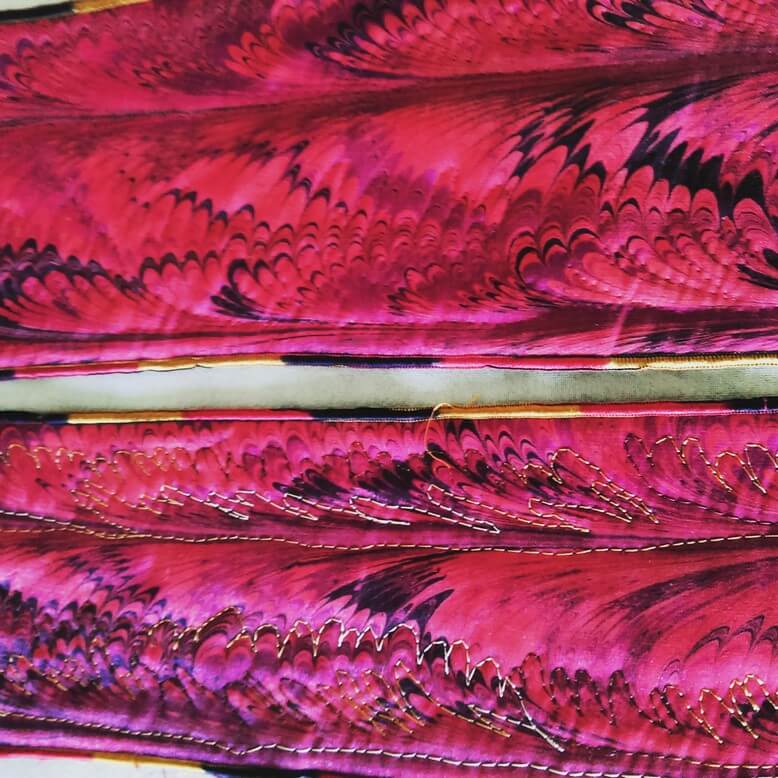
Right now I have 12 strips still with serged edges. I found a FABULOUS piece of red and gold fabric in my stash, and (hoping I have enough) I will put the binding on over the serged edges. It looks really good so far.

A close-up of the original weaving with the serged edges.
 A close-up of the back with all the hand-stitching to hold all the pieces tight and together (oy, did that take a while….)
 Before and after – original stitching, and after the frog stitch….
 More before and after….
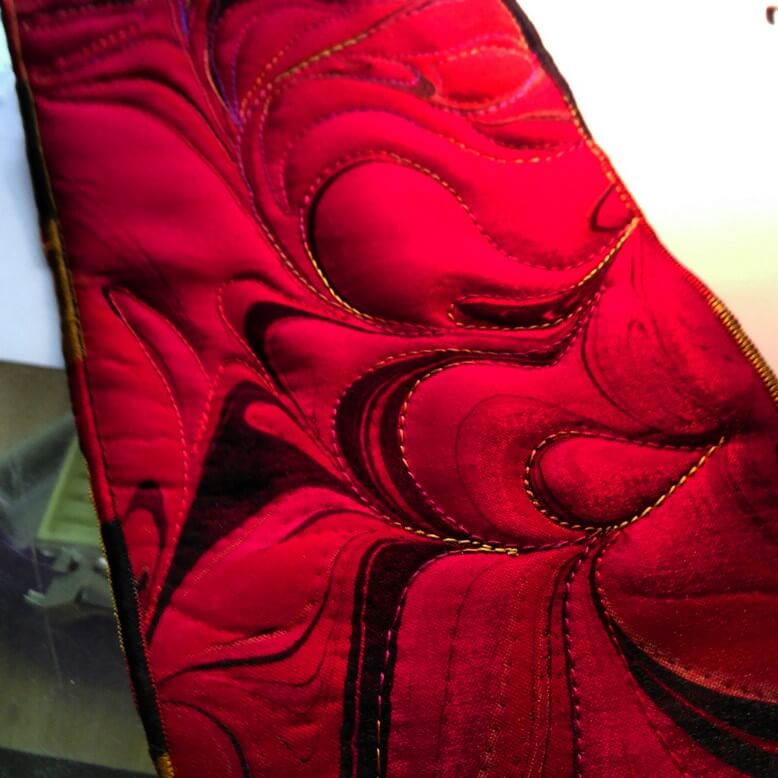 The beginning of new free motion quilting….
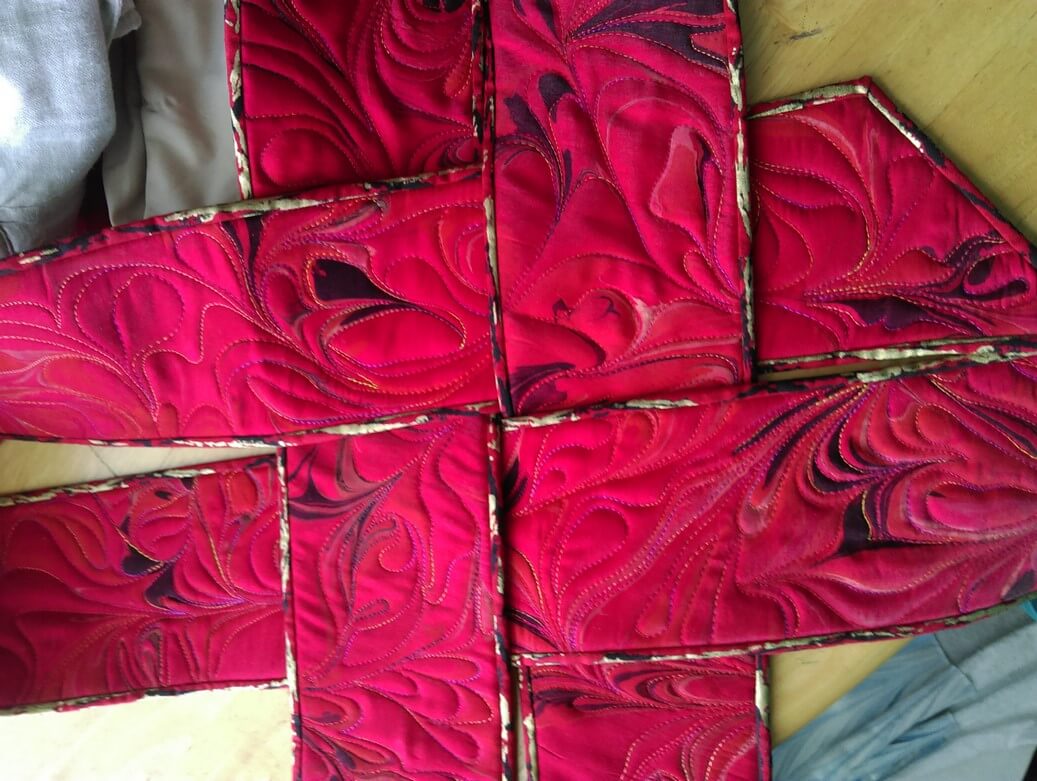 A look at the new binding and how it will work with the weavings.
This piece will also have a new name: Revolution. More on that as I get further along in the quilt.
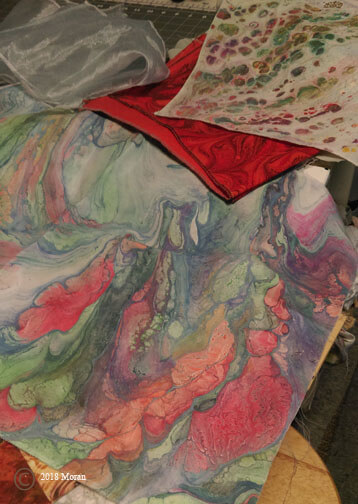
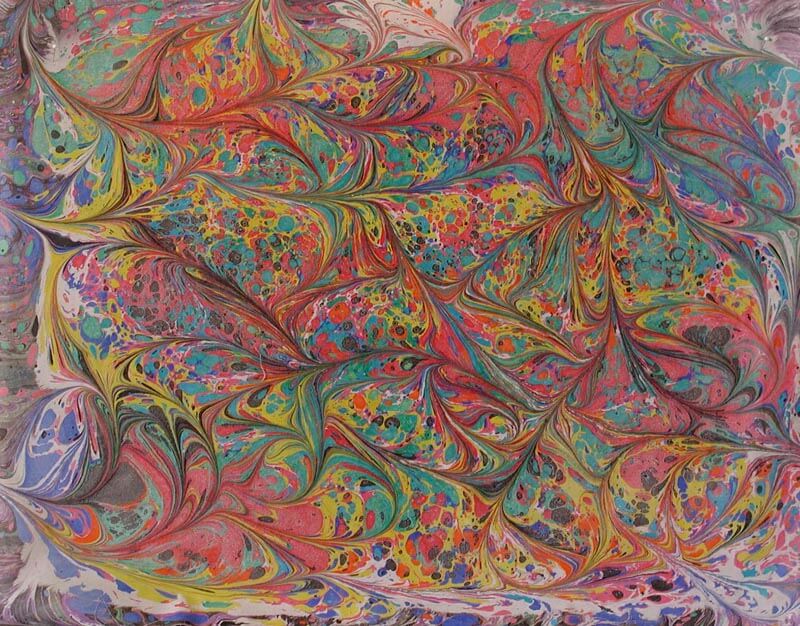
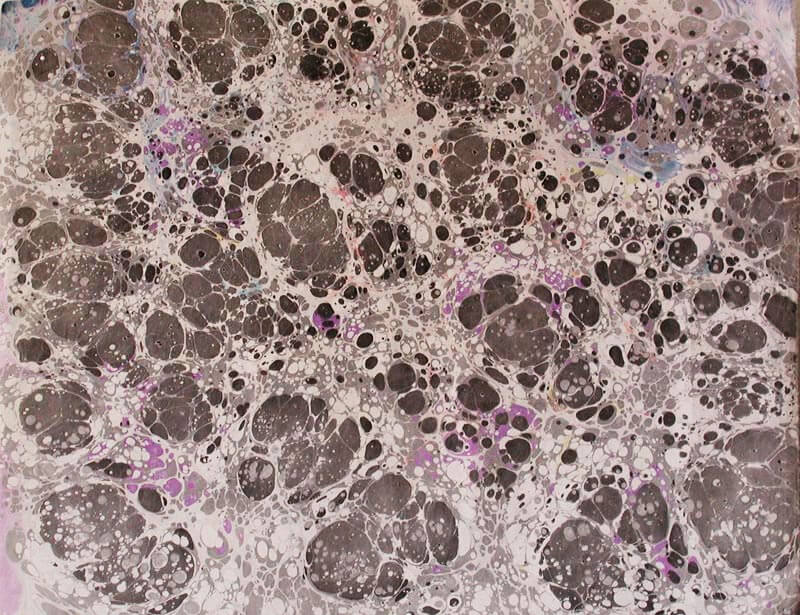
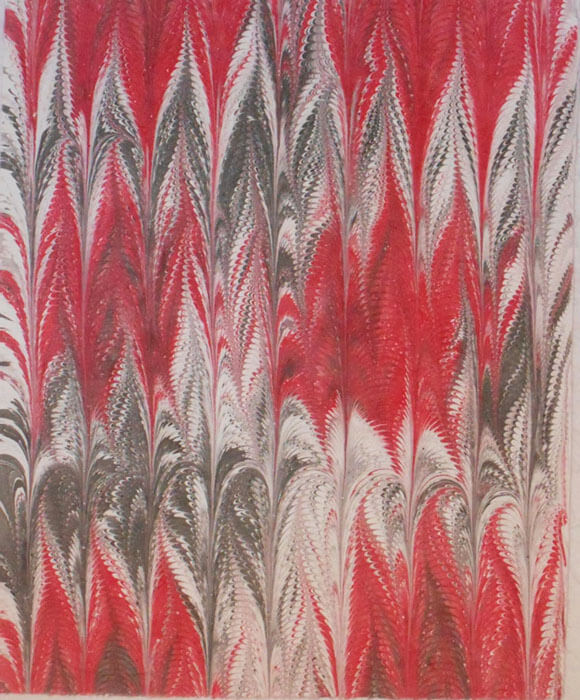
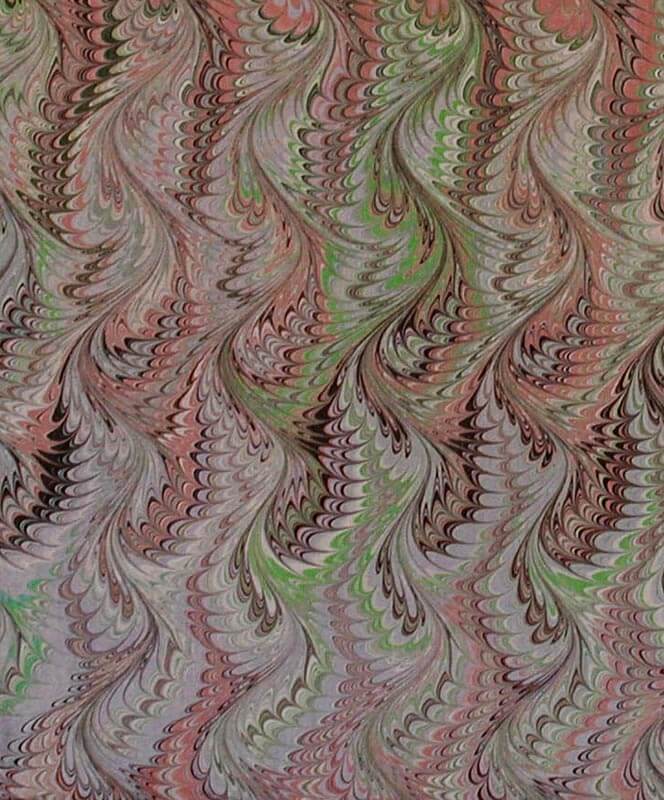
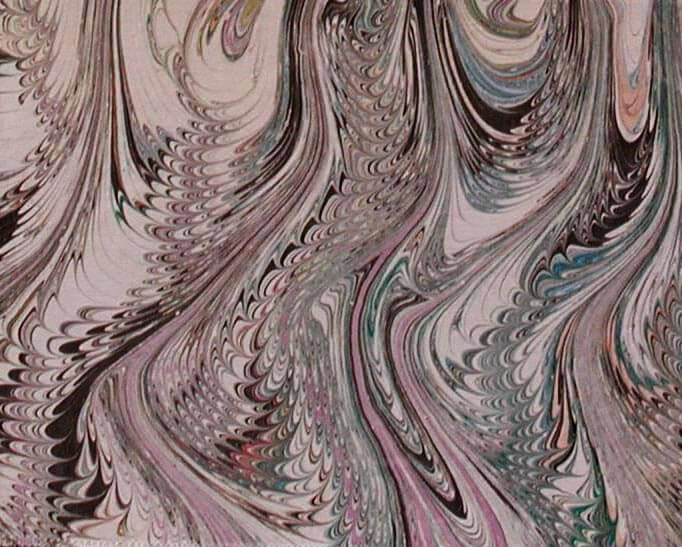
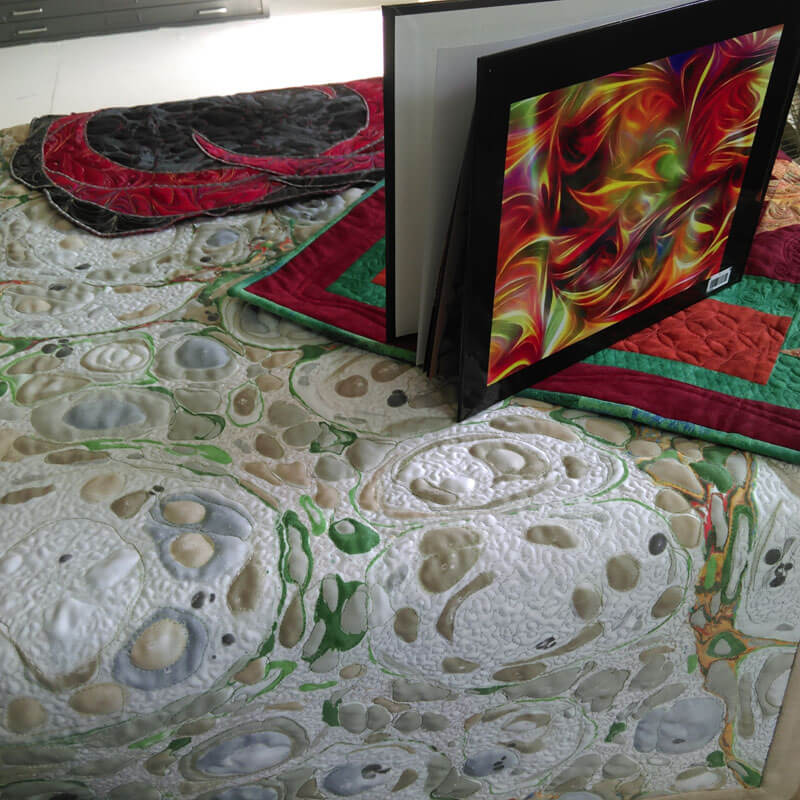
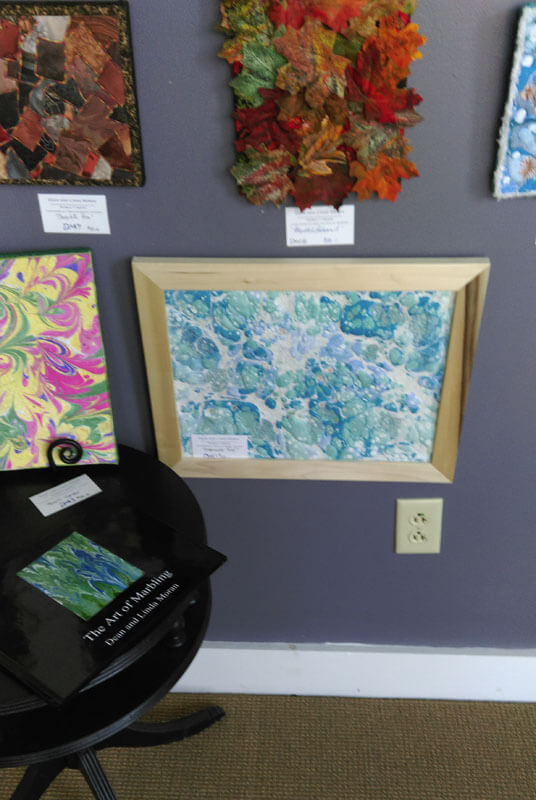
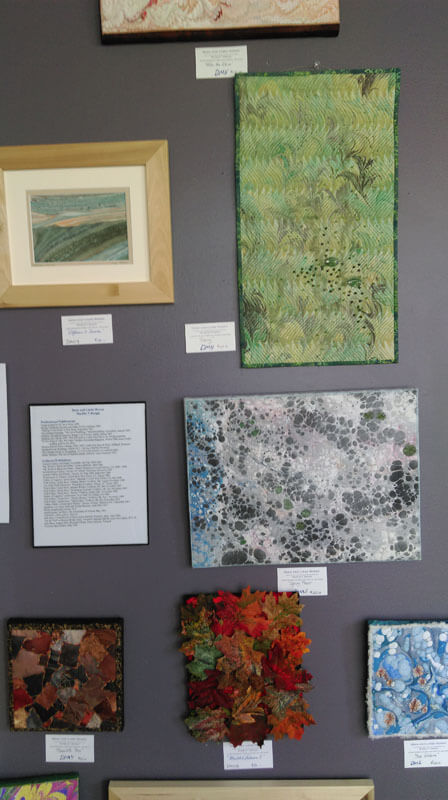
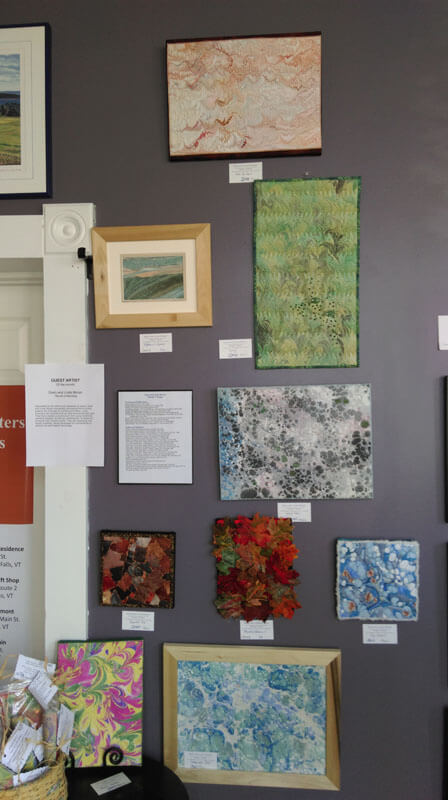
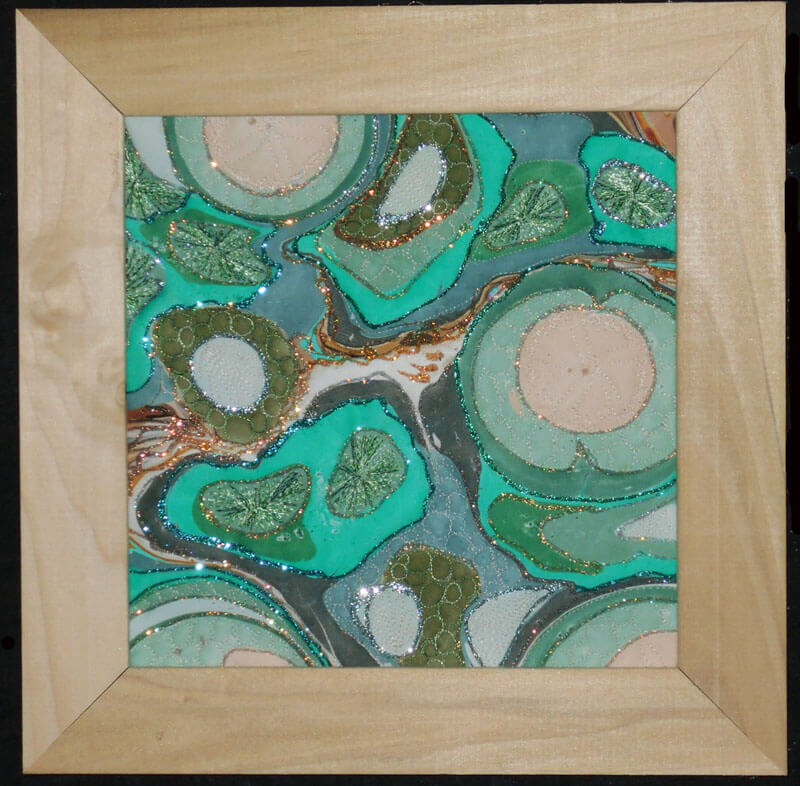
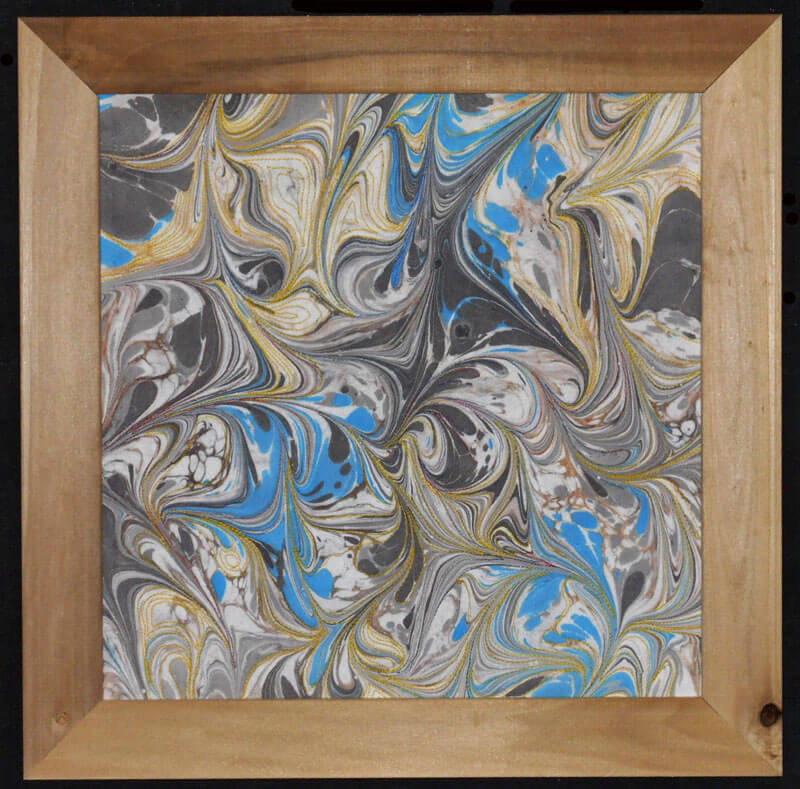
Samples of Marbled Fabrics
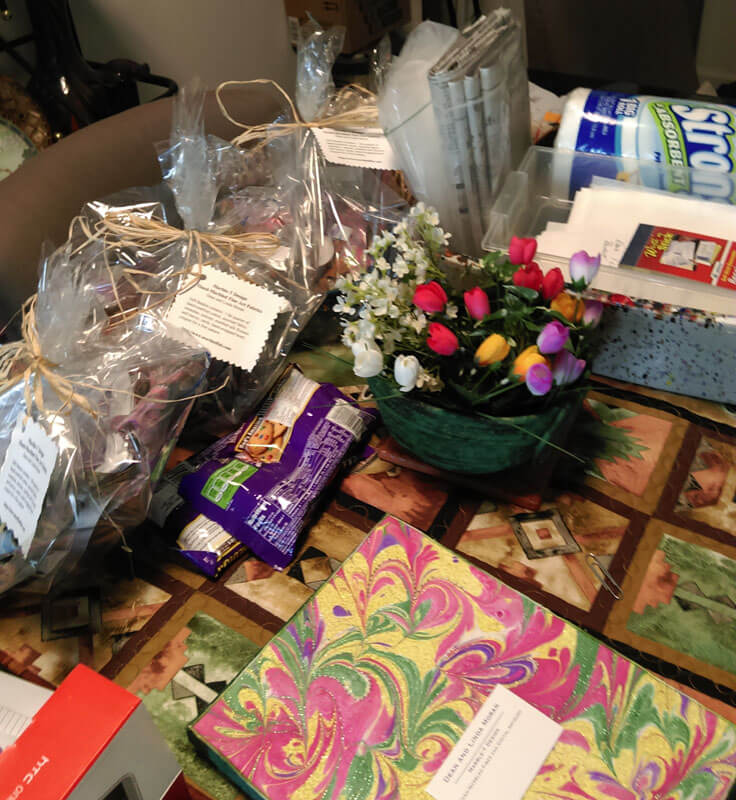
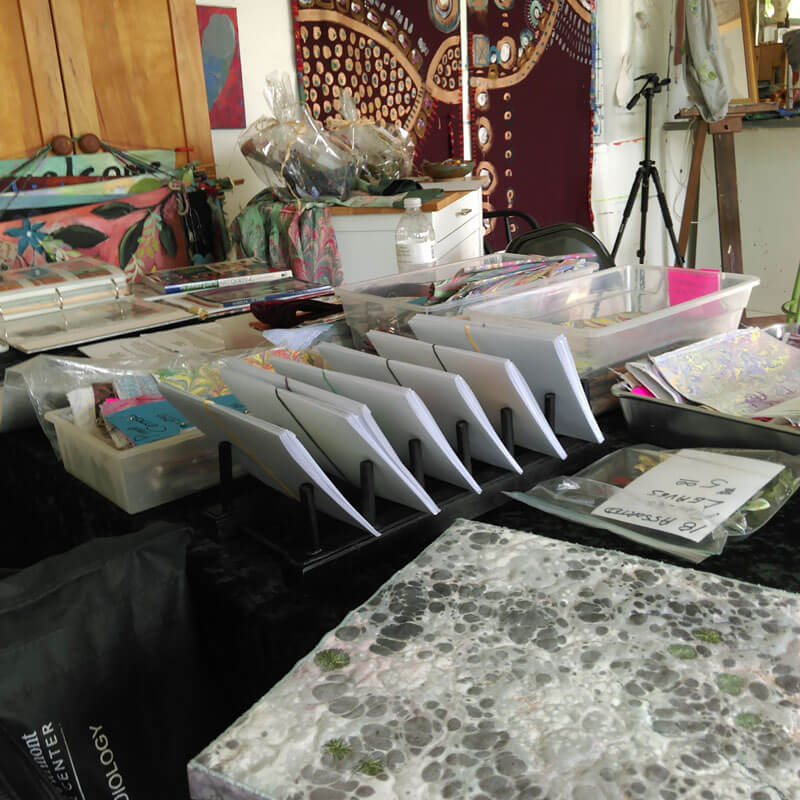
Cleaning out as part of getting into new ventures for the new year – resizing, sharpening, rephotographing fabrics – here are some sample fat quarters we have created over the years. We get tremendous joy out of creating – some look similar, but it seems like endless opportunities available to us to play with fabric and paint. Remember, we can customize for you! Let us know what you think….THESE ARE NOT FOR SALE – just pieces we have photos of from the past!
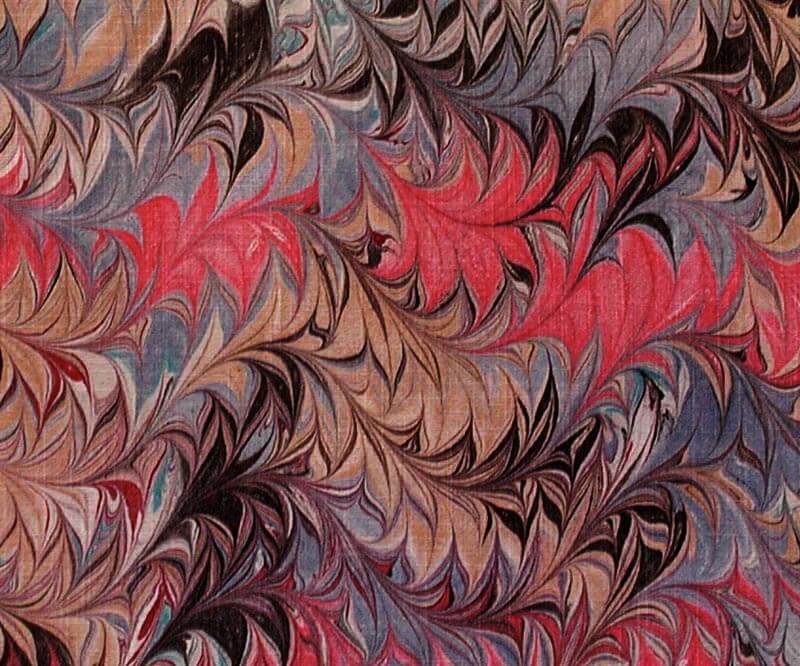
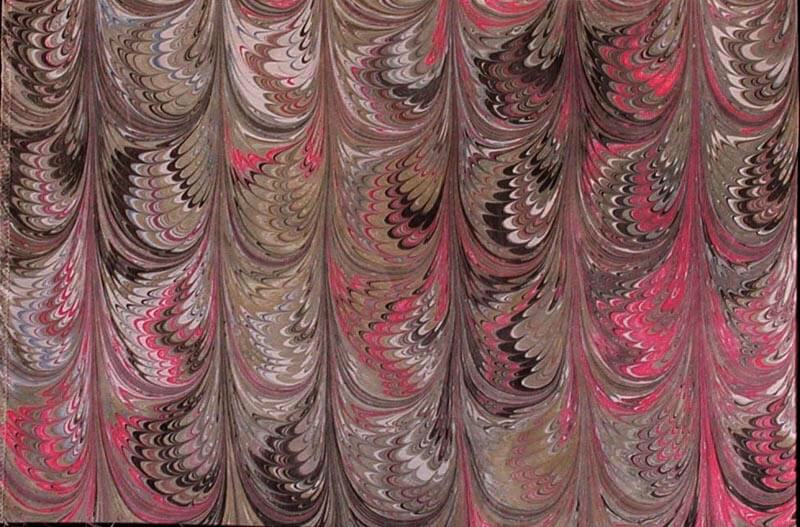
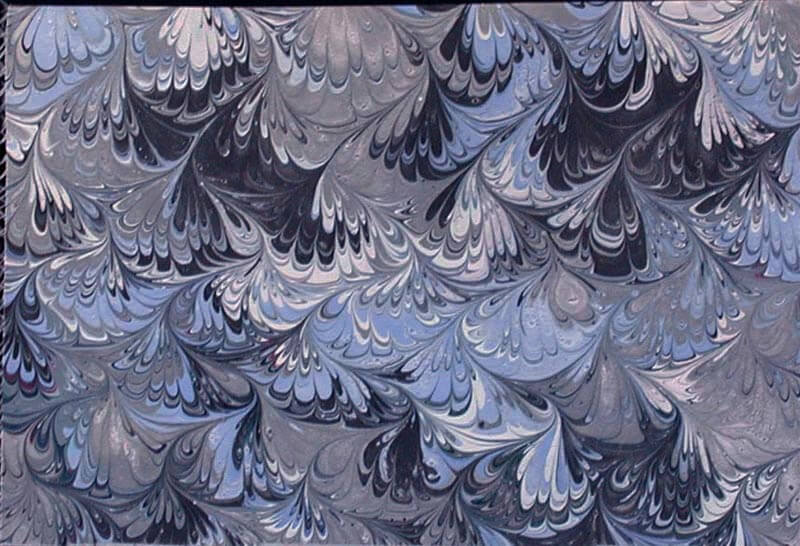
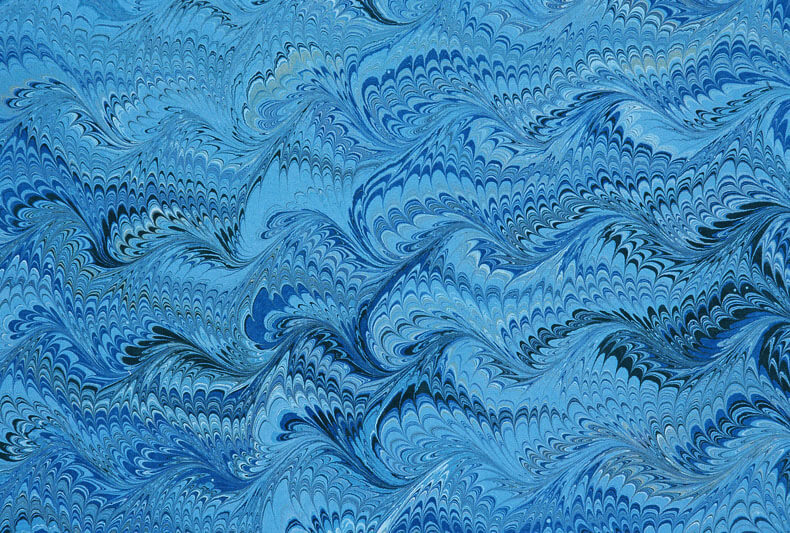
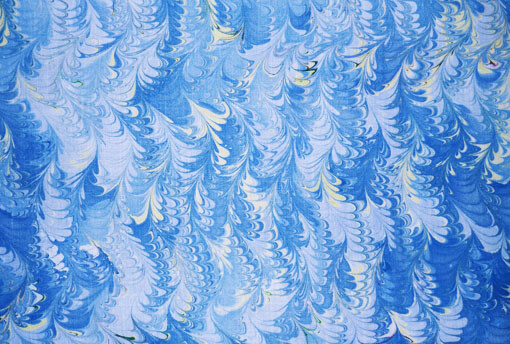
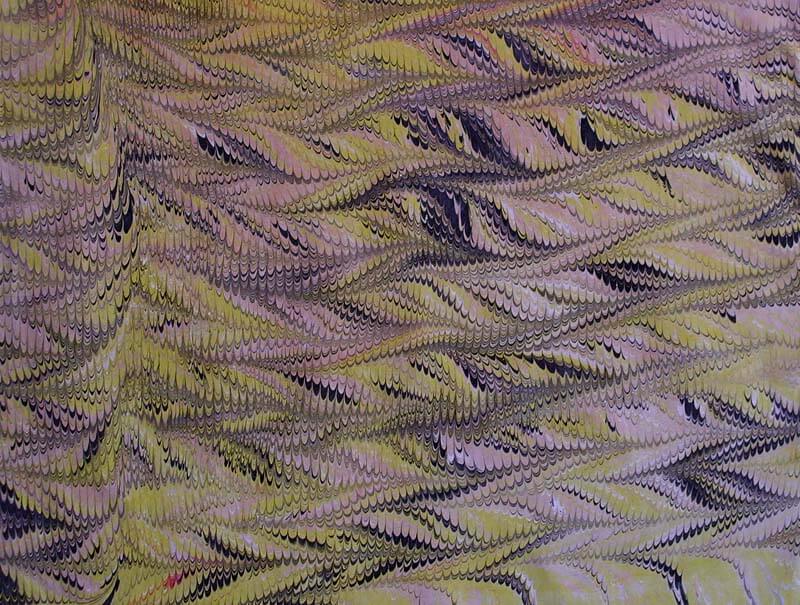
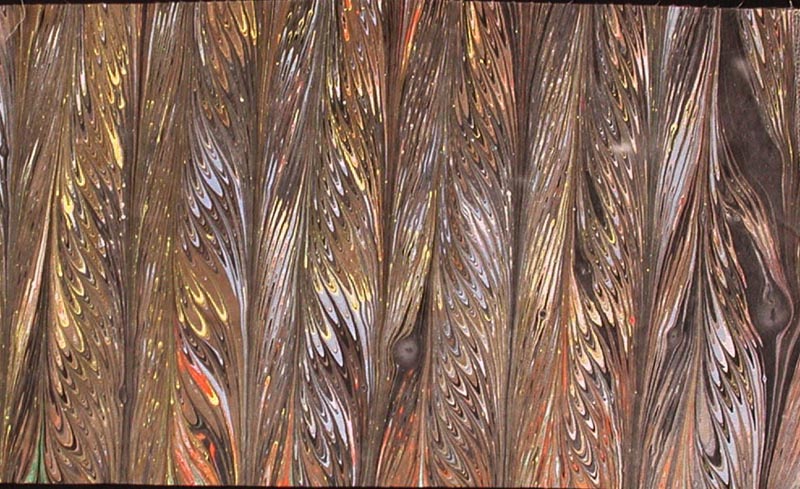
 So many iterations of traditional patterns! All from toothpicks, Popsicle sticks, straight pins, t-pins, small hair pics – lots of balsa and a huge amount of time to make the combs and rakes. It’s the prep that takes so long before you can have hours of fun!!
Art in 2016 – Part 6 in Review – More Small Works
 There were a lot of other small items completed – some UFO’s and some brand new. The small piece at the left (24 0nches square) was an OLD top from many years ago – part of a pattern kit for customers using marbled fabrics. The quilt top had some serious rolls of fabric where the iron (and the user…) had pressed wrong. So I to0k out all the stitches, fixed it, made the sandwich, and then requilted it with my practiced free motion skills. A lot of new patterns from Lori Kennedy’s The Inbox Jaunt – she has amazing tutorials.
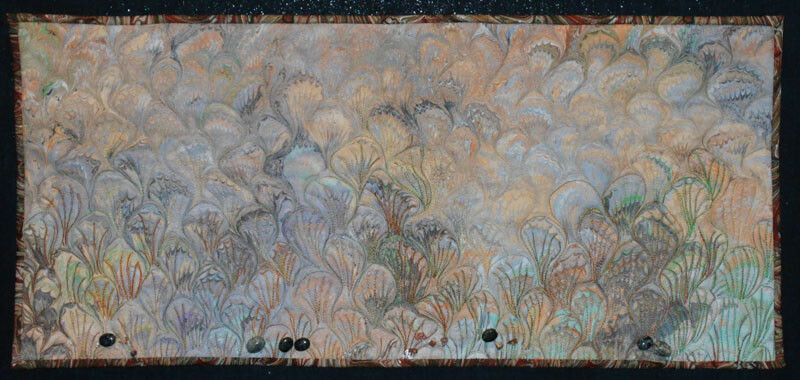
Then there were pieces where I looked through pieces of marbled fabric we had saved and waited for one to speak to me. A lot of them did in the course of the year. “Sonoran Desert” was one of those. this was done on white denim, and it was a pattern I’ve not quilted before – but it spoke to me of the saguaros of the Sonoran Desert.
 Didn’t like this binding – too sloppy to control, so did a regular fabric binding. It hung in our library show and now has a new home with a woman who lived in Tucson for a number of years. Added a few semi-precious pieces of turquoise, agates and lava.
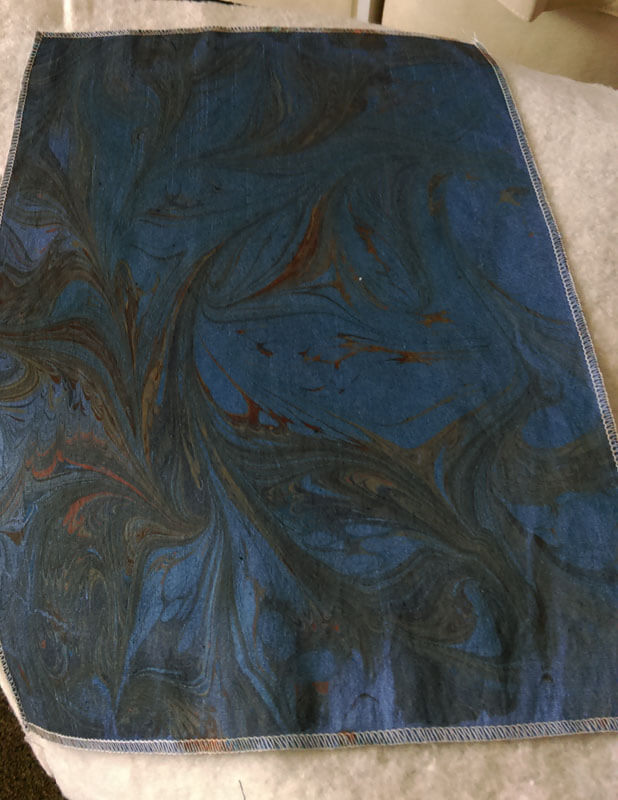
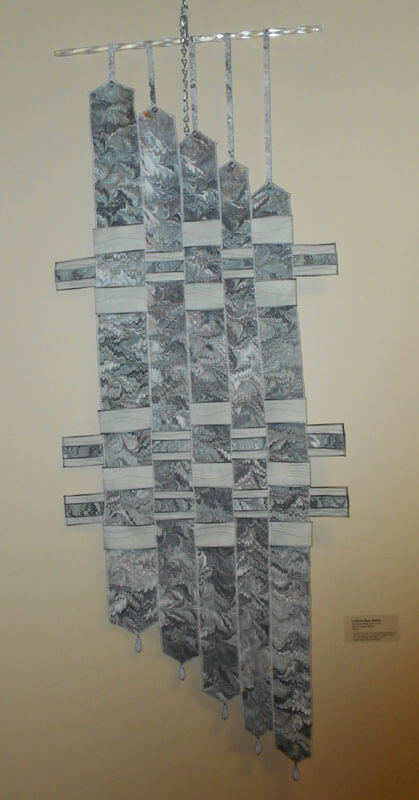
A friend keeps us supplied with all sorts of remnants of cottons, polys and silks. We used a couple to see if they would marble – and they did – spectacularly. One of them went immediately to our son in Seattle – he loved the dark colors – said they were “sexy.” The one he received was “Sliver of Moonlight.” First pic is of the plain marbled fabric, second is seeing the stitching. Unfortunely no final pic of it mounted.
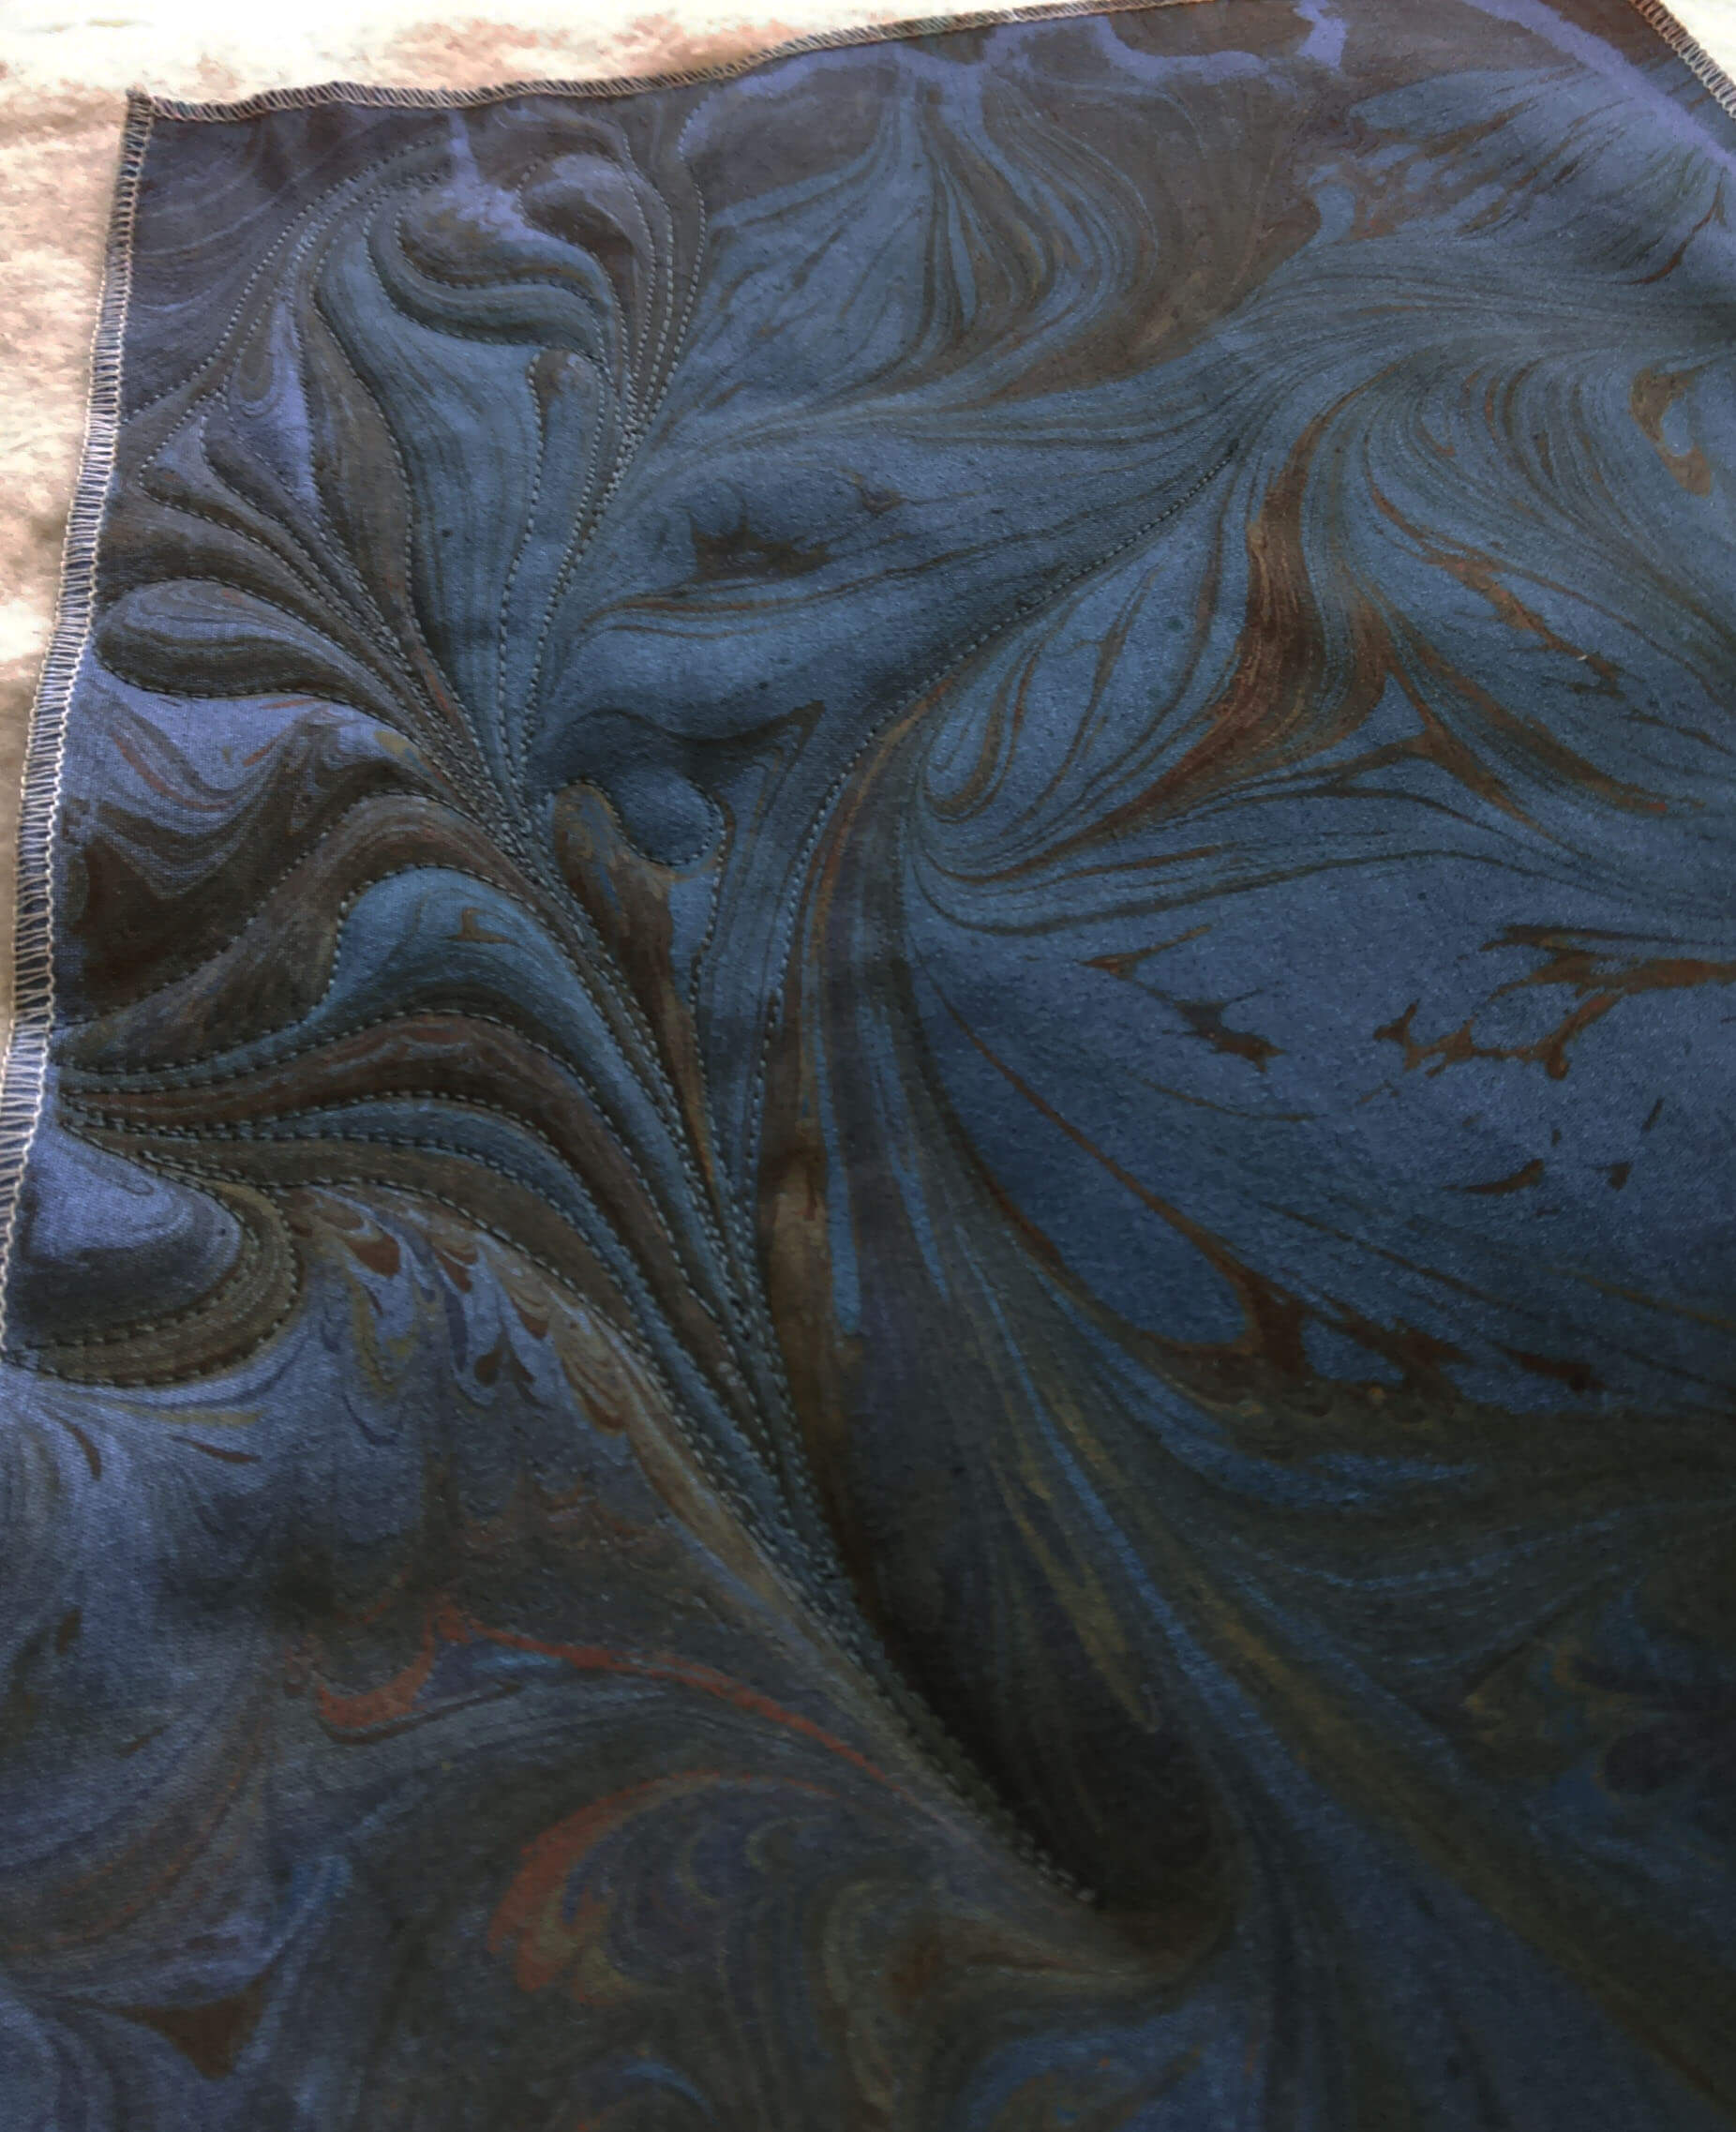
This one is same fabric – black poly-silk, and is called “Whispers in the Moonlight.”
 The finished piece is mounted on a canvas frame covered in black linen, and it “floats” about the frame.
There are more pieces, but I need to move on to new projects…..more on an upcoming sale we are having – next blog post!
hitting 1000 b logposts……
Art in 2016 – Part 4 Review – Classes and Shows…and a Book!
This was a big year for showing our work – many more options and acceptances than most of our time in Arizona. We taught a beginning marbling class at BluSeed Studios in Saranac Lake, NY, and in the process of chatting, we became part of their arts curriculum grant project. I’m really looking forward to this activity; I miss the days of working with The Kennedy Center to bring integrated arts into the classrooms in the Chittenden East School District in Vermont.A lot of great memories from the conferences, and then great memories from arts work within the district (need to do a blog post and reflect on the work we did….)

A couple of pictures from our Saranac Lake class, followed by an individual machine quilting class I did for a fellow artist who wanted to expand her techniques. Mary Hill is a mixed media artist, with vibrant work.

We spent Vermont Open Studios sharing space with Mary over Memorial Day Weekend. LOTSSof great discussions on marketing!!
It was a challenge to plan for what could take Mary’s already wonderful art to the next level.
 Mary Hill’s “experimenting as a result of our machine quilting class:
Plus, since May I have been working on an interactive teaching manual for the ebook Interactive Edge of the Sea. This takes all I have worked on in curriculum in 40 years of teaching and brings it together for teachers, with a modern update on using all forms of new assessment and social media within the classroom. My hope is that this manual becomes a template for other disciplines, as there are a lot of useful interactive teaching techniques – and everything is correlated to current educational standards. A labor of love with my second mom, Betty Hupp. Here’s the cover:
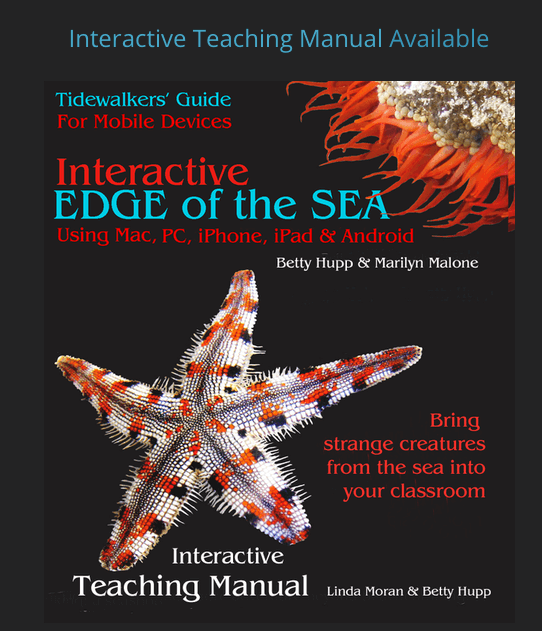 A snippet of the lesson plan section….

We are just about done with final edits, and after the first of the year it heads off to coding. I have a lot of links to check to be sure they all work!
Bunches of shows…..here are pictures of our small pieces at Sweet Grass Gallery in Williston, VT for the month of November.
There’s still more…..stay tuned!
Art in 2016 – Part 3 Review – A Few Other Commissions
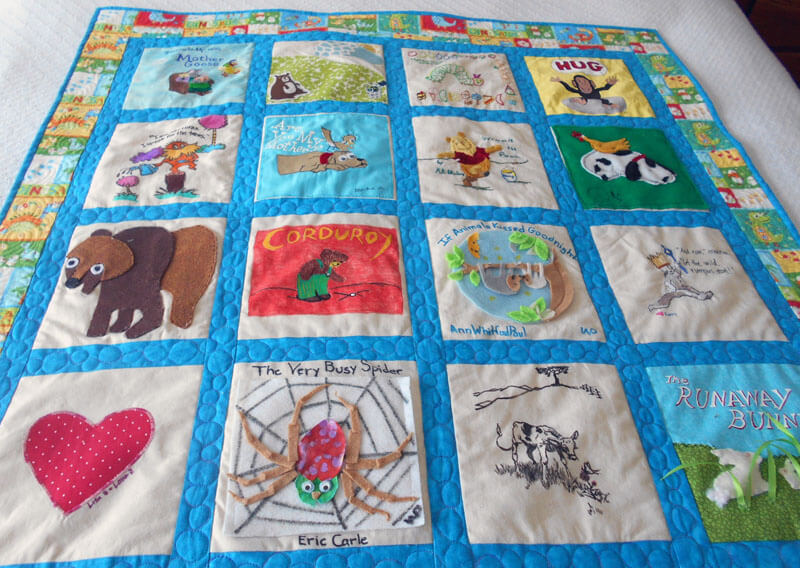
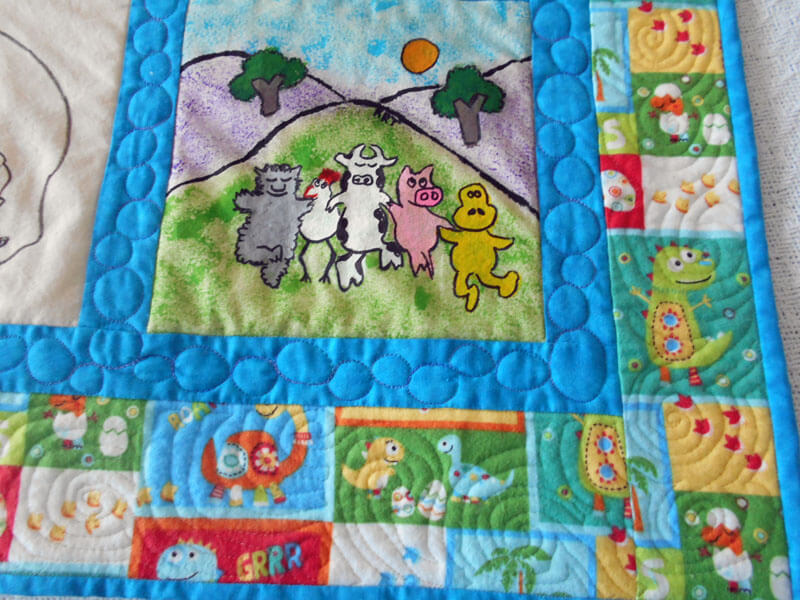
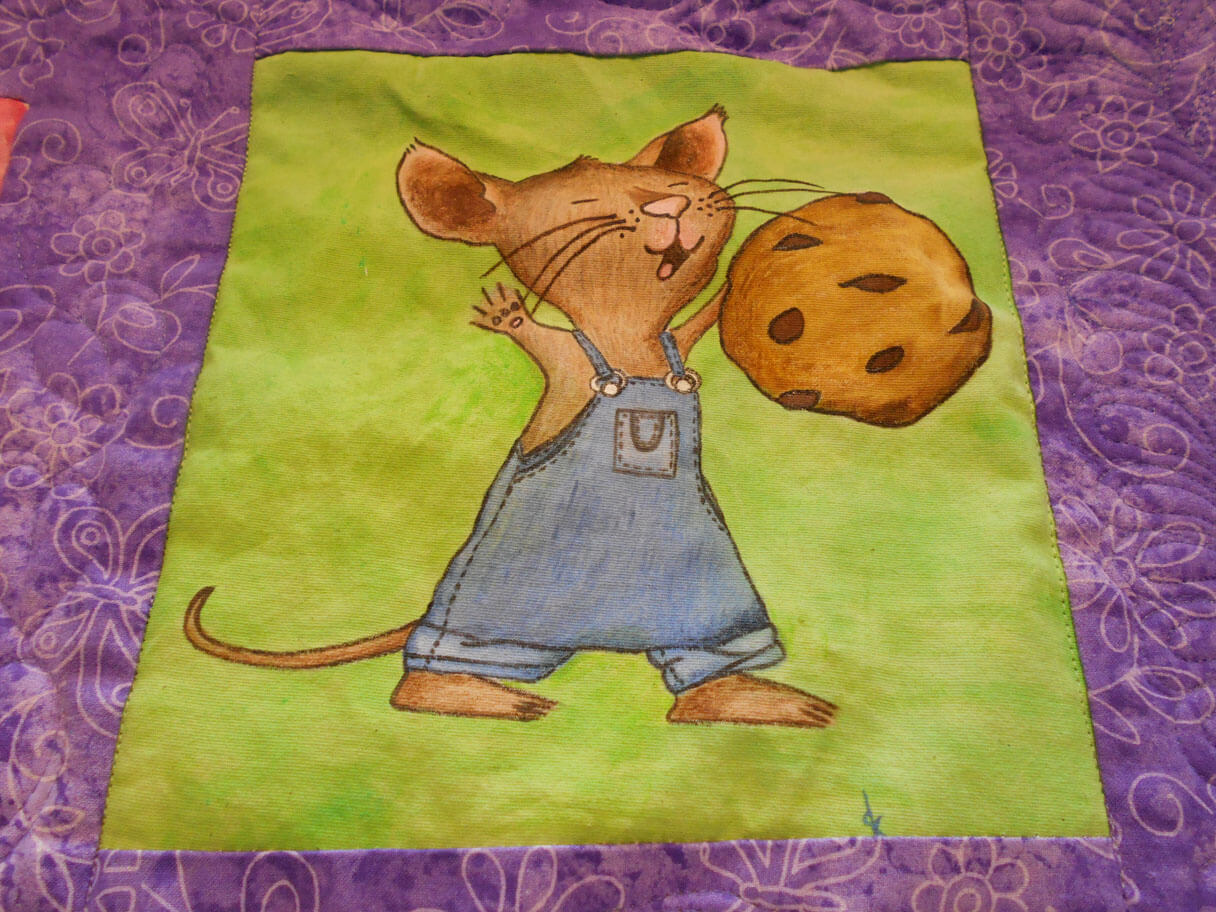
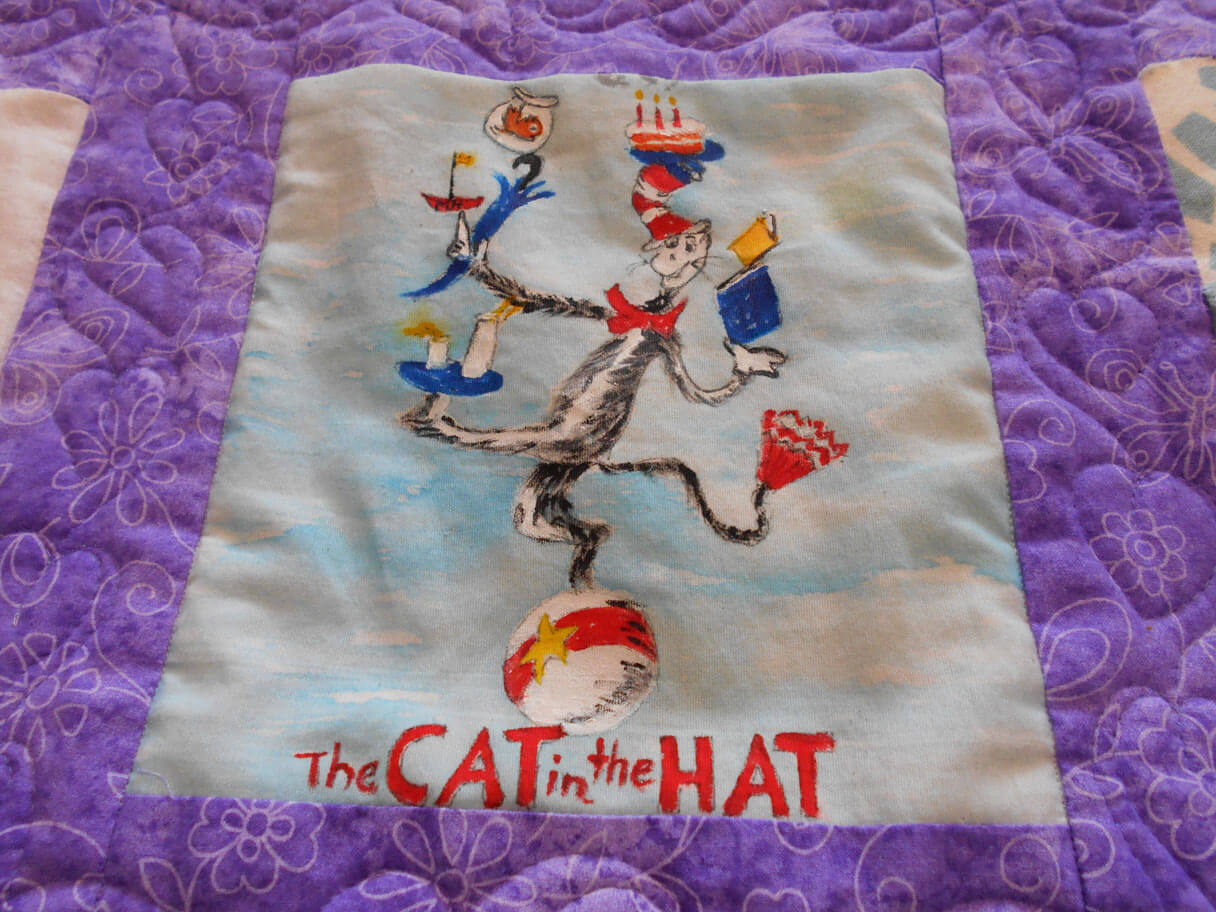
I was very involved this year in helping others create some wonderful fiber art. First up was a baby quilt for a teacher at a former school of mine. The teachers all created blocks based on children’s books, and then along with the baby quilt, gave the books to the new mom. It came out so cute!
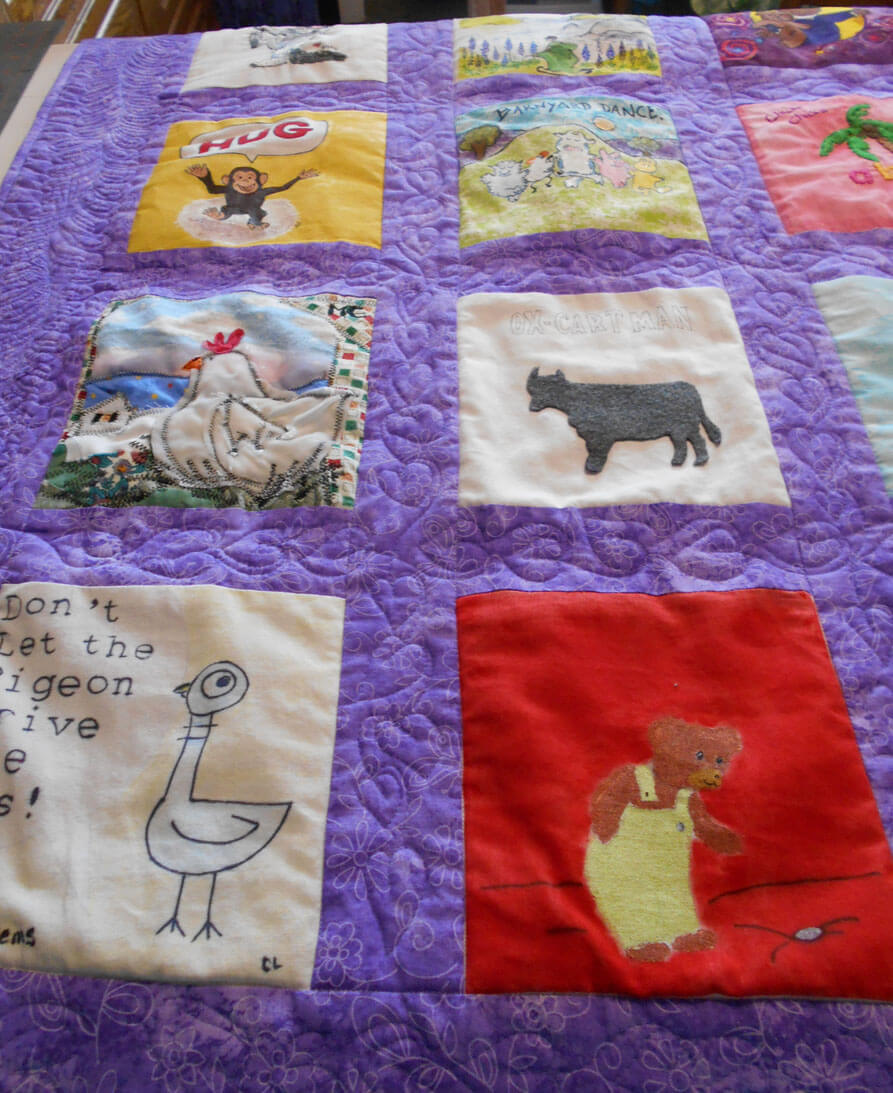
Children’s Book Baby Quilt
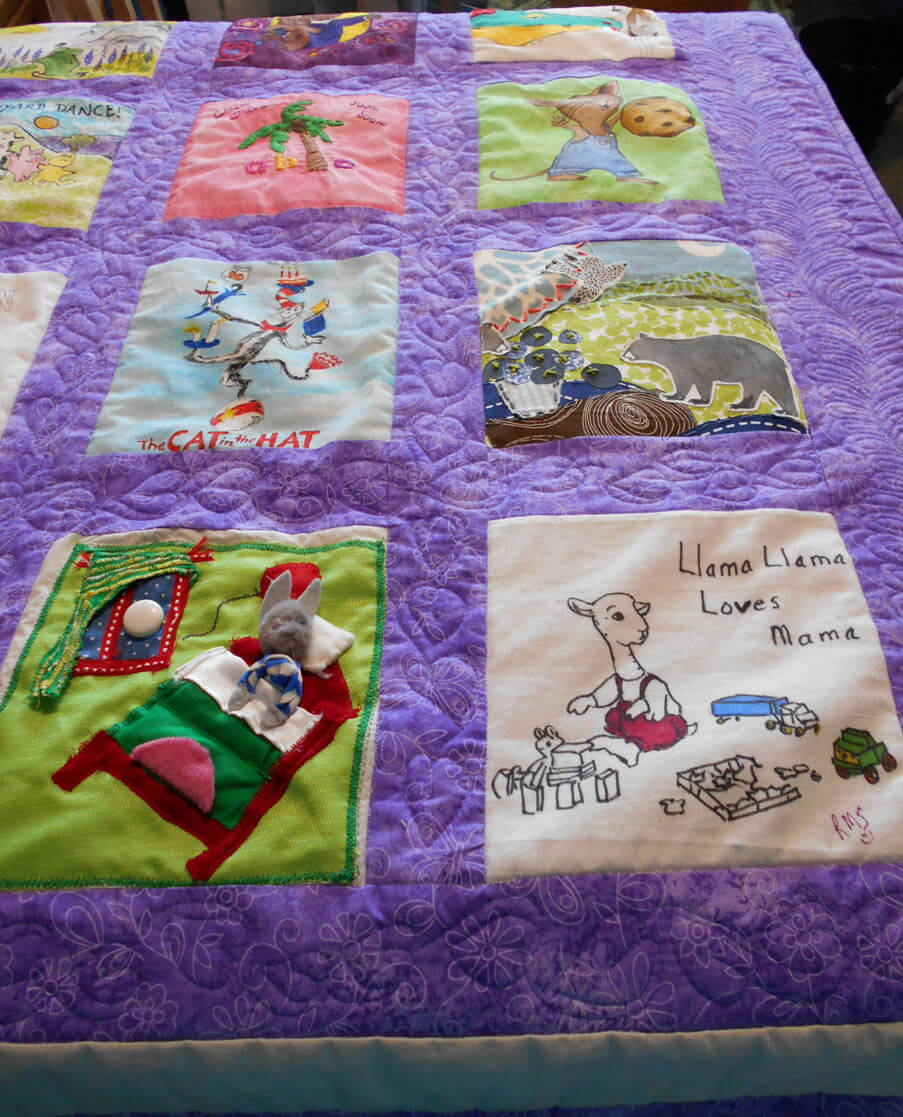
You can see the machine quilting – “leaves” for the pages of books – the leave of a book……a lot of fun to quilt. Next time….stabilize the pieces before they are sewn into blocks….

How many books can you identify?
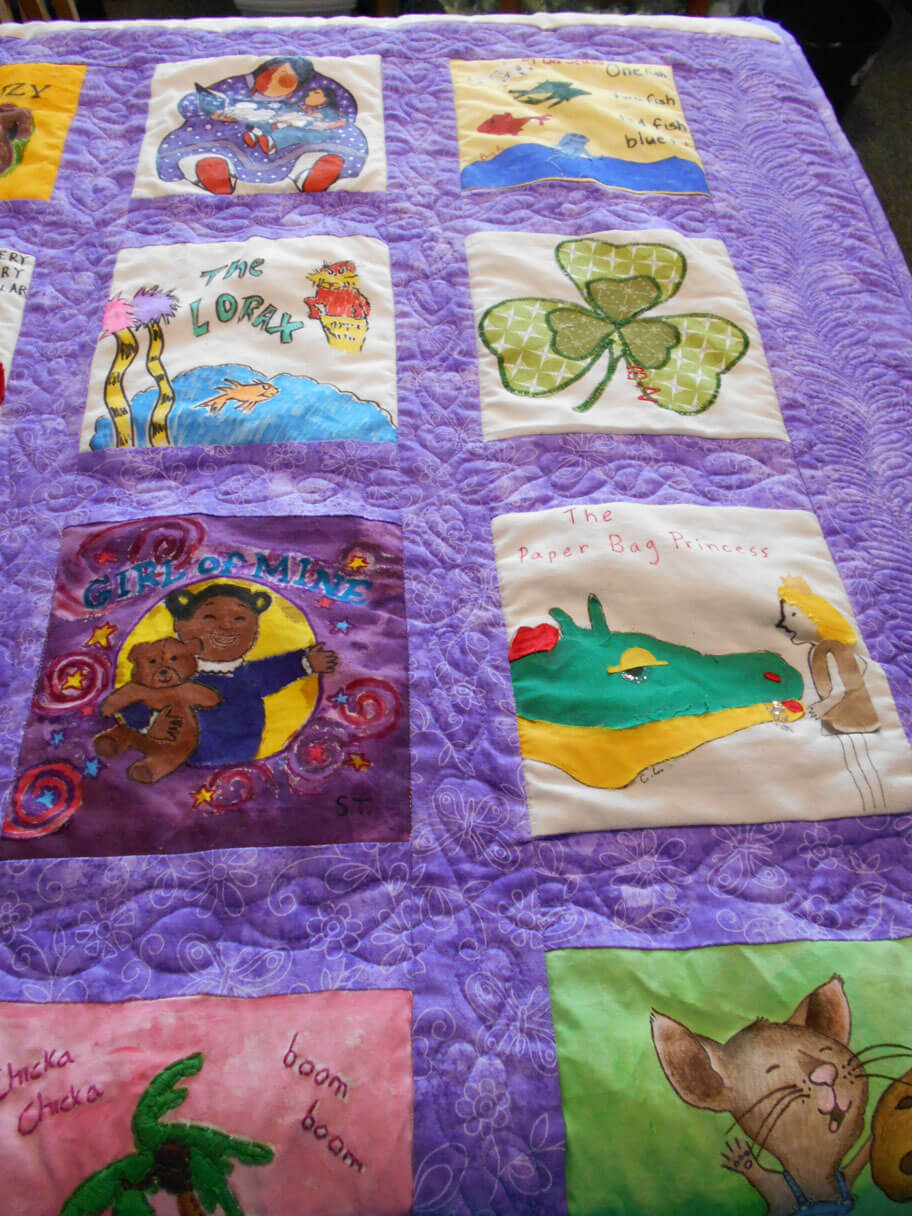

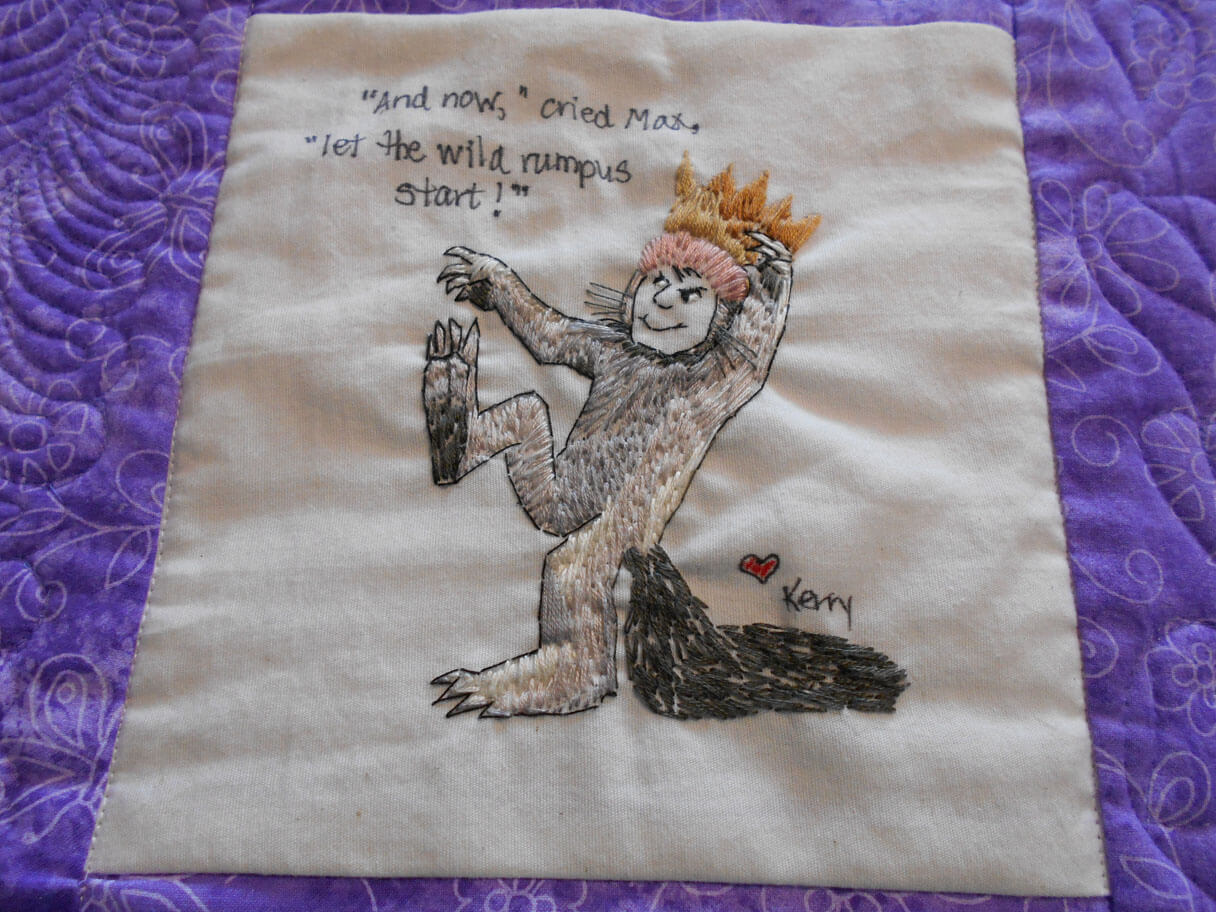
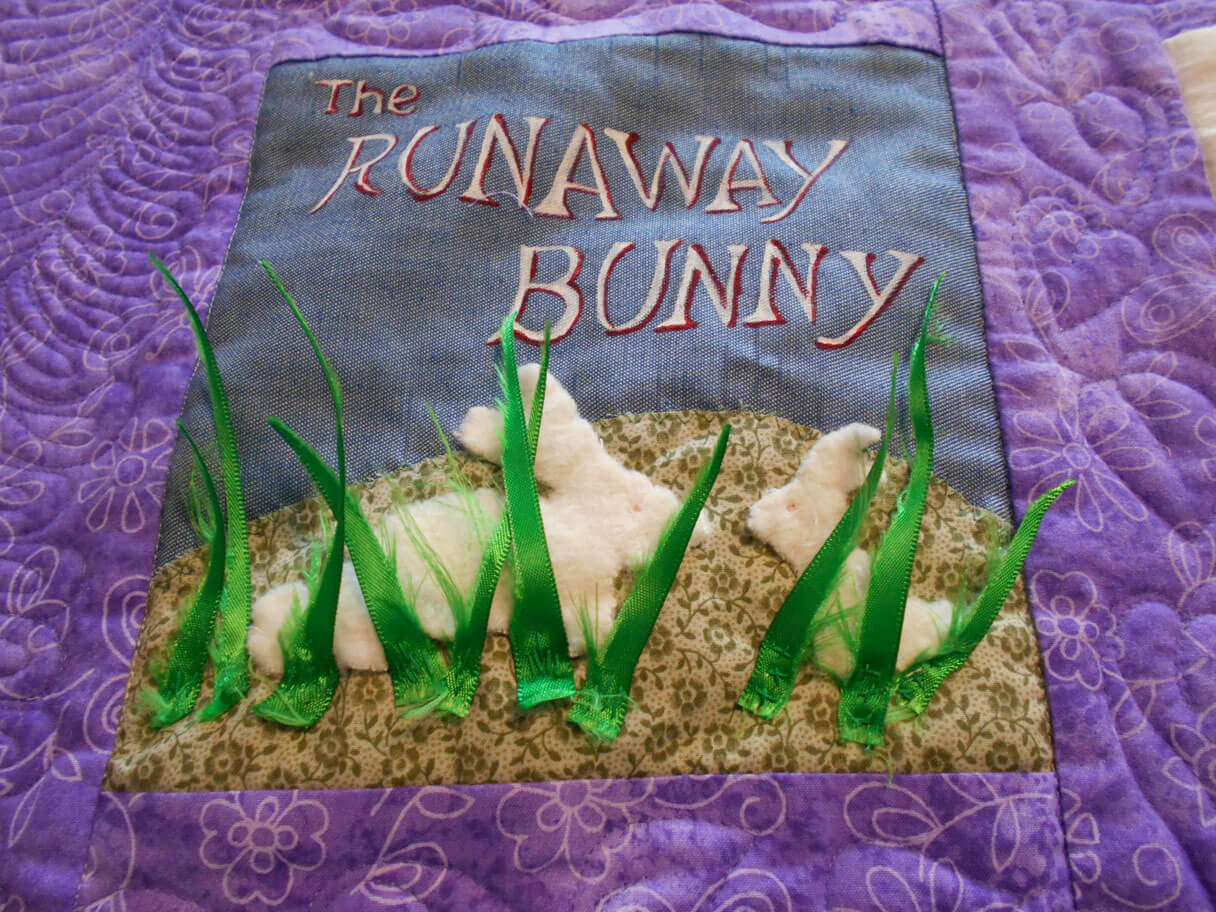
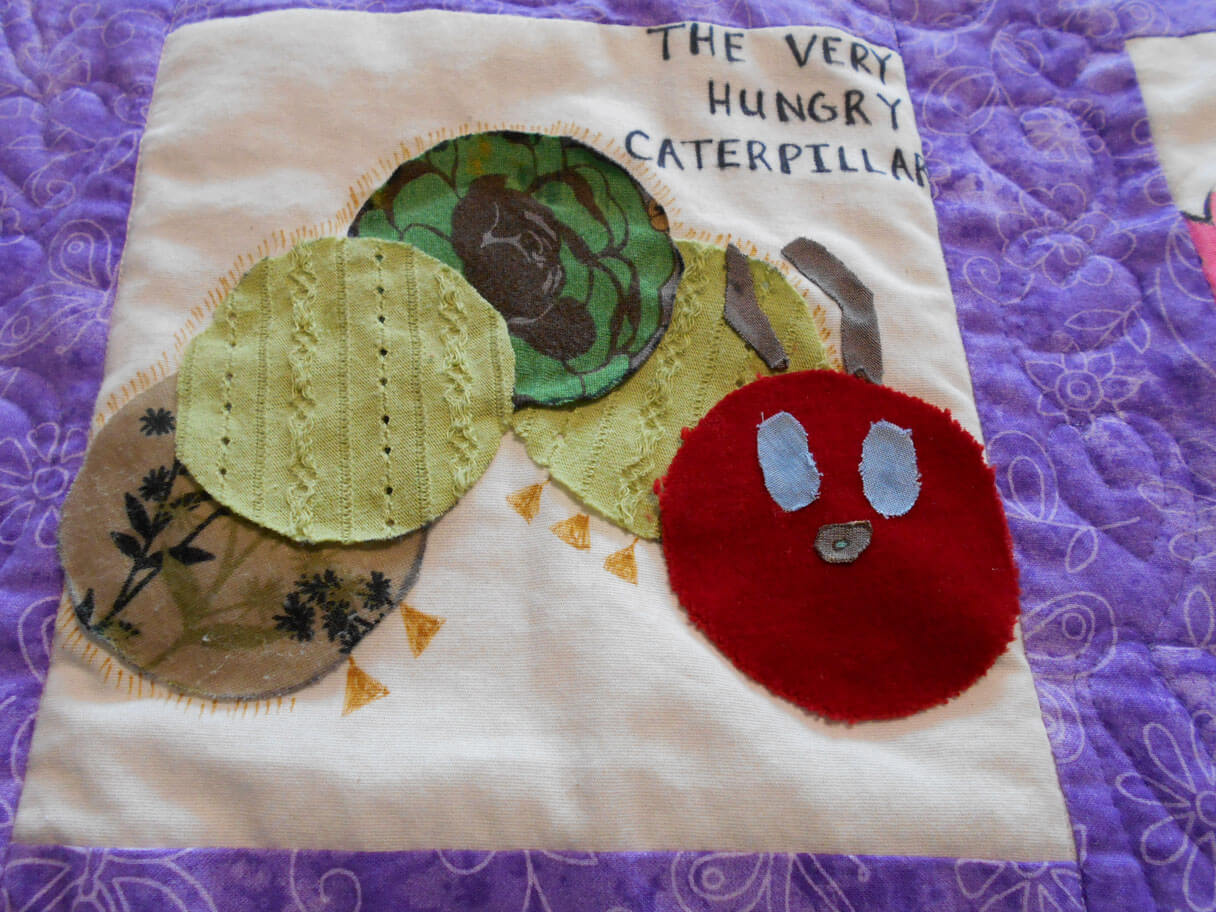

LOVE Patricia Pallaco!
Two more baby quilts scheduled for the new year….prolific bunch at Camels Hump Middle School!
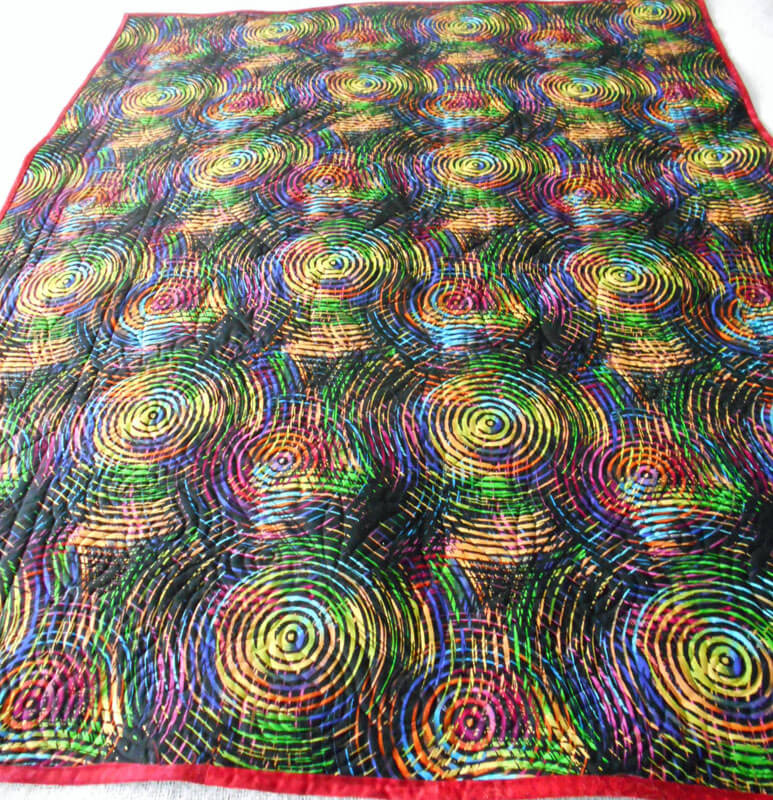
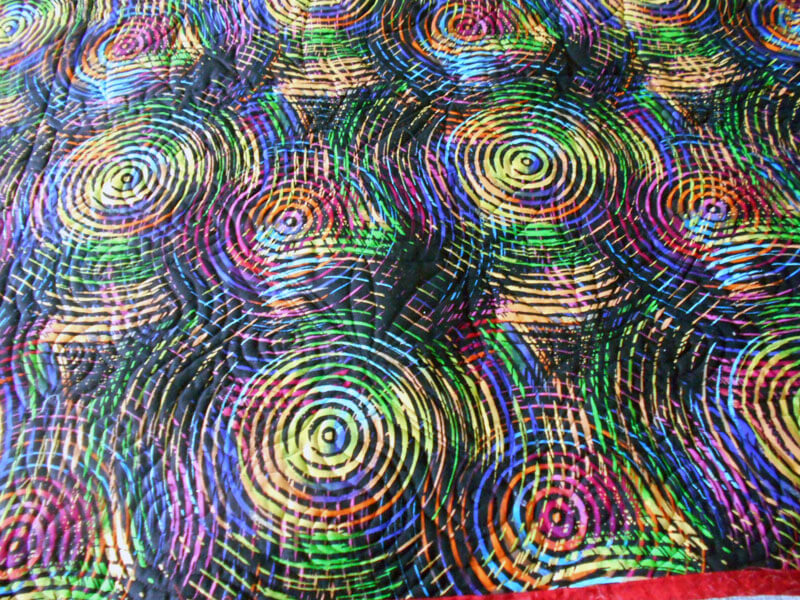
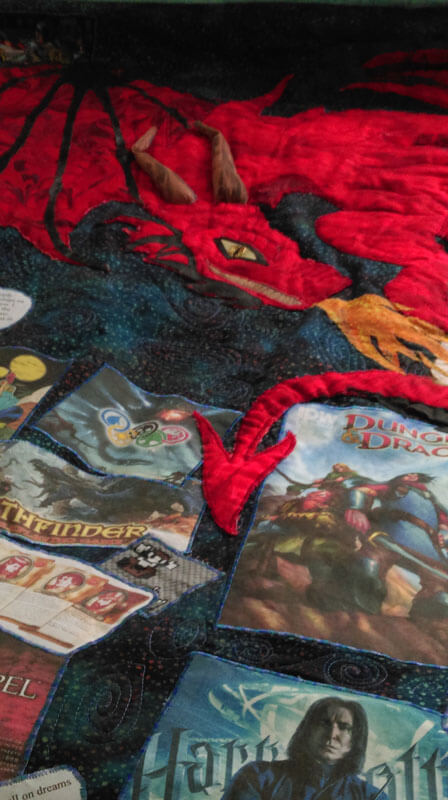
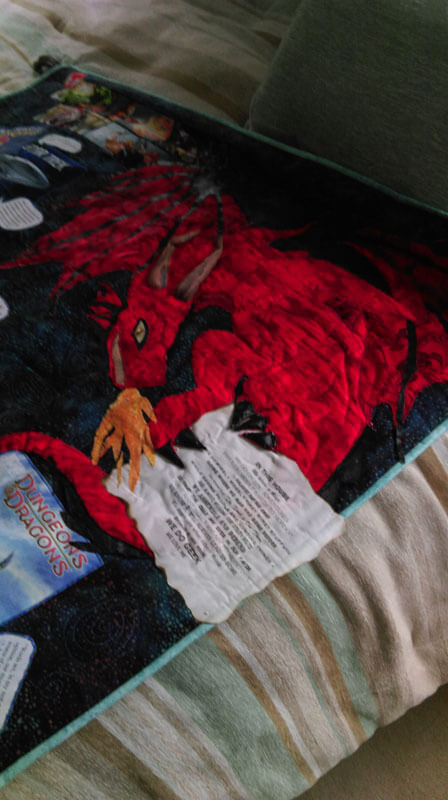
A good friend made a “science fiction” quilt for her son – a gamer, doctoral student, and avid reader. It was SO MUCH fun helping in the process, from using spray basting, to zigzagging quotes, to creating the dragon (a “must-have in this quilt). It hangs from a curtain rod that is very “Lord of the Rings” in design. I was responsible for the machine quilting of dozens of galaxies within the quilt. The dragon has a lot of marbled fabric within it, and it works so well! Kathy did an amazing job. Teeth, flame, wings, and horns all crafted from marbled fabrics. Hubby Dave did the design for the pattern, Kathy did the contruction with vinyl and a few other fabrics.
 The last heavy sewing/quilting happened when my friend Kathy wanted to recreate a marbled wall hanging of ours that one of her daughters loved. Sure…..to find she wanted it reversible…and a few other changes….


 The story of the original piece is here.
I don’t have any finished pics at this point – just an in-progress. Oh, did I forget to mention she wanted one for each daughter? Different colors for reversible? Different quilting patterns? It really was a lot of fun, and it challenged me to revisit a reversible binding….but I made Kathy do all the hand-stitching……
A close-up of in-progress……
 Can’t wait for pictures of both the blues and the greens!
The year started with this commission: The Arroyo –
Starting stitching
Embellinging
On the wall at Frog Hollow Gallery
…and we’re not done for the year!!
Art in 2016 – Part 2 Review – Small Works
A lot of smaller work was started, finished, and revised this year – part of the need to create more pieces, and part to experiment with new ideas. We also tried more framing (pretty successful) and mounting on canvas (very successful, and not that all expensive). The biggest issue seemed to be people didn’t know what to do with small wall hangings or table-toppers. By framing them we are leading our customers to see the piece on a wall, looking like artwork. This is also working well for galleries and stores with small spaces.
The “Chocolate Box” piece on the left was done some 18 years ago as part of a challenge on the QuiltArt list to create an 8 x 8 piece with the theme of “brown.” I pulled all kinds of browns from my stash, including some marbled fabrics, and then I zigzagged them together with the idea of creating a “Whitman’s Sampler.” I have always thought it looked very cute. I rediscovered it this summer, adding batting and backing, variegated thread in a more prominent zigzag, put on a binding, and mounted it on fabric. Lots of good feedback on the piece.
Another piece that saw framing was a small piece of marbled poly-satin that a friend (Suzan Drury of Saltwater Systems) added glitter to at least 10 years ago. Loved it, but it didn’t translate into something someone would want to buy – so on a whim I added batting and backing and then quilted it – thus “Pond 3” – a favorite topic. I learned to do sand dollars as part of a tutorial from Lori Kennedy (theinboxjaunt.com), so you will see clam shells, sea urchins, and sand dollars throughout the small piece. It looks quite striking. One thing I learned in the framing process was to move to lighter-colored frames to keep a piece from feeling constrained.
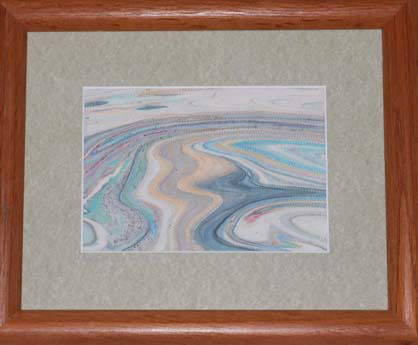
this year saw the debut of a new series – “Leftovers.” The idea for this came about when we would clean the marbling tray after a session. There were wonderful designs of leftover paint as we emptied the carrageenan. We started saving some small pieces to capture to designs – all of which are very organic and “earth strata.” Two pieces made their debut at Phoenix Books in Essex as part of a rotating display of work by the Essex Art League. There are LOTS more to come – all of which need me to stare at a piece for a while to determine how it wants to be stitched. They are all simply framed and look almost like photographs.
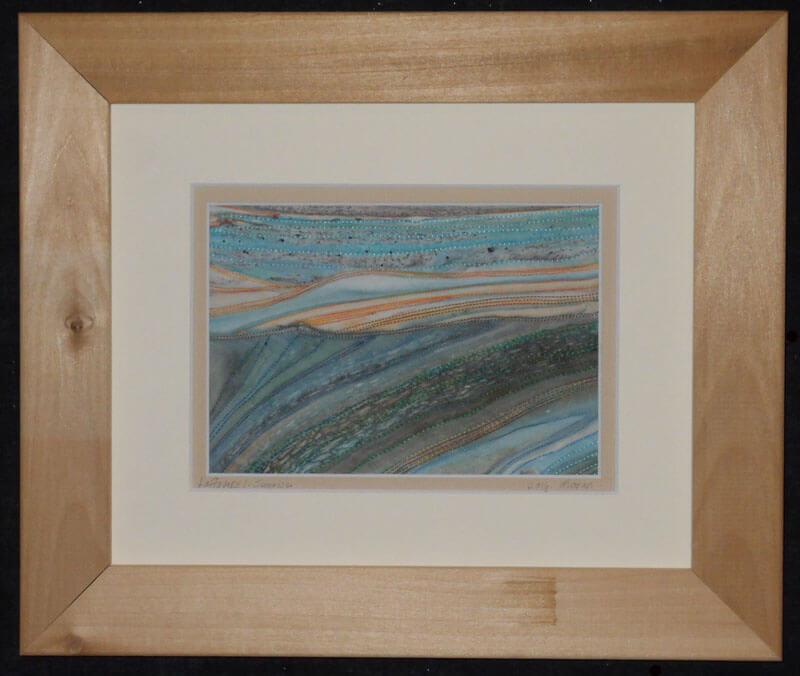
Leftovers 1: Sunrise
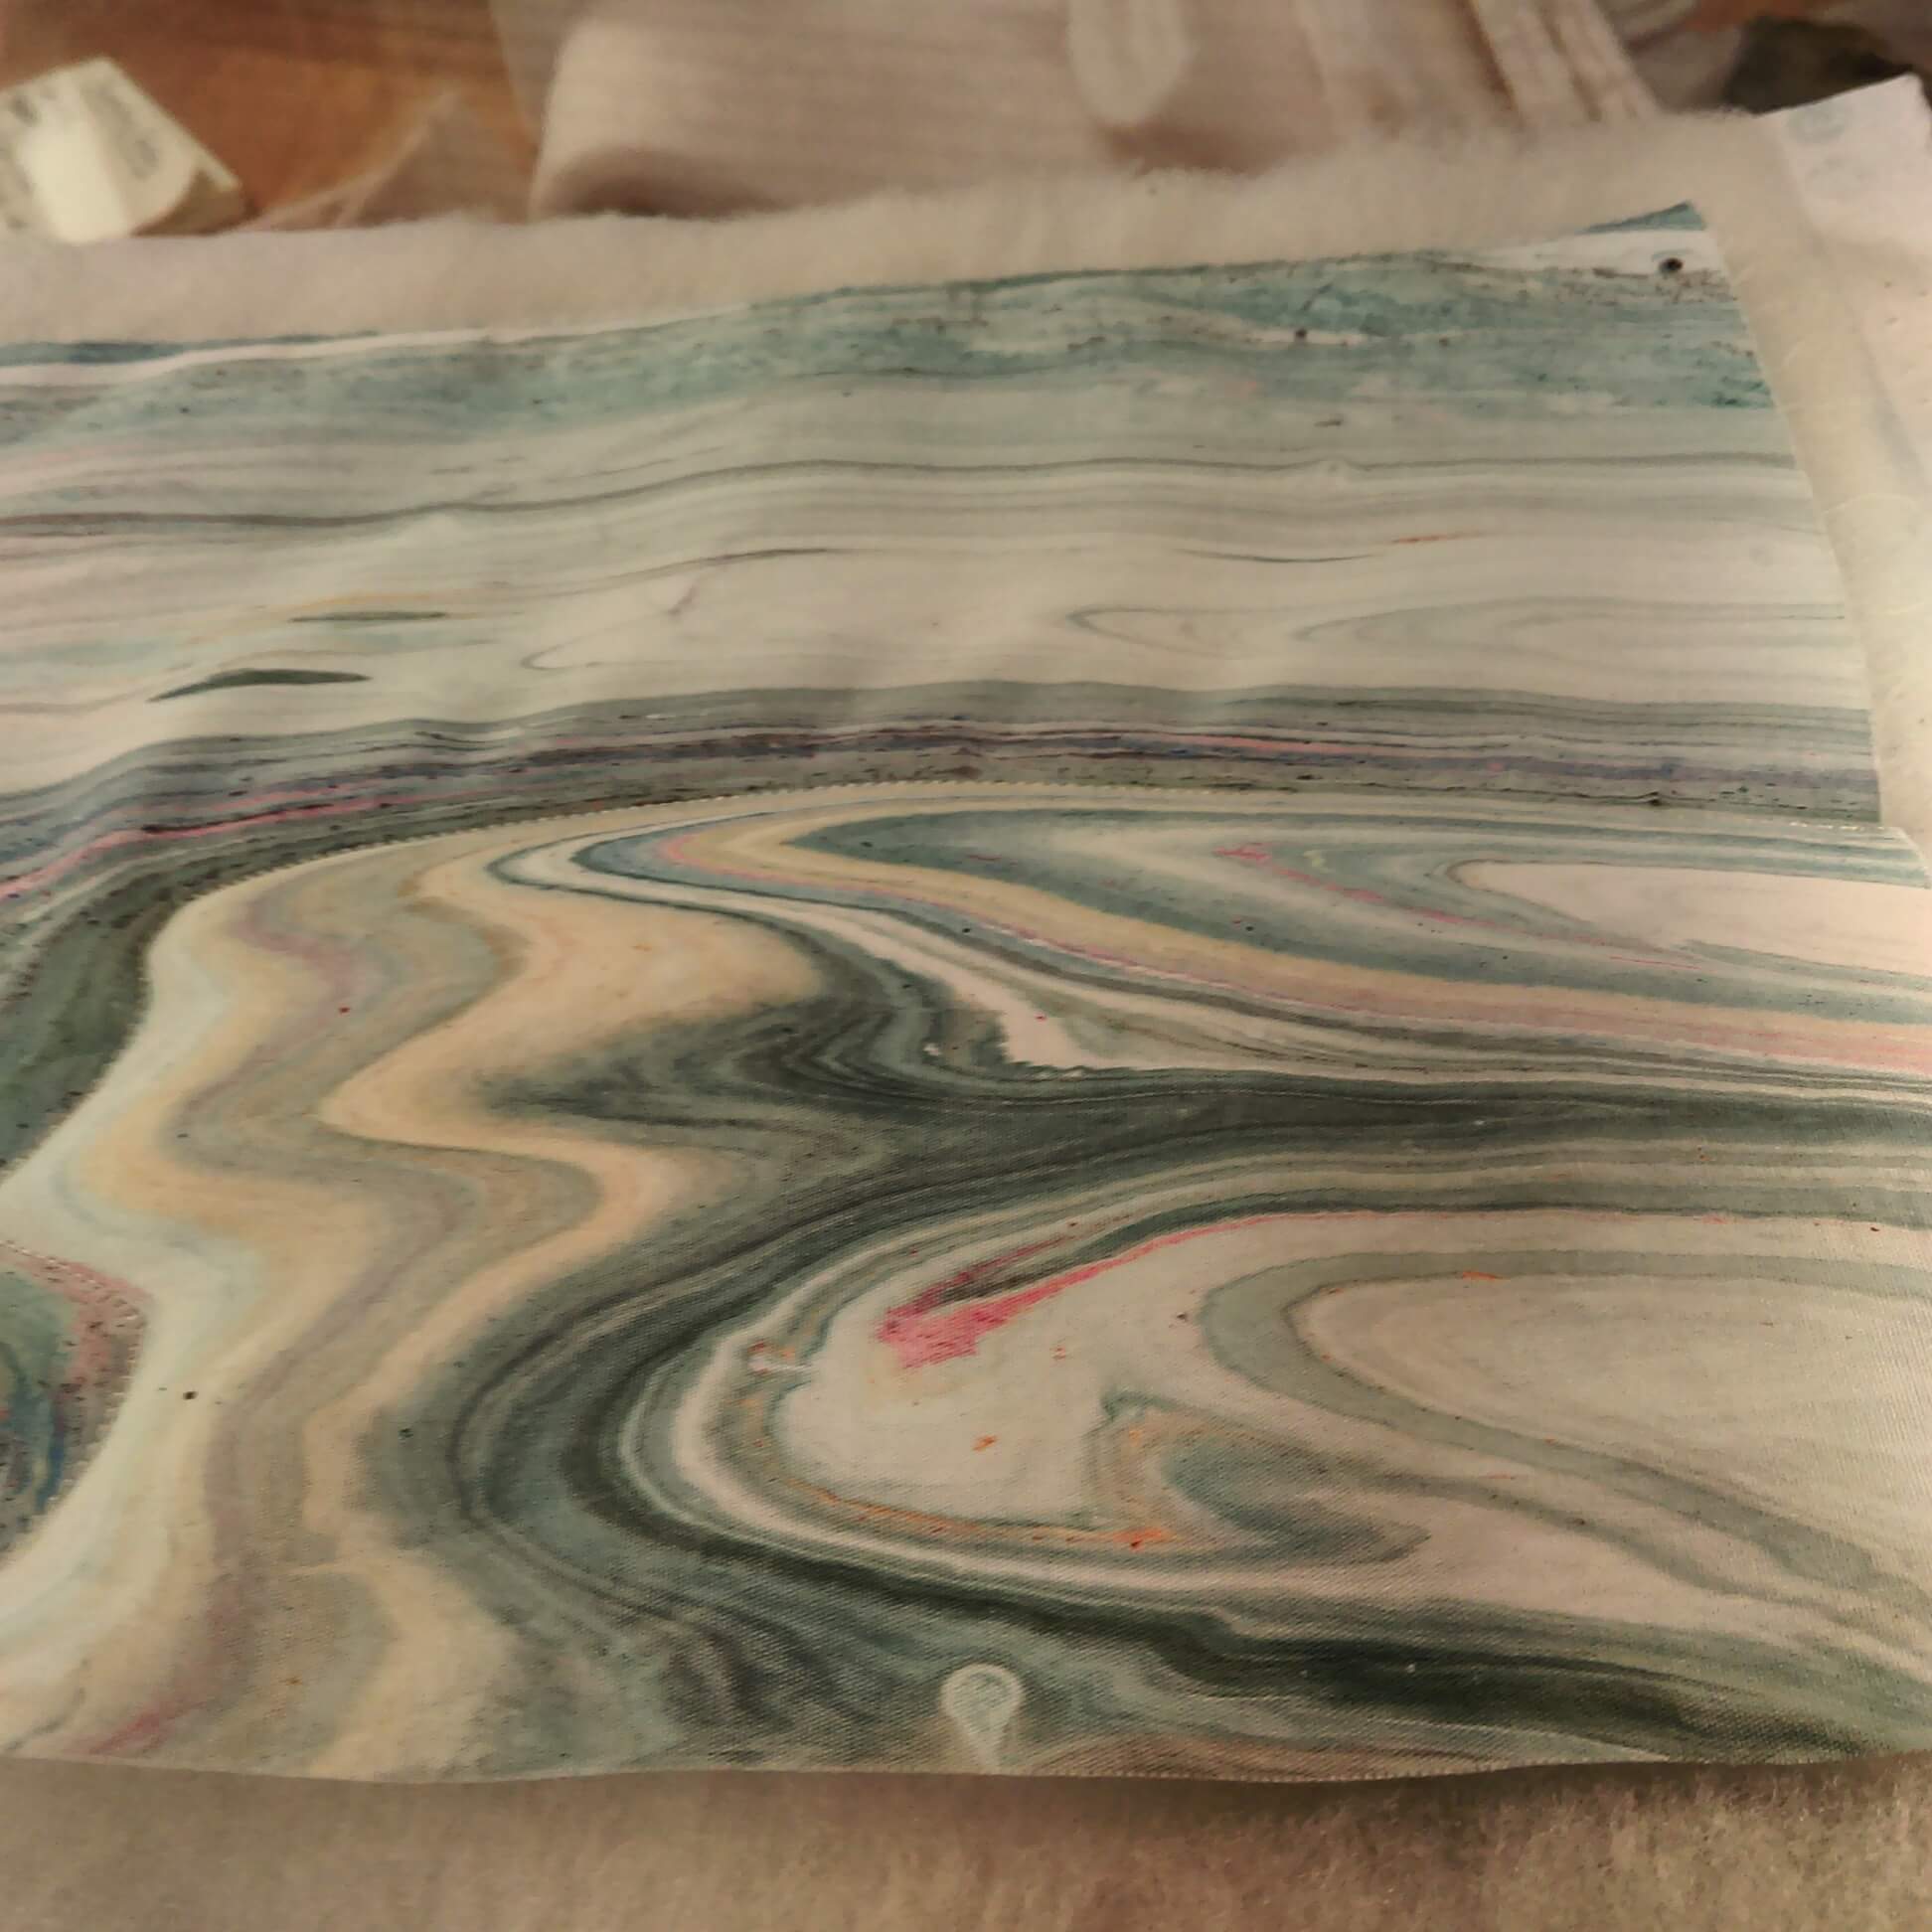
Before stitching on From Above:
Ultrasuede marbles wonderfully. Over the past couple of years we have been doing yards of this for Bead My Love to sell at the various bead and gem shows. We get to keep a few pieces for ourselves, and this year I finally attacked quilting one – with some interesting lessons….the fabric feels like suede, but it doesn’t translate to a puffiness when quilting (note to self: use extra batting for the next piece). Also, the various colors didn’t show well, which is why I went with Superior Threads New Brytes yellow – a thicker thread. this is a 12 x 12 piece of ultrasuede. Introducing “Partly Sunny, Chance of Storms.”
Partly Sunny, Chance of Storms
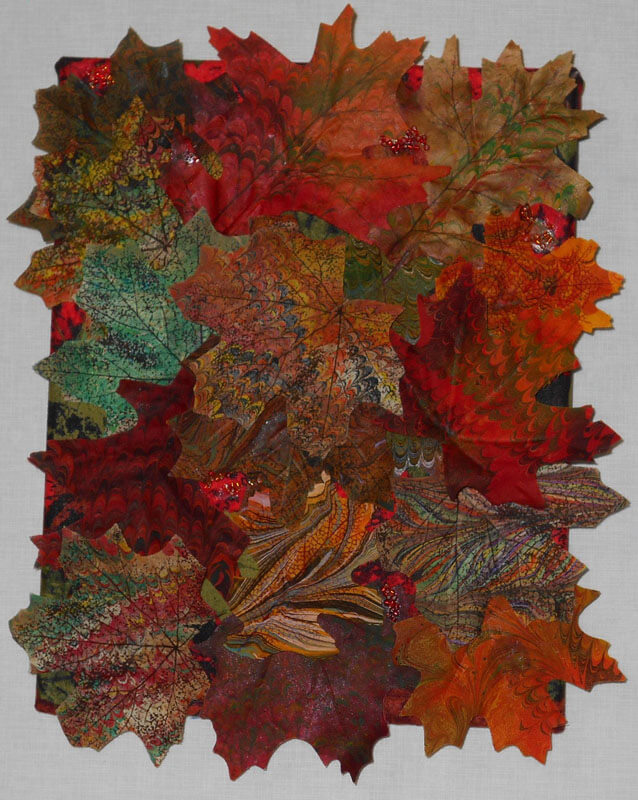
One more piece – we also started marbling flowers and leaves from the silk flower sections of the craft stores – another way to use up left-over paint in the marbling tray. Here’s “Autumn,” a collage of some marbled silk leaves. Covered canvas, 8 x 10 inches.
More next time as I continue to review the year. Comments welcome!
Day Nine on Road Trip……catching up…..
If you caught my Facebook post yesterday, you heard the story of the horrendous borde crossing at Niagara.
Oy, one for the travel nightmares. Awoke to a beautiful morning on the Upper Peninsula, great views as we went across the Macinac Bridge, lots of green forests…..and then…..yea, verily, on the eighth day it rained…and rained…but we drove out of it. Our plan was to go to Flint and then east through Canada to avoid going through Detroit….same mileage essentially…..but then the border crossing south of Niagra Falls…..three and one-half hours from end to end…and I am NOT exaggerating…..construction on Canadian side, two to one to. two and back again to one lane that hardly moved. Finally could see booths, and that was just the Canadian side…..an absolute crawl over the bridge (and I am ot fond of bridges…freaking out, thinking how I would escape if the bridge broke)…and then more single lane to two lanes to three lanes to four lanes…NONE of which moved. Oy….probably not going too far tomorrow until we recoup…..eating dinner at 8:30 PM, which is unheard of for us…and it’s still light out. Must be karma paying us back for a great yesterday………
Here are a few shots of crossing on the Mackinac Bridge.
Crossing Lake Michigan

Mackinac Bridge
..and the beginning of the traffic at the border crossing….

Border crossing
Now back to the art museum…

A fabulous sculpture outside the museum…can just see loads of kids climbing on it!

Another outside sculpture…reminds me of one in Tucson, near the downtown public library.
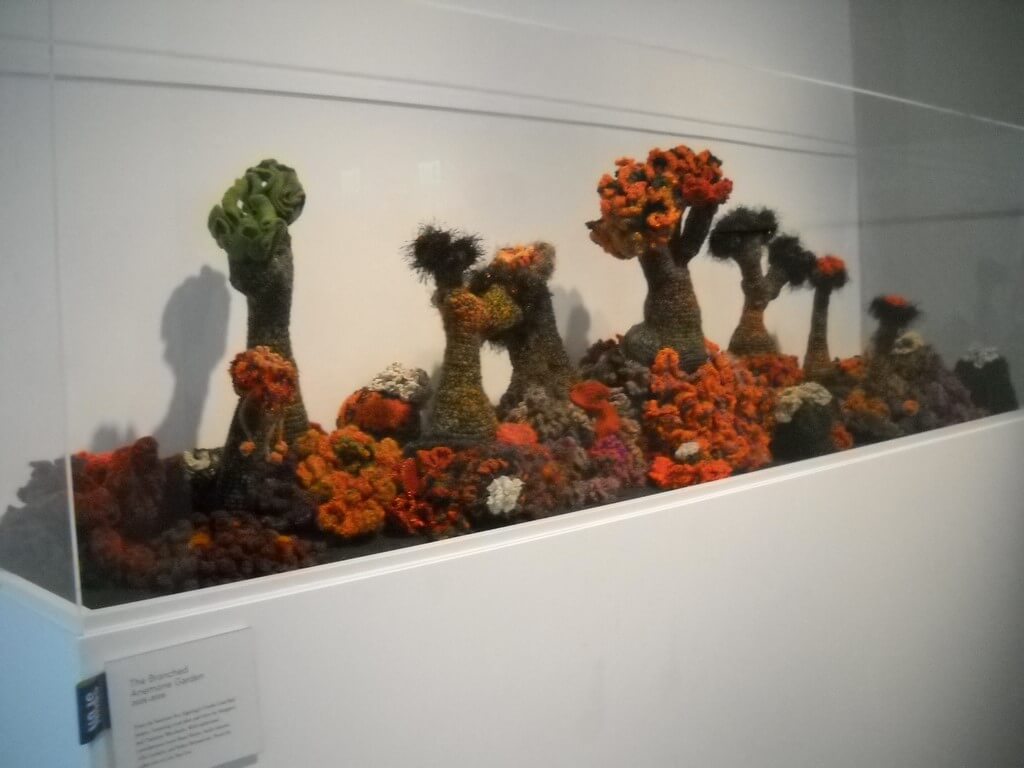
There were two coral sculptures inside the exhibit. This is one of them, talking about coral being the indicators of the health of a reef. This is all crochet….. The Branched Anemone Garden, Margaret and Christine Wertheim.
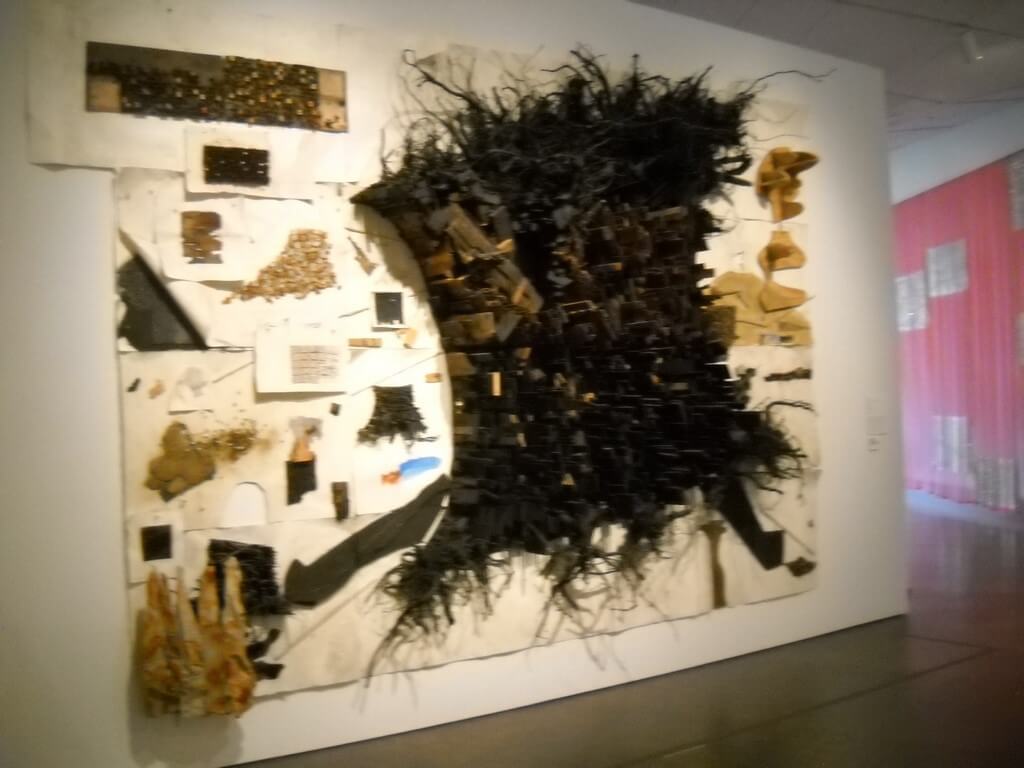
Kathryn Spence uses “dirty, discarded pieces to indicate the invasion of the natural environment by human-produced garbage.”
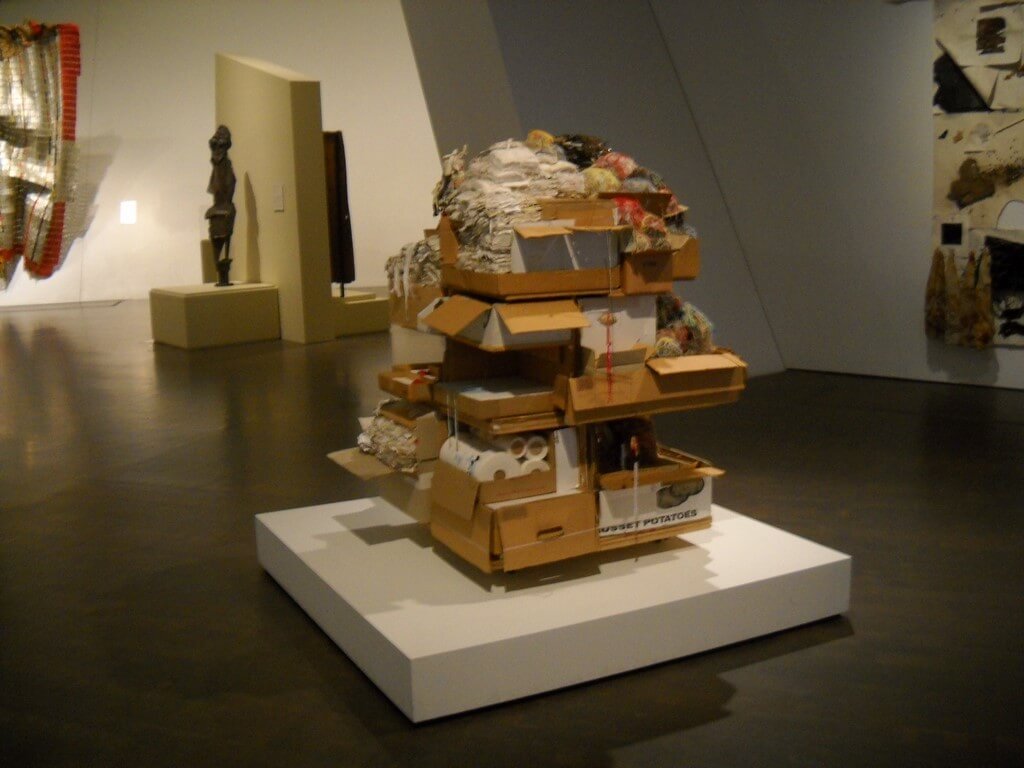
Leonardo Drew – “Number 162 is made from raw materials (wood, metal, paint, thumbtacks, paper, ink, graphite) that are manipulated and aged to suggest the passage of time and the cyclical nature of our existence.”
Even More from The Textile and Fiber Art List!

Oh, for an endless amount of money to spend on art! TAFA is like my own private store, and I WANT WANT WANT everything I see. Enjoy these new artists this week.
 From Hana: “Weaving technology is the use of woolen thread on mesh canvas with the aid of a hook. The weaving in itself is accomplished in free flow on a direct path from the “picture in one’s mind” to the canvas, without a previously drawn sketch on paper or canvas. This type of work enables maximum spontaneity and allows for a free flow of mood and color within the framework of the subject on the one hand (desert landscape for example) but on the other hand, enables the carpet to evolve and “breathe” in the process of its creation. In addition to weaving wall carpets I also paint, mostly oil on canvas but I use other techniques as well. My paintings are strictly figurative and very different from my carpets. While the carpets essentially try to convey the mood of a landscape through the free and more abstract use of form and color the paintings are either portraits or still life scenes that emphasize the composition of the scene or the mood of the person in the portrait. The colors I use in the paintings are not as bright as those I use in the carpets and they have a more introvert and subdued nature.” Woolscapes
 From Wil Opio Oguta :”Inspiration for the quilts I make comes from a variety of sources. It can be nature, an expression, a color or a material. For most of my quilts I use my own hand dyed fabric. My quilts can be very colorful or simply black and white. I work in a contemporary style, but have no objection at all to incorporating traditional blocks. Often I use raw edge appliqué, but don’t be surprised if I switch techniques for another quilt. I love working with fiber, but if the quilt wants/needs it, I add other materials to it. This can be bark, buttons, lutrador and paint. It all depends on what I feel is needed. For me, making art quilts is a way of expressing what I see, translating the world into fabric and fibers, emphasizing/focusing on what is important to me and to show you how I feel about it.” WilOpioOguta
 From Kim Buchheit: “Kim is a designer and artist living and working in Grand Canyon National Park. Her love of felt is rooted in an affection for its understated beauty, a fondness for the old-world craft of felt-making, and the simple earth-and animal-friendly nature of the materials used in the process.” Wildly Woolly
 From Wen Redmond: “I am quite passionate about my work. I continue to explore my chosen medium, fabric, to see what it can do, to stretch its perception as art medium. When I work, I encourage a collaborative process with spirit or my higher self, that mind-boggling principle of the universe. This process can also be called ‘flow’. When you are in this state of mind, the intuitive is tapped and the work can become more than the sum of it’s parts. I work out insights, inspirations, feelings and reactions to the outer world. Allowing time for these inspirations to percolate up from my unconscious is a vital part of my process. Each piece is wrought individually and is one of a kind. These include original photographs, artistically manipulated, printed on prepared fabrics and various textile substrates. The works can include painting, dying, stamping screen-printing, mono printing and other means of surface design. Among a variety of presentations, I created an innovative technique, Holographic Images, employing photographs on silk organza to create a unique 3-D effect. Layers peeled back reveal the source, the inspiration, and my mad desire to capture thoughts, dreams and the beauty of nature. ” Wen Redmond
 From Salley Mavor: ” have had a life-long fascination with little things and needlework. Toward the end of art school, I rediscovered my childhood delight in sewing and creating miniature scenes. Leaving traditional illustration mediums behind, but still interested in narrative work, I taught myself stitching and fiber art techniques. For me, manipulating materials with my hands with a needle and thread was so much more satisfying than rendering with a pencil or brush. I found that I could communicate my ideas more clearly this way and that my hands would direct me in a compelling way. My early pieces were soft sculpture, and then turned flatter, with raised figures and objects on a fabric background. I came up with the term “fabric relief” in 1982 to better describe my evolving technique. My 3-dimentional pictures resemble miniature, shallow stage sets, with scenery, props and characters telling a story. I embroider, wrap, appliqué and paint different materials and found objects to create scenes in relief, with figures imposed on an embellished fabric background. My work is decorative and detailed, full of patterns from nature, all stitched by hand. For the past 20 years, I’ve been working in the field of illustration, making artwork which is then photographed and printed in children’s books. The original fabric relief pictures have a second life when they are mounted and framed under glass in shadow boxes, ready to display as individual pieces. ” Wee Folk Studio
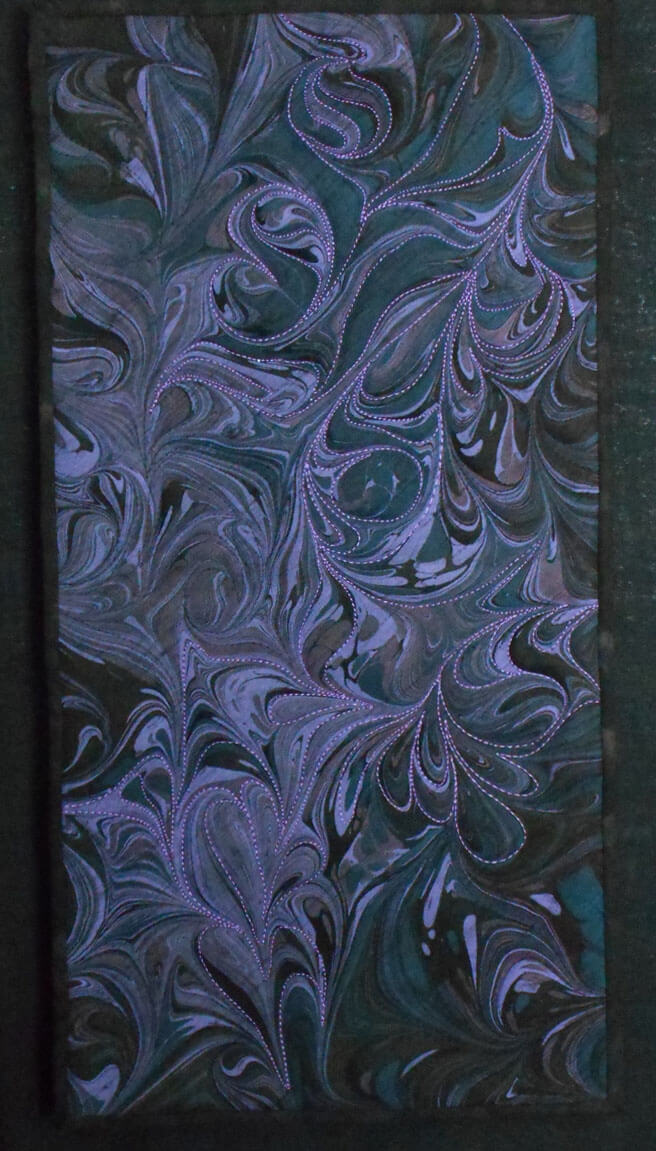
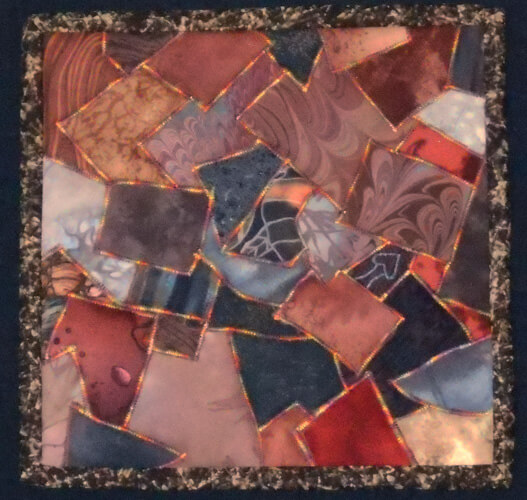
Sunday Stories – Misfiring Synapses

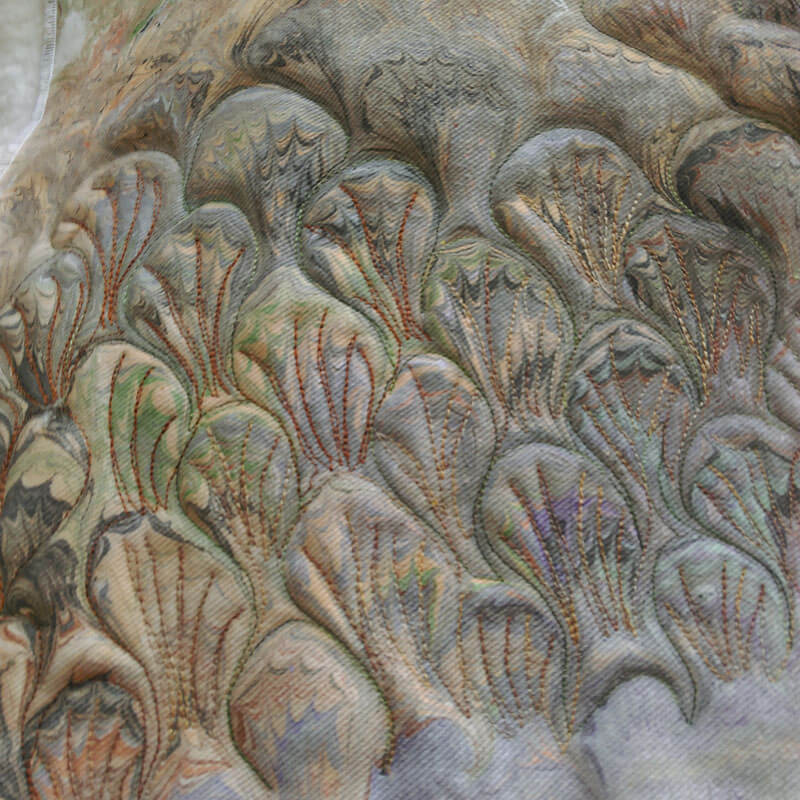
I’ve had a couple of people come by and see my “Misfiring Synapses,” a piece I did on depression. It’s getting mixed reactions. Some people don’t get it because it’s fiber and doesn’t look like their mental picture of fiber – which is a typical quilt. Some don’t get the imagery in the abstraction, and that’s okay. But most people who do get it love it – they say it’s exactly what they figure their mind is going through. Which is what I was aiming for in its creation. I think if you’ve suffered from some form of depression, especially situational, you get the idea that something is ultimately not right in your brain.
When the call for this show came up, I spent a lot of time trying to think 1) how I would interpret it, and 2) how I would do it in marbled fabric. We had done some black satin a while back for a different piece, and it was pretty organic in form. As I was going through fabric, I happened on the piece and thought it looked quite a bit like a nerve ending. Very dendritic. So I went with that piece, and I wish I’d taken a picture of the satin without anything done to it.
I wanted the effect of an irritation, like an itch that just wouldn’t go away. As I was checking through my threads, I saw a Rainbow thread from Superior that was a red/purple/black, and I thought it might work. When you look at the above photo, you can see that the red shows, and then it looks like there isn’t other thread. It looks like an irritated part of a nerve. Just what I wanted.
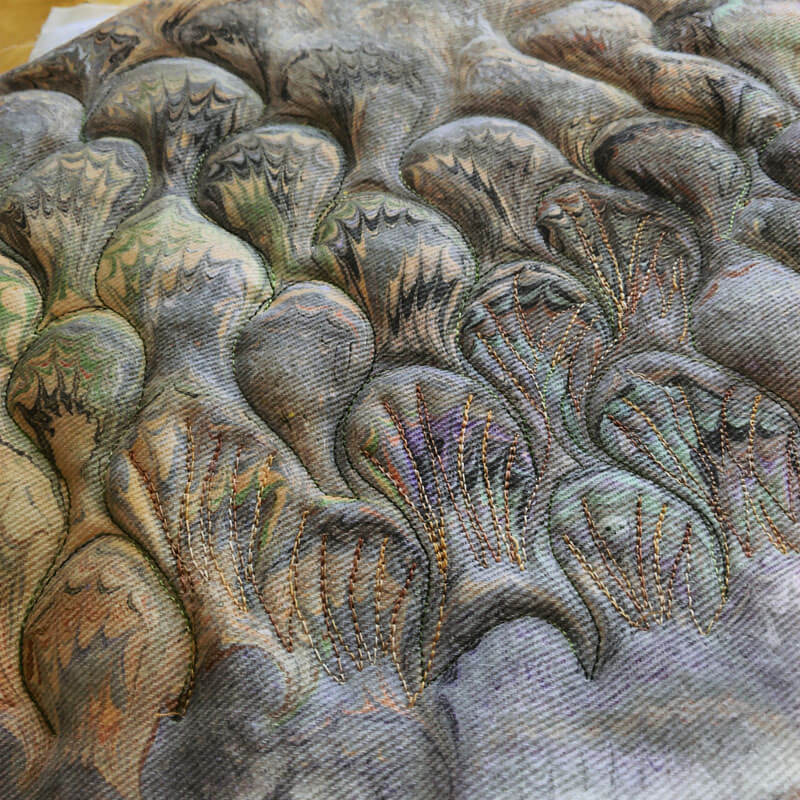
So I had the center of the piece, but I wasn’t sure how to develop the “looking inside” aspect – I wanted it to feel like you were looking deep into the brain and seeing just this one little piece of irritant. I had two different types of red fabrics, both satins, and both with some freeform designs, again very organic.

I did a lot of the same type of quilting, following the black, this time with a variegated series of reds. Lots of bubbling texture resulted. I did the same thing with the second piece of red. What I seemed to have were two different areas of the brain, both pretty irritated.
I also had some more great black satin, this time in more formal marbled patterns, and I figured this would work really well for the outer shell of the brain, all the “gray matter.” I continued with the curved pieces that overlapped each other, much like I would imagine the parts of the brain does. Each of the curved pieces had serged edges with the idea of the gray matter and all the wrinkles you see in the surface of the brain. There were a lot of issues in connected these pieces. I had to work from the design wall to the flat table, and then to the sewing machine, hoping I could get all the pieces of the puzzle together. My intriguing back of the piece started to look really messy, so before it travels at all, I will add another backing to it, to make it a lot neater.
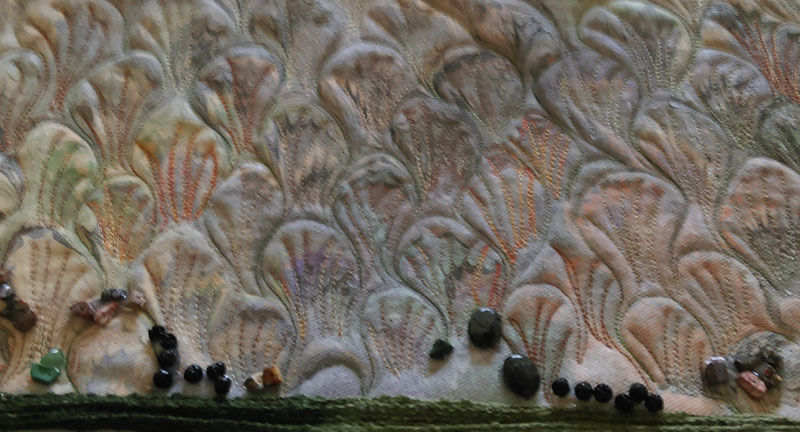
 You can see a lot of the overlaps and edging in the above picture. What I particularly love about the piece is that it works both from a distance and close up. From a distance you see this really interesting organic shape, and the colors are somewhat disconcerting and upsetting. Close up it looks like it is undulating.
 I left it nice and big for you so you could examine all the various parts of this.
17 by 20 inches, available for sale.
Comments?
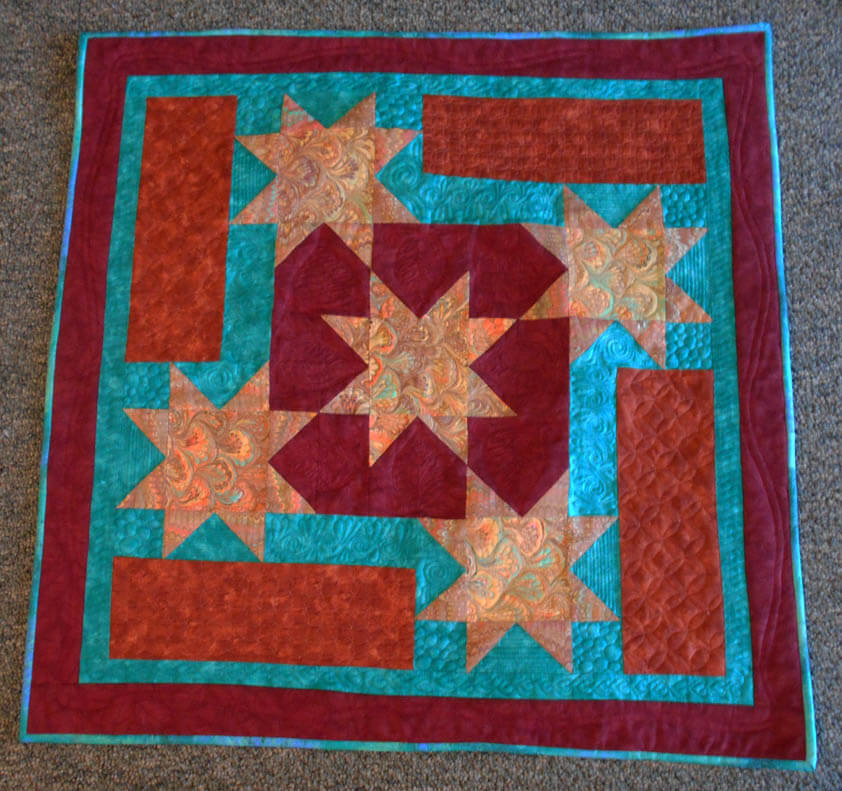
It All Started with the Yucca…..Wednesday Work in Progress

Albuquerque Outdoors - http://outdoors.itsatrip.org/
This new piece has had an interesting origin…..we were in Cornville , AZ visiting friends, and our driver wanted to stop in the high desert and see about getting some yucca stalks for walking sticks. If you look at the picture, the stalks are what’s left after the gorgeous blooms are done. They are evidently extremely strong and hold a lot of weight. So we have two collected stalks in the car, and I’m thinking, hmmmmm – these could make interesting wall hanging “hangers.” Turns out we got as a gift two really strong, perfect-height-for-hiking sticks from another friend we were off to visit, so I decided to keep these two, one as a walking stick for me (I just need it for balance) and one for a potential hanger for a wall piece.
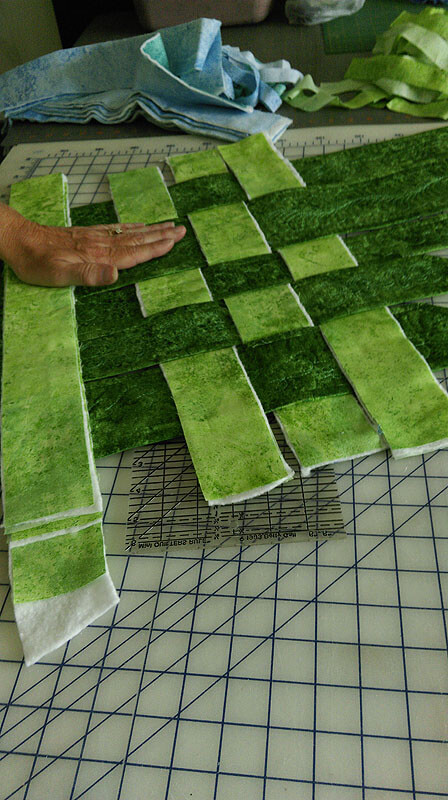
I was looking at it today, as I was kicking around another weaving piece. It would make a good “topper” for a new piece. I had in mind a set of seasons pieces, and then suddenly I got the thought to create the fabric and weave them all together for a year of seasons.
Here are two samples of some of the weavings I have done with marbled fabrics. The first is my very beginning one, Gaia 1: Interdependence. The second is Gaia 3: Autumn.


All of a sudden the design was in my head, and I sketched it out, something I don’t normally do. Here it is:

Creating the fabric will take some time, and I know with other projects in the pipeline, I won’t get to this until mid-September. Hubby is the main marbler, so he will have his work cut out for him. I will need to also watch the proportions in this piece – ever mindful of Michael Kors and Nina Garcia from Project Runway…..
Stay tuned for progress. In the meantime, here’s a few stories for past weavings in the Gaia series.
The Textiles and Fiber Arts List

I’ve been lucky enough for nearly a year now to belong to what is rapidly becoming THE place to find textiles and fiber arts on line: TAFA, or the Textiles and Fiber Arts List. I joined last fall, and one immediate benefit was increased traffic to my blog, website, and Etsy store. Plus, lately I just go looking at the various designers – the artwork available through this site is absolutely amazing!
TAFA: The Textile and Fiber Art List is a membership based organization that seeks to access larger markets for its members by using social media and other web based opportunities. Members include working artists, textile businesses, galleries, suppliers and other fiber/textile people who have an established web presence. All artists are juried in to TAFA to maintain the quality of the work available.
It is a web site that brings together fiber art and those interested in fiber art. The talent, the beautiful fiber art, and the quality products of its members is quite extraordinary. Currently there is a drive to raise money for a new web site, an improved site both for those browsing, shopping or connecting. Connect those who work with handmade fiber arts and the artists and those who are selling handmade fiber art. The new site will provide such an improved experience, convenient, easy to use and beautiful to look at. Want a mini preview? Here’s the link you’ll want to read.
Also, now is the perfect time to join & become a TAFA member. The cost is minimal and benefits great. That info is also on TAFA’s site. Beware – the cost of membership will go up once the new site is active.
Do this – you’ll be glad you did!