Archive for the ‘quilting classses’ Category
Contemplative – Personal, so skip if you wish……
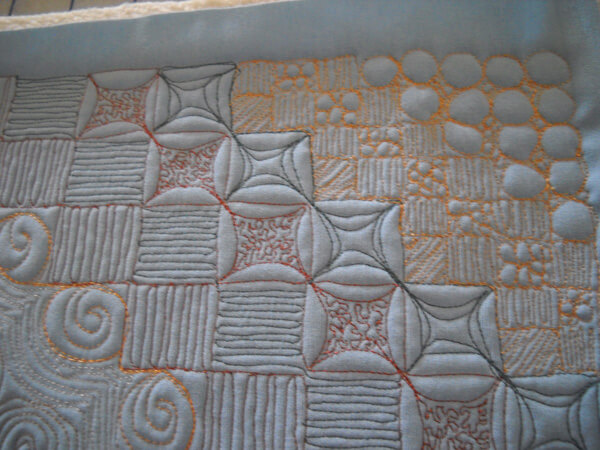
free motion quilting practice
This has been an interesting two months of contemplation, not just on politics, which will certainly govern how I live the rest of my life, but also in terms of how to lead the best possible life in the years I have left. Note to self – aiming for three digits. The work on the resistance quilt brought up a lot of unresolved issues concerning emotional abuse by my mother ever since I can remember. The work I’m doing in attempting to lose weight talks about getting to the root of whatever is unconsciously holding you back. It’s my relationship with my mother.
So between energy work, meditation, reading, and hypnosis, I am coming to terms with issues. I feel mentally healthier. I am slowly letting go of some of the dramatic episodes – I no longer hyperventilate when that issue rears its head. It has been an extremely productive 6 months for art, although not for writing. My mantra needs to be “writing, creating, marketing every day.” I
know I need to get a therapist to help me bring closure as a result of the work I have done so far. Especially after Saturday – I was scheduled to teach a free motion quilting class, and I called on Friday at 11:30 AM to see if it was still canceled, as she had called about it the week prior. No, it was a go. So I hurry around getting ready, and when I show up Saturday morning, there are only two paid students. When I asked her since she knew one canceled the night before, why she didn’t cancel, she verbally attacked me, saying that I owed a class to those who had paid, it was my responsibility, I owed it to those who had paid. I was so stunned at her attack I wasn’t able to respond.
Gaslighting, just like my mother always did to me. I realized that was what had shut me down – I was being attacked in the same way by someone else. Yes, I need to definitely figure out how to bring closure to my family issues, but I also need to do what’s right for me when I’m teaching. After time to think about it, I emailed and asked her to send the check – she didn’t even have it ready for me because I was in the way of the printer during class. I told her to cancel the August class, as we had already talked about that, and she knows from experience that classes don’t go in the summer. If she decides to call me to schedule new classes, there will be a contract for her to sign. She also didn’t want to make copies for me (a total of 12) since she is leasing a printer and it costs her money. Keep in mind she is getting 30% of the class fee and I told her I was holding strong at a class of at least 3 in order for it to be a go.
The contract will indicate a whole bunch of things: she gets 25% if she doesn’t want to raise the class fee, she will make copies as needed, and anything less than three students the morning of the class, she will cancel it. If someone doesn’t show and doesn’t call, I receive half the class amount to compensate me for my time. (Yes, one of the two for the class didn’t show….that’s $7.00 an hour for my work…positive me, I may have a lead to teach in another shop.) Usually I have been able to work very simply with people in the field, but her personality is not right for me or her long-time customers and business. Lesson learned….
Thoughts are welcome….
Free Motion Quilting!
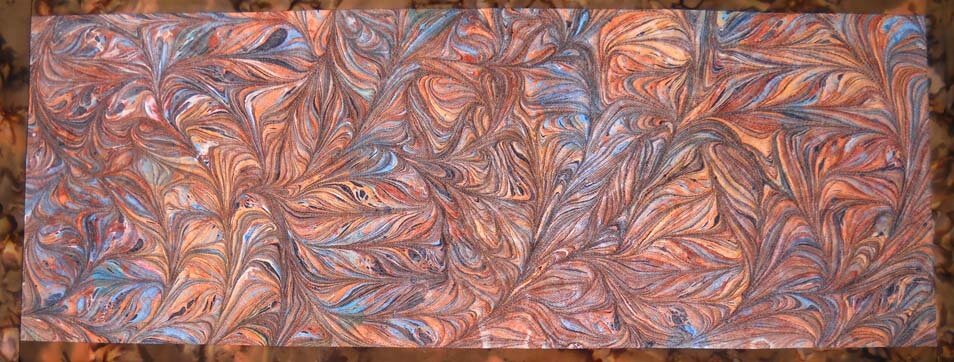
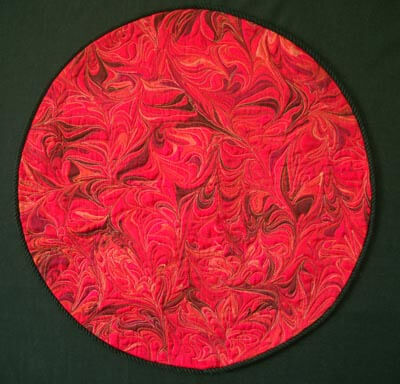 Can you tell I love me my unpolished red satin? This is “Mandala 1: Core,” also published in Linda Seward’s book Ultimate Guide to Art Quilting Techniques. It’s free motion quilting, but the nice thing about using marbled patterns is that you have lines to follow!
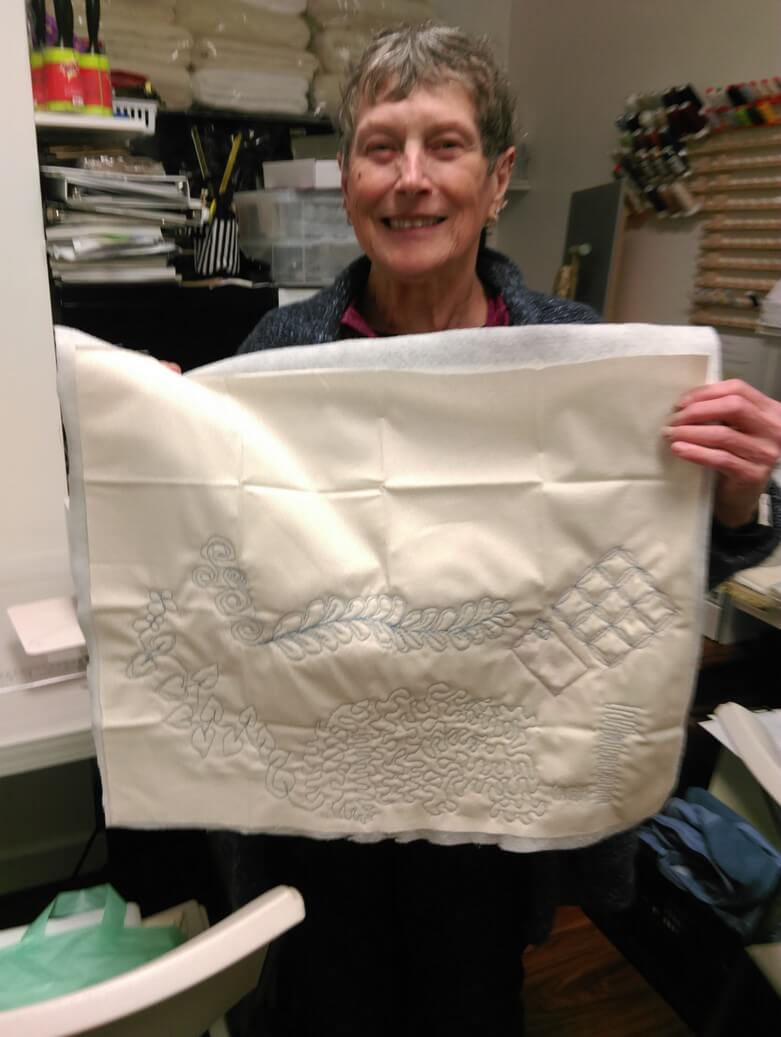
I taught beginning free motion quilting this past Saturday and had a FABULOUS time!! When I did my lesson plan for the class, and then as I was going through it with my students, a few things became very clear to me.
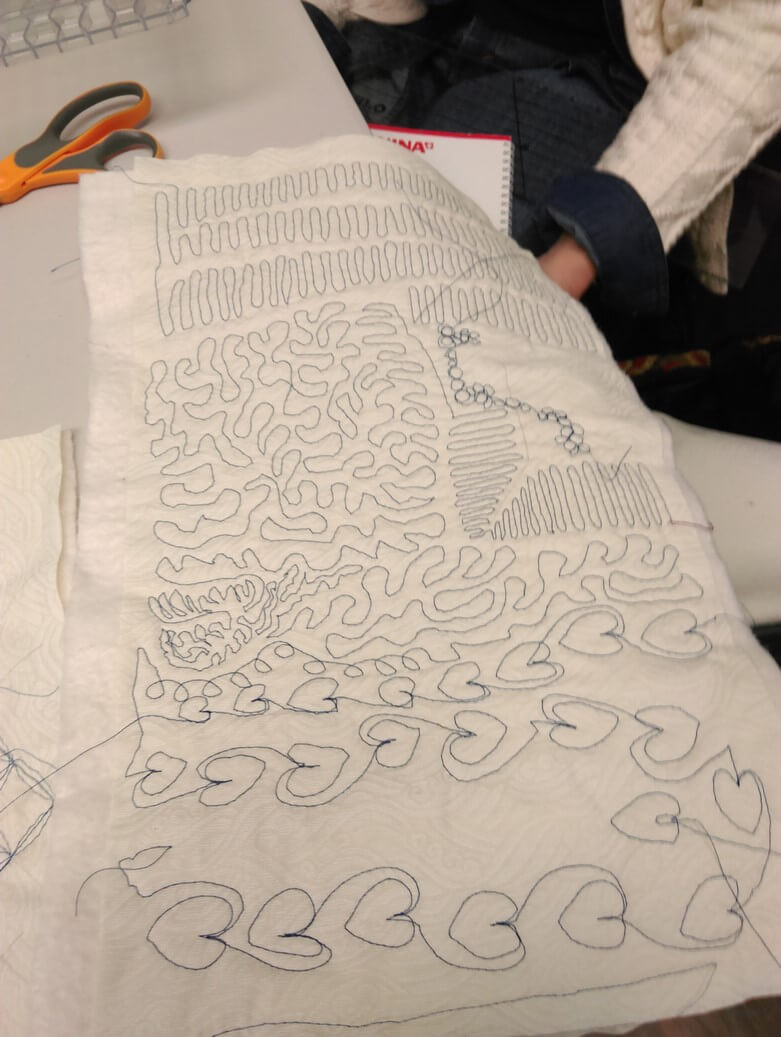
- Everything starts with a straight line done with the free motion foot. It helps develop rhythm and hand placement. No longer will I start with a motif when teaching beginners.
- It’s easy to go from straight line to stippling (large, medium, and micro) as well as figure out how not to get in a corner and have to stop. My students found it very easy to move quickly and easily into curved lines.
- At this point we stopped to talk about threads and tension. It seemed a good point, and there were questions cropping up. The biggest problem they (and probably most of us) have is silencing that Inner Critic and realizing we have to practice – most of us aren’t willing to approach it that way at the beginning. (Ask me how I know that…). One person had bobbin issues, and the rest were concerned with moving that upper tension dial, as well as determining if their machine like same thread top and bottom, or another combination. I need to remember for future classes that “same thread top and bottom” may be more helpful to beginners. I’m so used to the quirks of my machine and how to work with different top and bottom
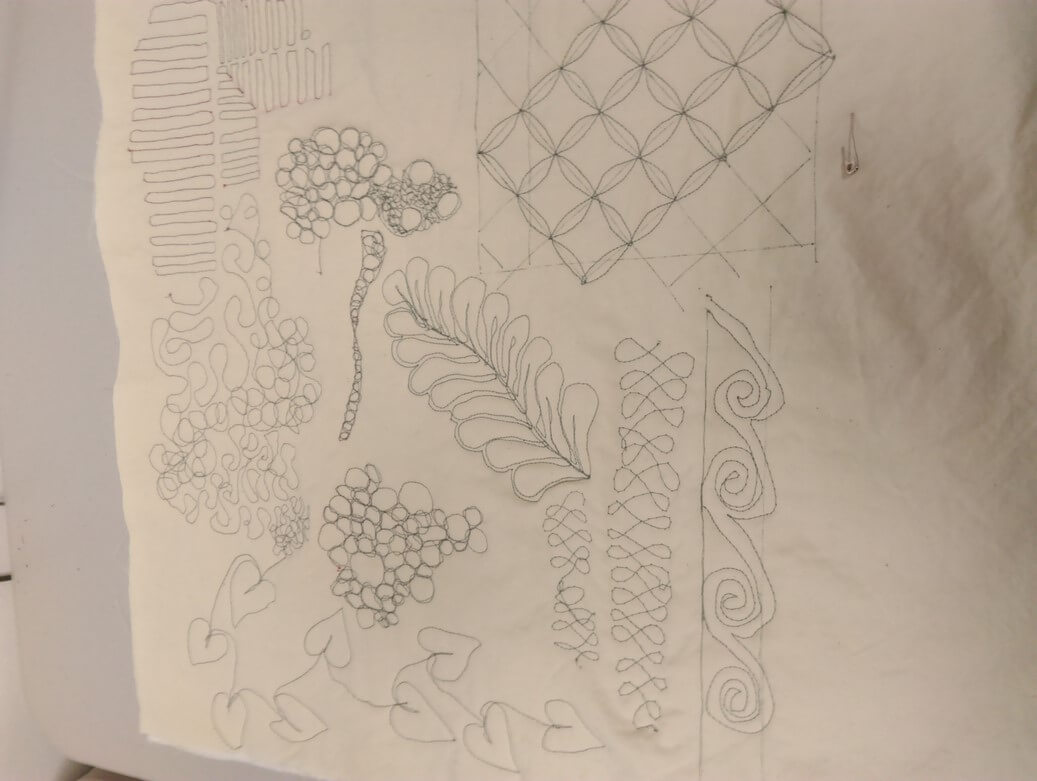
- Next pattern was a basic heart-shaped leaf, first learned by me in the 2012 Free Motion Quilting Challenge by quilter Frances Moore.
- Pebbles were next – large, medium, fill-ins, different sizes. This seemed a natural progression.
- Then spirals, grid patterns, and feathers. No one really got frustrated, mainly because they could see how previous learning morphed into a new pattern pretty easily.
Lots of samples from me so students could see practical applications within actual quilts, as well as all my practice fat quarters that I now use to practice or check tension before beginning a new project.
Best part? Everyone signed up for Intermediate FMQ in March!
Beginning Free Motion Quilting
Beginning Free Motion Quilting – Yes, You Can!
4 hours, $40.00 (plus 1/2 hour working lunch) 10:00 – 2:30,
February 11, Saturday
Quilting With Color, Williston, Vermont 802-876-7135
Now what? Your quilt top is done…send it out or quilt it yourself? You can free-motion your own quilt top, no fancy domestic or long-arm machine needed! YOU CAN do it all yourself – it just takes practice! From thread choice, basic supplies, setting up your machine, to learning basic FMQ patterns to build other designs on, you will learn the happy sounds of your machine as you practice six basic patterns on fat-quarter sandwiches: straight lines (without a ruler or walking foot), various size stipples, pebbles, basic feather, grid work, and a leaf/vine shape.
You supply:
* sewing machine in working order, ability to lower feed dogs, instruction manual (I can’t stress enough how you need familiarity with your machine and lowering the feed dogs)
* free motion (or darning) foot; NEW #80 0r #90 machine needles (#90 might be easier for you if you want to use fancy threads)
* a selection of threads, from “old and cheap” to “fancy and expensive” (cotton and poly are welcome)
* low-loft cotton (or 80/20 cotton) batting in fat quarter size for two quilt sandwiches
* 4 fat quarters (18 x 22 inches), one for the top and one for the bottom of two quilt sandwiches (not fancy fabrics, just for practice, and muslin is fine – tone-on-tone or solid color is best for getting started
* scrap paper and pen or pencil
* scissors
* marking tools (fabric marker or chalk
* ruler for marking grid lines on the fat quarters
OPTIONAL: small white board and marker for practicing designs; a machine extension table (you will be happier with one…), Machingers quilting gloves.
One of many samples looking at how you can add free motion quilting to your work….

COME JOIN US!!
The Hum-Purr of My Machine….
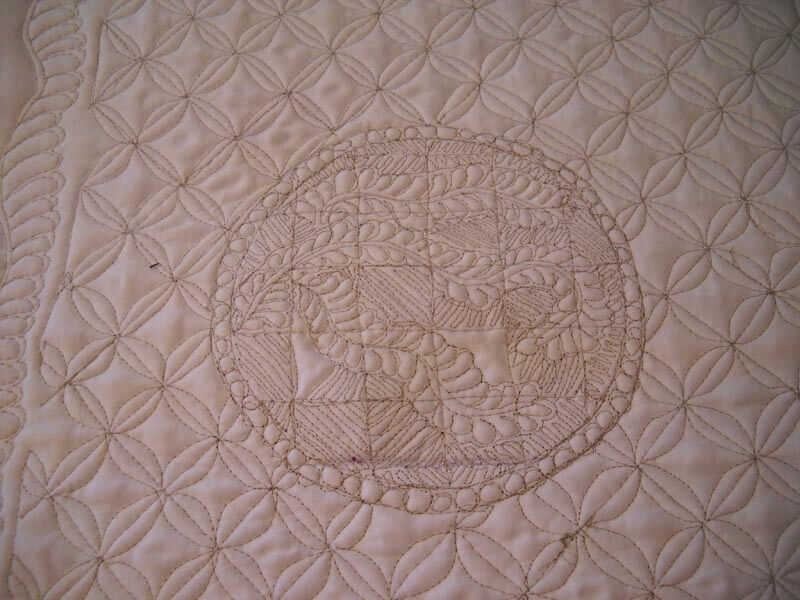
Thank you, Cindy Needham, for talking about the hum-purr your machine makes when you are in the groove! And I have been in the groove this past month – another quilt under the presser foot, this one a 16-year-old top that I am giving to my yoga instructor. I haven’t done anything with the top prior to this, because there was an area I really wanted to do feathers in, and I wasn’t willing to hand-quilt them. So now that I can do feathers in free-motion, sounds about right to finish this top…..except the area I was thinking really needed something else…..so I did a grid pattern, and I LOVE IT! It makes the traditional top look much more modern.
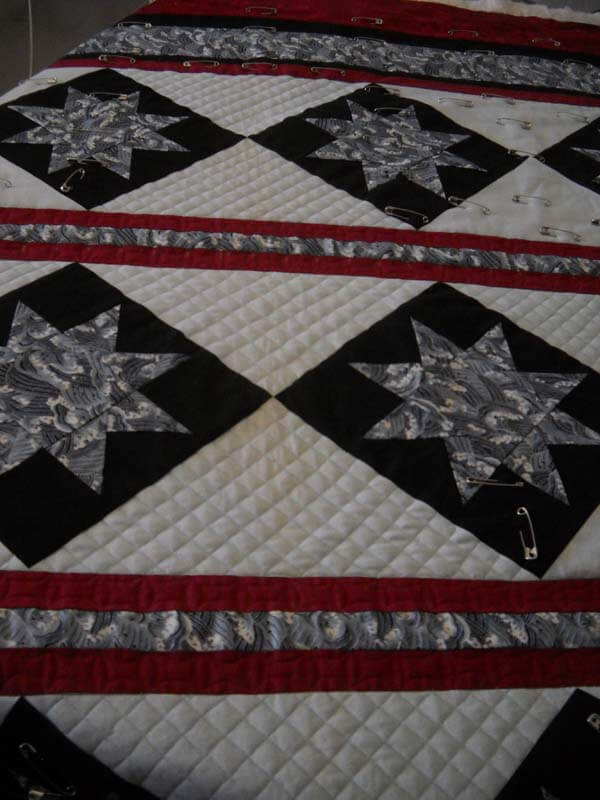
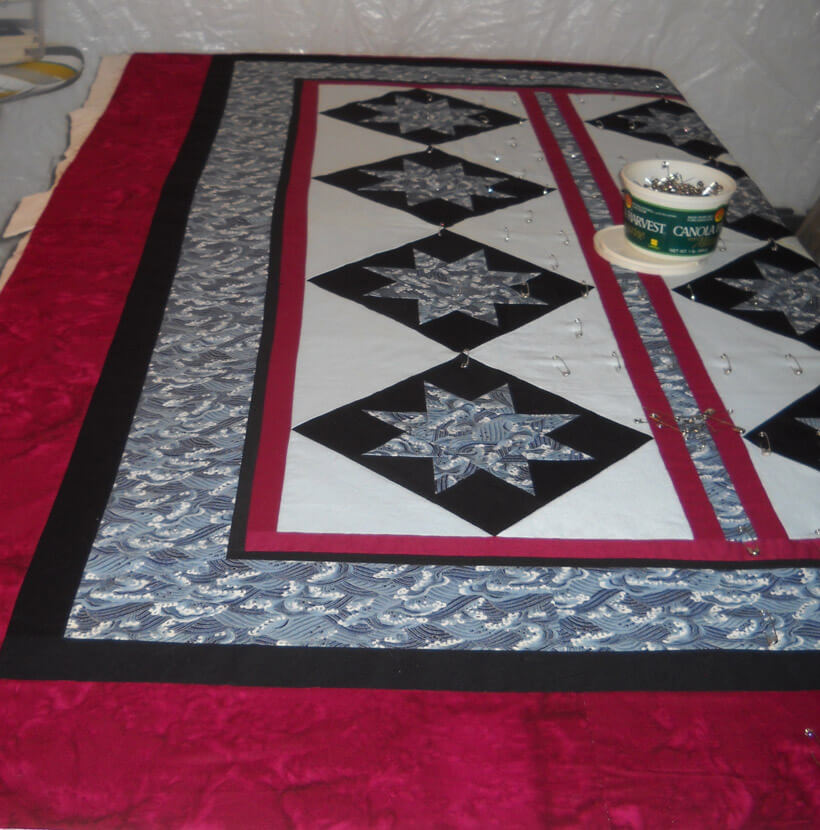
Below is the quilt being basted – my safety pins have gotten quite the workout in the last few months! The quilt top originally ended with the blue wave border, but it wasn’t long enough to cover a chilly body. So I added another black and wine border – lots of ideas for quilting those – and yes, I will have feathers somewhere on this quilt!
Before I started in on this, I continued with the BOM from our local quilt store, four months to catch up on, and I’m pleased with how they look. Based on progress I’ve made with the amount of sewing over the last couple of months, I would probably do some colors differently in the original blocks. Here’s the new ones:
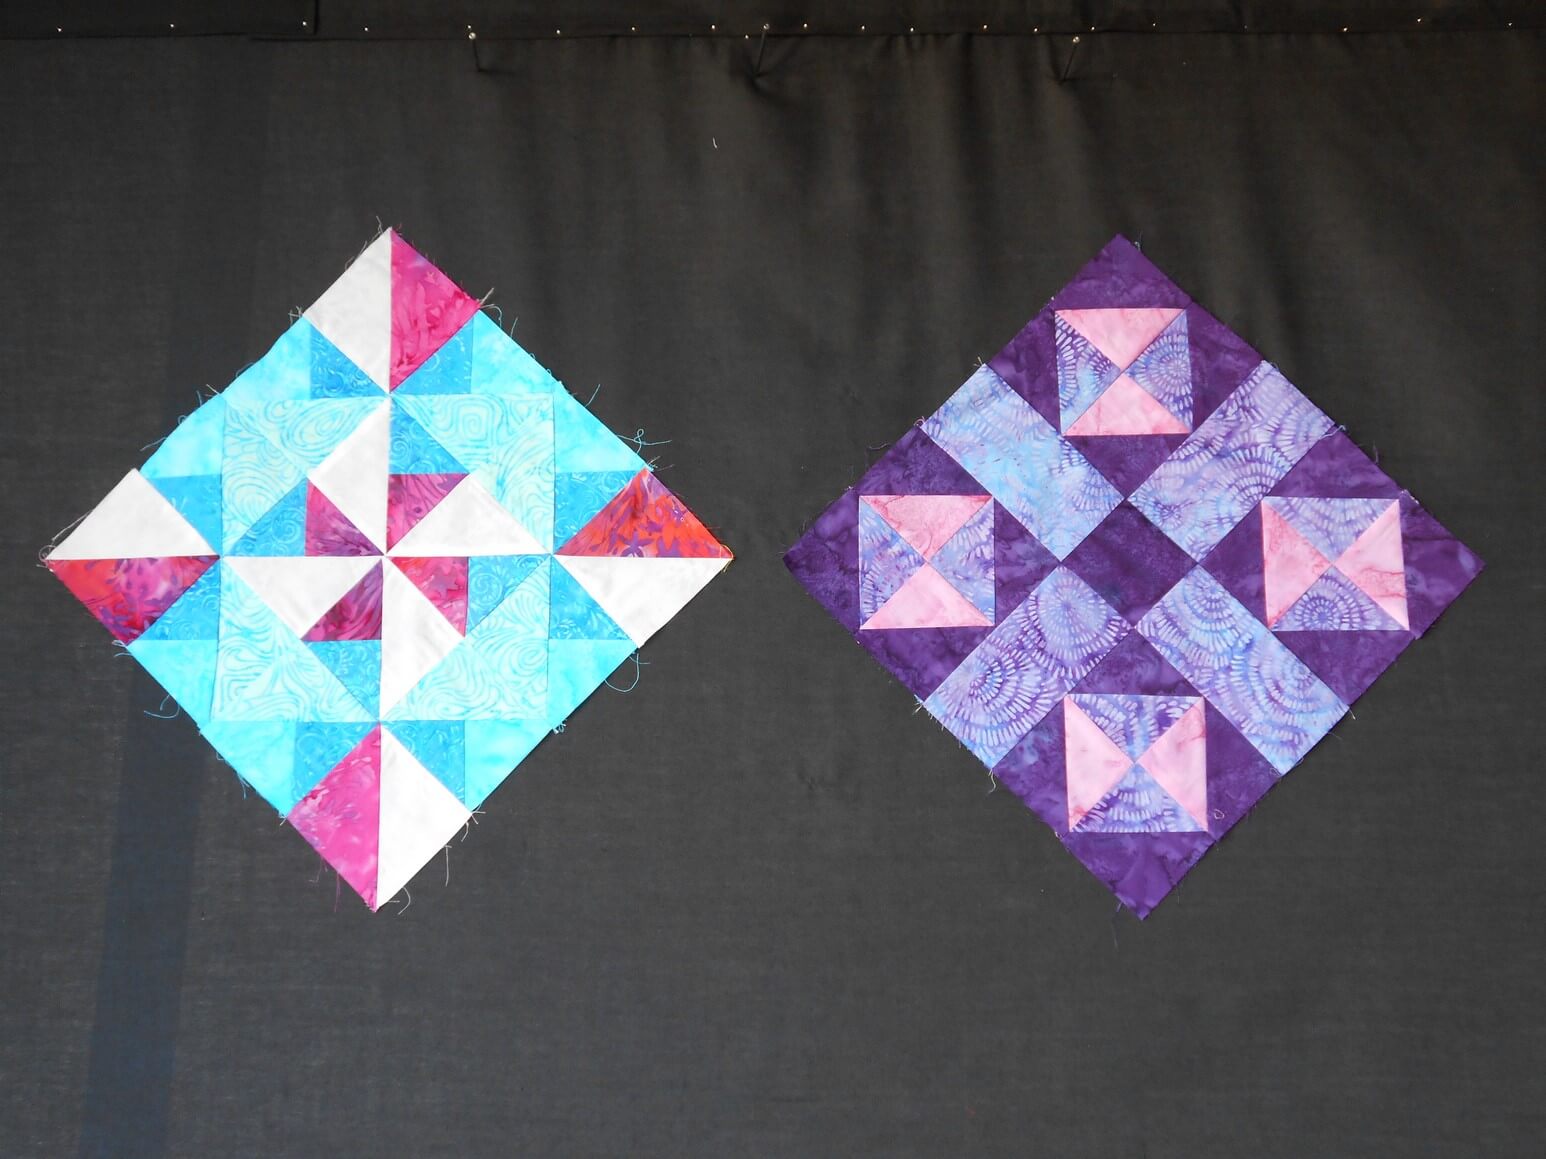
Photography really isn’t doing them justice!
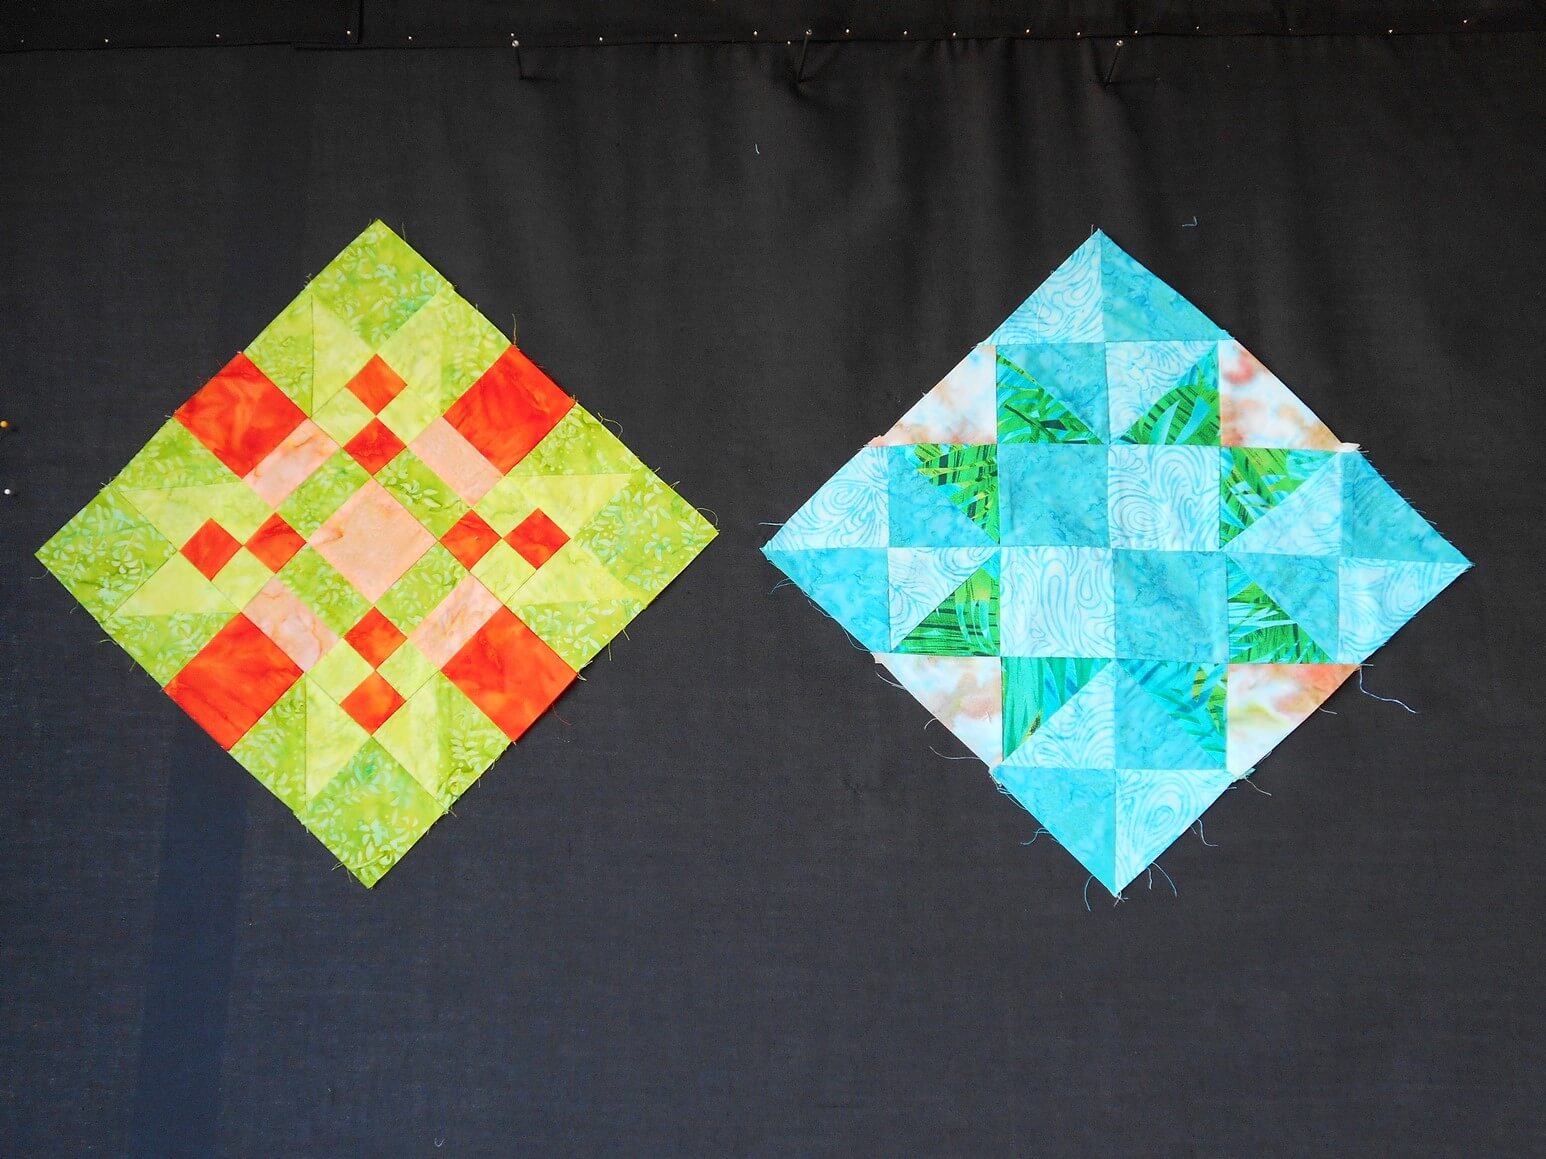 I love the green and orange one!
Up after this quilt is a lap quilt for my great-niece who turns 13 in August, and I would like to have it done for when we see them in May. I’ve made the commitment that all 8 of my great-nieces and great-nephews will get a lap quilt from me when they turn 13. This means lap quilts for the next 11 years…….